You are using an out of date browser. It may not display this or other websites correctly.
You should upgrade or use an alternative browser.
You should upgrade or use an alternative browser.
Deagostini Falcon. Anyone seen this?
- Thread starter Howard
- Start date
I see Chefhawk has already uploaded pictures of the cockpit tube! I picked up issue 6 today and the cockpit really looks the part now! It comes in three parts - a canopy, the lower plating below the canopy, and a ring which connects it to the tube. I added some pic to my album if anyone is interested.
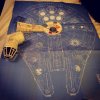
Here is a pic of the parts included in issue 6 - lots of parts!

And here is the first quality issue - broken parts on greeblie sprue. Easily fixed by gluing back together, but better packaging for these delicate parts would have avoided this.

Here is a pic of the parts included in issue 6 - lots of parts!

And here is the first quality issue - broken parts on greeblie sprue. Easily fixed by gluing back together, but better packaging for these delicate parts would have avoided this.

Interesting read and pics but unfortunately we are getting the signatures on the model as well.
http://www.modelermagic.com/?p=66253
If we are getting the signatures it looks like they will be extra decals, that site shows a signature under the cockpit and there is no signature printed on the underside of the cockpit part I got today.
Envisagedimage
New Member
Some updates from me, no point posting the new pics, but if I could suggest to Trimotor to contact DeAgostini they will send replacement parts.
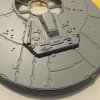
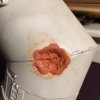
As i'm re-painting anyway I am applying primer as I get the parts below are the Gun turret hull panel, with added bits, added notch and window rotated, and the original cockpit tube asteroid damage and my take on it using Milliput and followed by some model filler, still not completely happy with it.
Gun turret hull panel
Cockpit tunnel damage as supplied
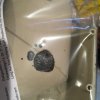
With Millput after cutting out the existing damage, sorry only had terracotta left.
Literally just after being primed
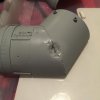
As i'm re-painting anyway I am applying primer as I get the parts below are the Gun turret hull panel, with added bits, added notch and window rotated, and the original cockpit tube asteroid damage and my take on it using Milliput and followed by some model filler, still not completely happy with it.
Gun turret hull panel

Cockpit tunnel damage as supplied

With Millput after cutting out the existing damage, sorry only had terracotta left.

Literally just after being primed

Thanks for the suggestion Envisagedimage, my repair job worked perfectly, so there is no need to get a replacement, however, even a small card box would have possibly prevented the damage from occuring in the first place.
Do you have a link to a photo of the studio Falcon showing the cockpit tube damage? I have been intending to improve this area as you have, but I cannot find a reference picture of the real thing on the studio scale website or elsewhere.
Do you have a link to a photo of the studio Falcon showing the cockpit tube damage? I have been intending to improve this area as you have, but I cannot find a reference picture of the real thing on the studio scale website or elsewhere.
Envisagedimage
New Member
gyoung2993
Sr Member
Thanks for the update fellas !!!...I am so excited seeing you gentleman jump in there with this project , still awaiting on 5 and 6 to arrive.....I am definitely now getting rid of the Fine Molds MF....had it for years....this Deagostini will be my new present for the next 2 years...LOL...thanks for sharing the update photos !!!
Junk Pilot
Sr Member
The damage there is intentional because it's also a feature on the 5ft model as well.

As far as seeing it on screen I doubt that ILM ever filmed it from an angle where it could be seen and if they did it would be for a split second and if you did you really wouldn't be able to make it out anyway.


As far as seeing it on screen I doubt that ILM ever filmed it from an angle where it could be seen and if they did it would be for a split second and if you did you really wouldn't be able to make it out anyway.

Are there any reference pics from the movie(s) that show this cockpit tunnel damage or was it caused from picking it up in the wrong spot while moving it? If it was actually seen on screen I'd try to replicate the damage myself, but if not I'd leave it alone!
Last edited:
Junk Pilot
Sr Member
Maybe I should sell mine as well. Apart from not having touched it in nearly 5 years it is unpainted and most of the details have been added so I'm not sure how much I could get for it.
Thanks for the update fellas !!!...I am so excited seeing you gentleman jump in there with this project , still awaiting on 5 and 6 to arrive.....I am definitely now getting rid of the Fine Molds MF....had it for years....this Deagostini will be my new present for the next 2 years...LOL...thanks for sharing the update photos !!!
gyoung2993
Sr Member
I heard that....mine has never been touched....I think the box top was removed long enough for fresh air...I never have removed the contents at all...Buy this DeAgostini MF , is going to be magnificent !!! Wish we could order in bulk like 25 copies at once....LOLMaybe I should sell mine as well. Apart from not having touched it in nearly 5 years it is unpainted and most of the details have been added so I'm not sure how much I could get for it.
gyoung2993
Sr Member
I am not sure that I want to try and put any damage on the cockpit area....I think I will have to skip this part....LOL...I am not as talented and brave as so of you are with the detail damages !!!....I will stick with ....uuuuuuhhhhhh.....right out the packages....LOL
bourne4400
New Member
Has anyone else subscribed to the digital copies (for convenience), I can't seem to download any of the issues except the first one. Contacted De Agostini but no help from them.
This evenings work was to fit the greeblie pieces. I have three small pieces left to fit tomorrow, and then I will take some pics for you all to see.
A few observations:
1. The plastic is brittle compared to what I am used to working with in Tamiya, Hasegawa, Eduard, Airfix etc kits. Be especially careful with the thinnest hose and the very thin part which mounts on top.
2. The pipes on the bottom stand out proud compared to the studio model. This can be rectified by trimming the ends that plug into the hull. I found that the hole in the Tamiya Tyrrell gearbox was small and required enlarging with a drill in a pin vice.
3. The hose part on the greeblie that sits on the upper port side of the tube is finer than that on the filming model when compared with photos. I will most likely cut the hose section out and replace it later.
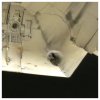
The damage there is intentional because it's also a feature on the 5ft model as well.
View attachment 438290
As far as seeing it on screen I doubt that ILM ever filmed it from an angle where it could be seen and if they did it would be for a split second and if you did you really wouldn't be able to make it out anyway.
View attachment 438289
Yeah... thanks for clarifying that... every pic I've seen of that damage on the cockpit tunnel was from the models and I don't think I ever saw the damage in the movie. Made me think that maybe the damage was caused by them moving it and grabbing it in a soft soft to make it cave in like that. Good to know it was actually intentional.
If we are getting the signatures it looks like they will be extra decals, that site shows a signature under the cockpit and there is no signature printed on the underside of the cockpit part I got today.
Thank Goodness.
As promised, here are some pictures of the greeblies fitted. The pipes on the lower part of the tube have been trimmed to sit closer to the surface of the tube.


It's still missing the long thin piece with the rectangle on the end that sits on top. This part is very fragile so I will wait until I finish cutting out where the extra armour plate notches should be (Black marks).


It's still missing the long thin piece with the rectangle on the end that sits on top. This part is very fragile so I will wait until I finish cutting out where the extra armour plate notches should be (Black marks).
As promised, here are some pictures of the greeblies fitted. The pipes on the lower part of the tube have been trimmed to sit closer to the surface of the tube.
View attachment 438750
View attachment 438751
View attachment 438752
View attachment 438753
It's still missing the long thin piece with the rectangle on the end that sits on top. This part is very fragile so I will wait until I finish cutting out where the extra armour plate notches should be (Black marks).
This just gets better and better. One of my big concerns was all the piping, how they were gonna do it, was it gonna be molded on, etc.
I am so glad to see this.
Similar threads
- Replies
- 22
- Views
- 2,641
- Replies
- 5
- Views
- 1,145
- Replies
- 0
- Views
- 307

