You are using an out of date browser. It may not display this or other websites correctly.
You should upgrade or use an alternative browser.
You should upgrade or use an alternative browser.
The Death Star
- Thread starter JediMichael
- Start date
JediMichael
Master Member
It's looking great, hard to believe what you started with.
Thanks. If I could go back and start over, I'd do things a bit different now...but oh well. Mostly, I think I'd find a way to fill in most of the random engraved lines on the model, as it just makes trying to add pencil marks so much harder.
Caretaker10
Active Member
I don't know why.. But after all the work and effort put into this project it still looks like a toy to me.. Sorry to say this..
I am very curious what the endresult will be.. I am still following your progress..
I am very curious what the endresult will be.. I am still following your progress..
JediMichael
Master Member
I don't know why.. But after all the work and effort put into this project it still looks like a toy to me.. Sorry to say this..
I am very curious what the endresult will be.. I am still following your progress..
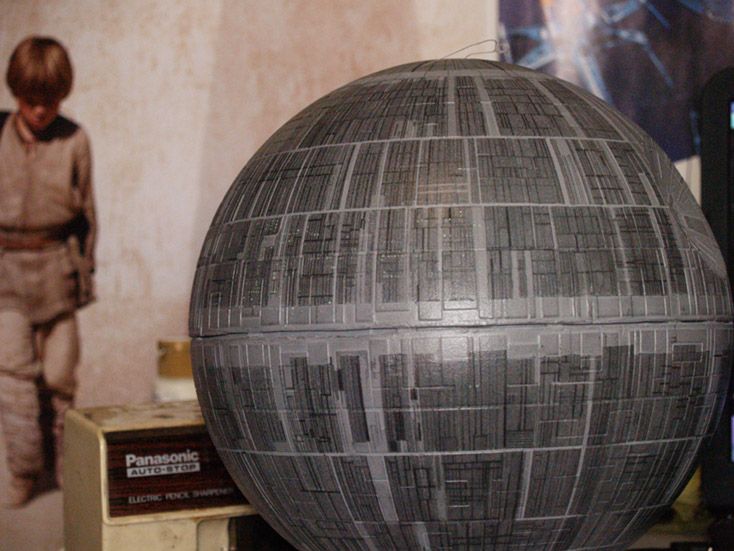
I think because of 1, that shine on it gives it that toyist look, and 2, the lighting of the whole model. Once done, I will try and take the best picture I can get and clean it up in photoshop for added effect. In person, things look better than the photos. Those guys at ILM were just crazy good with everything.
JediMichael
Master Member
Got most all of the top right side done. Its so much easier than the left, as most all the lines are just vertical ones. Will post pics once I get it all lined in.
Decided to google up the death star AMT model kit. A few people who did their take on it, but not even close to accurate detailing. I am so thankful to have Rob's thread to go by.
I even found the same model being sold on amazon for $144.00. Thats just insane for this model. Glad I got mine for only $10.
Scarecrow Joe
Sr Member
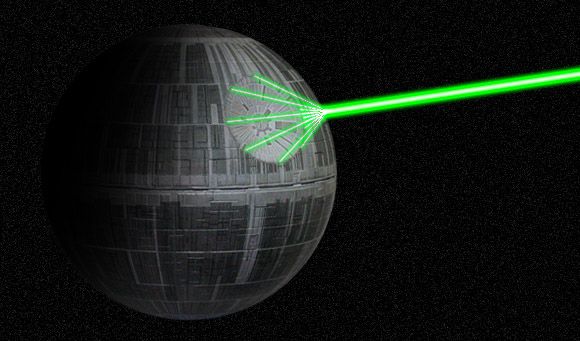
Try some matte clear coat over the whole thing to kill the shine and consider the lighting man! Its quite easy here. You only need a strong light output from the inside and after drilling the tiny holes the thing would look amazing in a low lighting room. You don't need to take it apart, just drill a hole big enough for the light to go through. If my memories are correct thats the way ILM illuminated the original DS.
JediMichael
Master Member
Well, I am using matte clear, which has added more shine than it had before.
I'm also afraid that drilling little holes all over it would still be too visible at this scale. I have another idea that should work.
I'm also afraid that drilling little holes all over it would still be too visible at this scale. I have another idea that should work.
JediMichael
Master Member
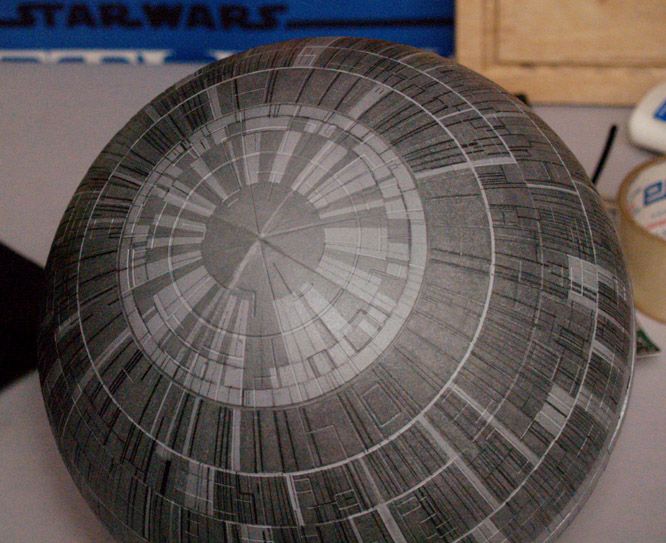
Finished most all the lines, at least the most important ones. Still have a few scattered ones around and then the top.
Was glad to finally get new pencils, as the old ones were dead.

Also wasn't happy with that long gray part under the dish. So I resprayed it gray and fixed it up and redrew the lines. I think I ended up making the square part a tad to fat, but not enough to need to redo it again. It really looks cleaner now.
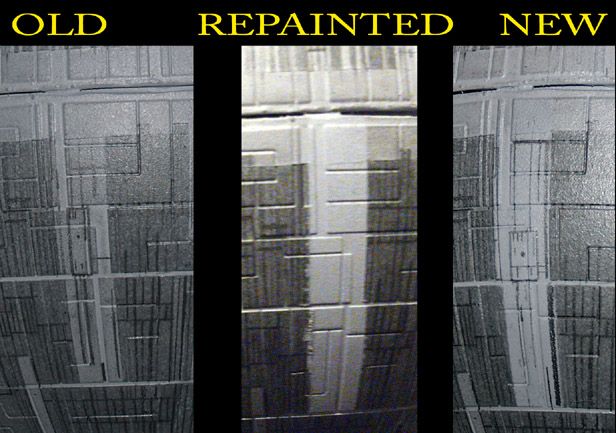
Heres the right side. Tried some different lighting to help keep down that shine, then fixed a bit in photoshop. Ends up looking brighter and less shiny, but more grainy.
And heres the very back side, which worked out good because of how small this model is, and me not knowing how to put in each dark gray area, it filled in the whole thing, rather than having a big blank spot like in the real model.
Soon comes all the "lights"......
Was glad to finally get new pencils, as the old ones were dead.

Also wasn't happy with that long gray part under the dish. So I resprayed it gray and fixed it up and redrew the lines. I think I ended up making the square part a tad to fat, but not enough to need to redo it again. It really looks cleaner now.

Heres the right side. Tried some different lighting to help keep down that shine, then fixed a bit in photoshop. Ends up looking brighter and less shiny, but more grainy.

And heres the very back side, which worked out good because of how small this model is, and me not knowing how to put in each dark gray area, it filled in the whole thing, rather than having a big blank spot like in the real model.

Soon comes all the "lights"......
JediMichael
Master Member
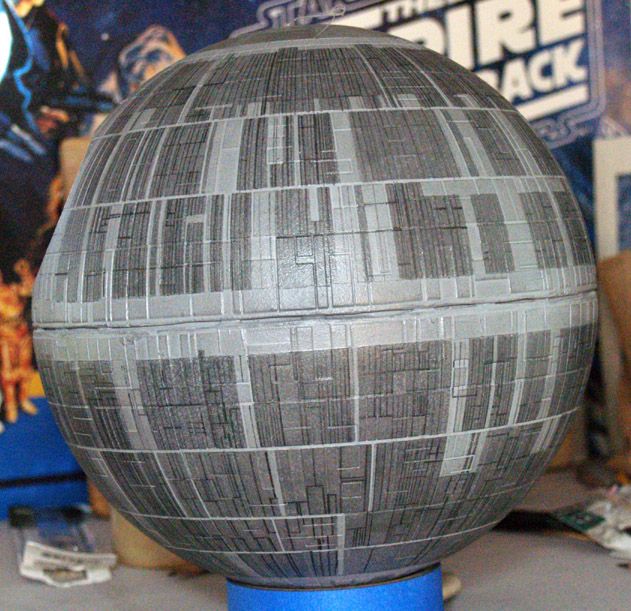
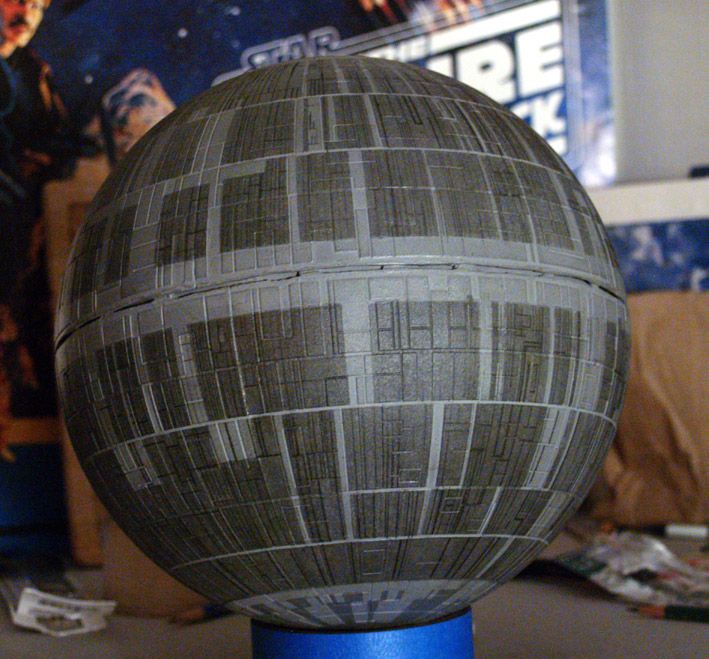
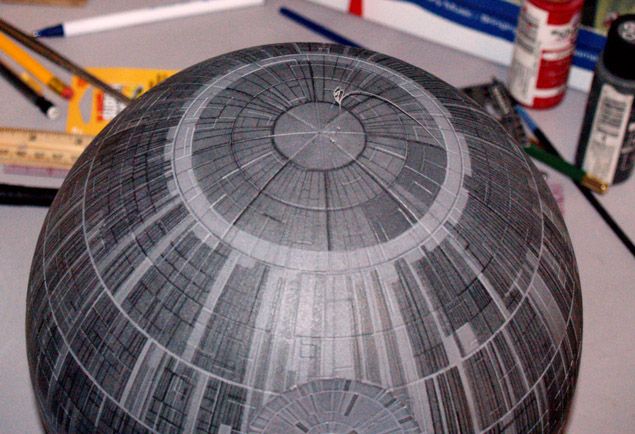
I do believe I have gotten all the lines drawn in. I'm so tired of lines right now.
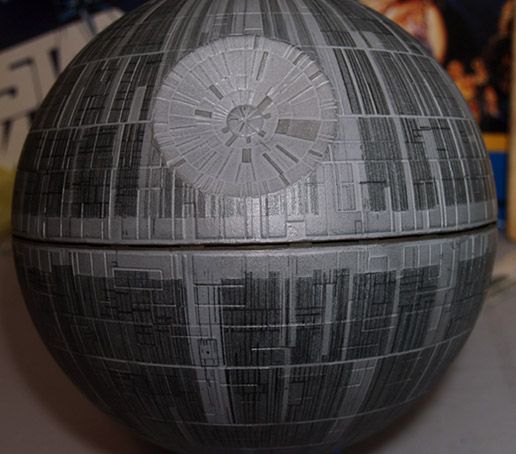
Heres the top.
The bottom.
And I was able to get this shot without any bad shine, so I decided to make up this shot real quick to see how it looks.
Now to add all the "lights".... I hope it works.
Off to bed, to late already and I have to get up at 5:30am.....
Heres the top.

The bottom.

And I was able to get this shot without any bad shine, so I decided to make up this shot real quick to see how it looks.

Now to add all the "lights".... I hope it works.
Off to bed, to late already and I have to get up at 5:30am.....
Caretaker10
Active Member
That looks so much better. Good job.
Jim
Jim
JediMichael
Master Member
That looks so much better. Good job.
Jim
Thanks. I'm quite happy how it has turned out so far. Being such a crappy model to begin with.
JediMichael
Master Member
Spent about the last 25 mins to "light up" the star of death.
Starting with this.
Then using a 4 foot blacklight....which was on the ceiling but fell the other day and thankfully didn't break.
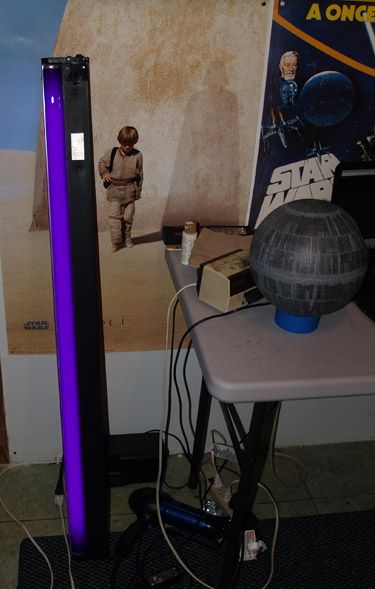
And I get this....nice blurry pic.
With the rooms lights on, you can still see the lights enough.
But with the room light off, looks pretty good. Can't wait to get a more focused beauty shot.

I want to do more now, but must sleep....
Starting with this.

Then using a 4 foot blacklight....which was on the ceiling but fell the other day and thankfully didn't break.

And I get this....nice blurry pic.

With the rooms lights on, you can still see the lights enough.

But with the room light off, looks pretty good. Can't wait to get a more focused beauty shot.

I want to do more now, but must sleep....
JediMichael
Master Member
That trench has been really bugging me for a while now, but I had no idea how to fix it. Before I even started painting it, I sanded it like crazy, but just couldn't get it to look so good. My sanding skills aren't so great anyways.
But today I thought of an idea. Blue tape it up just around the trench, then paint trench part dark gray. While it doesn't actually fix the problem, it tricks your eyes into not seeing the problem so much.
Theres those annoying little tabs that help hold the model together. I think I might try to paint them an even darker gray.
But heres what I got now.
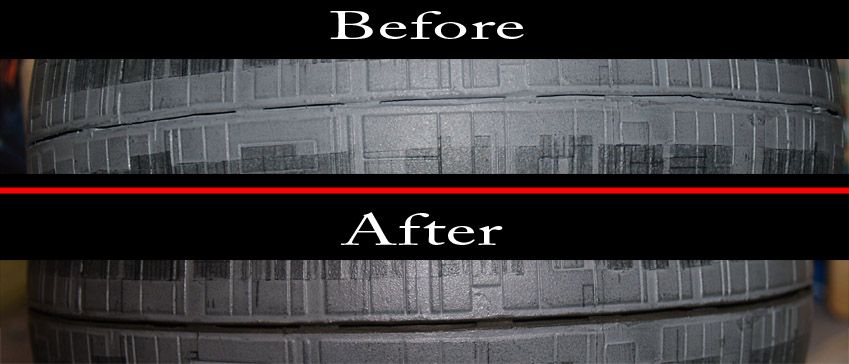
And a whole picture shot. So much better looking.

so you dipped the tack into the paint and "stippled" all those?? holy.... will be looking for pictures of the finished death star!! NICE JOB!! great pic's!!
JediMichael
Master Member
so you dipped the tack into the paint and "stippled" all those?? holy.... will be looking for pictures of the finished death star!! NICE JOB!! great pic's!!
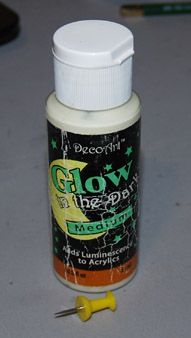
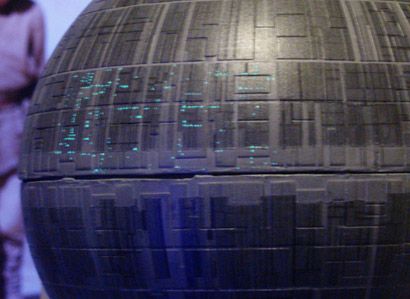
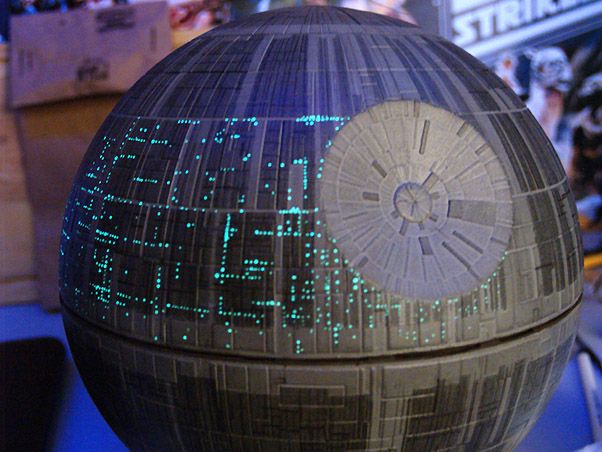
YES......and by the time I'm done, will probably hate little dots. The lights are also pretty accurate to the real model. Some I added where needed. But I found a pic off google of the real model nice and lit up at 19817×16000 resolution. Much MUCH higher than I would ever need. But I can perfectly see the pin holes they made. Although its only the left side. But gonna get this thing done. Thanks for watching.
JediMichael
Master Member
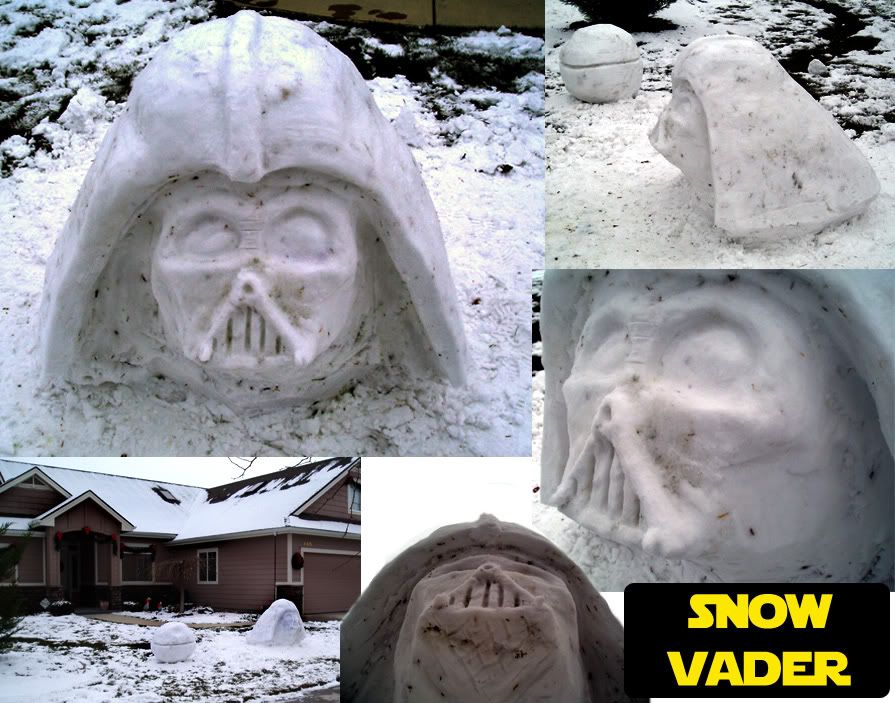
I can say I've been a death star fan for quite a while now. Visiting my parents during Christmas 2005.
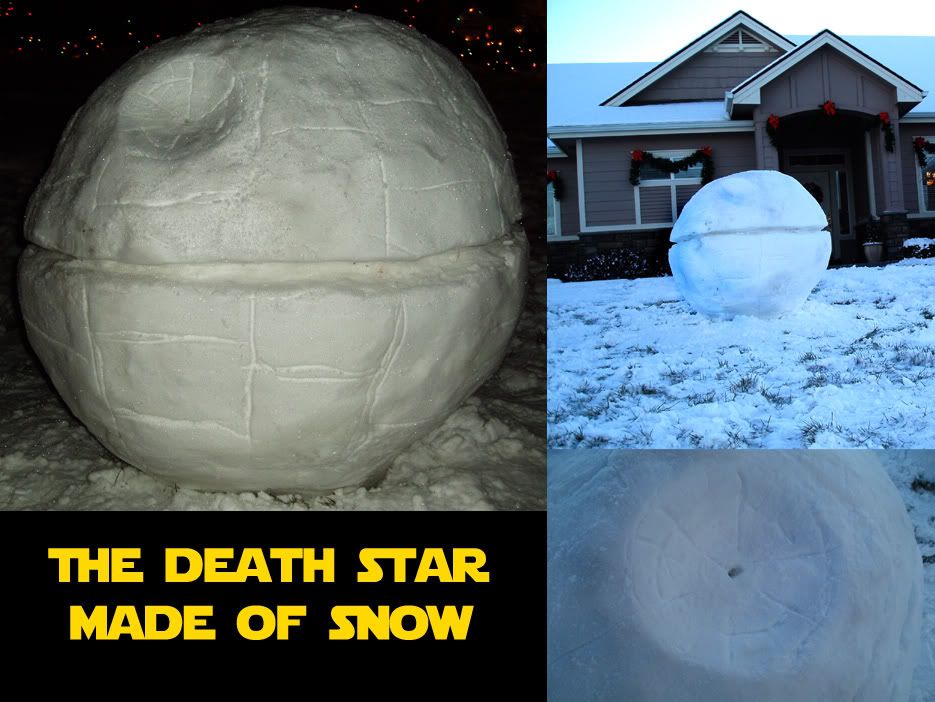
Can't have a death star without a super deformed Vader... (I live in Florida, so don't get to be in snow too often....and this was my first time ever craving snow)
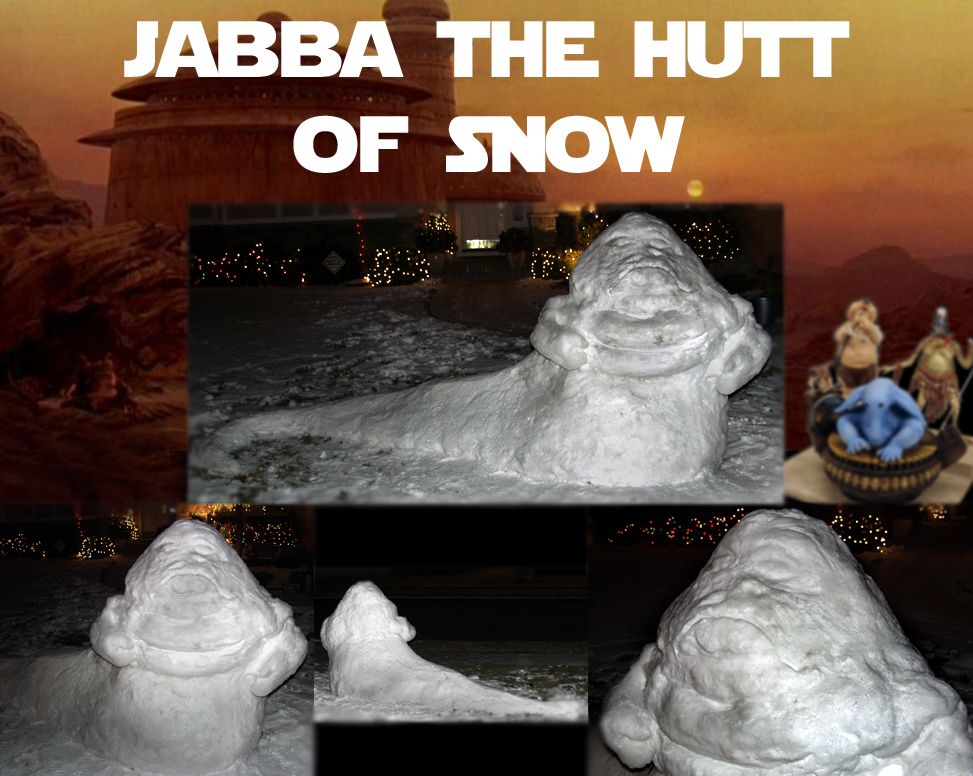
A year later while visiting again, did Jabba. You should have seen all the cars slowing down on their street.

Can't have a death star without a super deformed Vader... (I live in Florida, so don't get to be in snow too often....and this was my first time ever craving snow)

A year later while visiting again, did Jabba. You should have seen all the cars slowing down on their street.

yuumi2891103
Master Member
Adding the detail to make rather small and simple shape model like this is something very hard to do but also very interesting challenge.
You need many idea and skills to be done. Need many try and retry, another ideas and so on. So far you are doing very fine.
The idea of the black light and glow paint is very inspiring.
I love your snow work! I like to try that if I got the snow here.
All the best
katsu
You need many idea and skills to be done. Need many try and retry, another ideas and so on. So far you are doing very fine.
The idea of the black light and glow paint is very inspiring.
I love your snow work! I like to try that if I got the snow here.
All the best
katsu
JediMichael
Master Member
Adding the detail to make rather small and simple shape model like this is something very hard to do but also very interesting challenge.
You need many idea and skills to be done. Need many try and retry, another ideas and so on. So far you are doing very fine.
The idea of the black light and glow paint is very inspiring.
I love your snow work! I like to try that if I got the snow here.
All the best
katsu
Thank you. Adding these dots is sure a long process, but looking really good so far.
JediMichael
Master Member
Got a bit more done. What makes this so hard is that for one, not enough paint on the tack won't add even a small dot, but too much will make too big a dot. I've had to wipe a few too big ones off and redo it.

Similar threads
- Replies
- 6
- Views
- 1,410
- Replies
- 15
- Views
- 1,768