Re: MIB Pulsar project
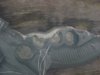
Grip work.......
First round of glassing to repair the missing/broken finger holes, about 40 layers of glass sheet in the center! I dremelled a groove down the center of the grip so the finger part is supported at the ends.


Another 15 or so.........


After the first round of sanding. Still have a bunch to remove.

and after sanding it all down there was some parts that needed to be built up with more glass . I again dremmeld a groove down the center and layed another 15-20 layers. Some to fill the missin chunks then more along the whole grip to support it. A bit of a put it on to take it off type of thing. I could have just used some filler or jb weld but it would have busted if you smacked it. This way it's not going anywhere.

After sanding it all down I have this. I still need to tape up the finger holes and do a little filling with epoxy but shes close. The top 2 and bottom finger holes are pretty much on, the other needs a bit of sanding to get the shape right.

I also did some repair on the grip back where the ribs were all missing. I filed them all back in and epoxied just that area. I need to do a little more and it will be good to go. They actually came out better then I thought they would.

I have started cleaning it up now. Just did a bit of sanding to see what I have.

Some of this thing just looks horrible no matter what. The clay job they did when they molded it is a mess. In the end I think once I have this cleaned up I am going to mold it as is, as a stunt so I can make another stunt if need be and then hack it and do serious clean up for a hero version with all the aluminum parts. If I cast another and then clean it up and then mold it again shrinkage is going start to creep in. So in the end I will use this shell for my personal hero build which pretty much means taking it down to a bare receiver so all the bit can be added back on. Then I can mold it again as a bare receiver. I did want to keep it as original as possible but to build the best heros it needs to be done.


I also got the front end halves back together, I closed the front up since most of it is closed up. I need to add a bunch of layers to build it up so I can sand the bevel into it. I also started putting a flange on it so that it can be inserted into the barrel and secured with the screws that are on the side of the barrel. Still a lot of work to go but it's finally coming together.
More to come........


Grip work.......
First round of glassing to repair the missing/broken finger holes, about 40 layers of glass sheet in the center! I dremelled a groove down the center of the grip so the finger part is supported at the ends.
Another 15 or so.........
After the first round of sanding. Still have a bunch to remove.
and after sanding it all down there was some parts that needed to be built up with more glass . I again dremmeld a groove down the center and layed another 15-20 layers. Some to fill the missin chunks then more along the whole grip to support it. A bit of a put it on to take it off type of thing. I could have just used some filler or jb weld but it would have busted if you smacked it. This way it's not going anywhere.
After sanding it all down I have this. I still need to tape up the finger holes and do a little filling with epoxy but shes close. The top 2 and bottom finger holes are pretty much on, the other needs a bit of sanding to get the shape right.
I also did some repair on the grip back where the ribs were all missing. I filed them all back in and epoxied just that area. I need to do a little more and it will be good to go. They actually came out better then I thought they would.
I have started cleaning it up now. Just did a bit of sanding to see what I have.
Some of this thing just looks horrible no matter what. The clay job they did when they molded it is a mess. In the end I think once I have this cleaned up I am going to mold it as is, as a stunt so I can make another stunt if need be and then hack it and do serious clean up for a hero version with all the aluminum parts. If I cast another and then clean it up and then mold it again shrinkage is going start to creep in. So in the end I will use this shell for my personal hero build which pretty much means taking it down to a bare receiver so all the bit can be added back on. Then I can mold it again as a bare receiver. I did want to keep it as original as possible but to build the best heros it needs to be done.
I also got the front end halves back together, I closed the front up since most of it is closed up. I need to add a bunch of layers to build it up so I can sand the bevel into it. I also started putting a flange on it so that it can be inserted into the barrel and secured with the screws that are on the side of the barrel. Still a lot of work to go but it's finally coming together.
More to come........
Attachments
Last edited:
")