pandatrooper
Well-Known Member
Good tips Mishakitty78! I found some similar details too pouring over the photos.
Qwerty32, yes this thread is still alive. Work and a toddler keeps me busy. See good progress below.")
- - - Updated - - -
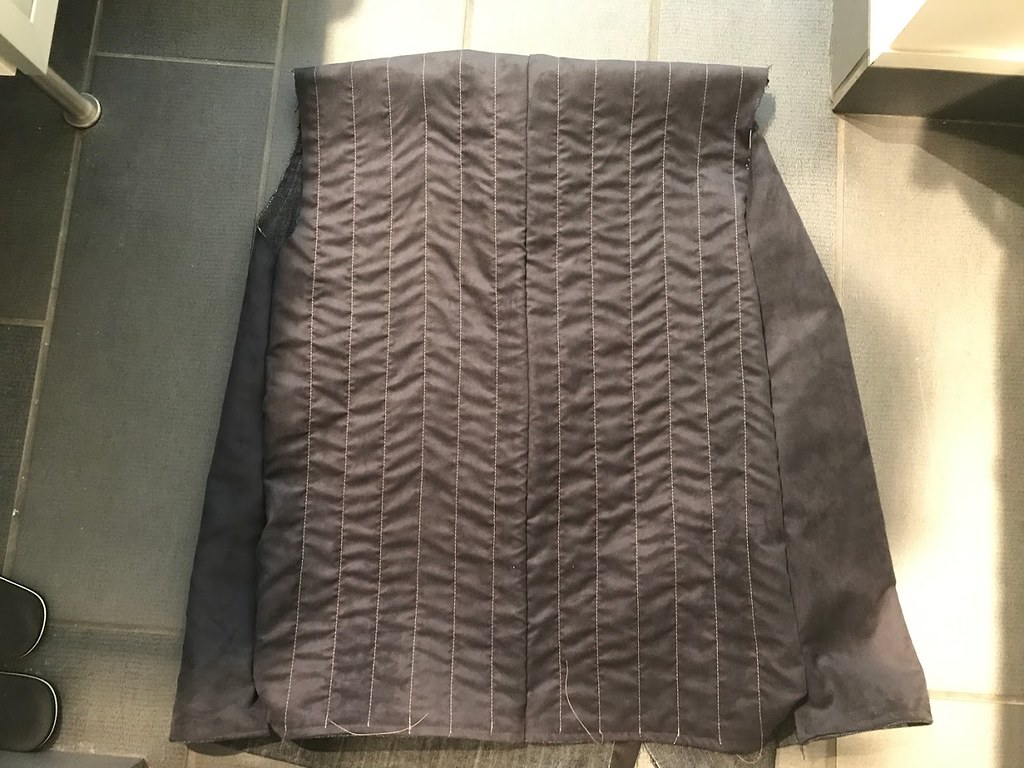
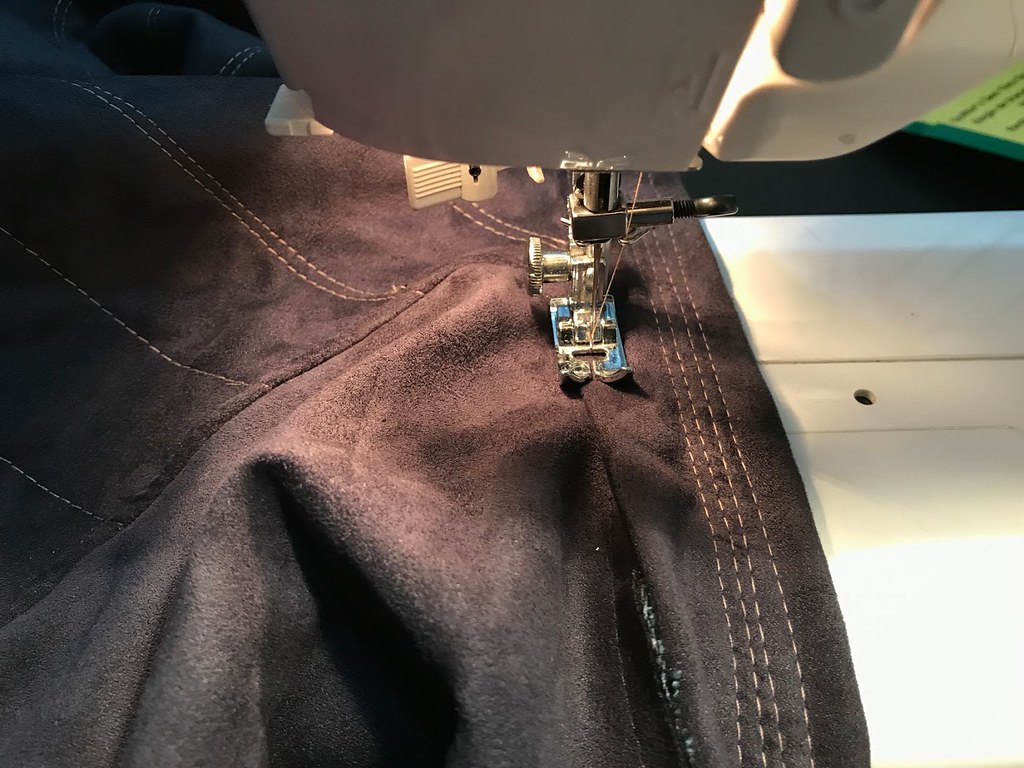
Some good progress as of late.
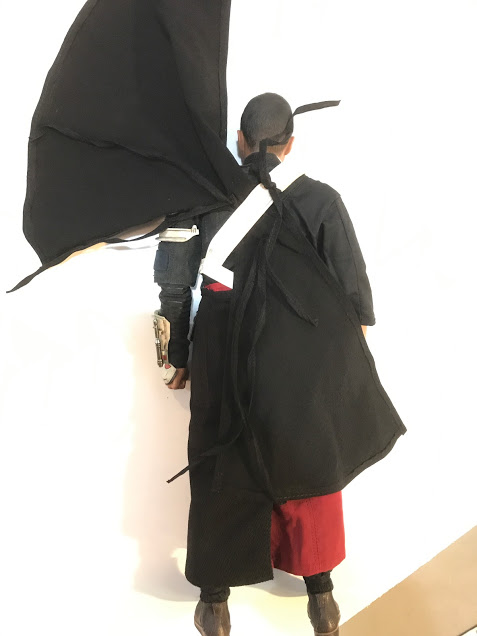
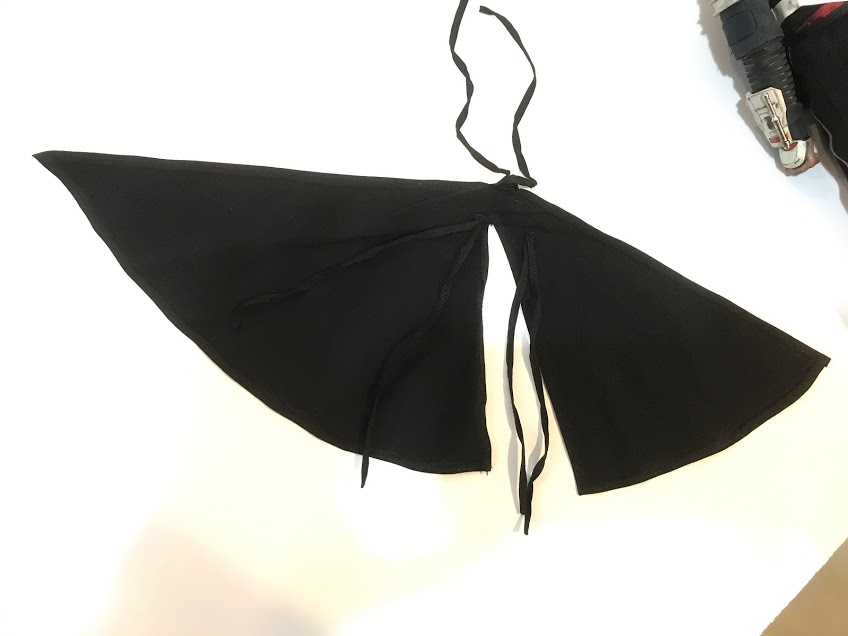
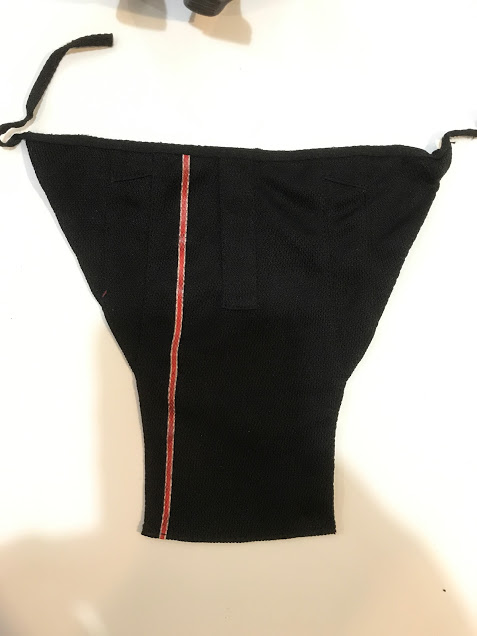
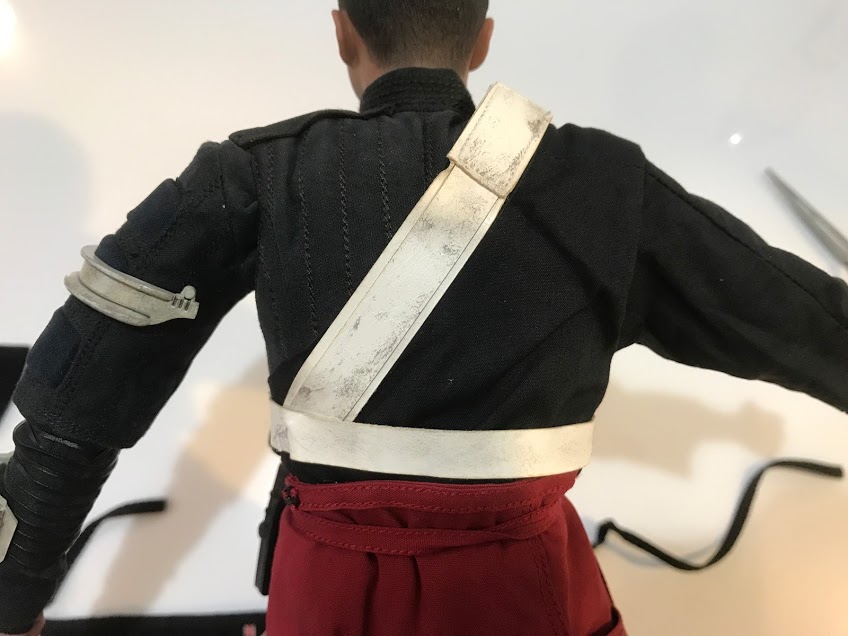
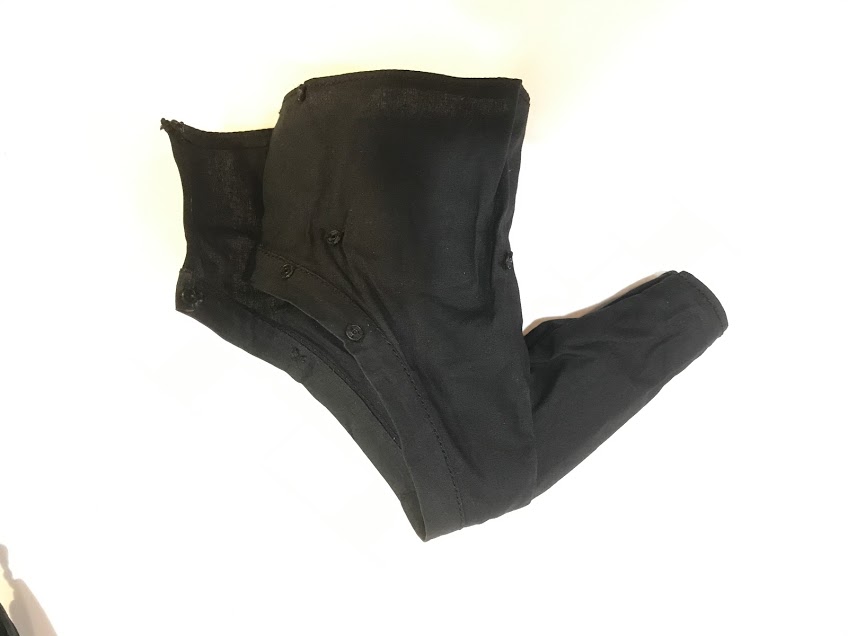
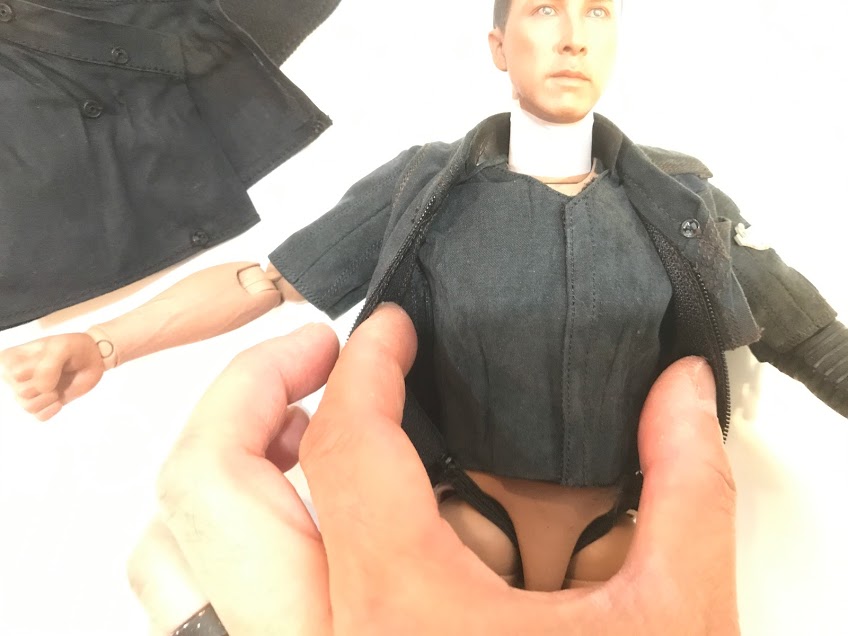
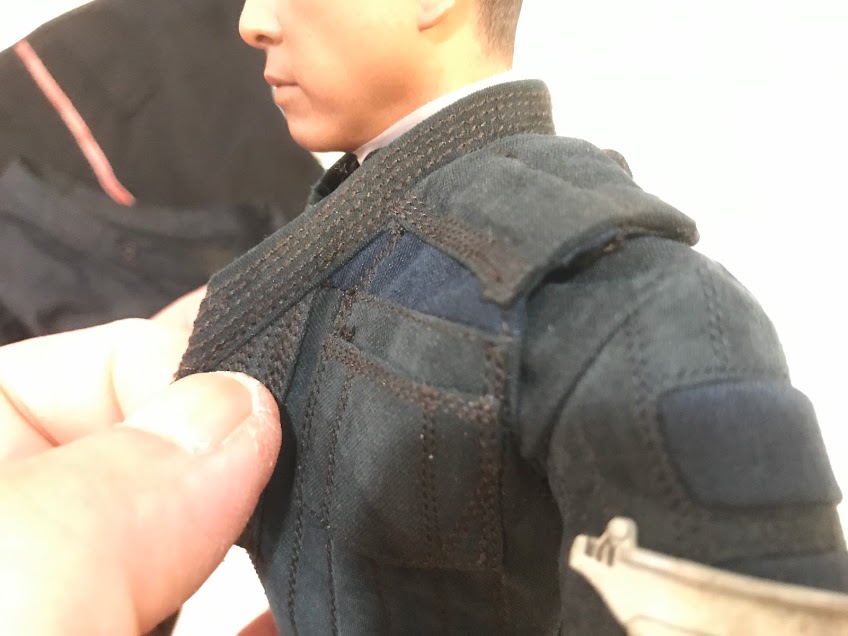
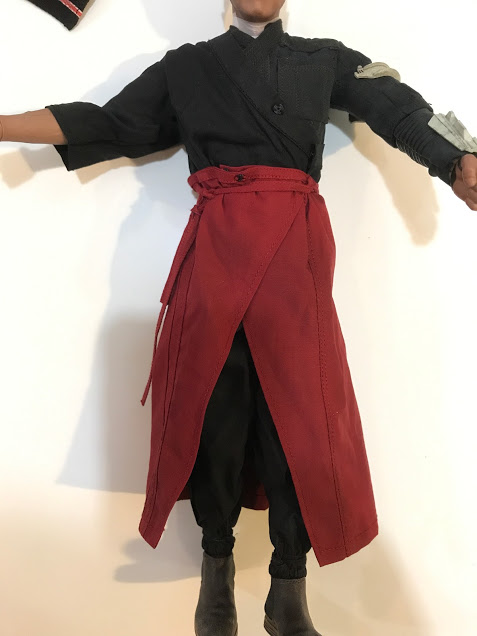
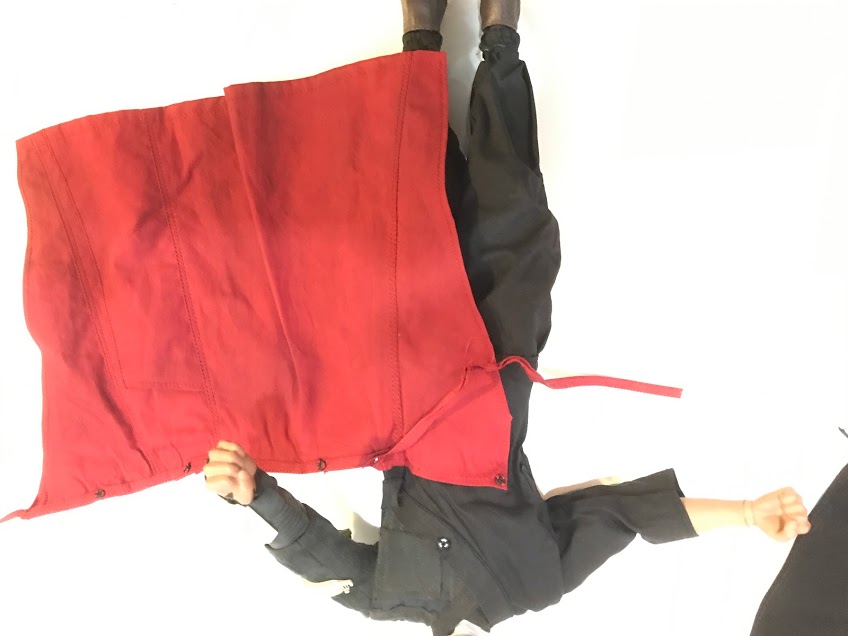
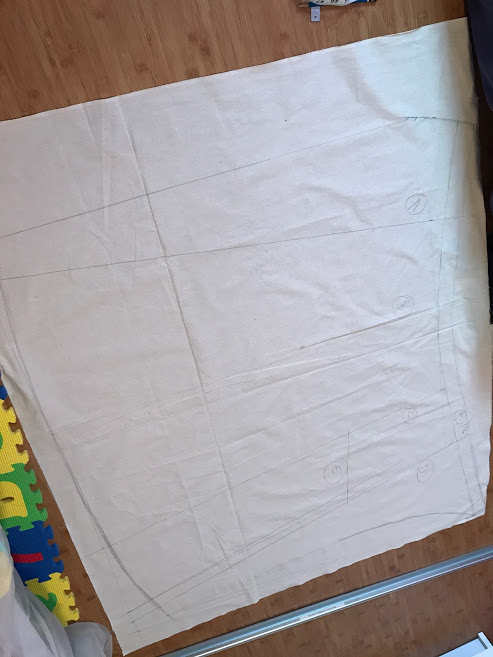
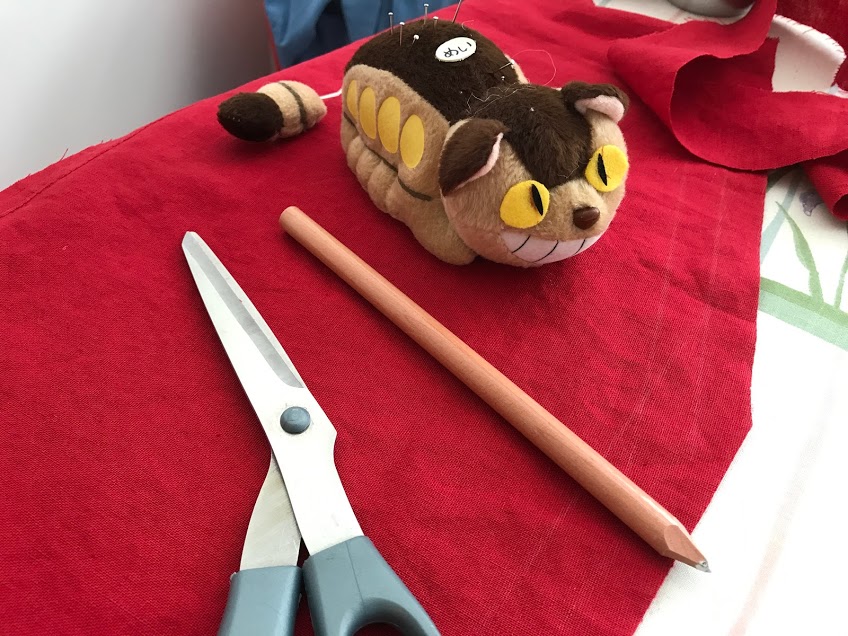
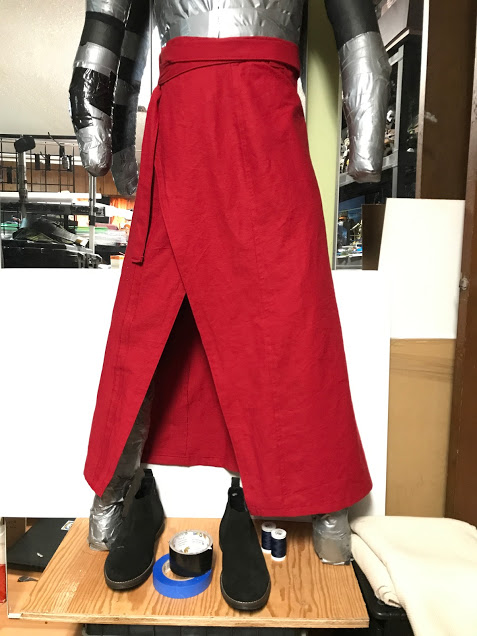
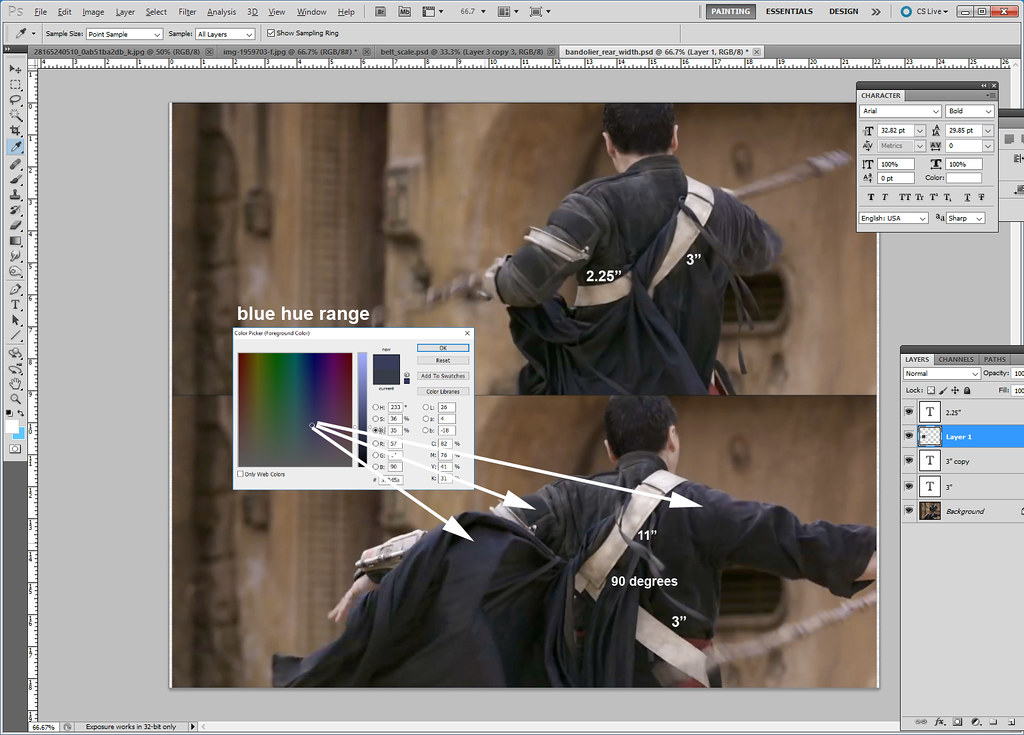
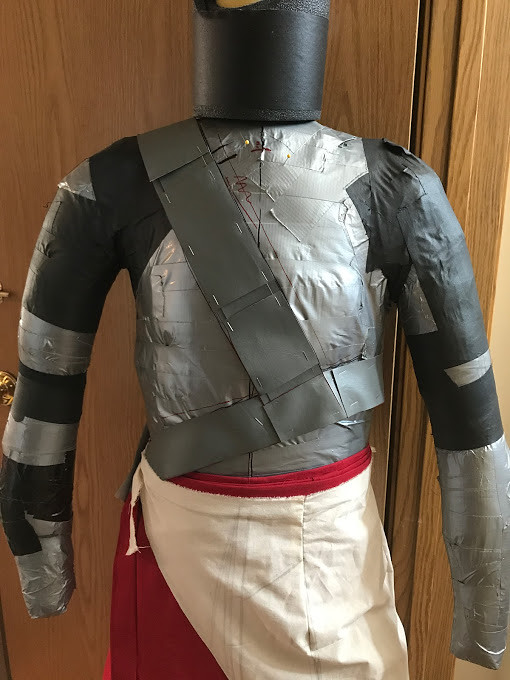
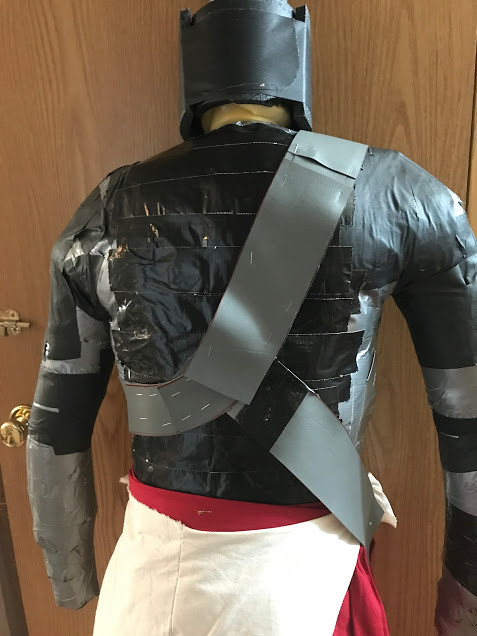
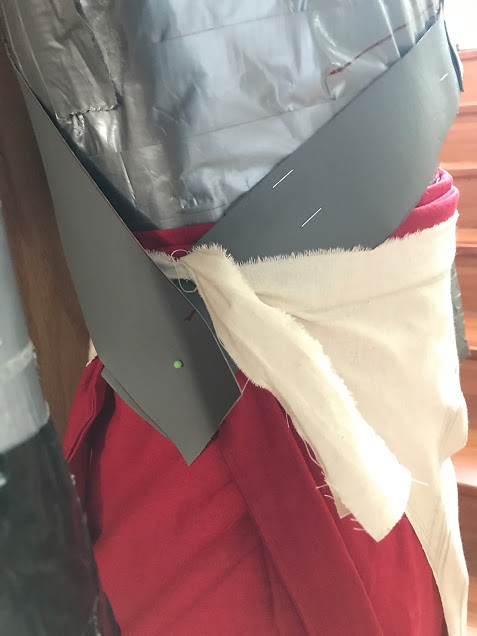
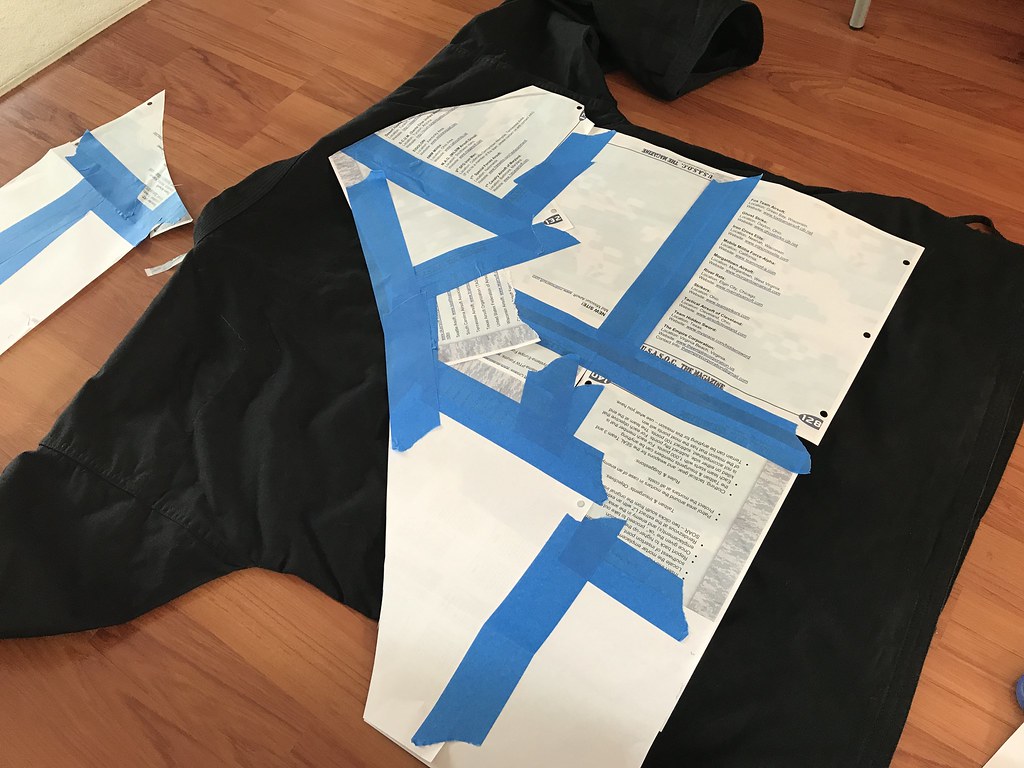
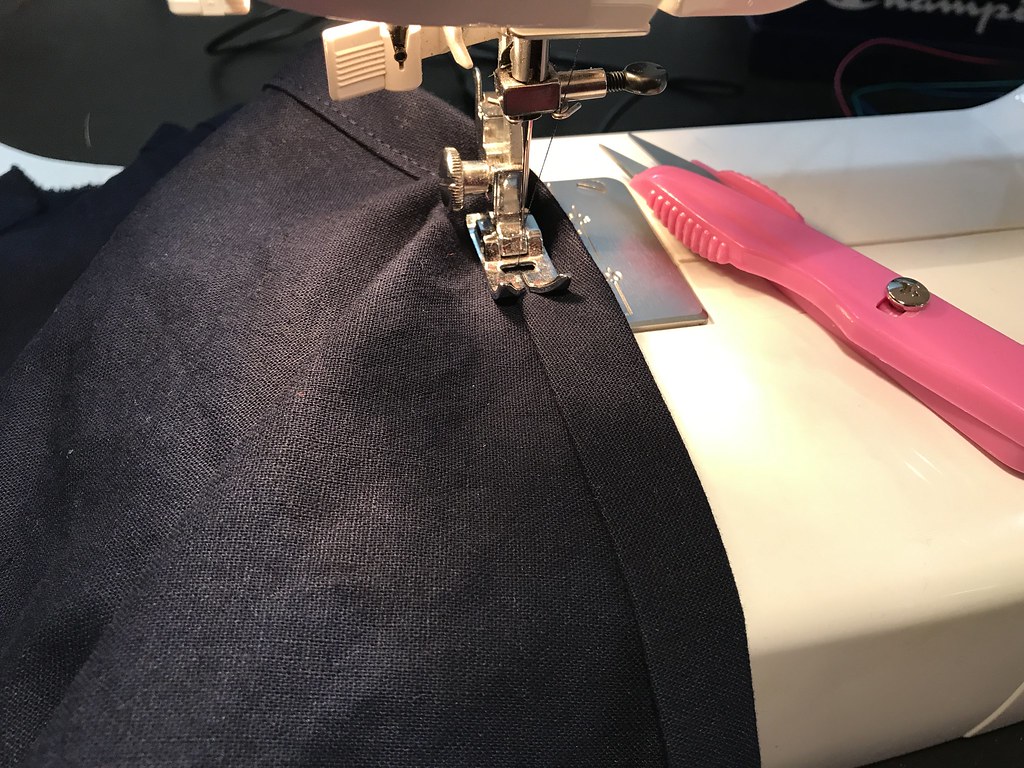
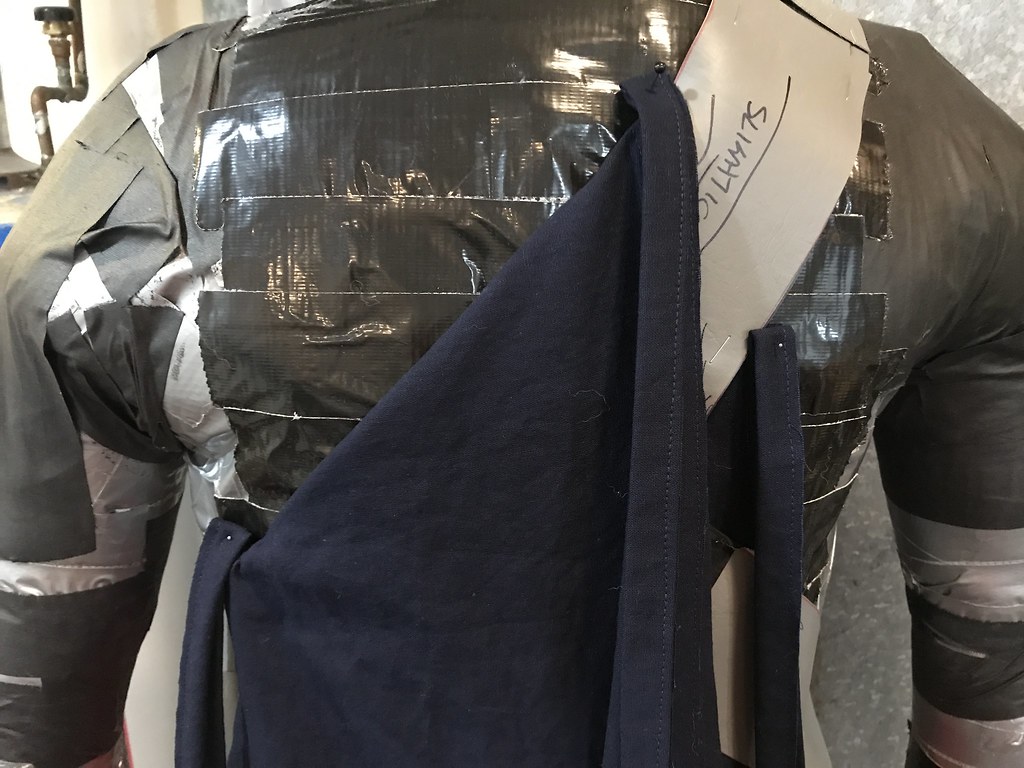
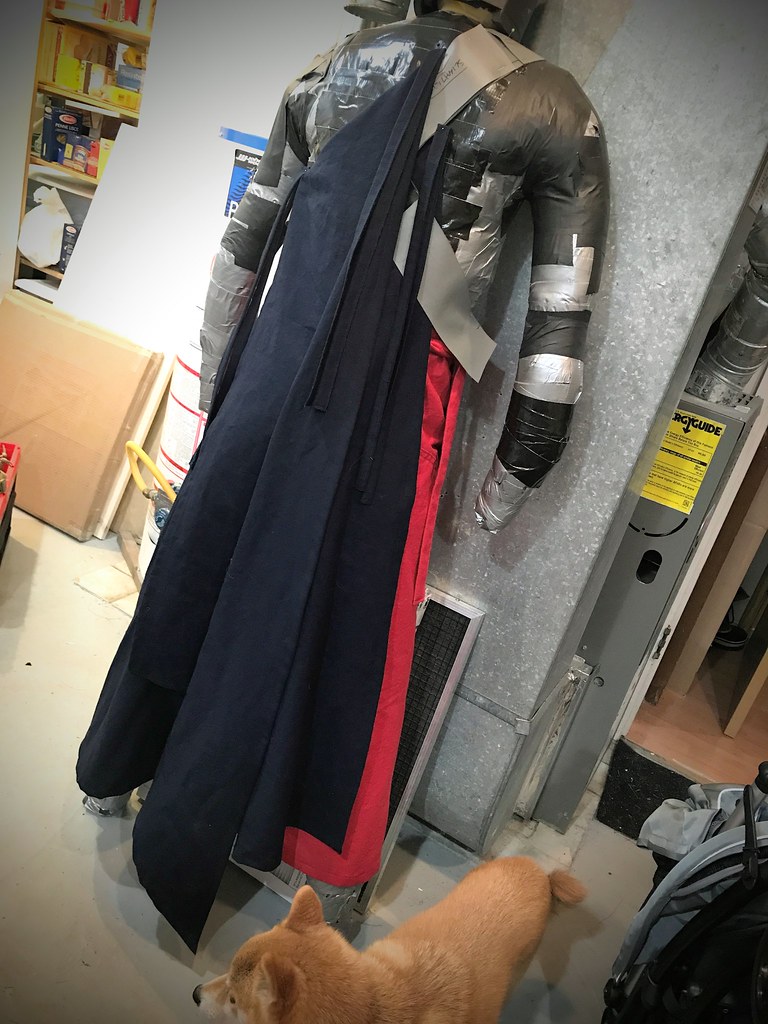
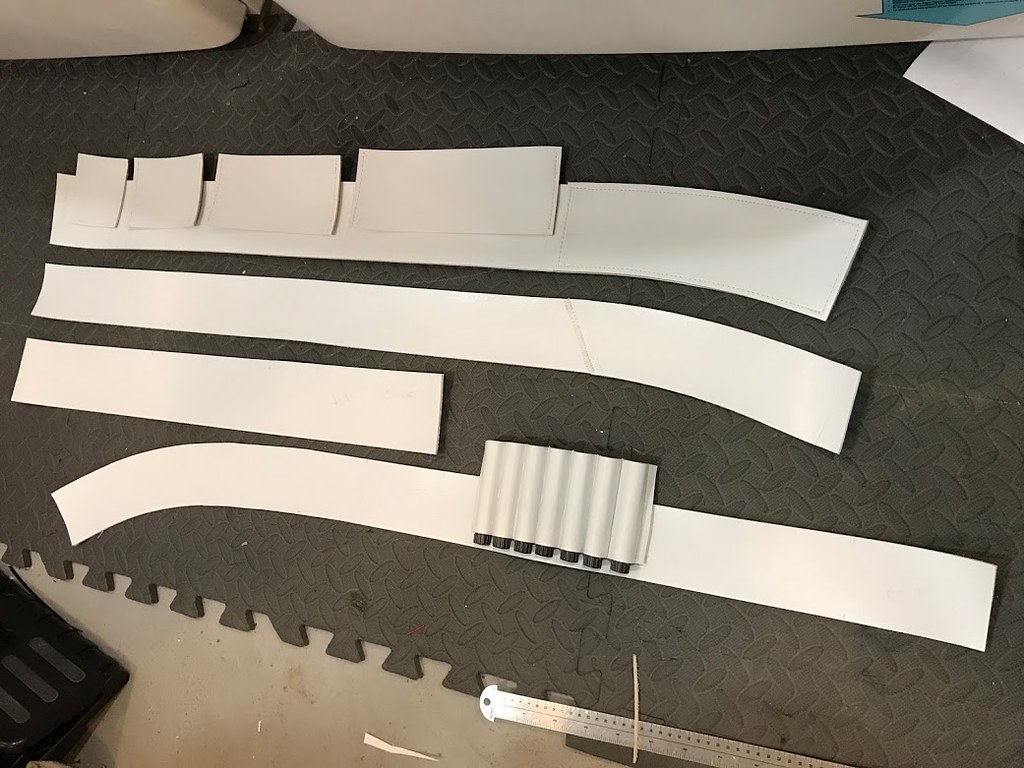
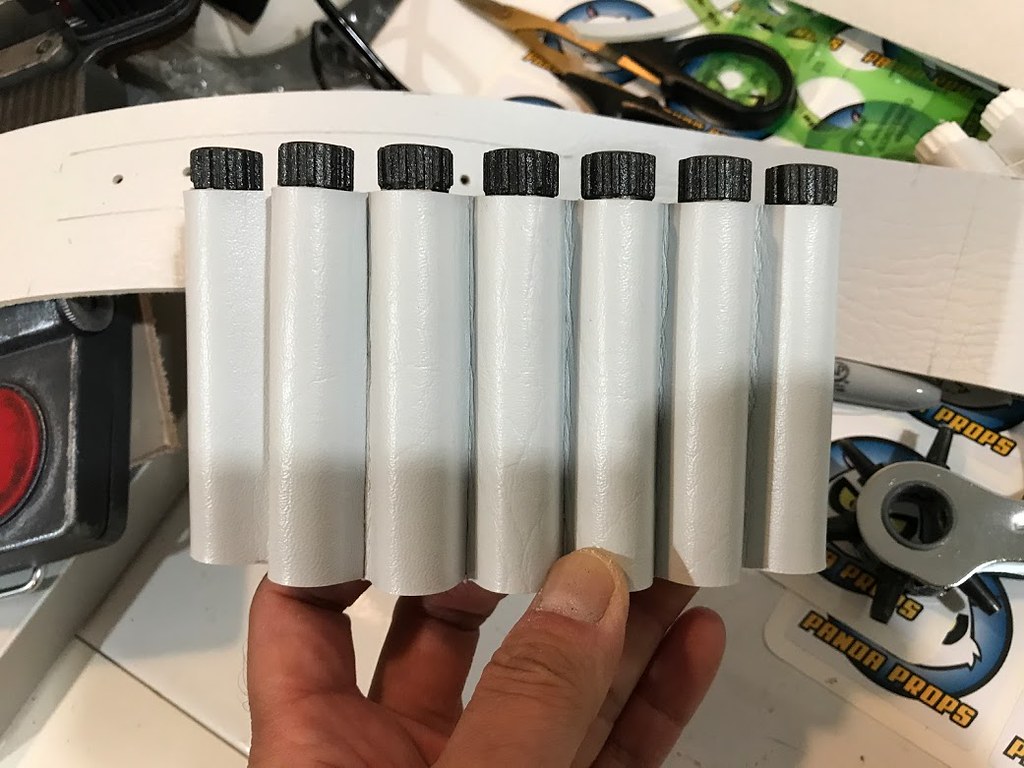
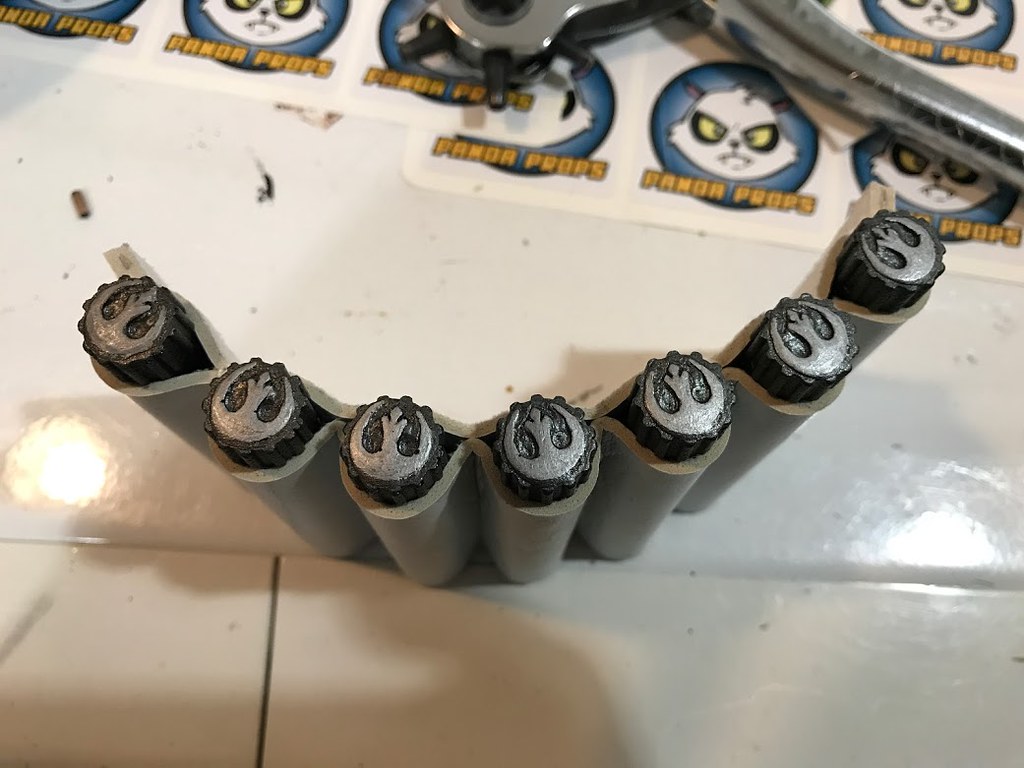
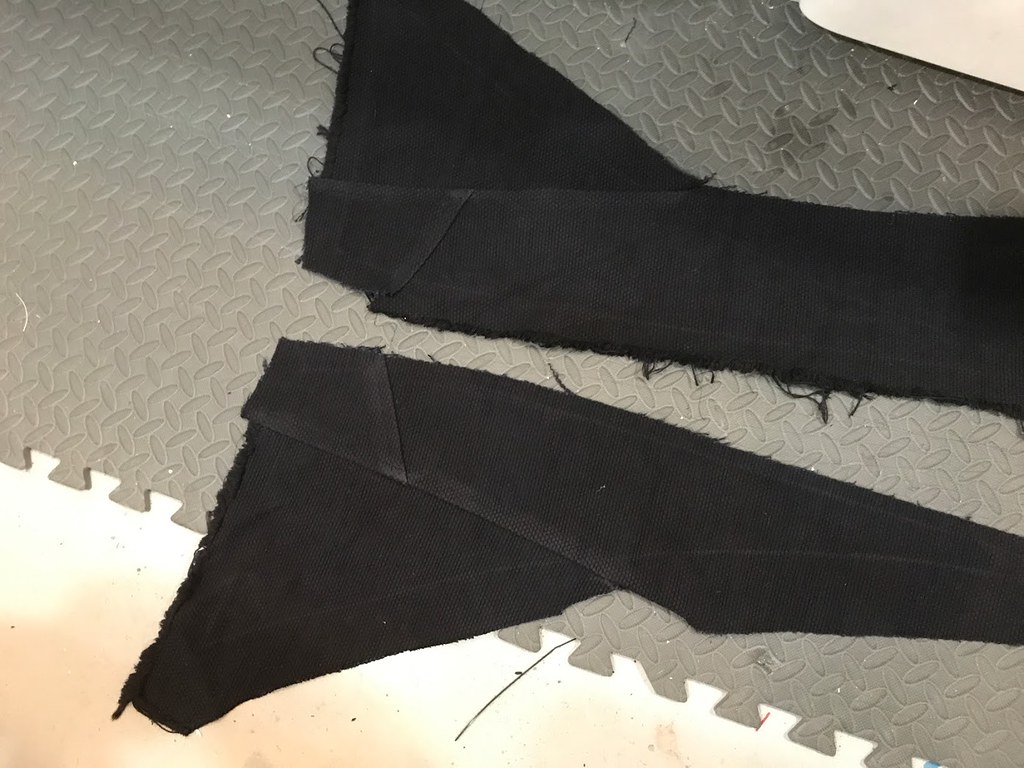
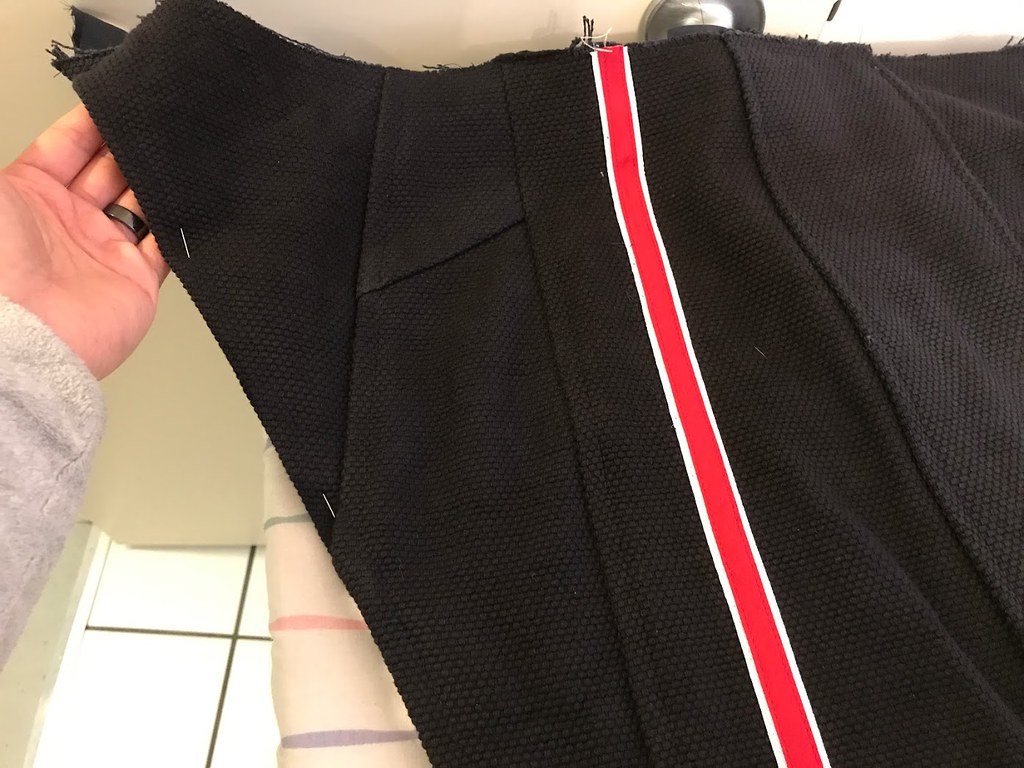
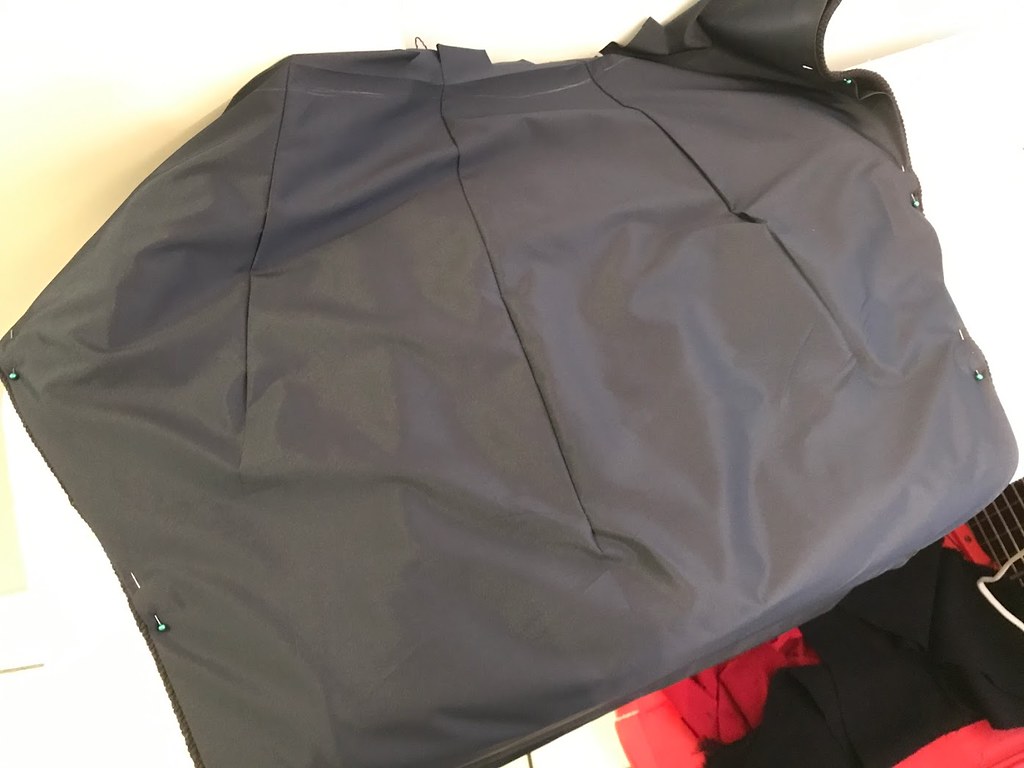
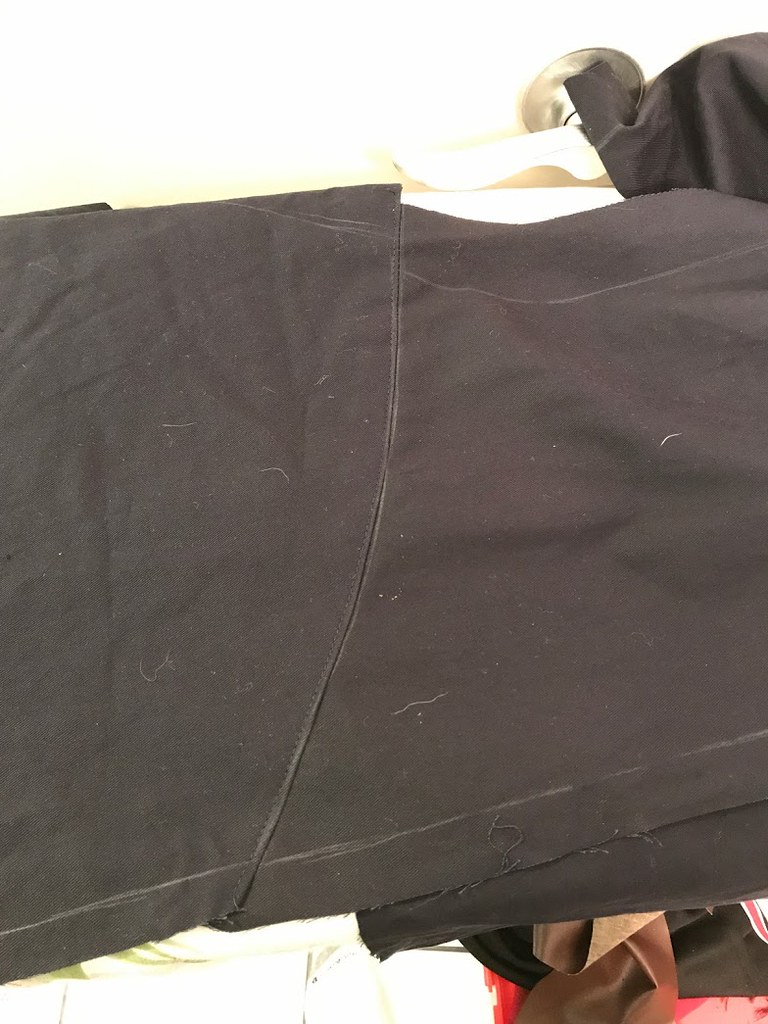
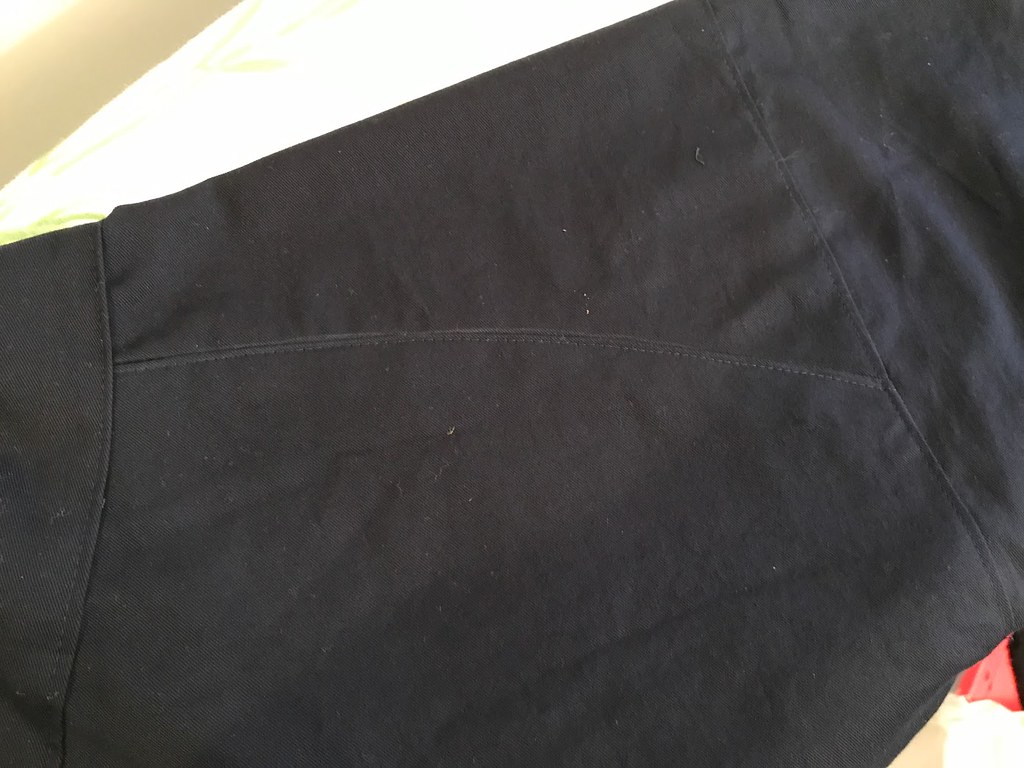
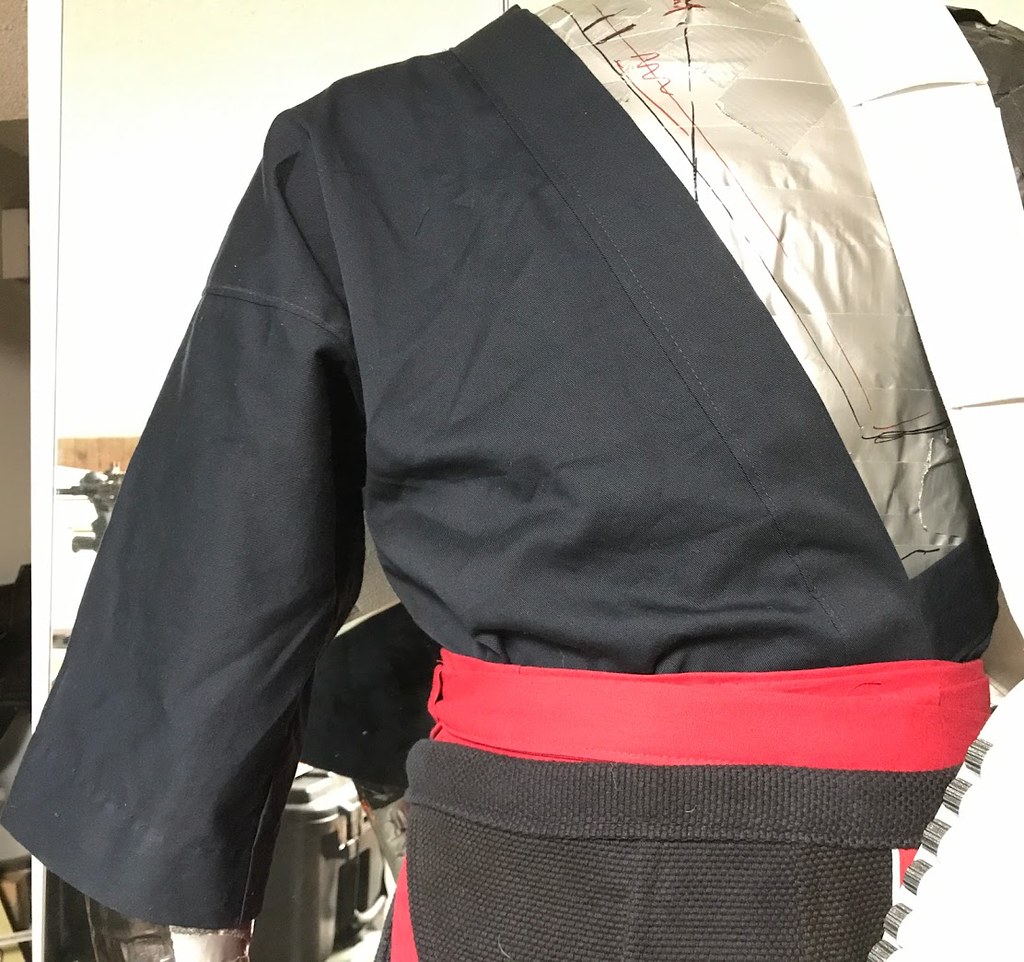
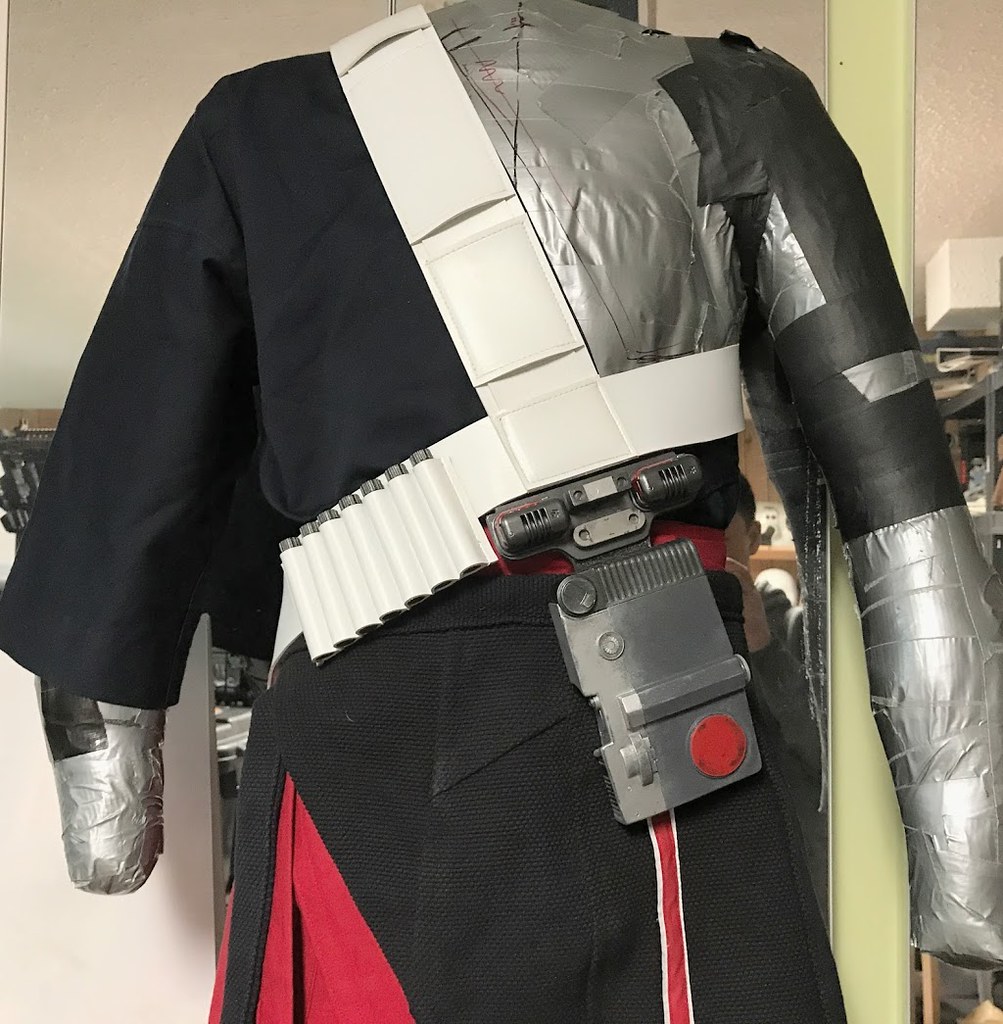
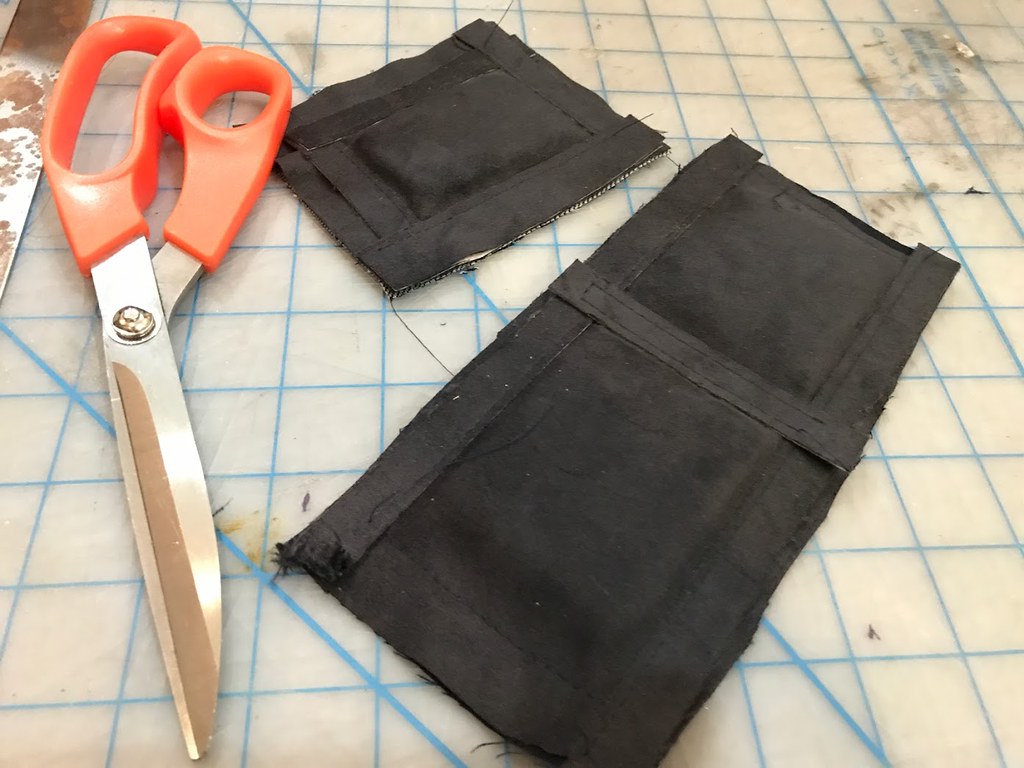
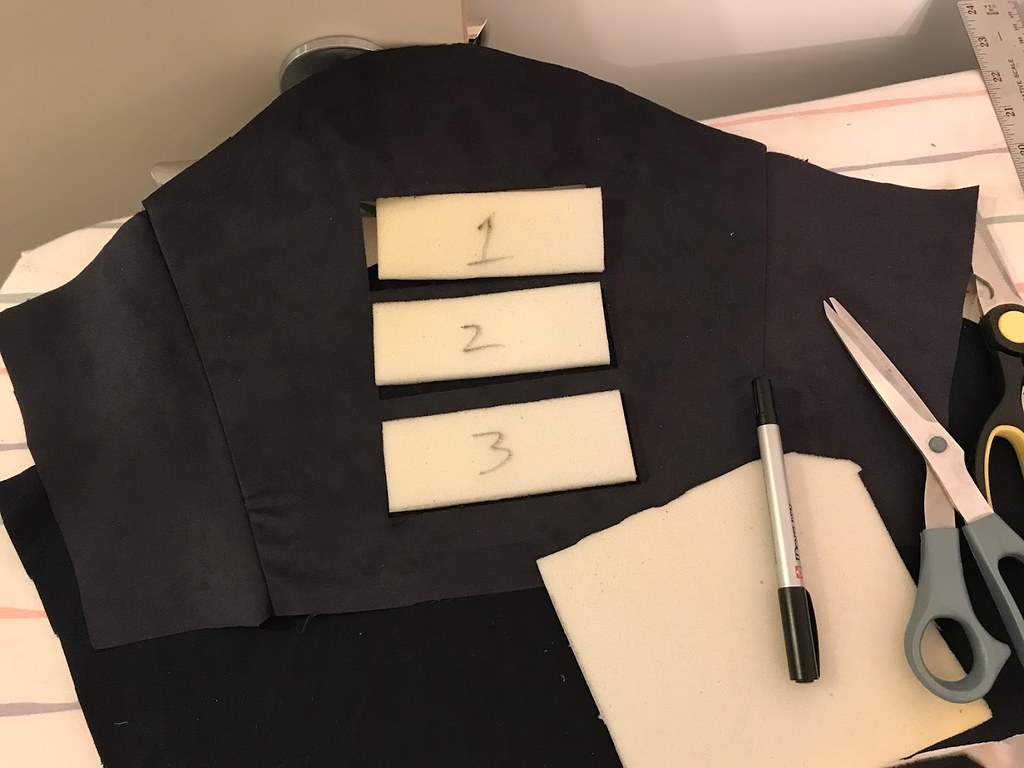
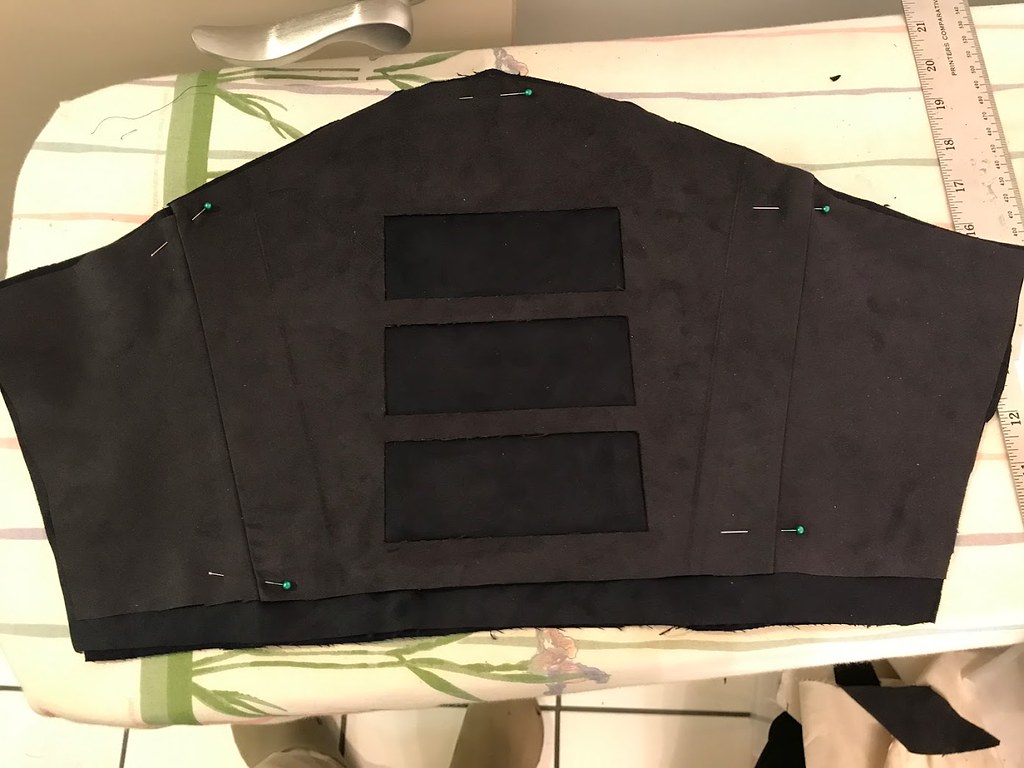
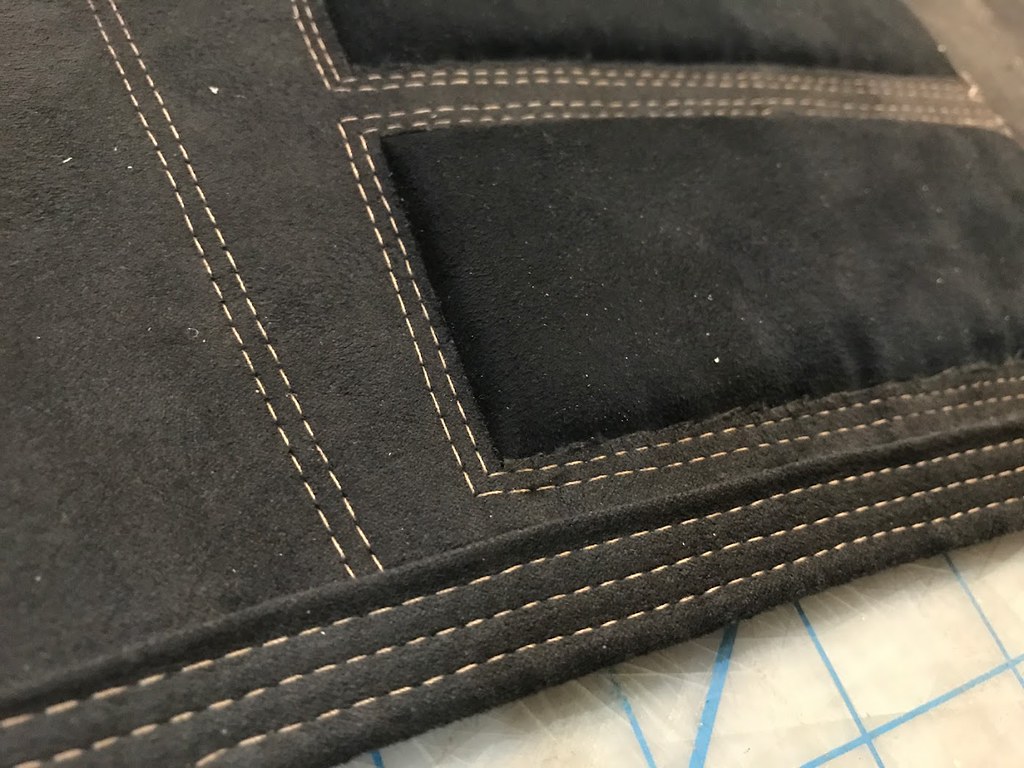
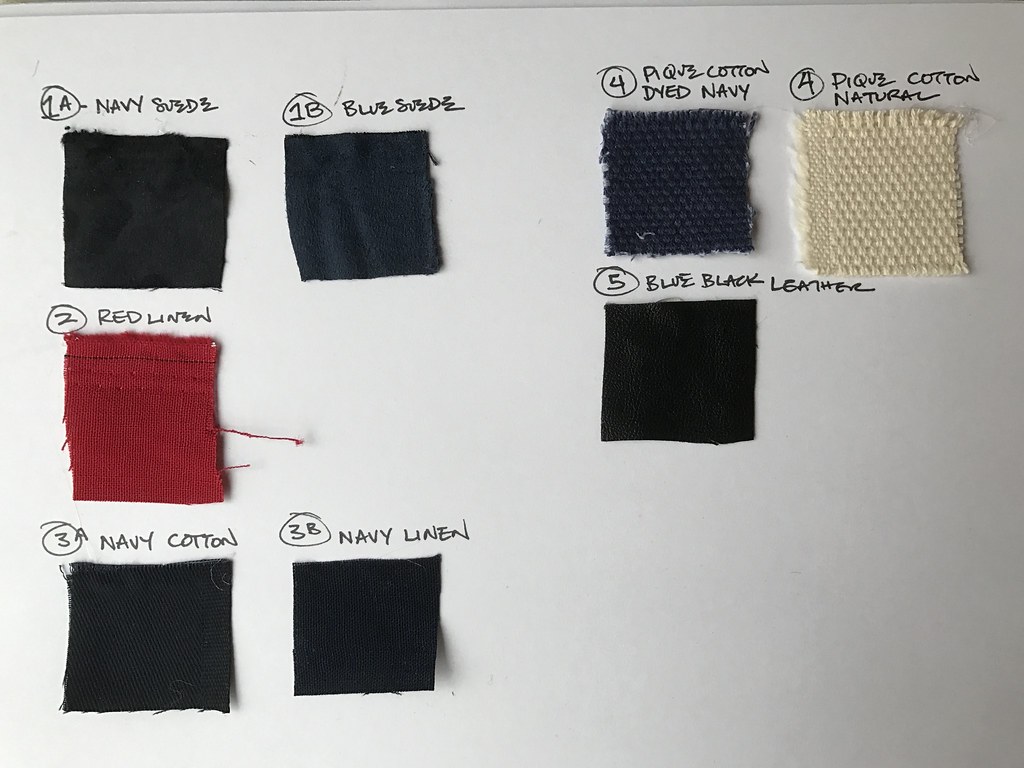
I did some detailed drawings to figure out all the separate pieces of Chirrut's costume, where the attachment points are, materials and fabrics, etc. I made a "swatch book" to see how all the colors would work together, pretty happy with them.
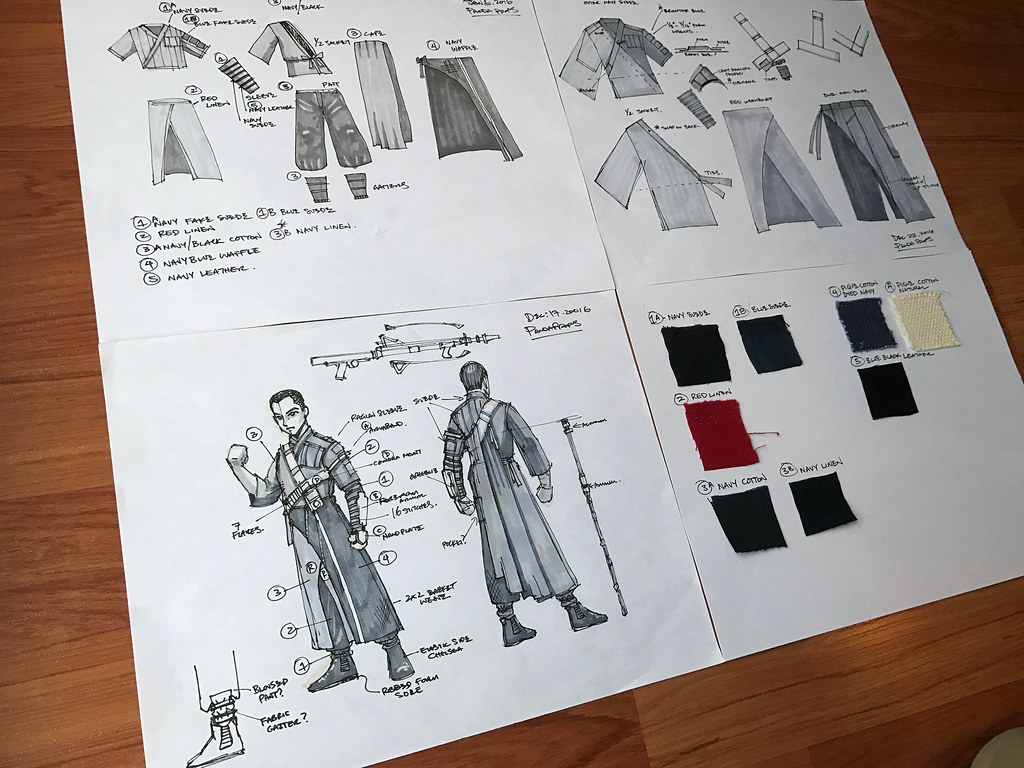
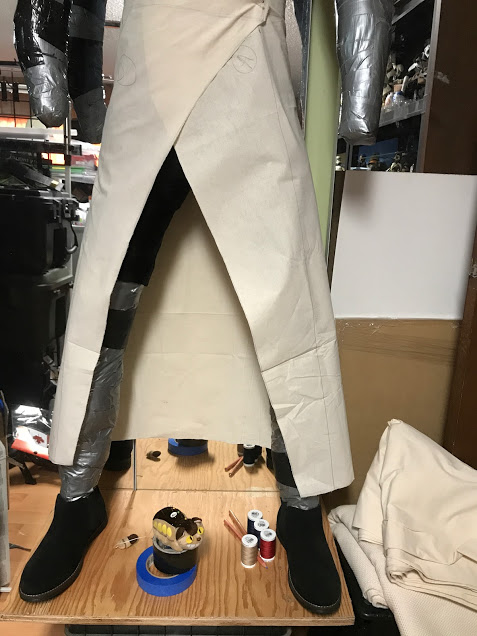
I ended up going to 4 different fabric stores to try and find the closest fabrics possible to the original costume. I was able to find:
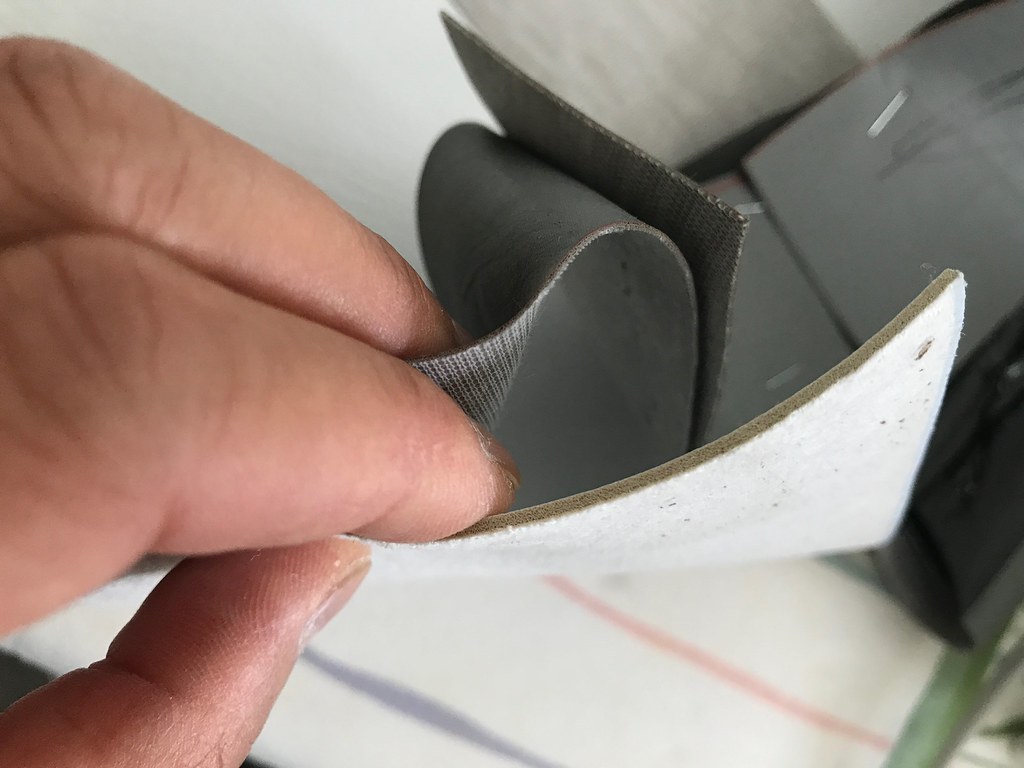
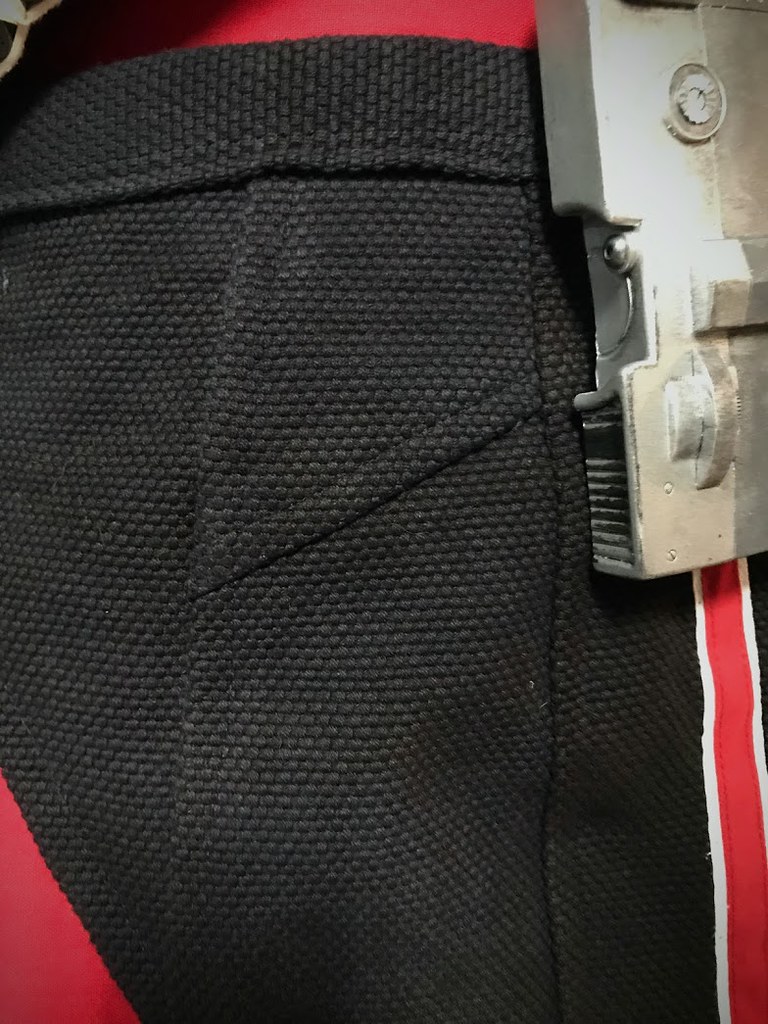
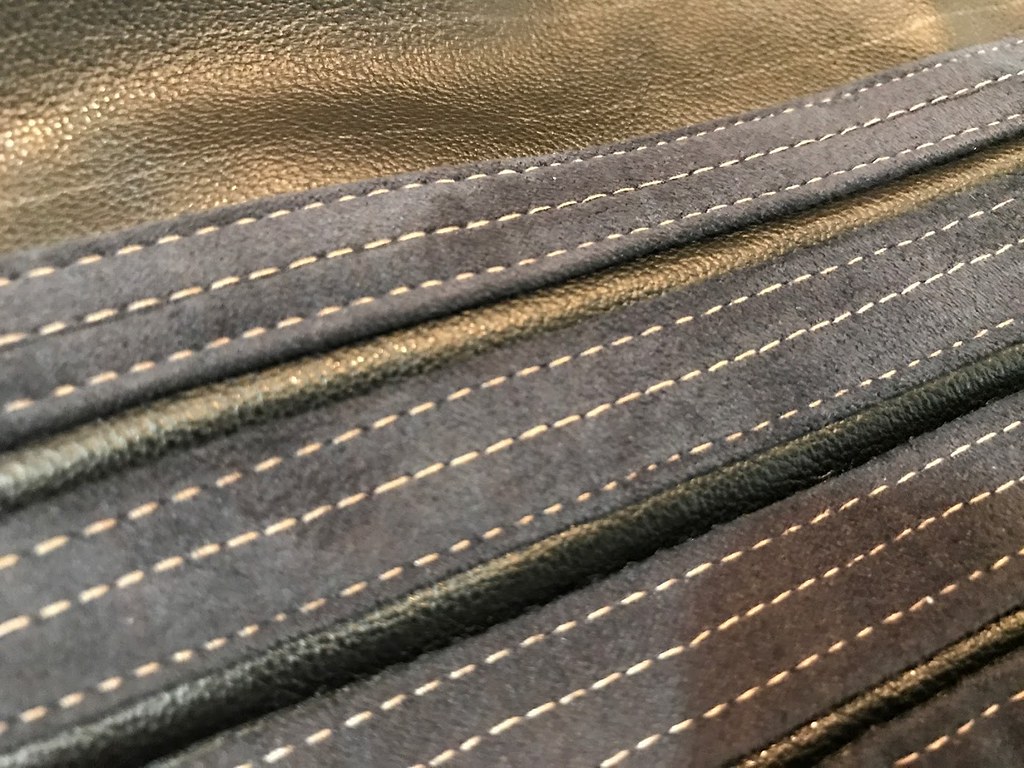
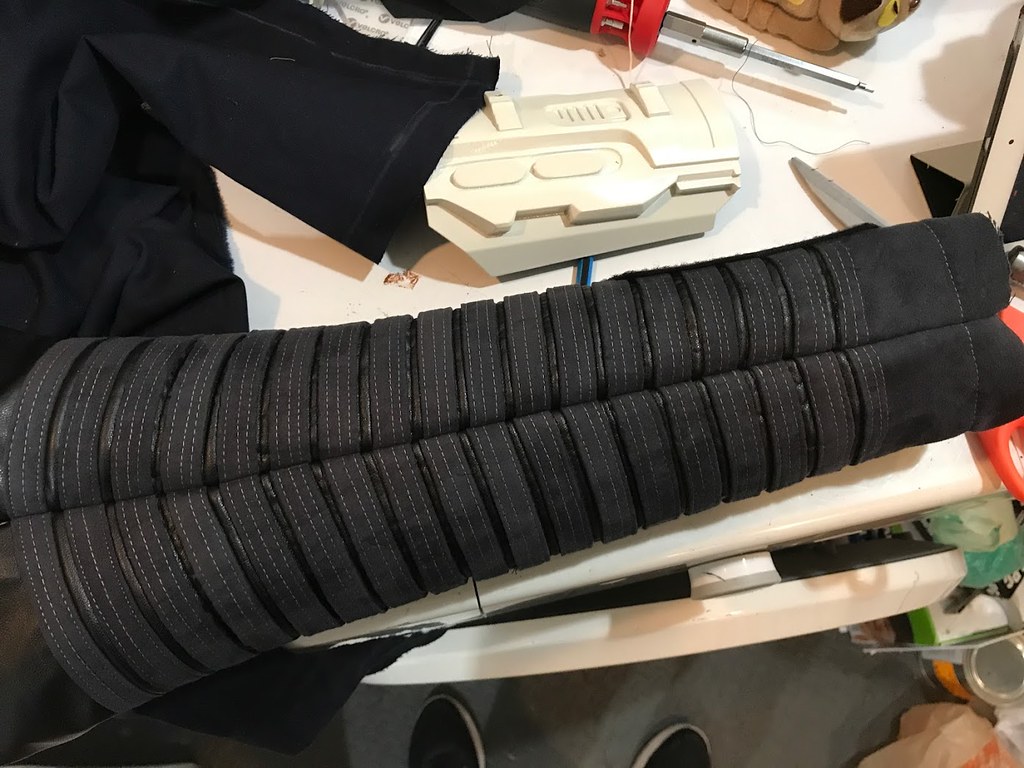
- 2 different blue suedes for the vest
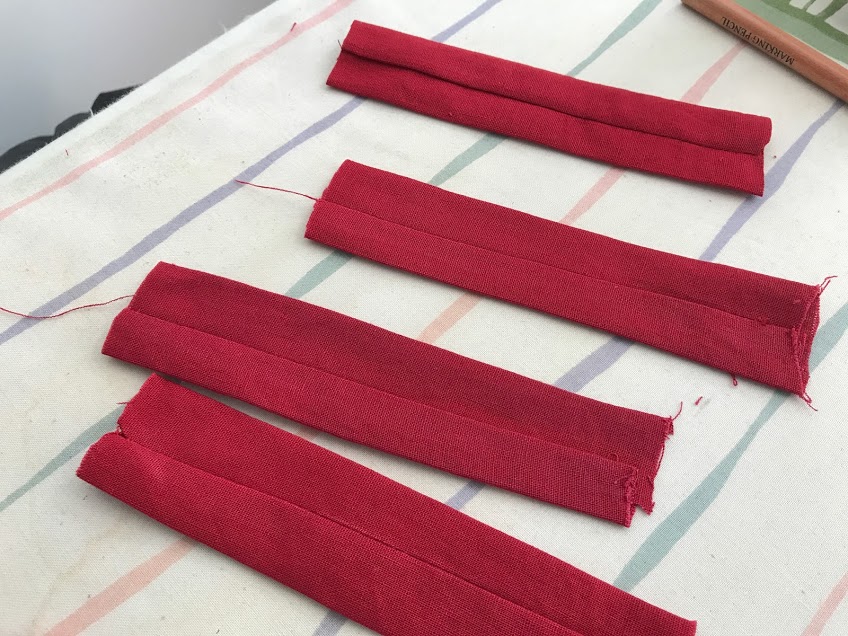
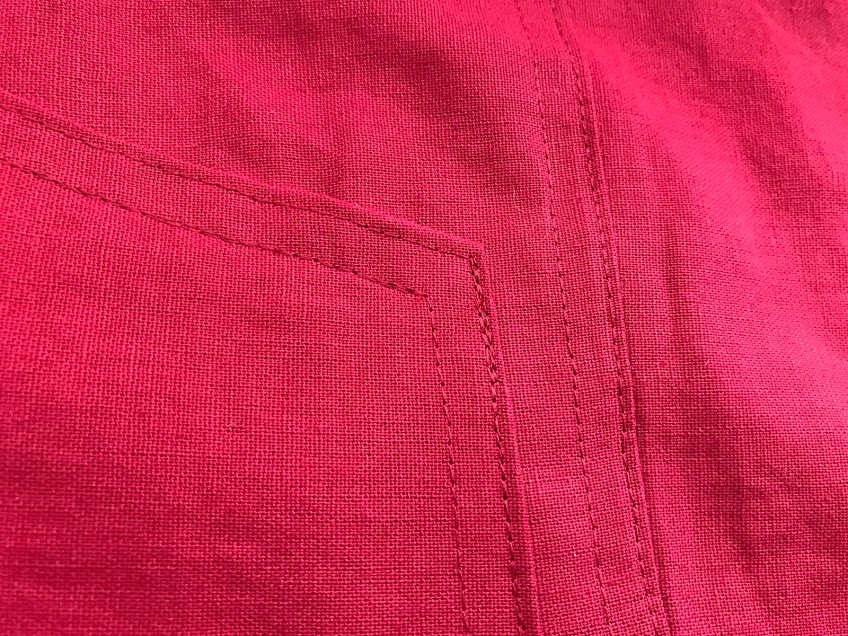
- red linen for the inner skirt
- a navy cotton and a linen for the outer robe and cape, pants and gaiters
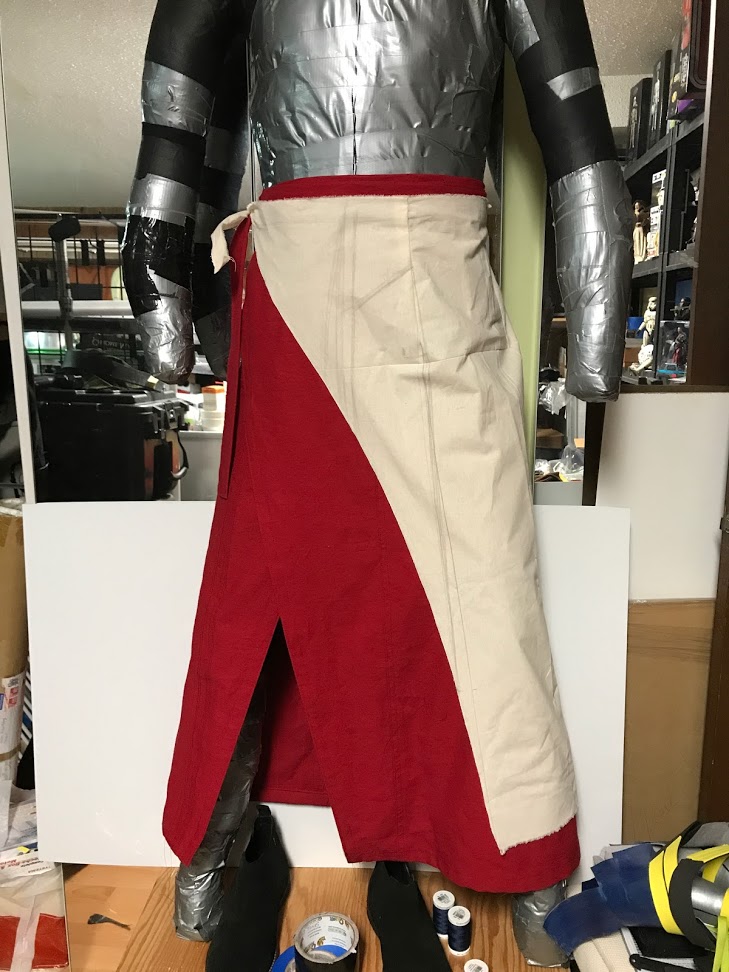
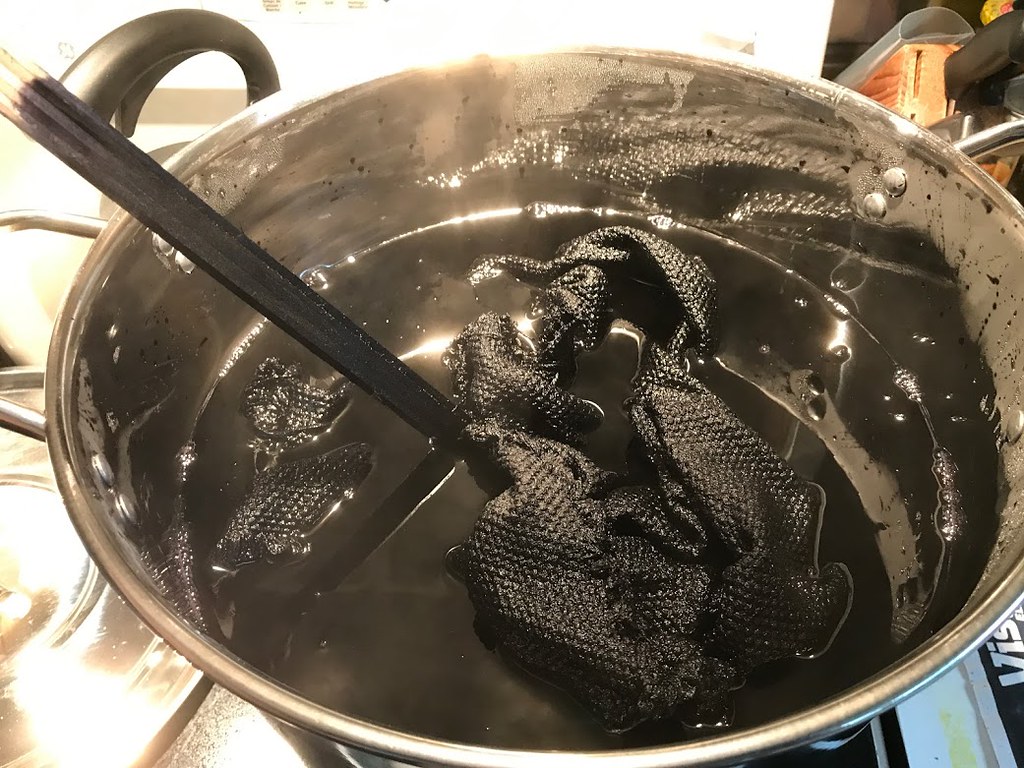
- pique cotton for the outer skirt (I have successfully dyed a sample navy blue)
- a very dark blue black thin vinyl or the base layer of the left sleeve
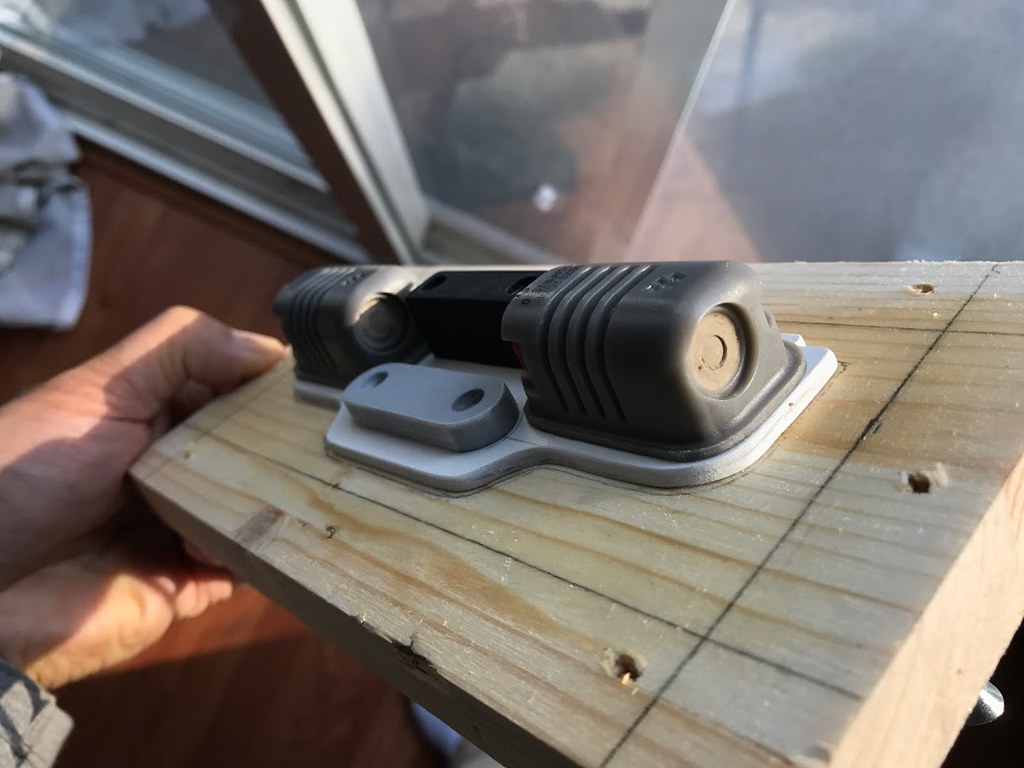
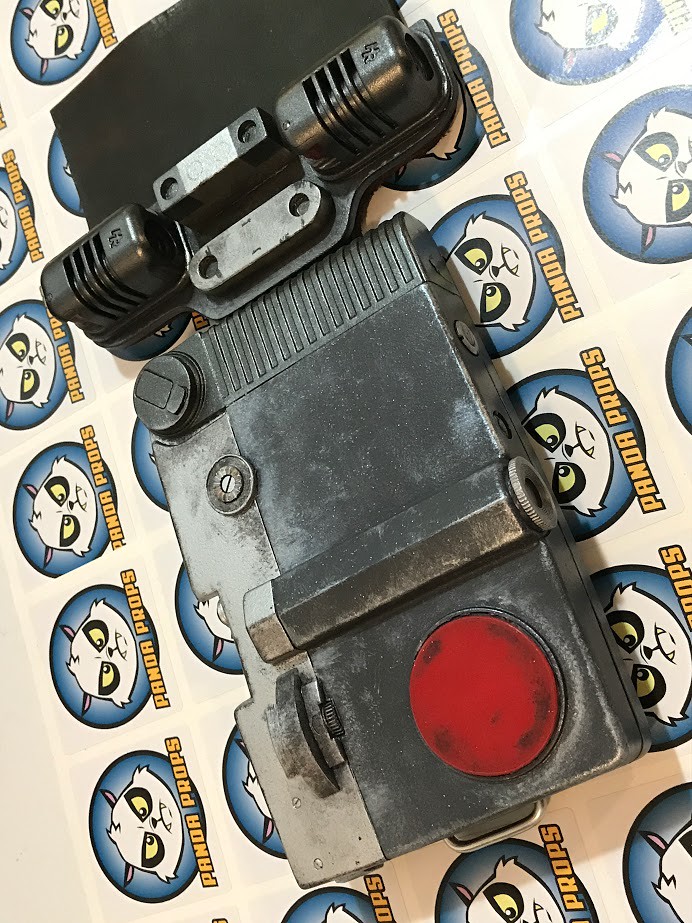
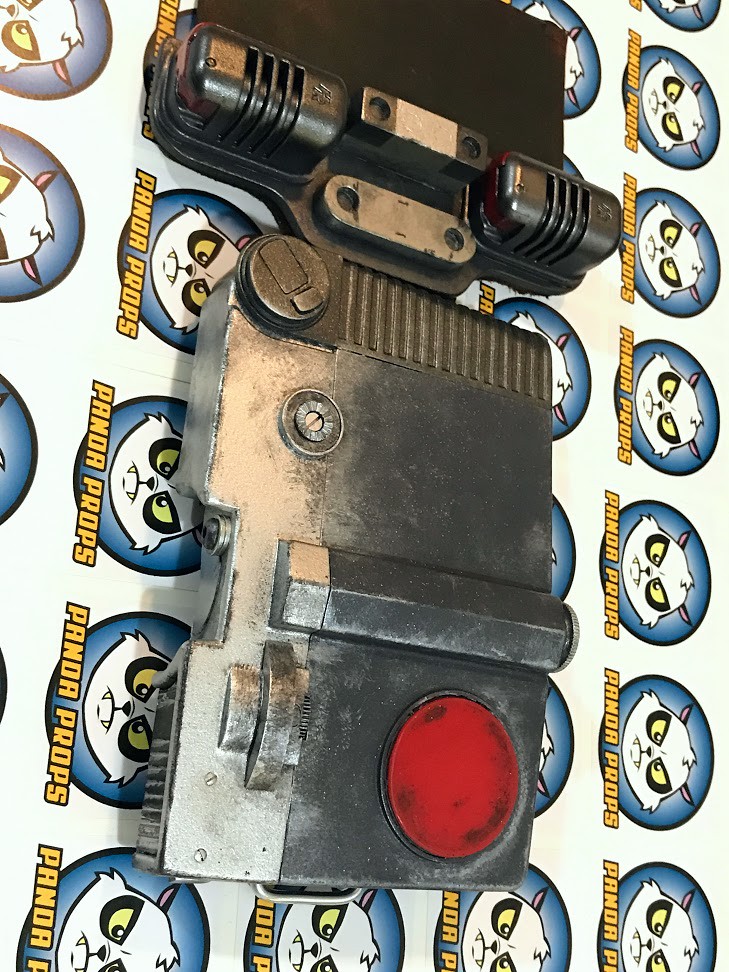
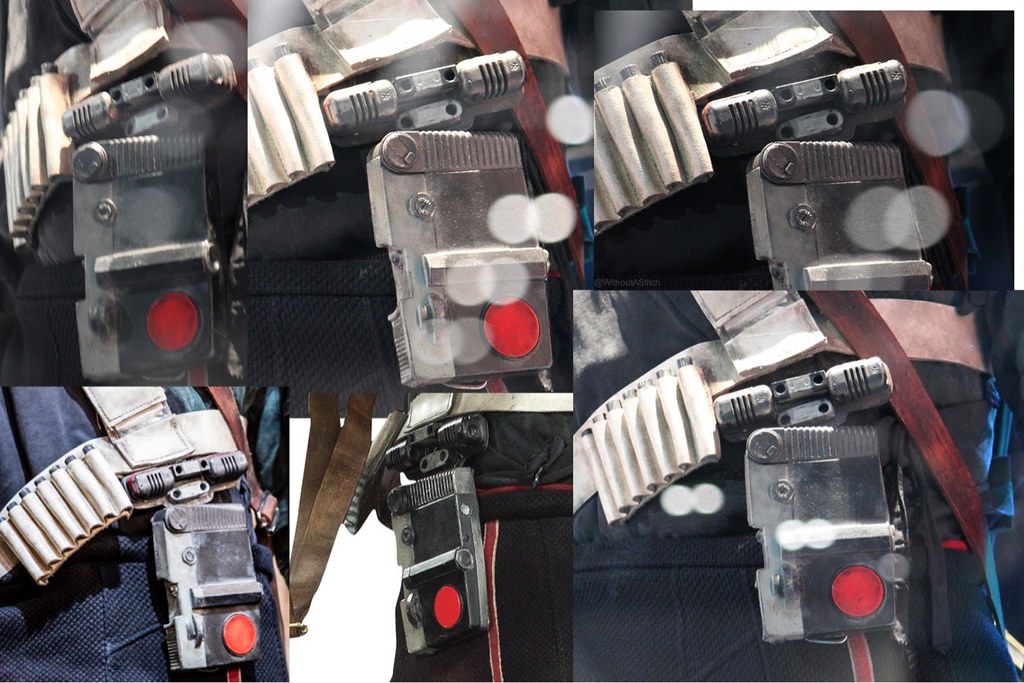
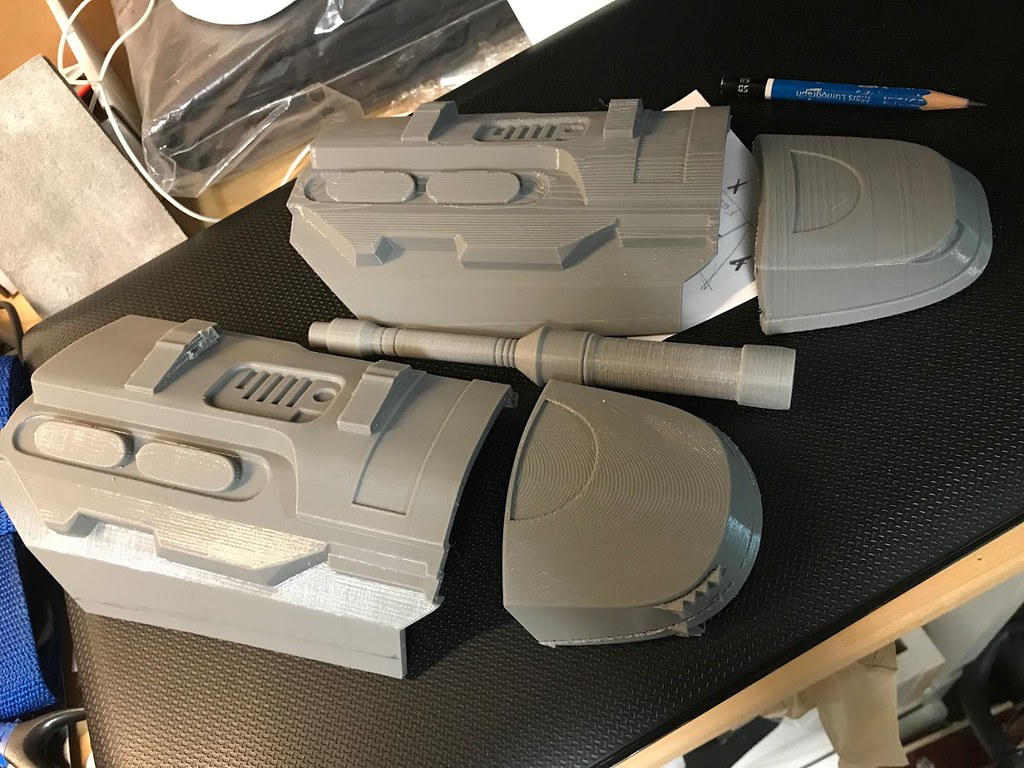
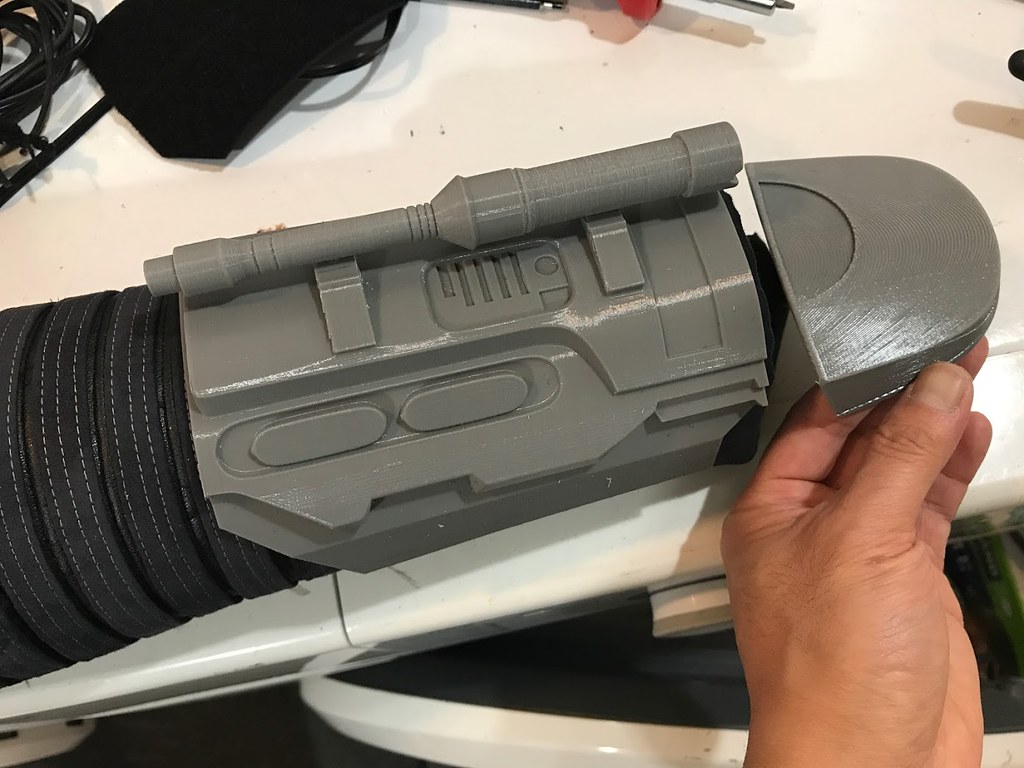
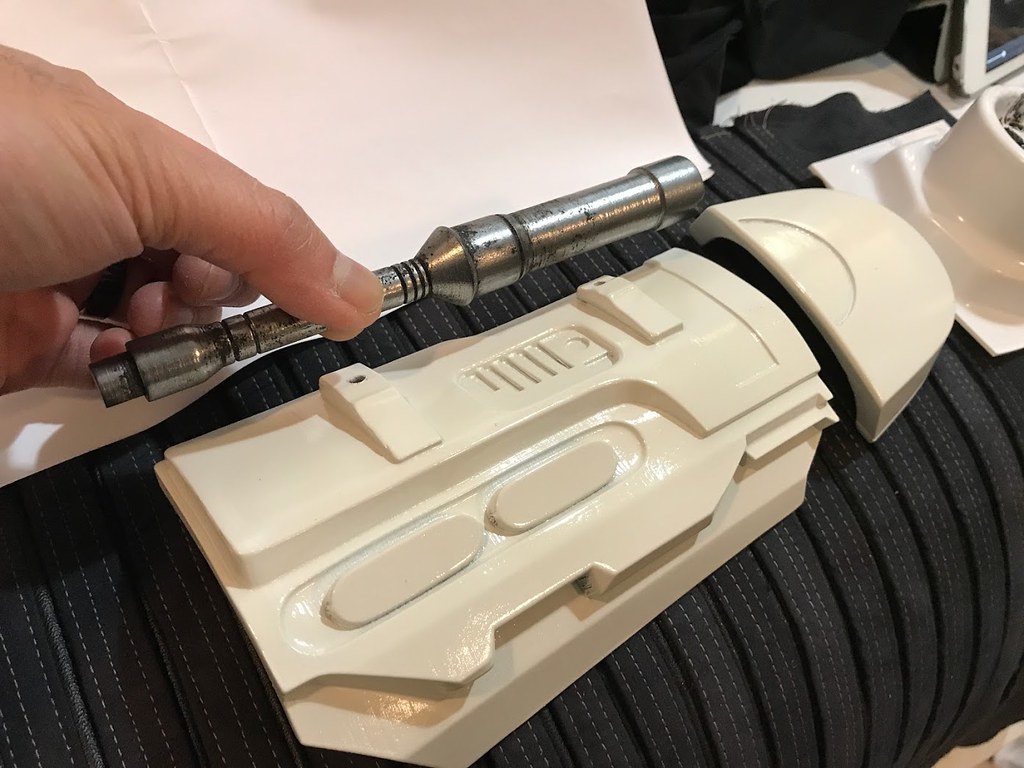
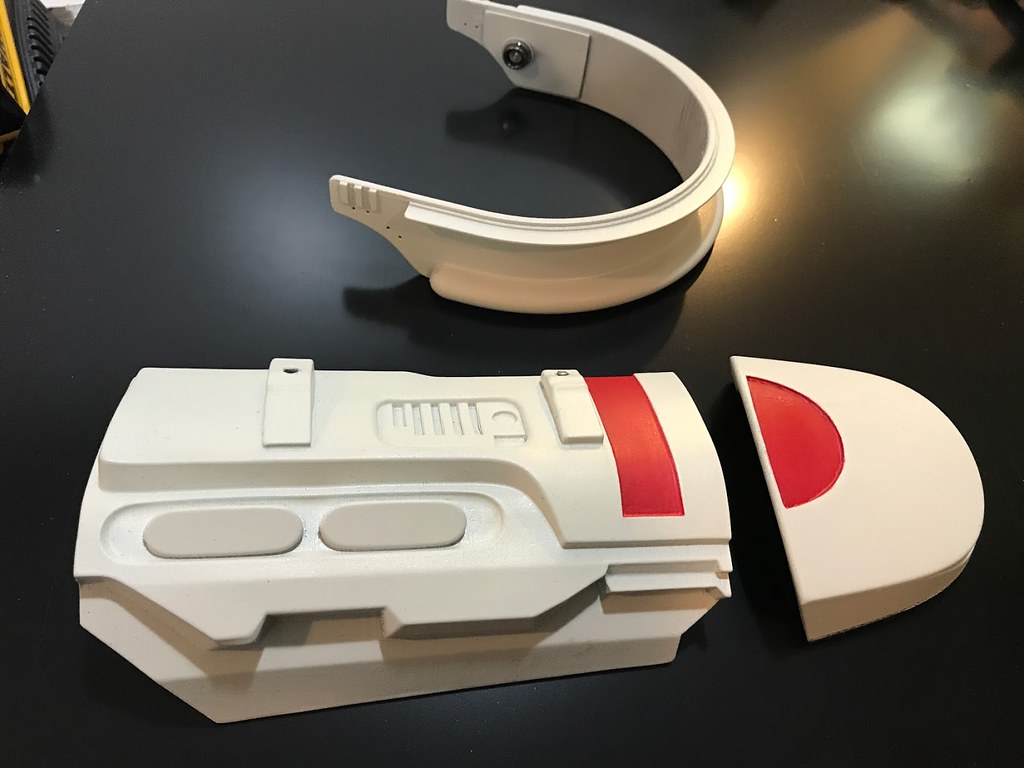
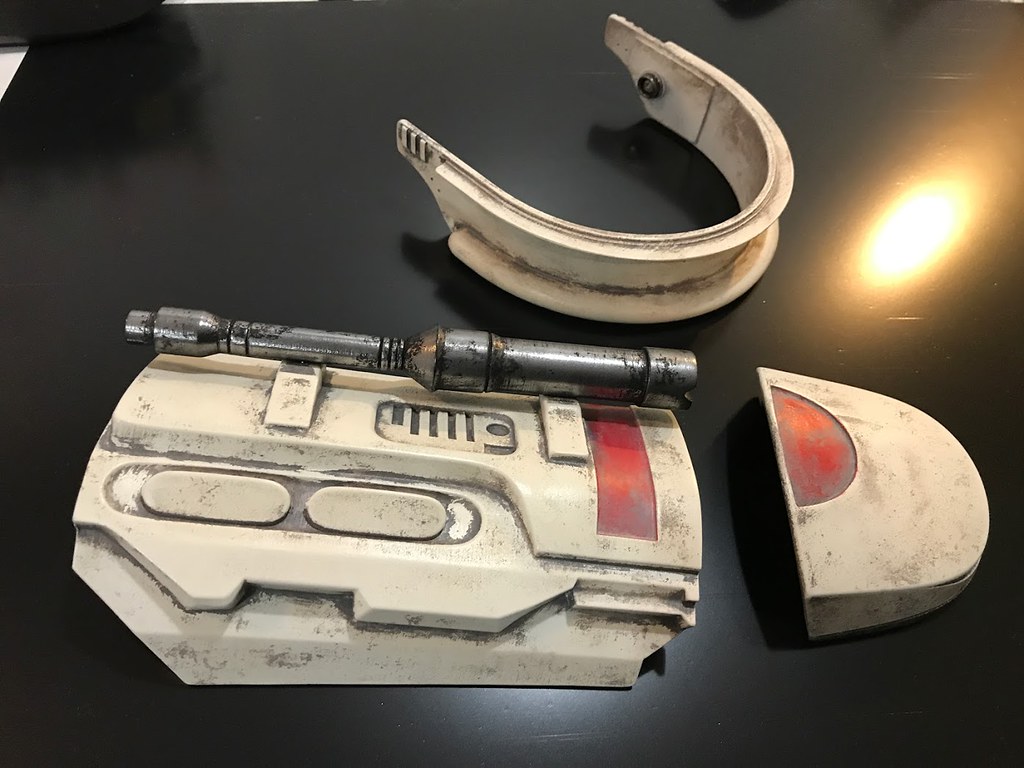
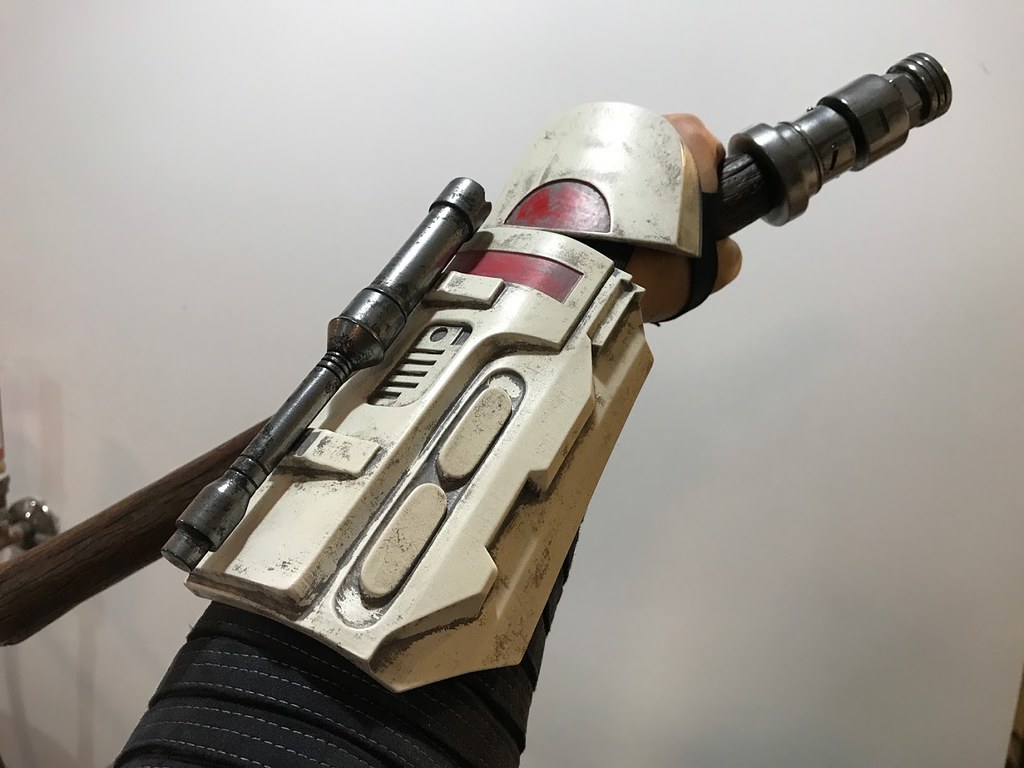
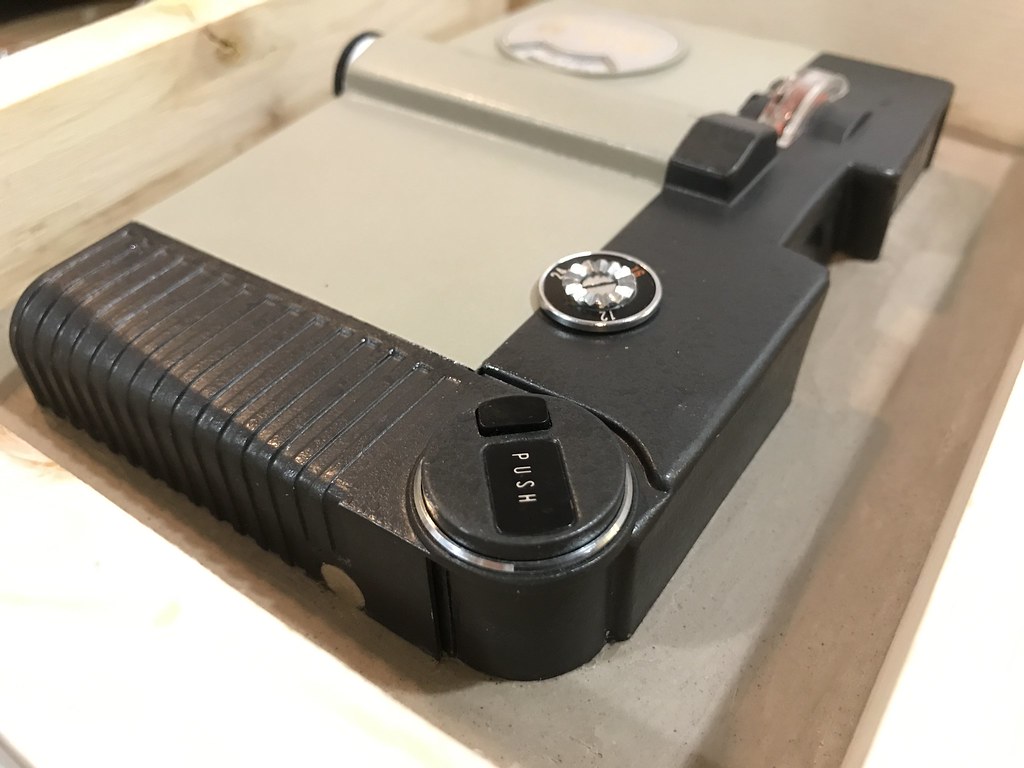
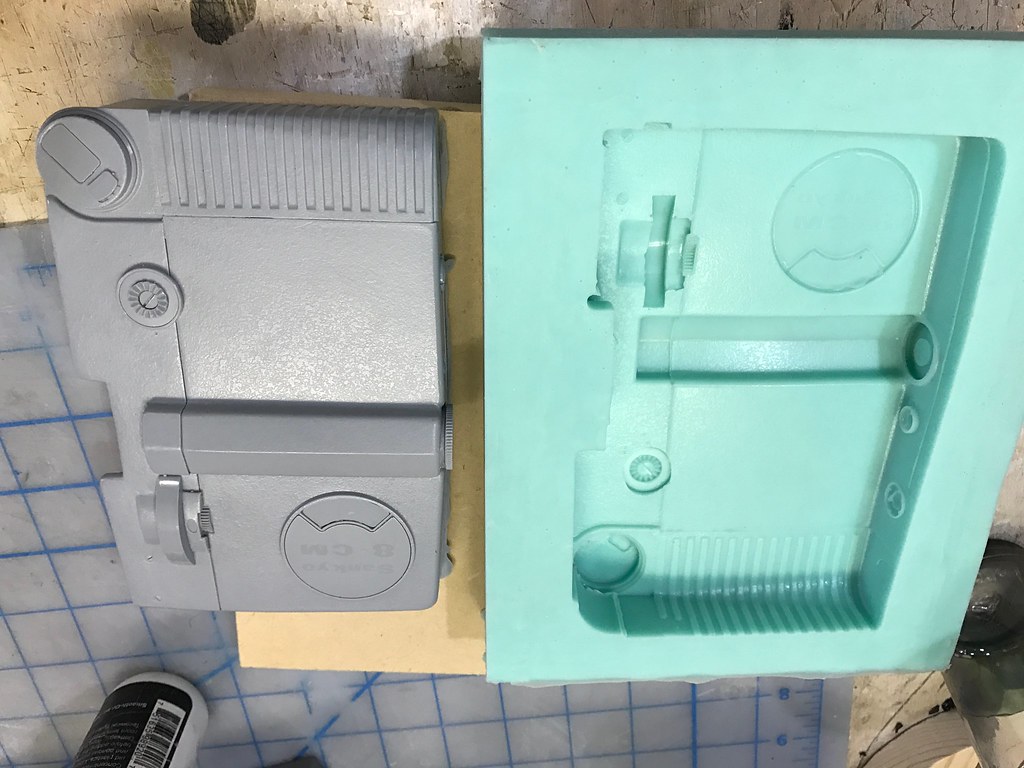
I sourced the original camera used and made a mold box, clayed it up and made a silicone mold using Mold Max 40. I have successfully pulled a resin version with a foam filled back to reduce weight. Only the front half is cast, just like the screen used version.
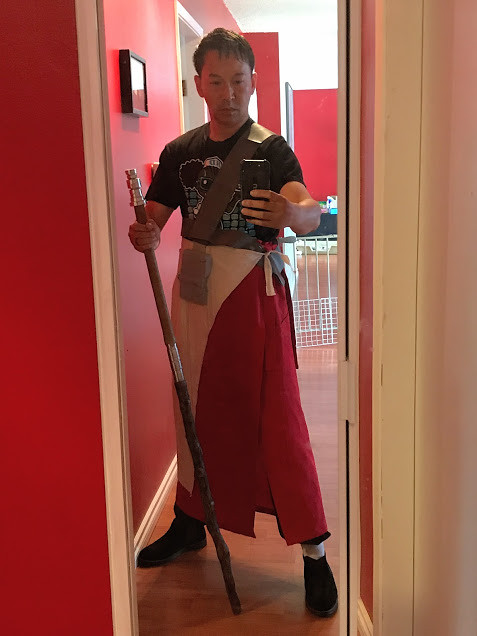
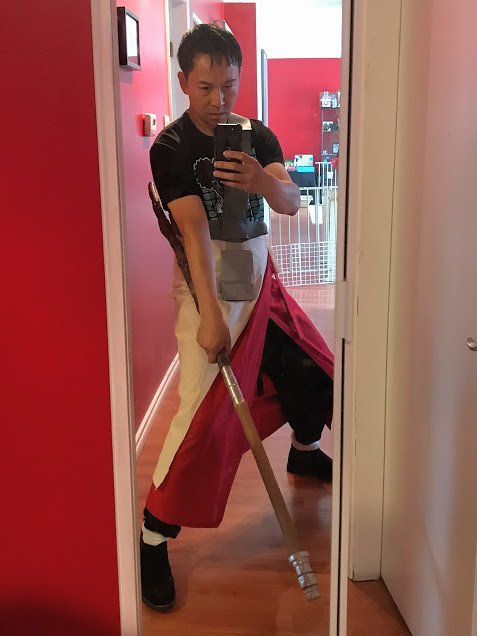
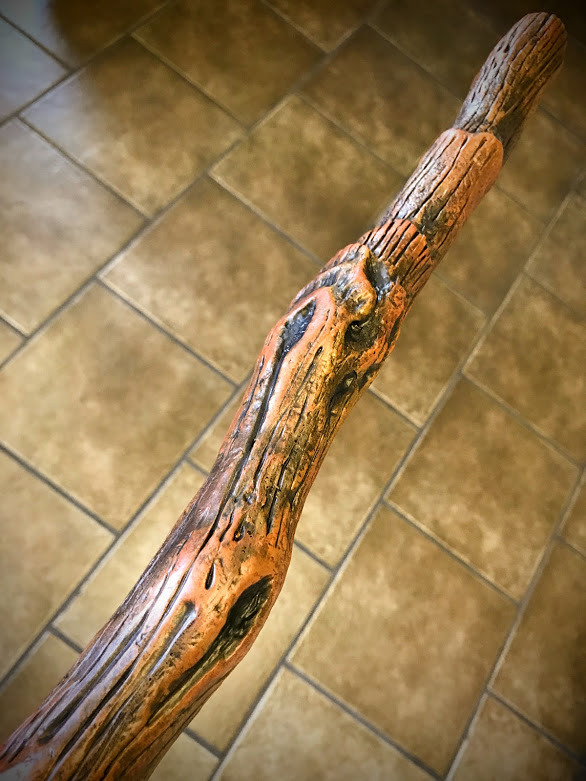
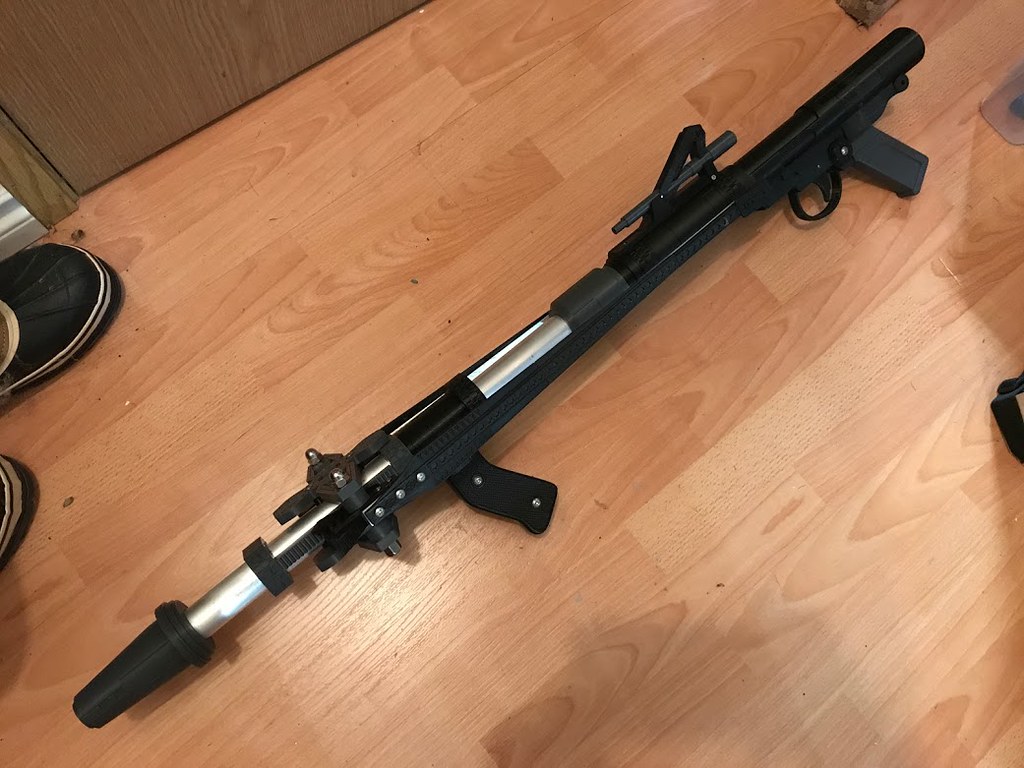
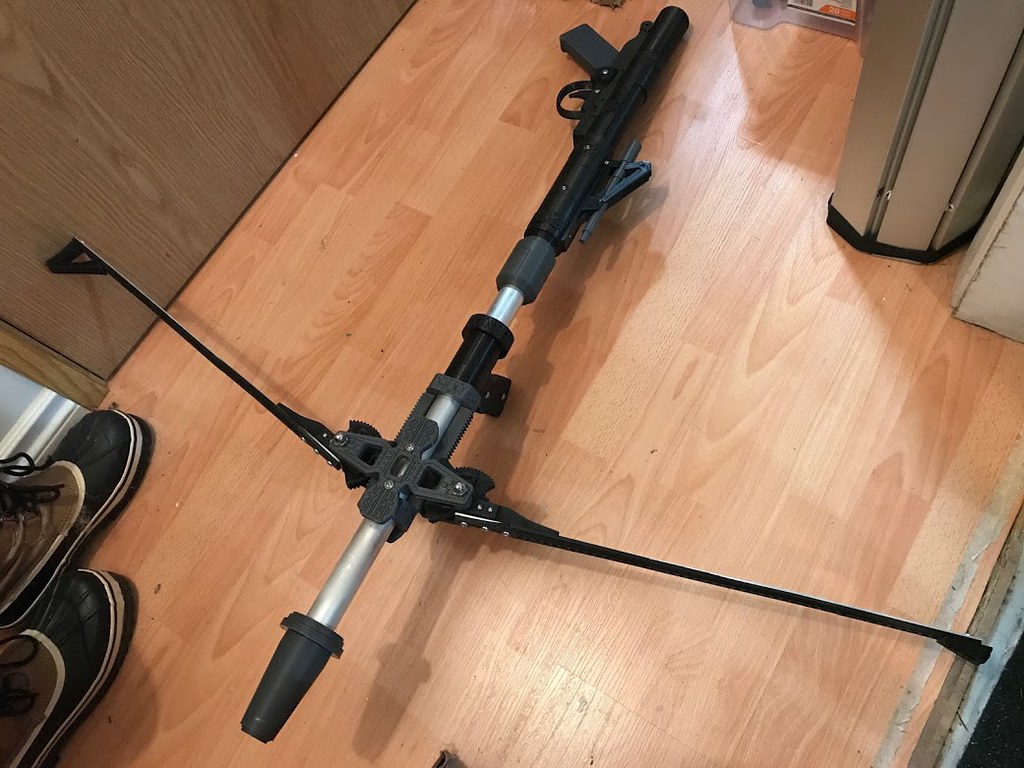
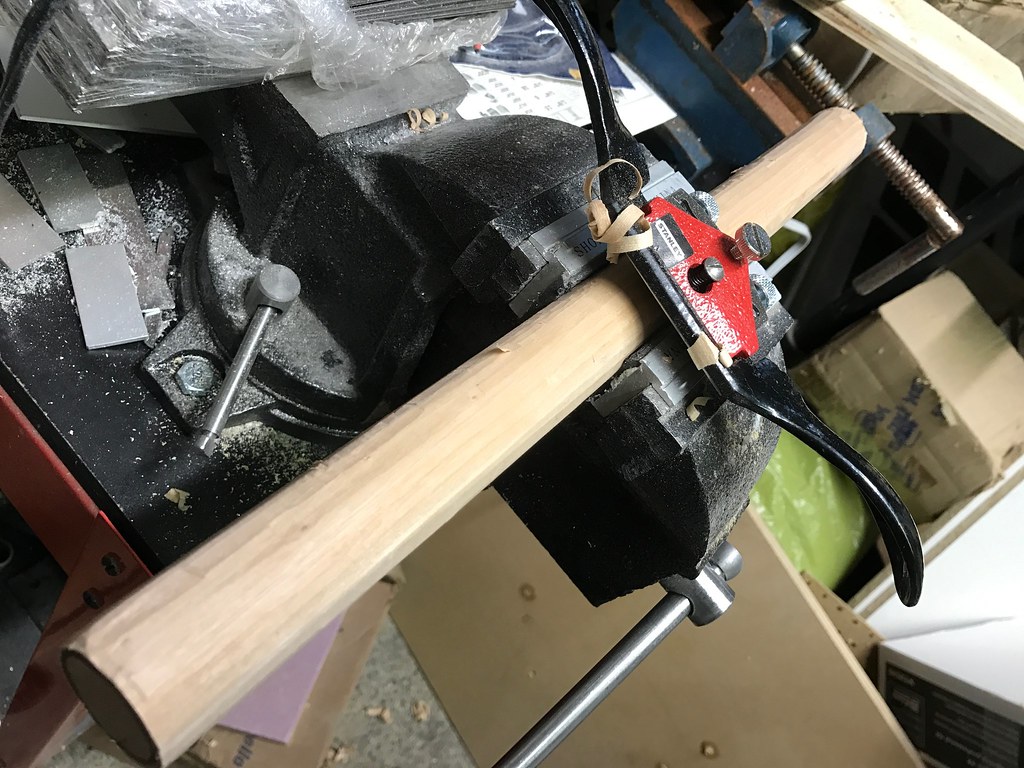
I also started on Chirrut's staff. For the upper section I used a 1.25" wood dowel and used a spoke shave to take it down an 1/8" and to add some irregularity. I'm going to hand carve it and weather it to add details.
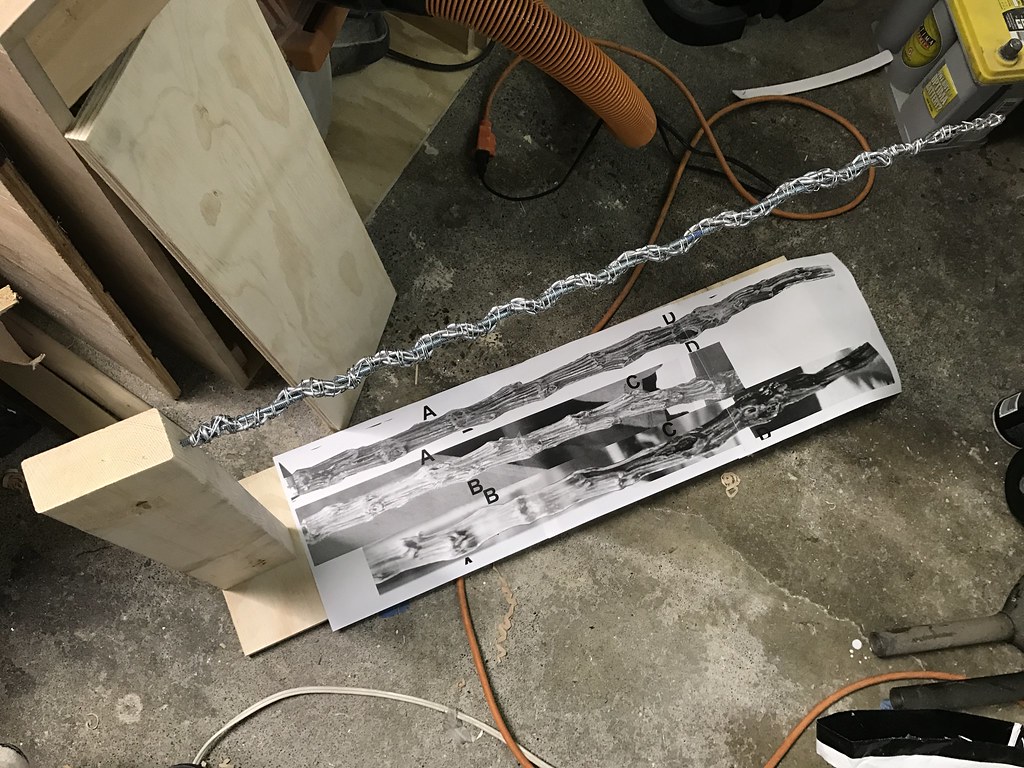
For the bottom half of the staff, I created an armature using threaded rod and aluminum armature wire twisted with a drill. Same technique I would use to sculpt figures or creatures. I bent the armature to match the screen used staff, it has an interesting organic bend to it. I built a simple stand to facilitate sculpting.
Added a base layer of Super Sculpey to stiffen the armature and add some volume.
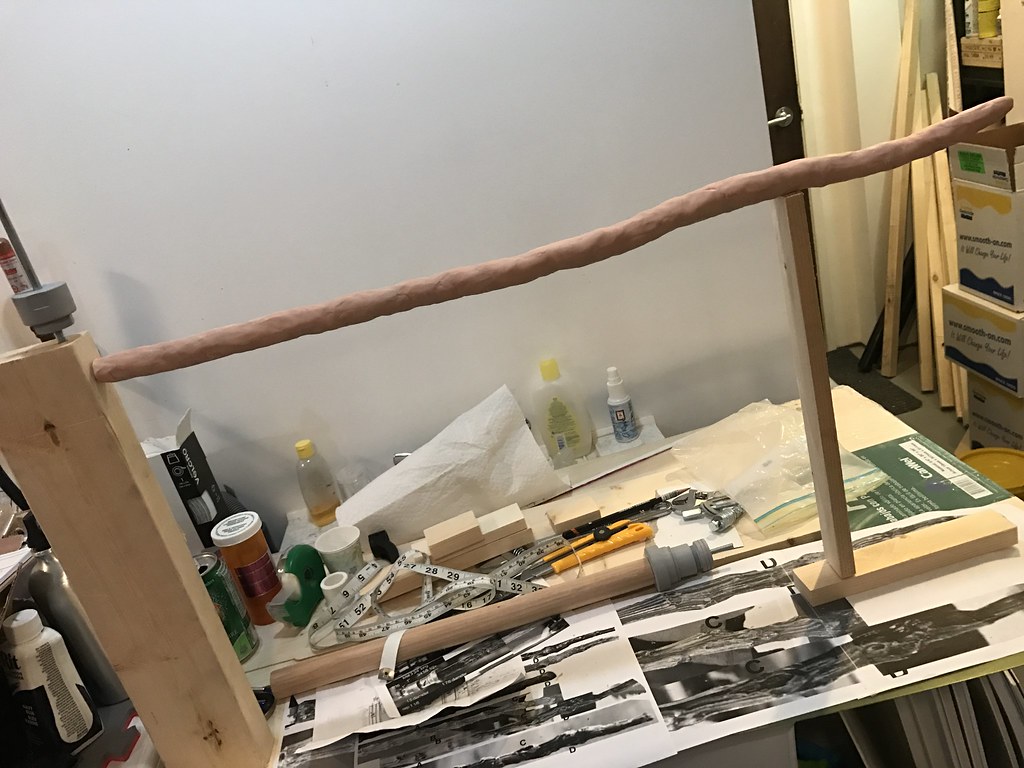
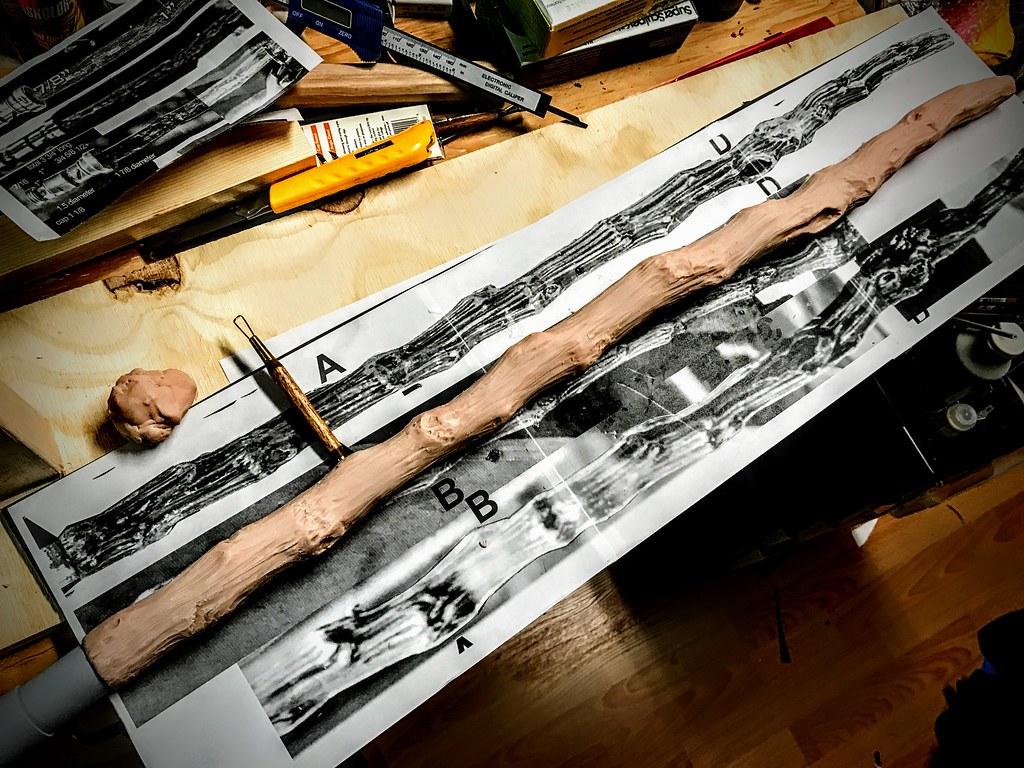
I have blocked in one side of the lower staff. I will still add more detail, I just wanted to get the basic shape. I am screen matching the "knots" in the wood, so that it can be as accurate as possible from every side. Pretty happy with it so far!
I will be molding the staff and casting it with an aluminum core.
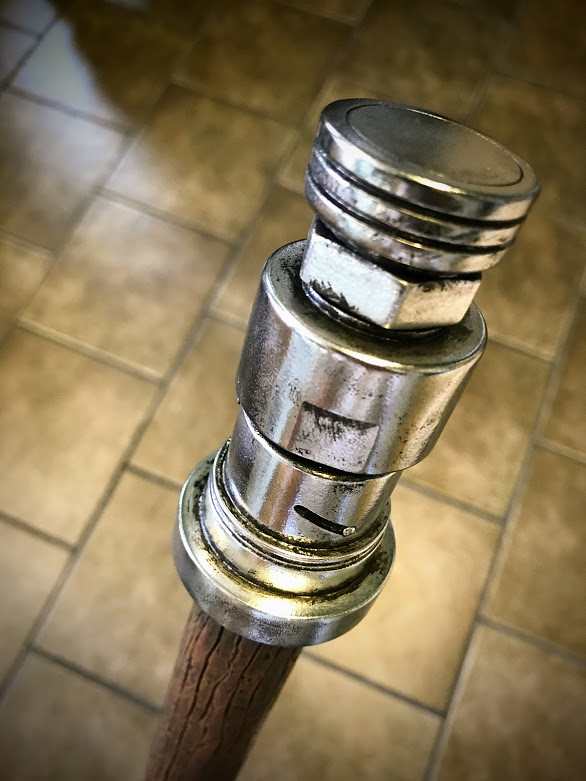
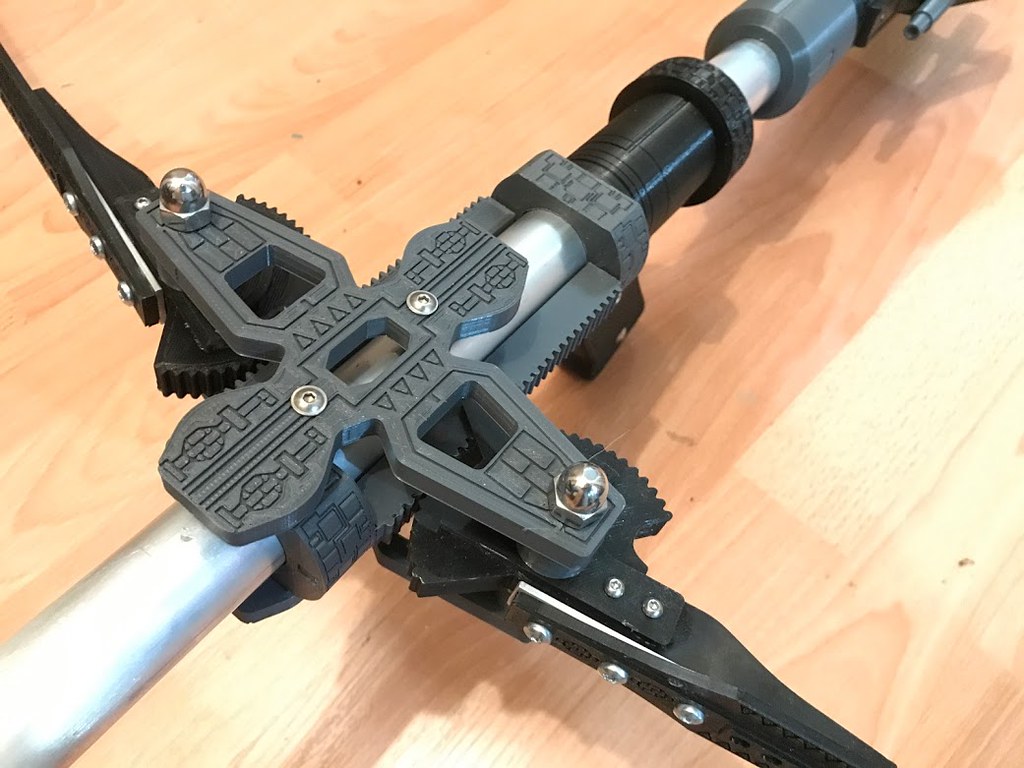
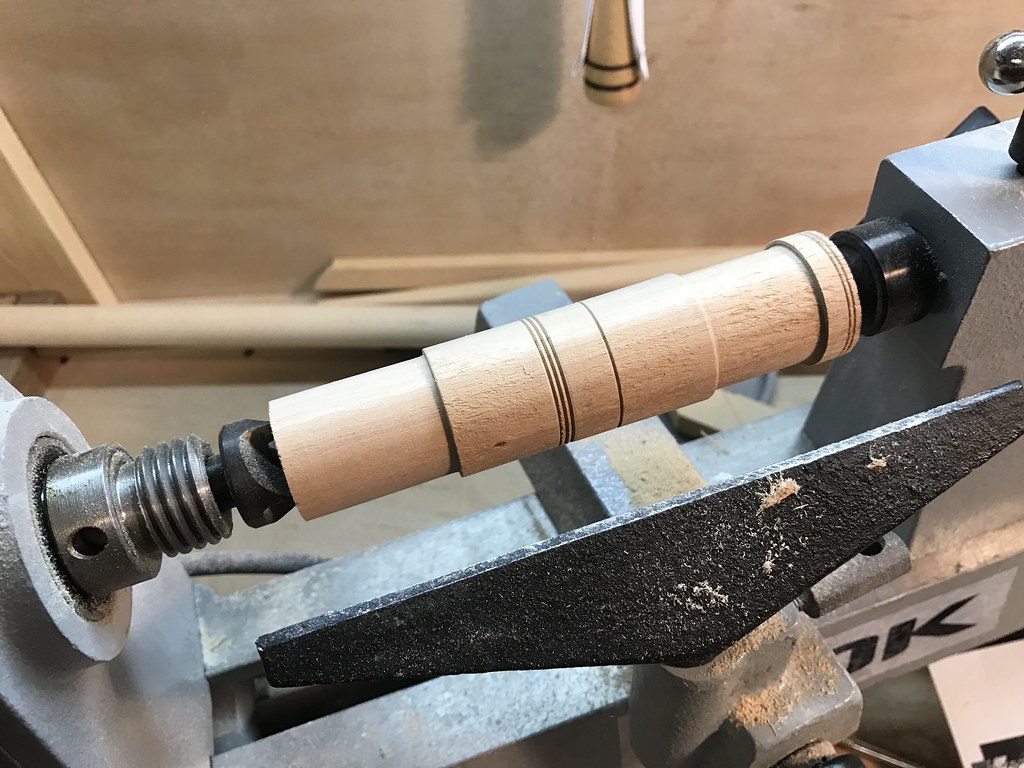
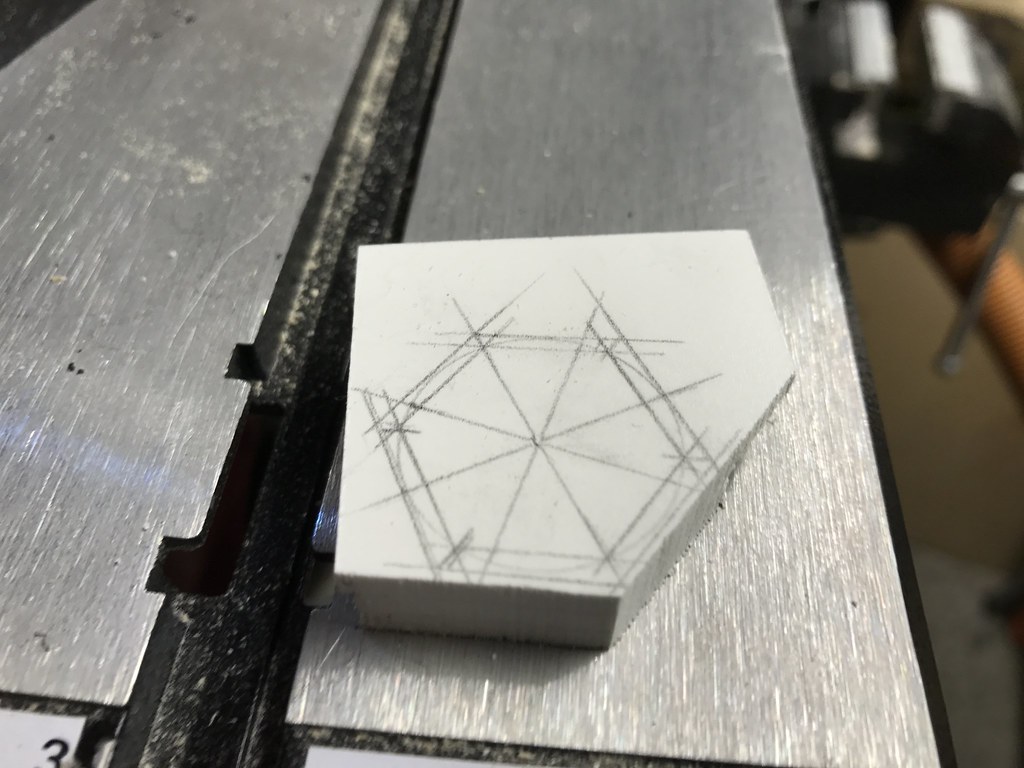
I turned the middle grip from wood on my lathe, and used some glazing putty to smooth it out. Will spray it with filler primer and sand it again.
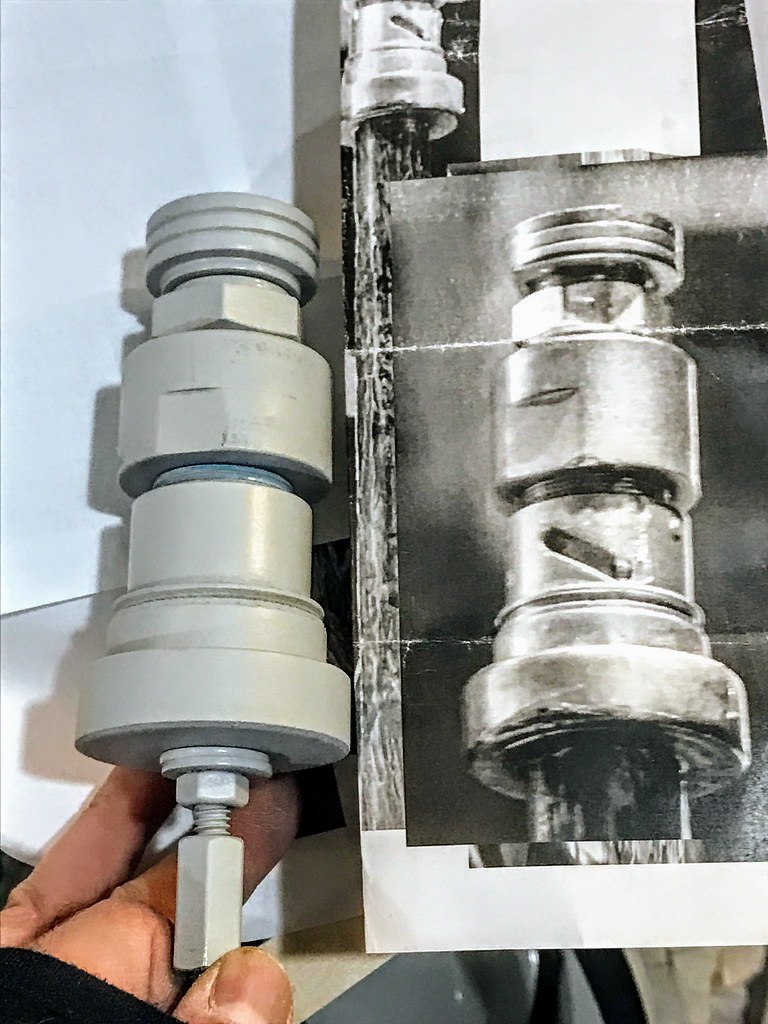
The topper was also turned on a lathe and will be smoothed. I tried to find plumbing or electrical or hydraulic fittings that matched but I couldn't find anything so I just turned them on the lathe.
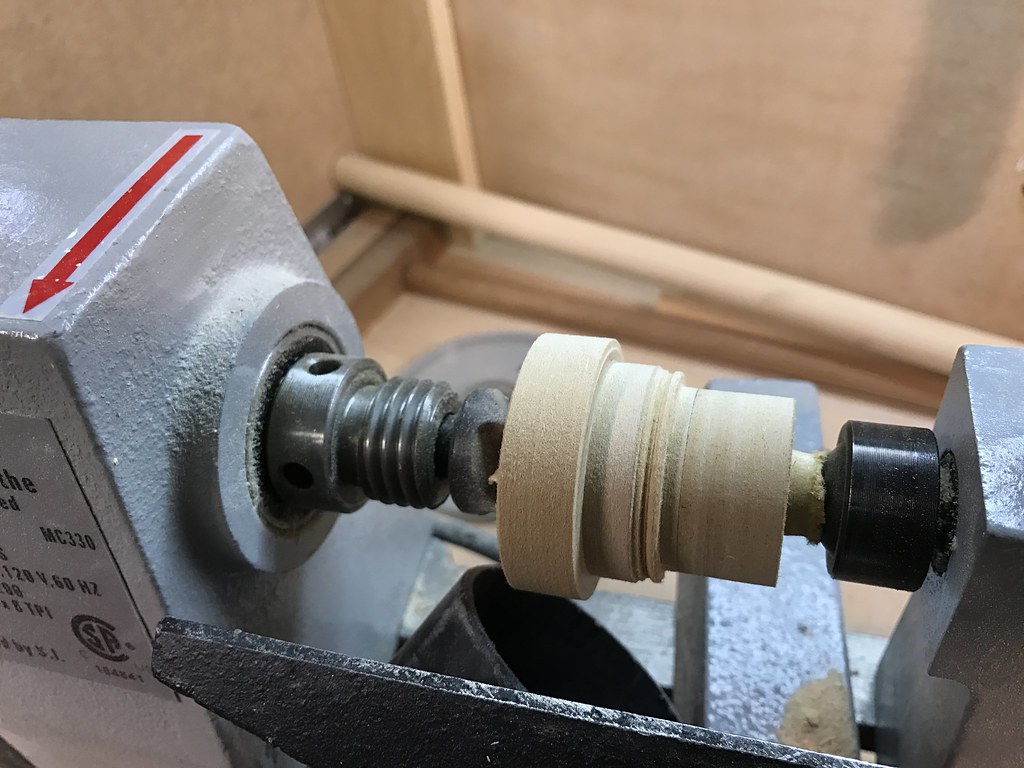
I couldn't find a nut of the same specifications so I scratchbuilt it from 3 layers of Sintra.
Topper is almost done, just need to mill out that diagonal slot and add a few greeblies.
Qwerty32, yes this thread is still alive. Work and a toddler keeps me busy. See good progress below.
- - - Updated - - -
Some good progress as of late.
I did some detailed drawings to figure out all the separate pieces of Chirrut's costume, where the attachment points are, materials and fabrics, etc. I made a "swatch book" to see how all the colors would work together, pretty happy with them.
I ended up going to 4 different fabric stores to try and find the closest fabrics possible to the original costume. I was able to find:
- 2 different blue suedes for the vest
- red linen for the inner skirt
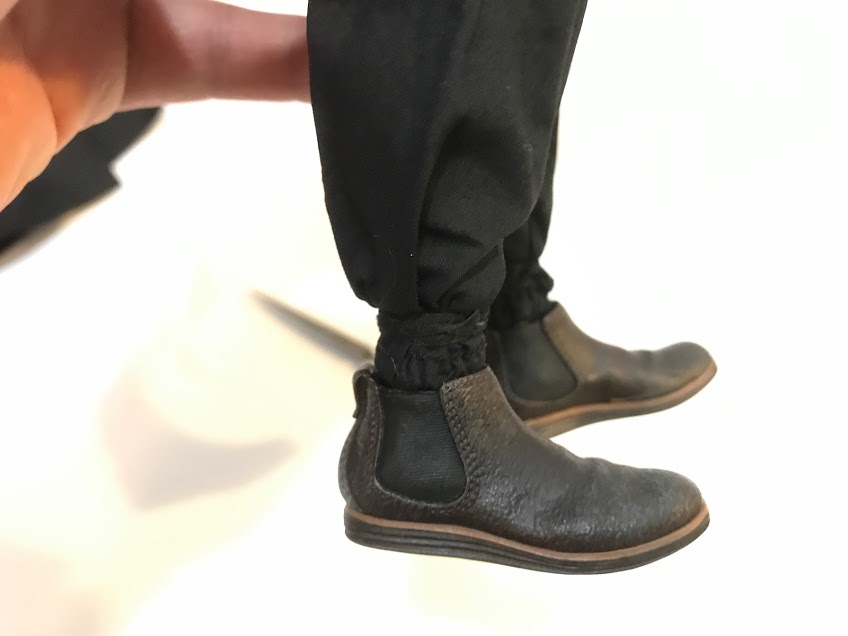
- a navy cotton and a linen for the outer robe and cape, pants and gaiters
- pique cotton for the outer skirt (I have successfully dyed a sample navy blue)
- a very dark blue black thin vinyl or the base layer of the left sleeve
I sourced the original camera used and made a mold box, clayed it up and made a silicone mold using Mold Max 40. I have successfully pulled a resin version with a foam filled back to reduce weight. Only the front half is cast, just like the screen used version.
I also started on Chirrut's staff. For the upper section I used a 1.25" wood dowel and used a spoke shave to take it down an 1/8" and to add some irregularity. I'm going to hand carve it and weather it to add details.
For the bottom half of the staff, I created an armature using threaded rod and aluminum armature wire twisted with a drill. Same technique I would use to sculpt figures or creatures. I bent the armature to match the screen used staff, it has an interesting organic bend to it. I built a simple stand to facilitate sculpting.
Added a base layer of Super Sculpey to stiffen the armature and add some volume.
I have blocked in one side of the lower staff. I will still add more detail, I just wanted to get the basic shape. I am screen matching the "knots" in the wood, so that it can be as accurate as possible from every side. Pretty happy with it so far!
I will be molding the staff and casting it with an aluminum core.
I turned the middle grip from wood on my lathe, and used some glazing putty to smooth it out. Will spray it with filler primer and sand it again.
The topper was also turned on a lathe and will be smoothed. I tried to find plumbing or electrical or hydraulic fittings that matched but I couldn't find anything so I just turned them on the lathe.
I couldn't find a nut of the same specifications so I scratchbuilt it from 3 layers of Sintra.
Topper is almost done, just need to mill out that diagonal slot and add a few greeblies.