You are using an out of date browser. It may not display this or other websites correctly.
You should upgrade or use an alternative browser.
You should upgrade or use an alternative browser.
1:1 Millennium Falcon Cockpit Replica - Group Build
- Thread starter SteveStarkiller
- Start date
Hi Gang,
Quick Monday Night update...
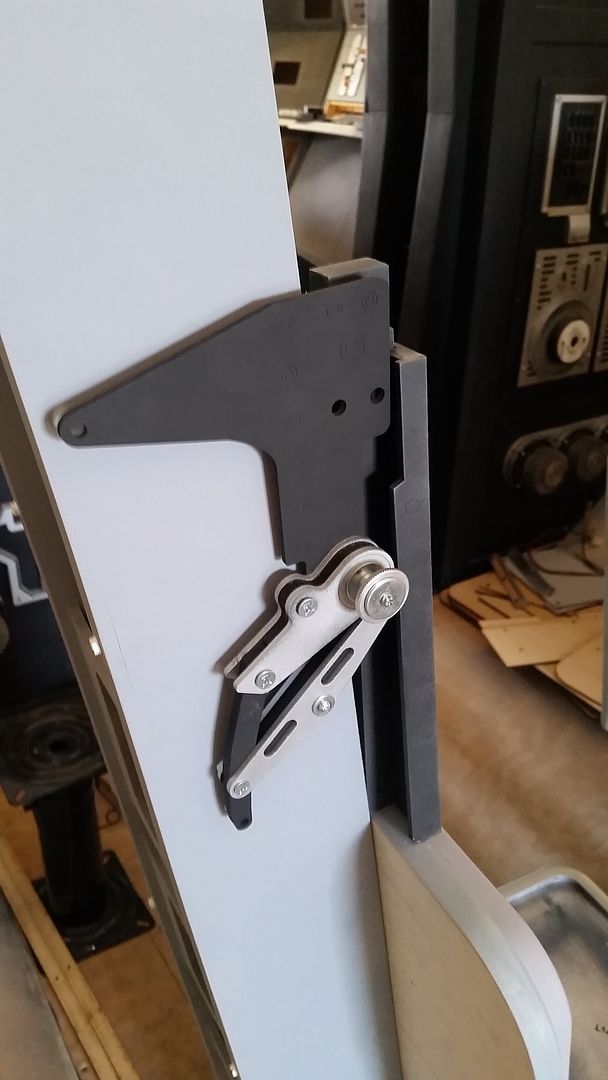
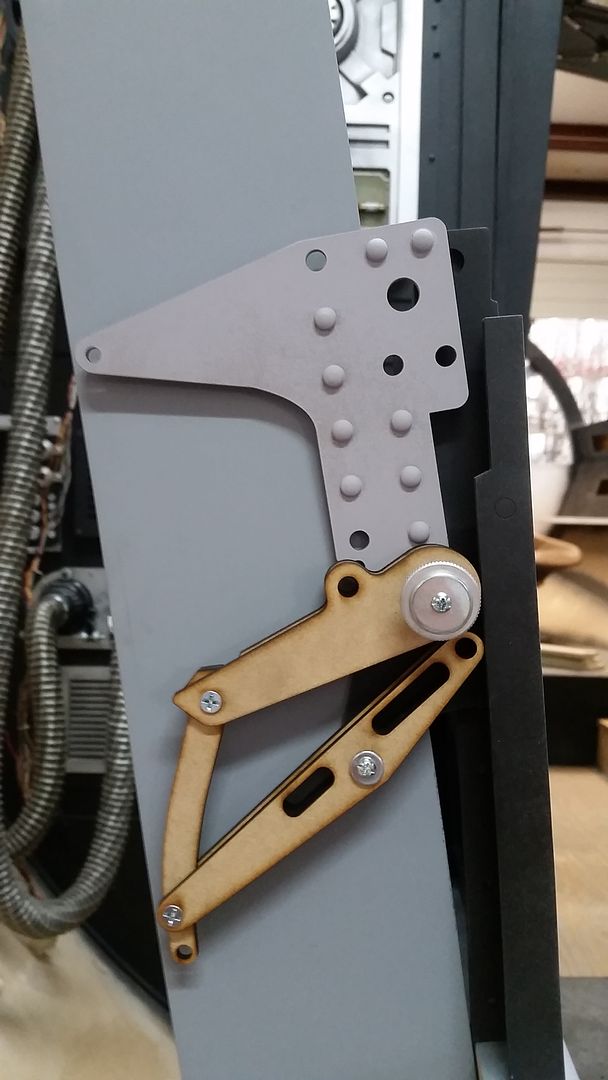
I'm continuing work on all the smaller details on the nav chairs. The photos that Stormy has posted and forwarded of his real Martin Baker ejection seat have been a gold mine of info! As I explained in the post above, all this new information and the use of real world objects forced me to alter things. Basically, I have to work with what I have and what's readily available to me.
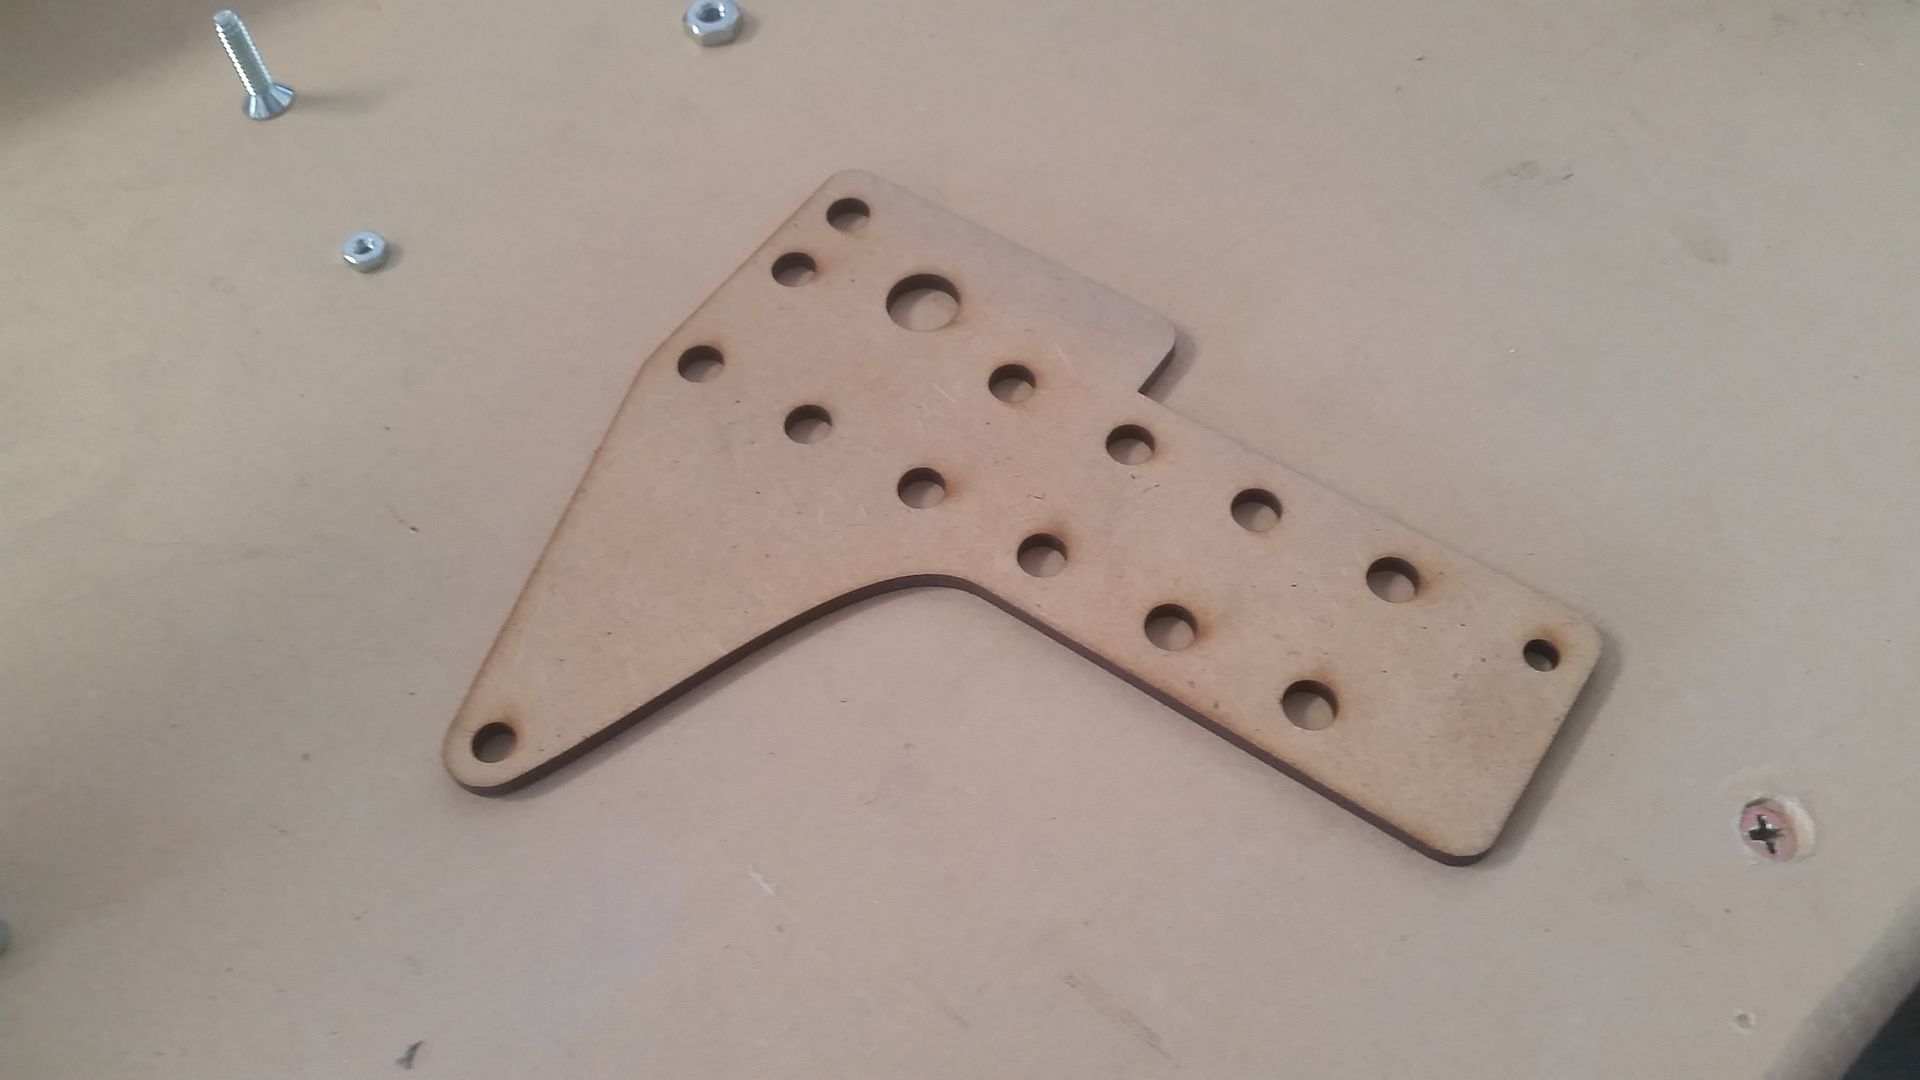
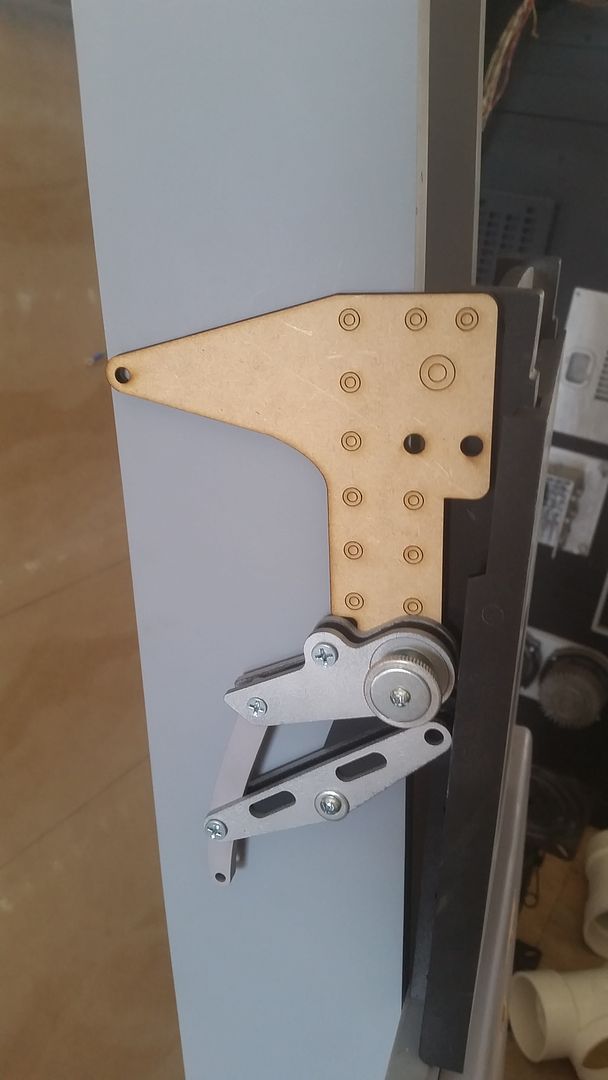
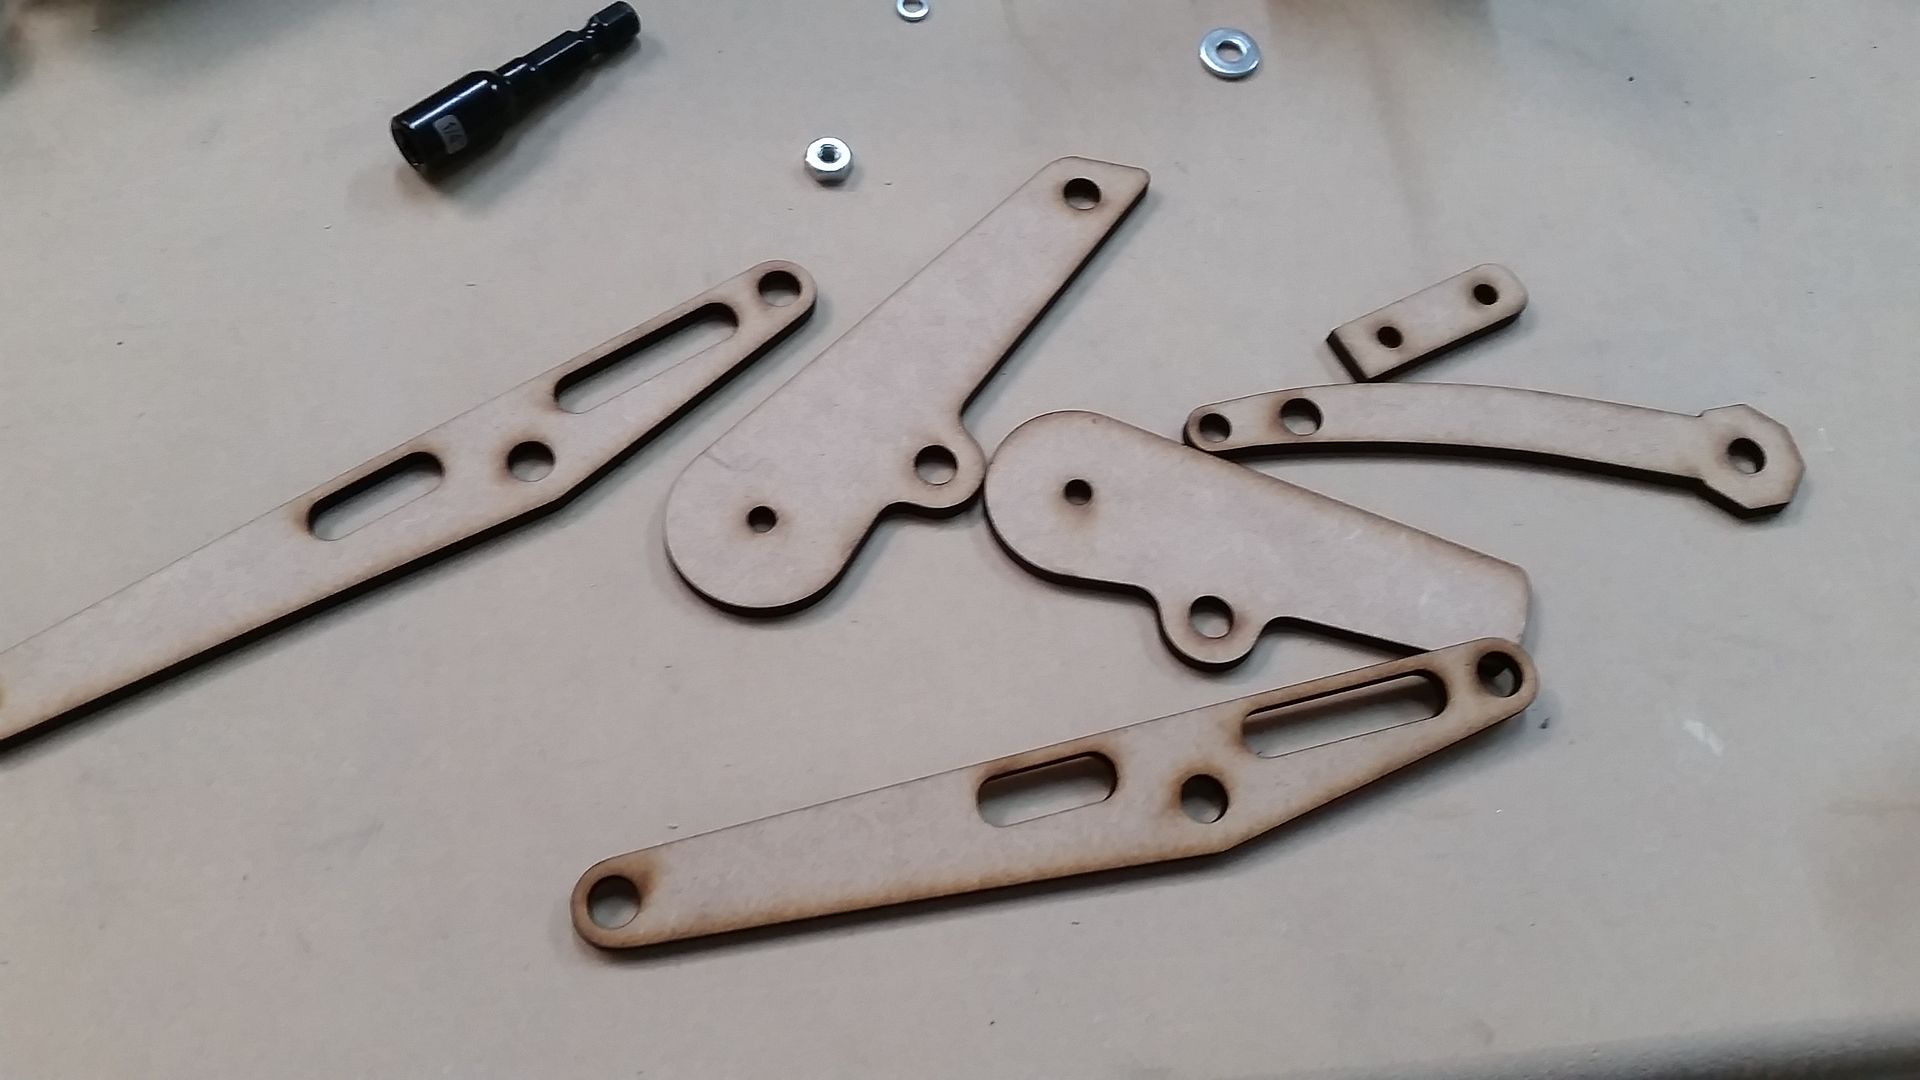
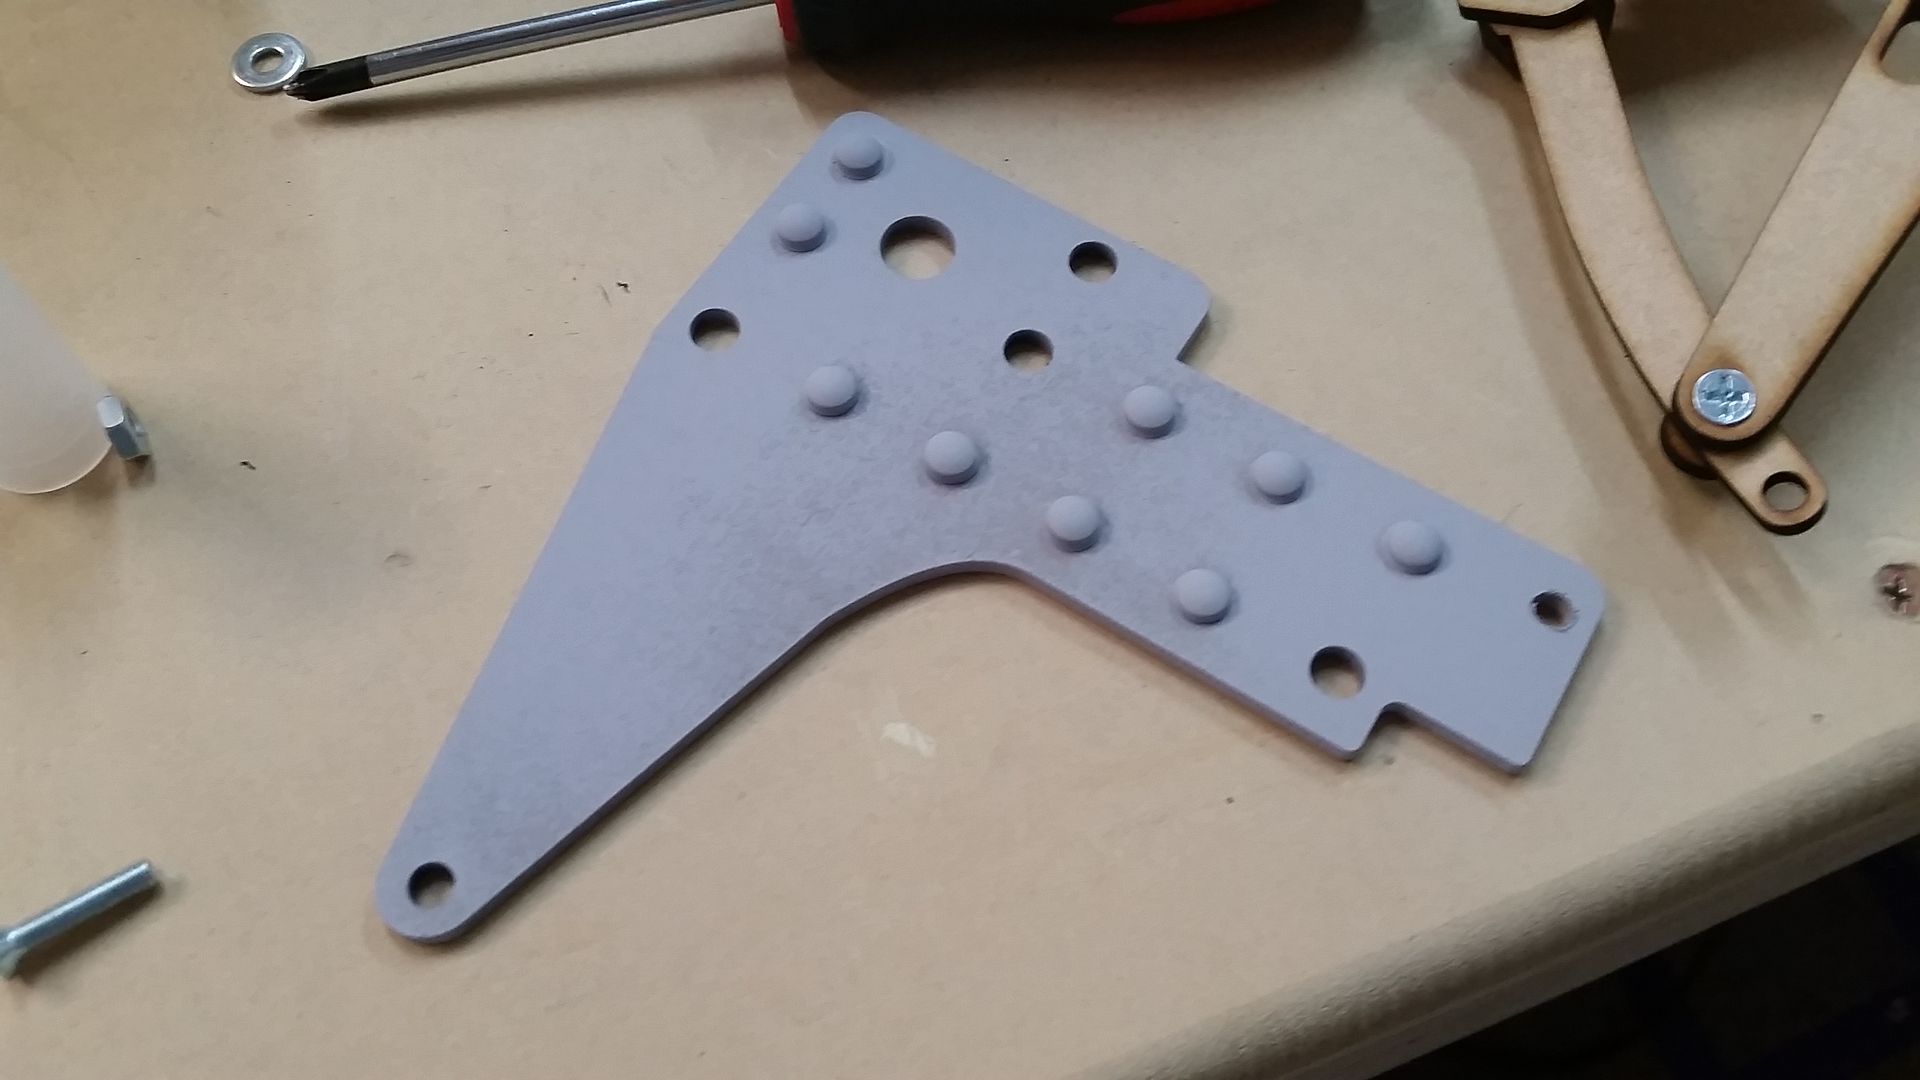
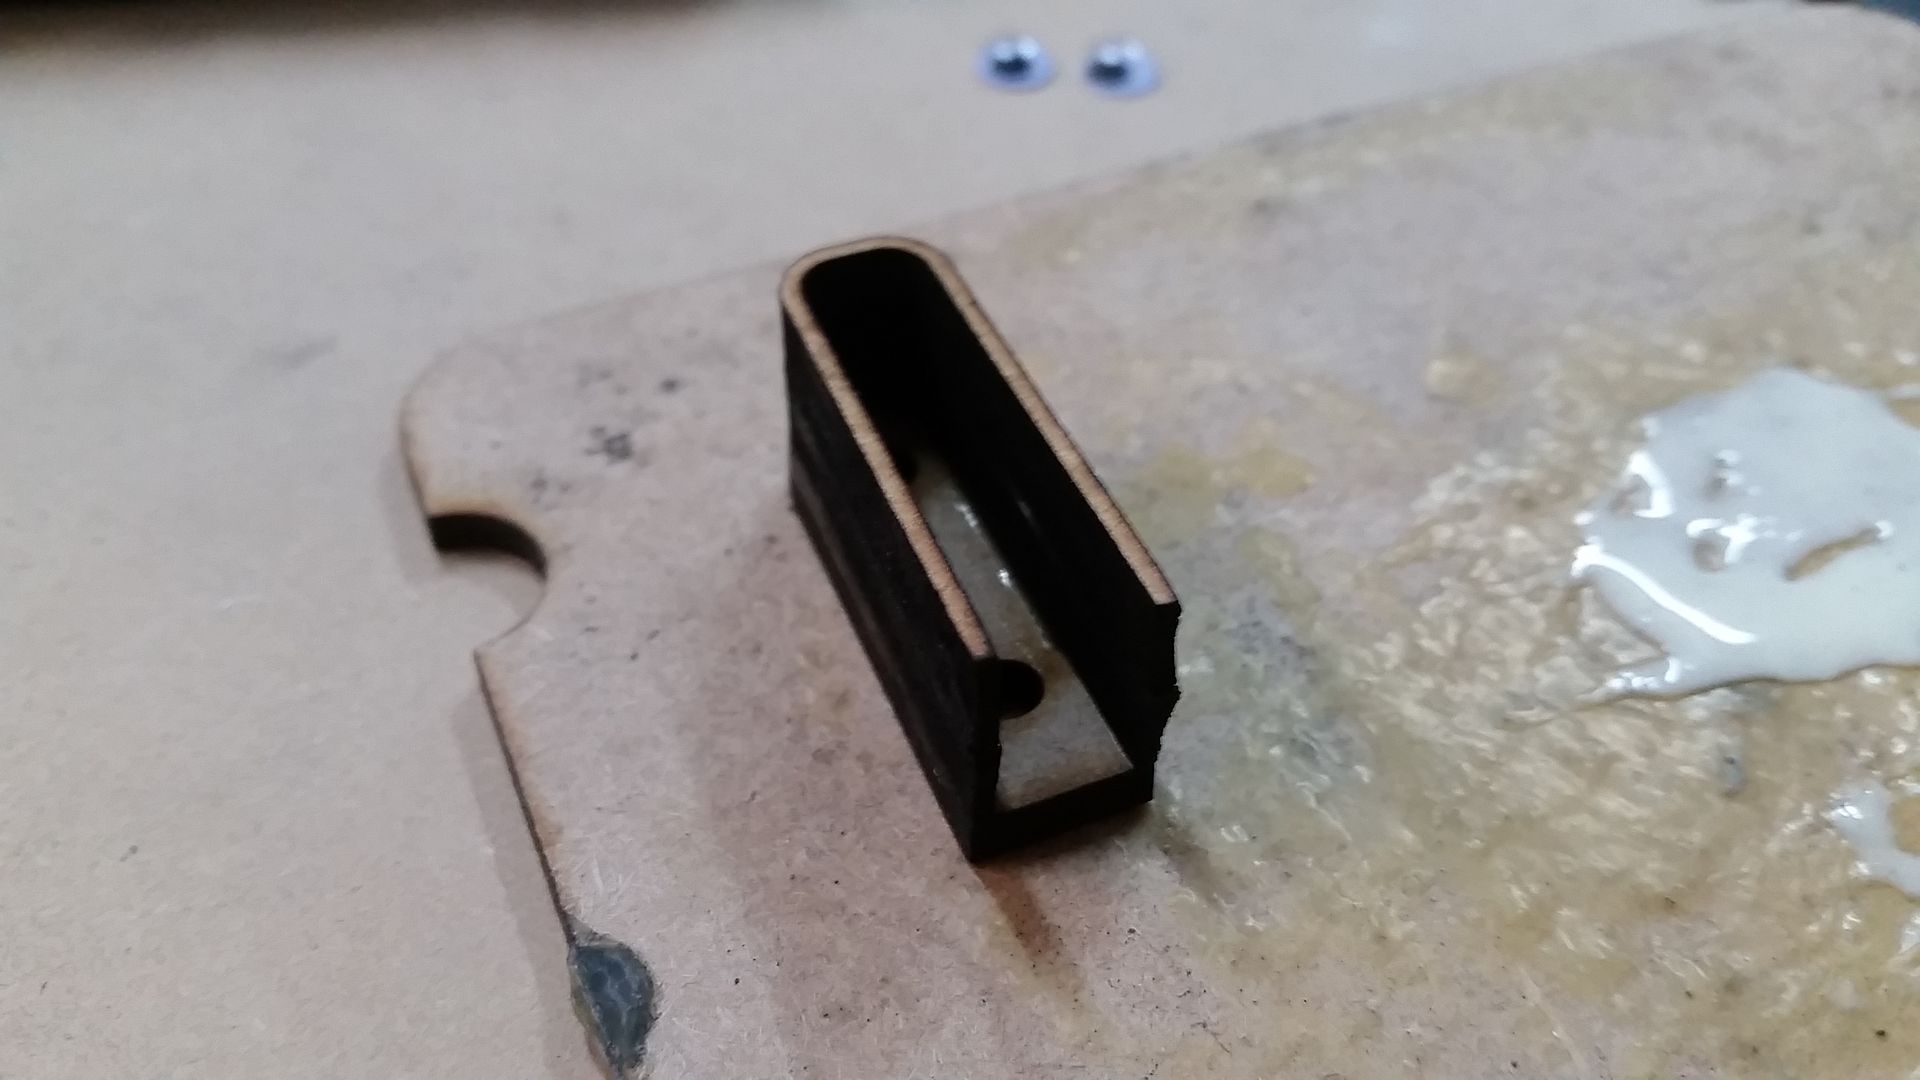
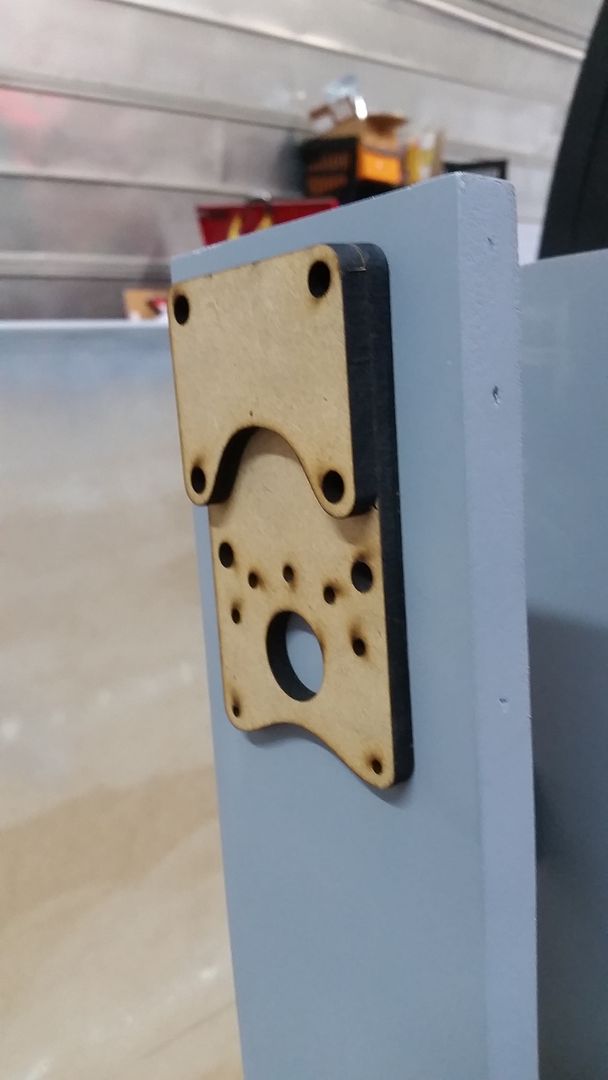
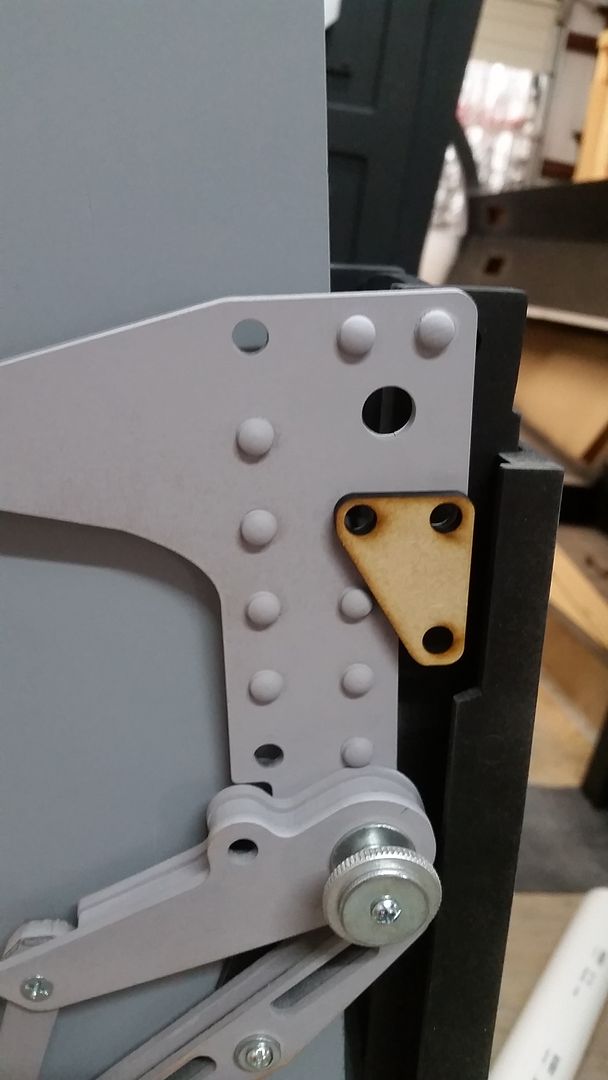
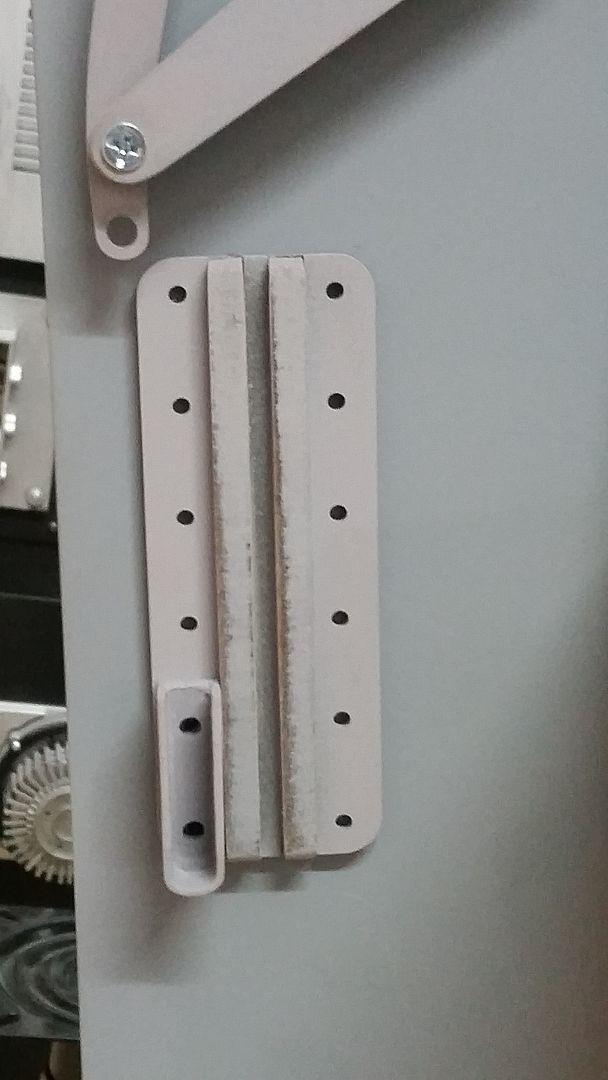
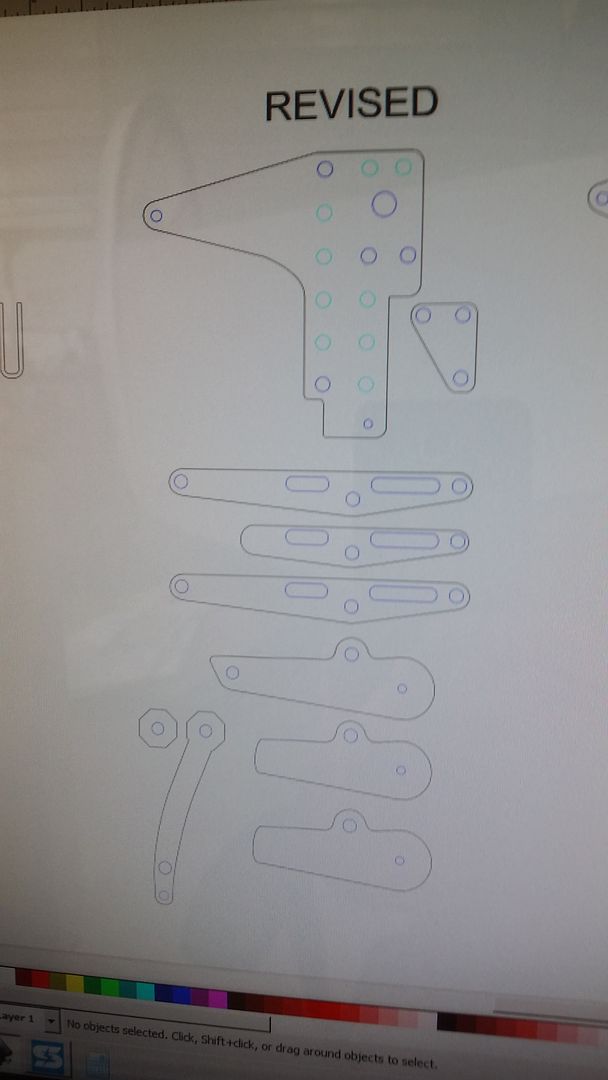
I laser cut this new piece
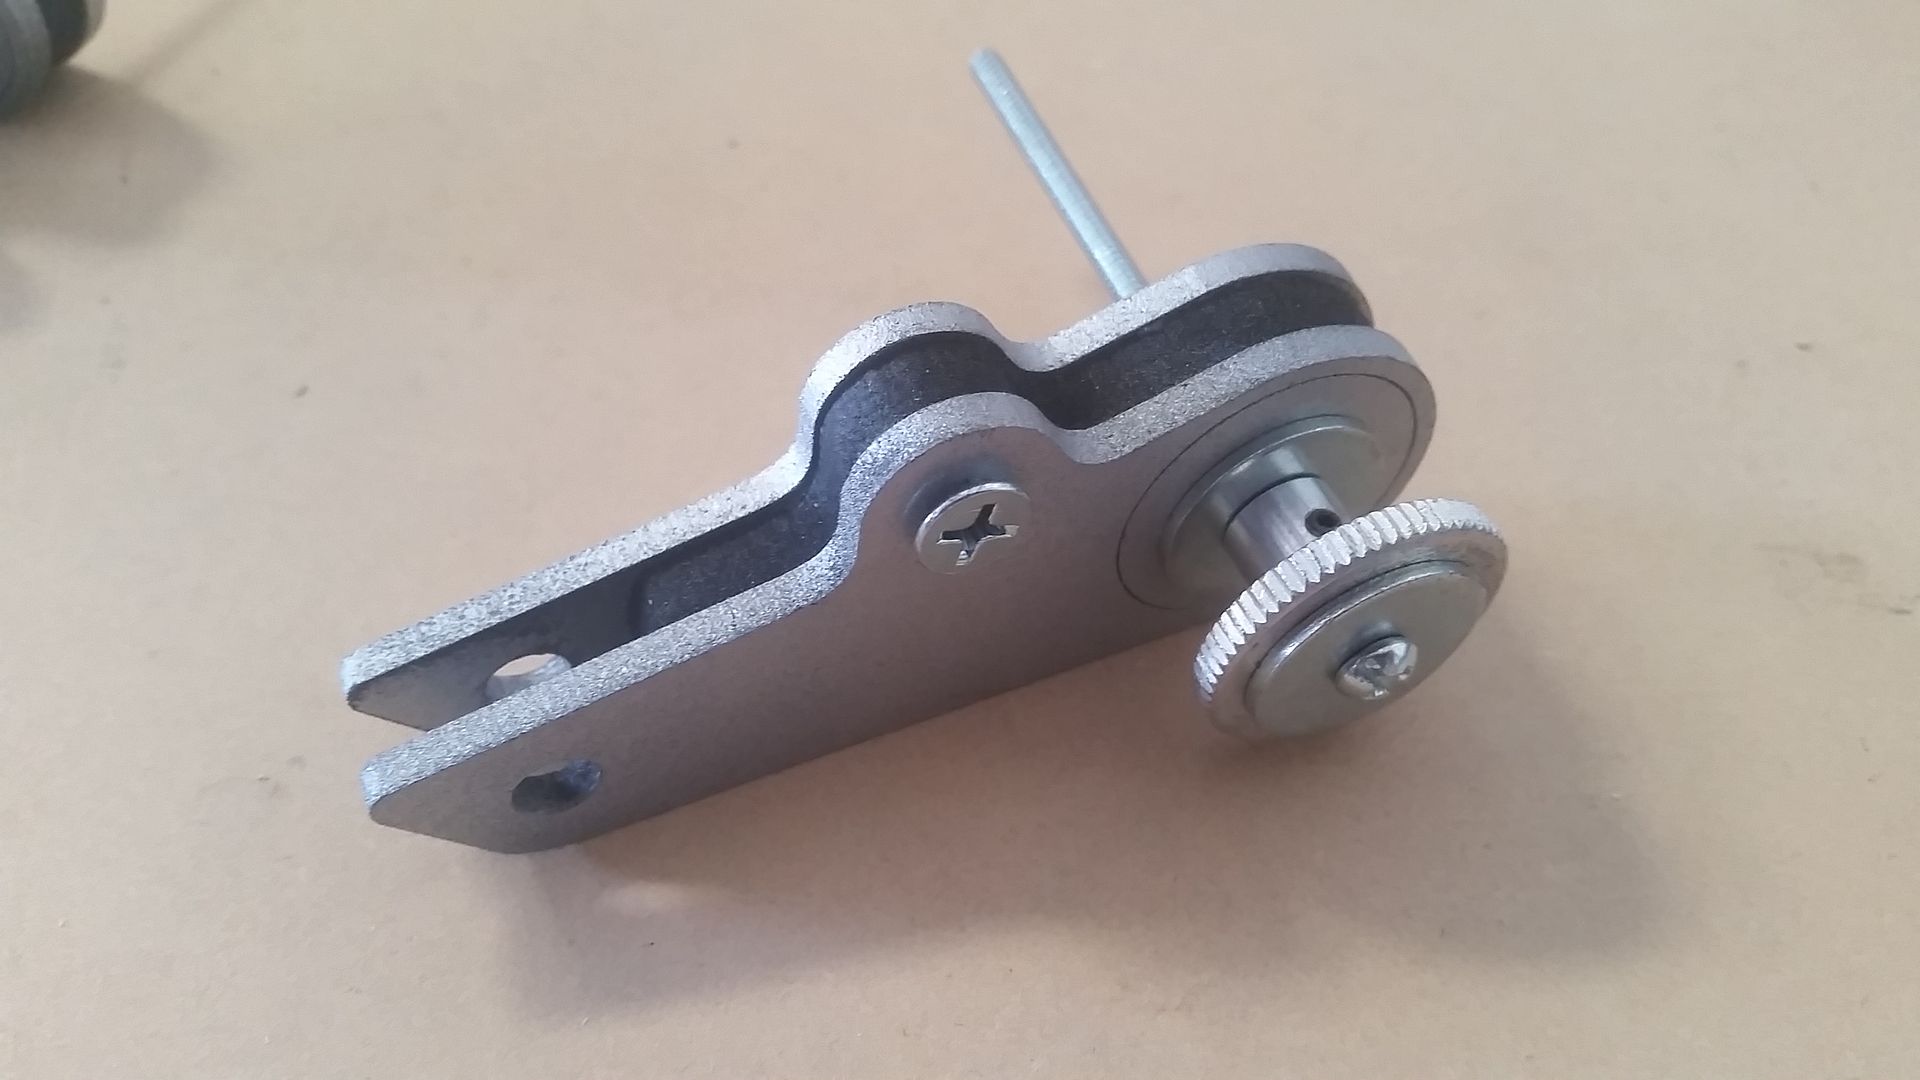
This part mounts to the new piece
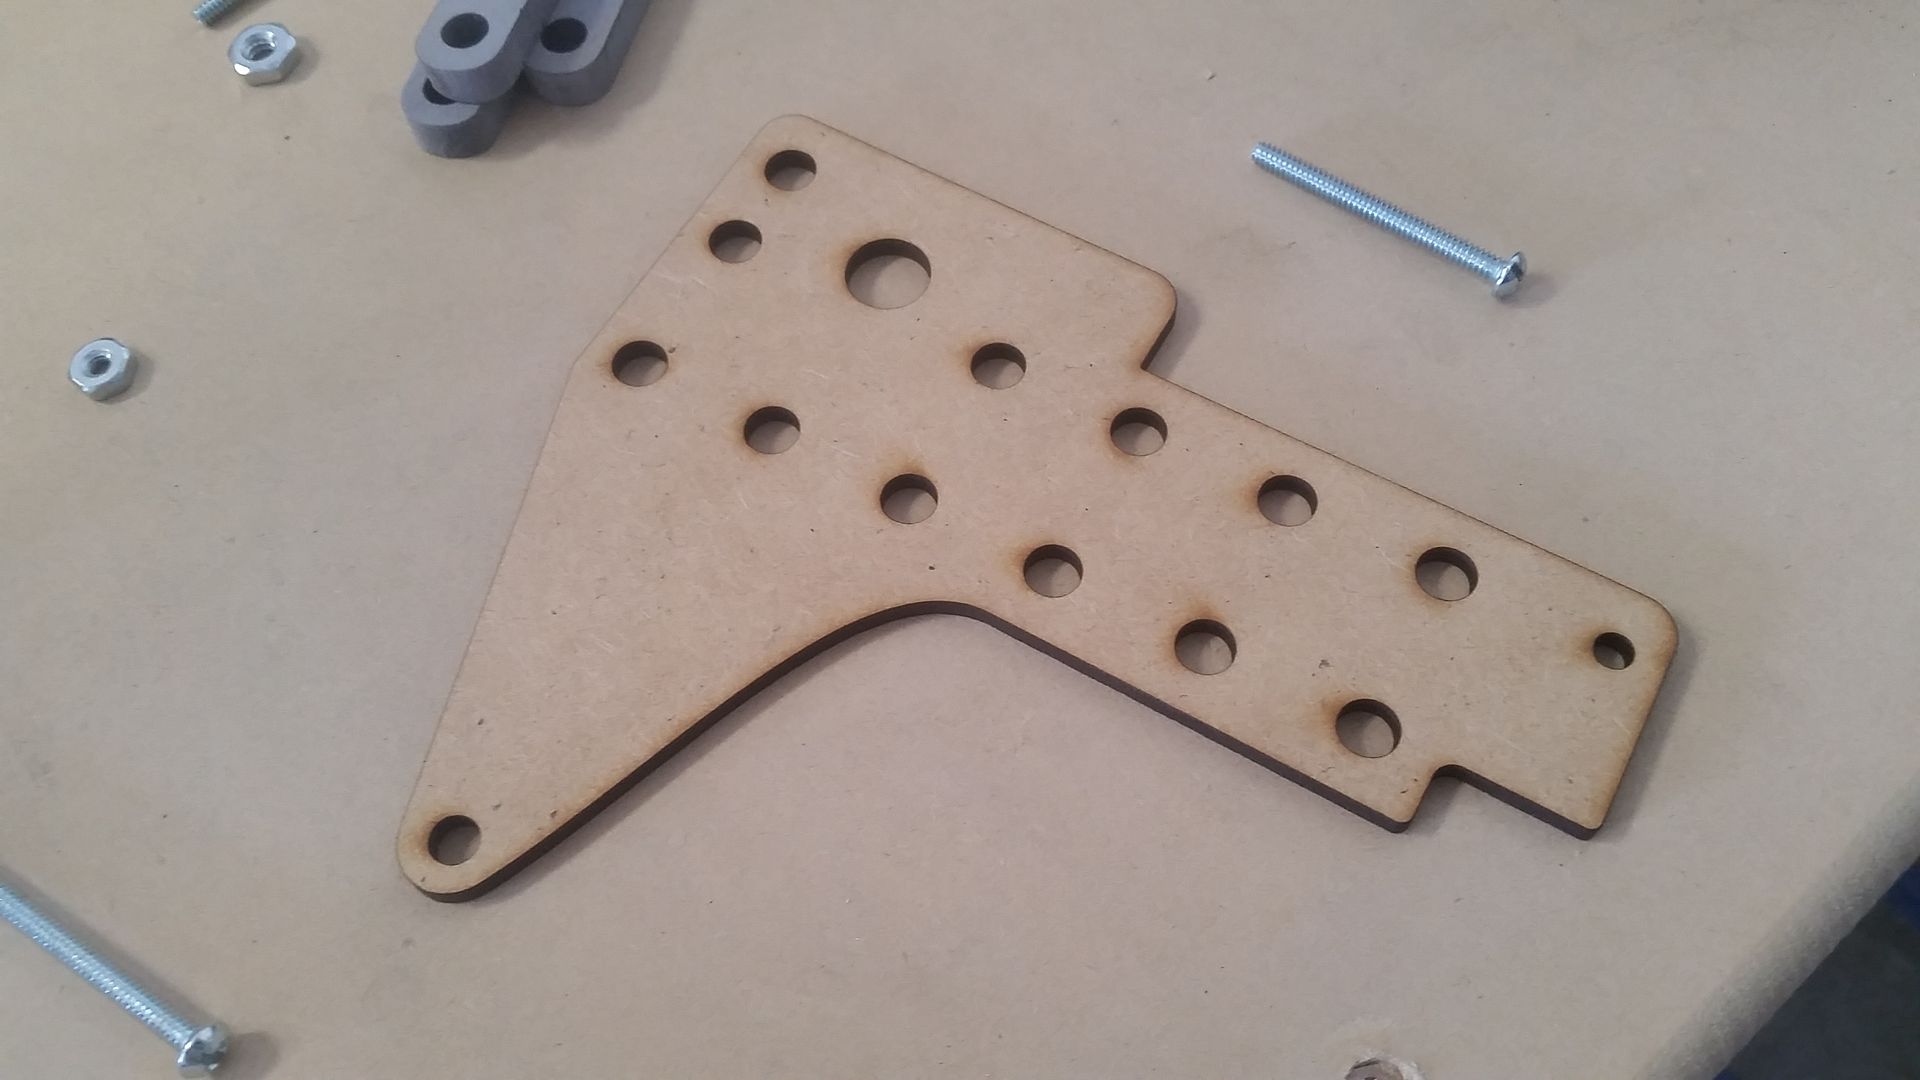
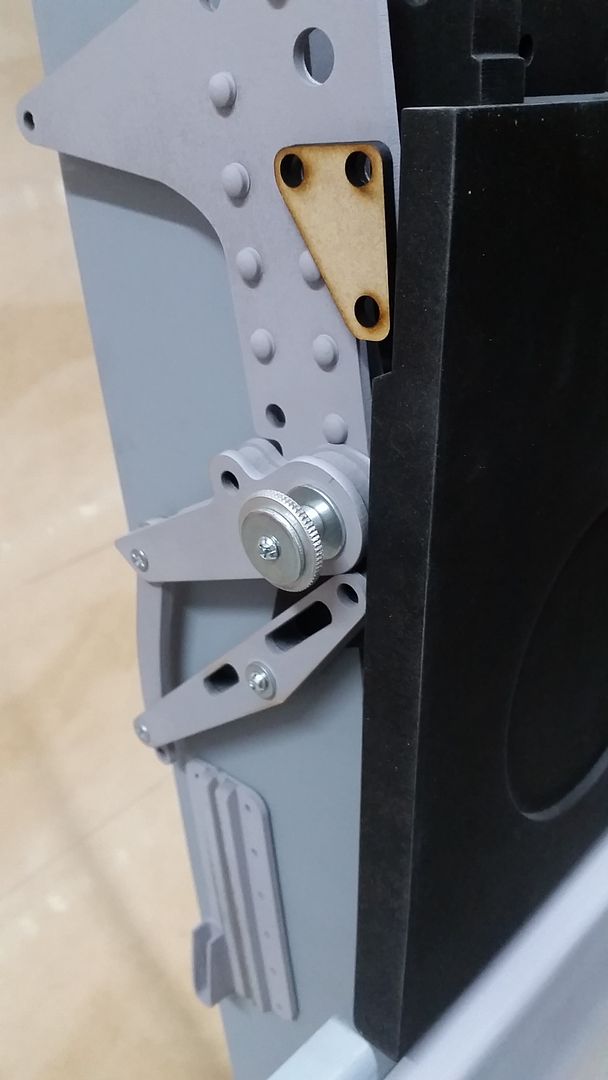
After some fiddling I came up with a new basic shape so all the parts fit together
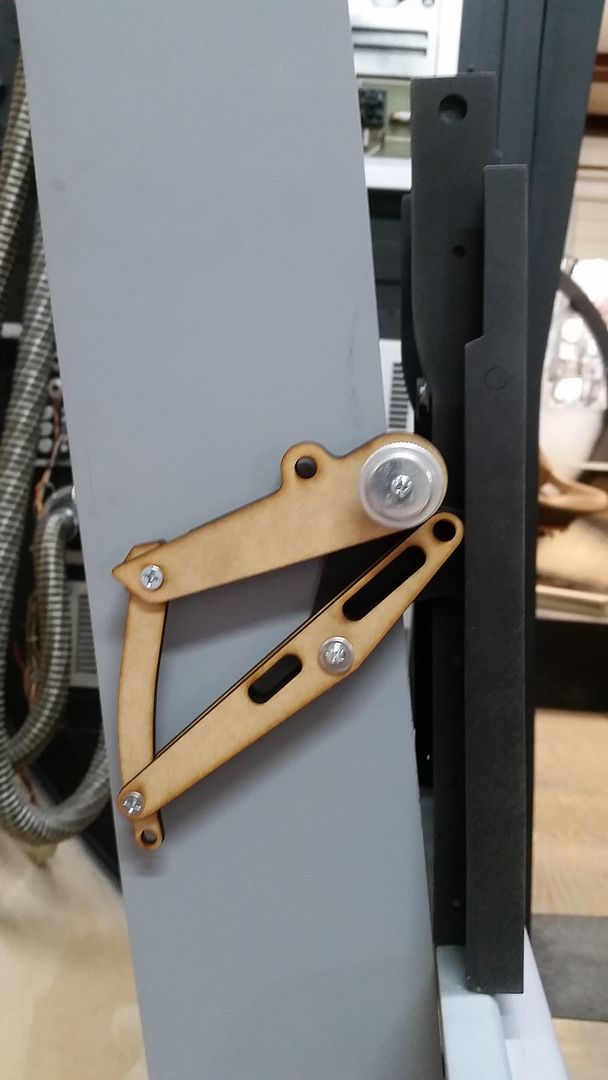
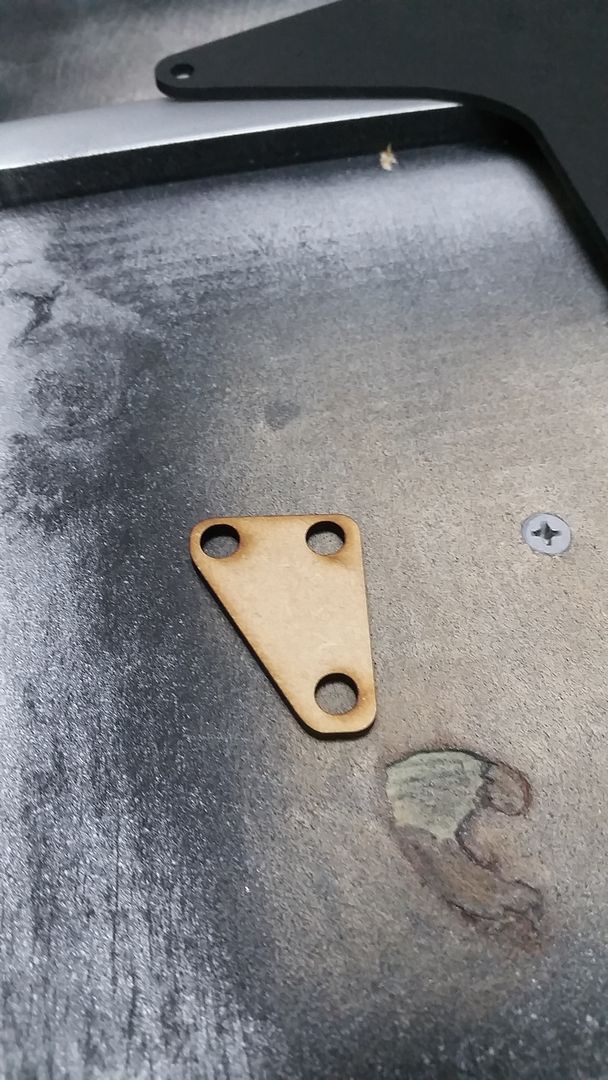
Mounted the pieces together
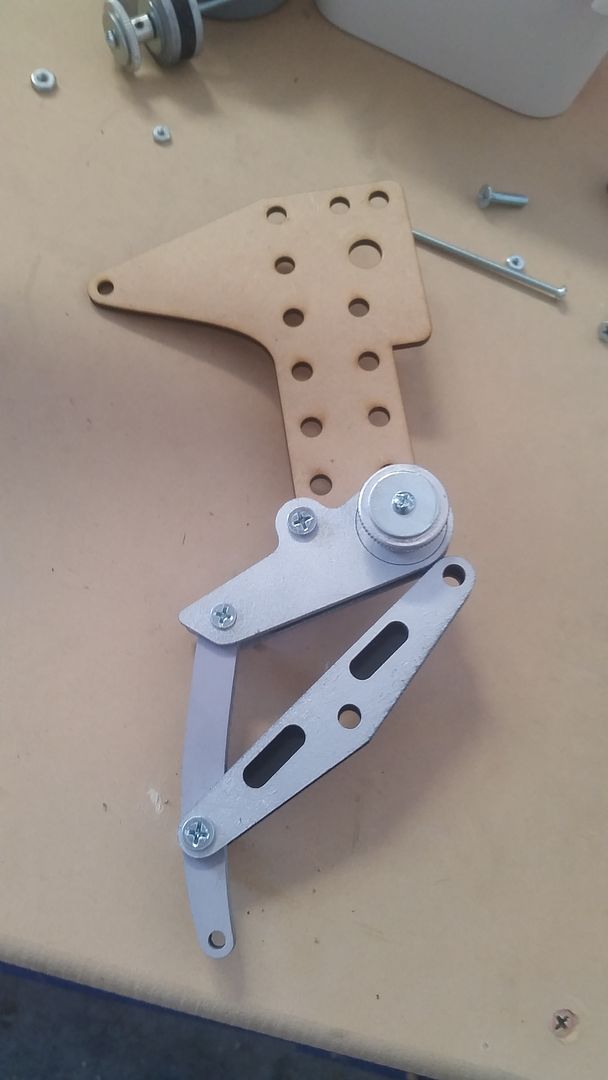
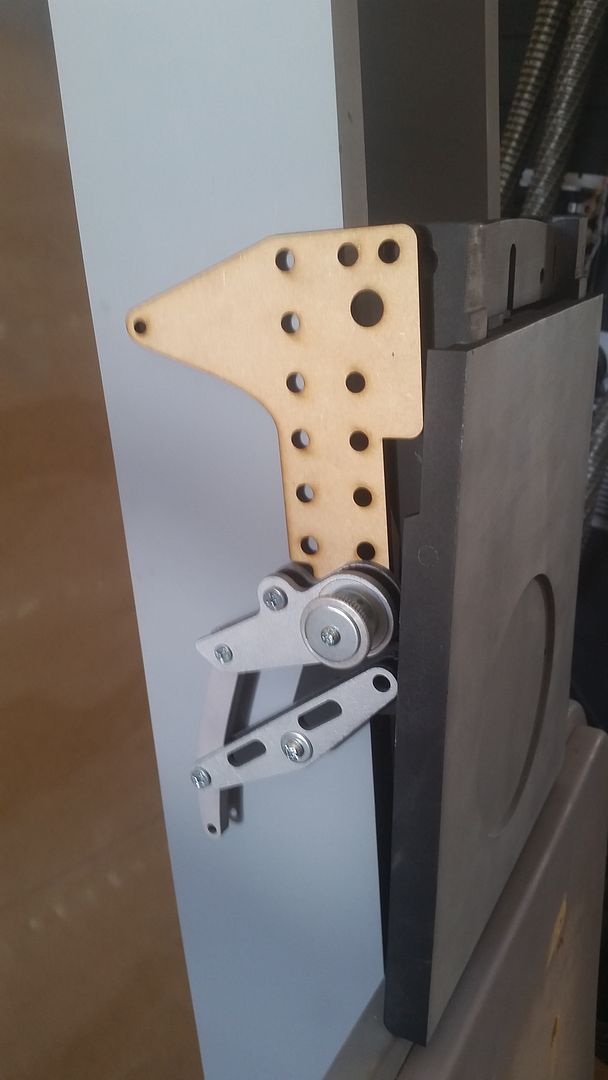
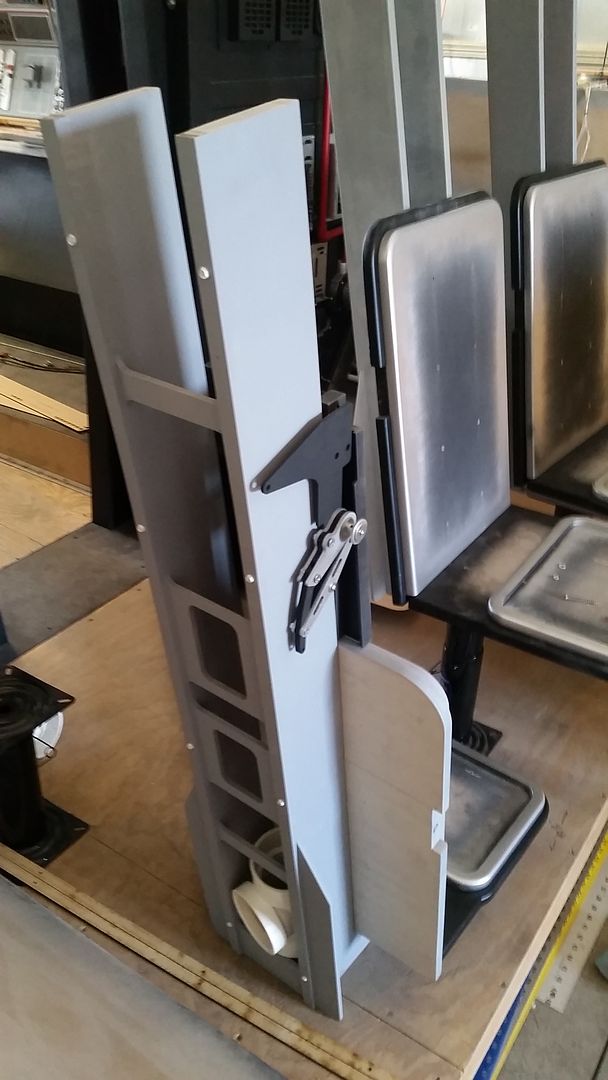
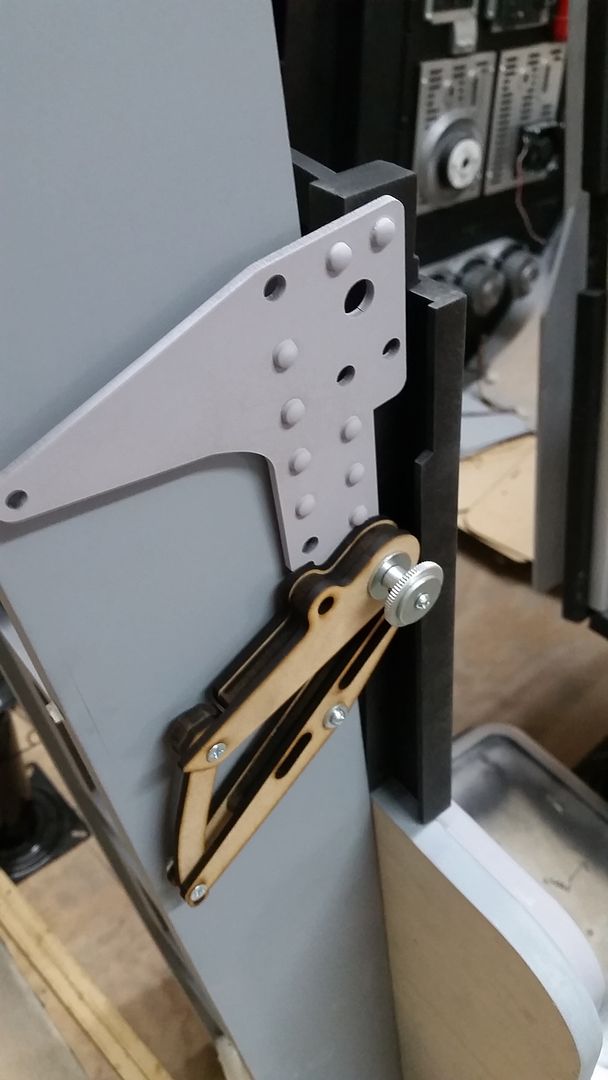
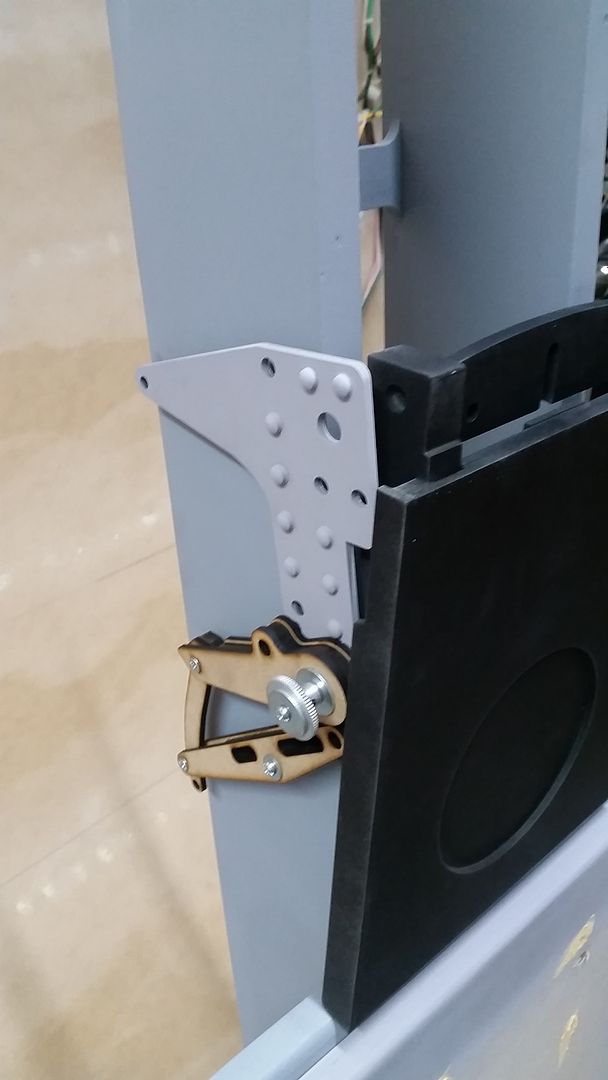
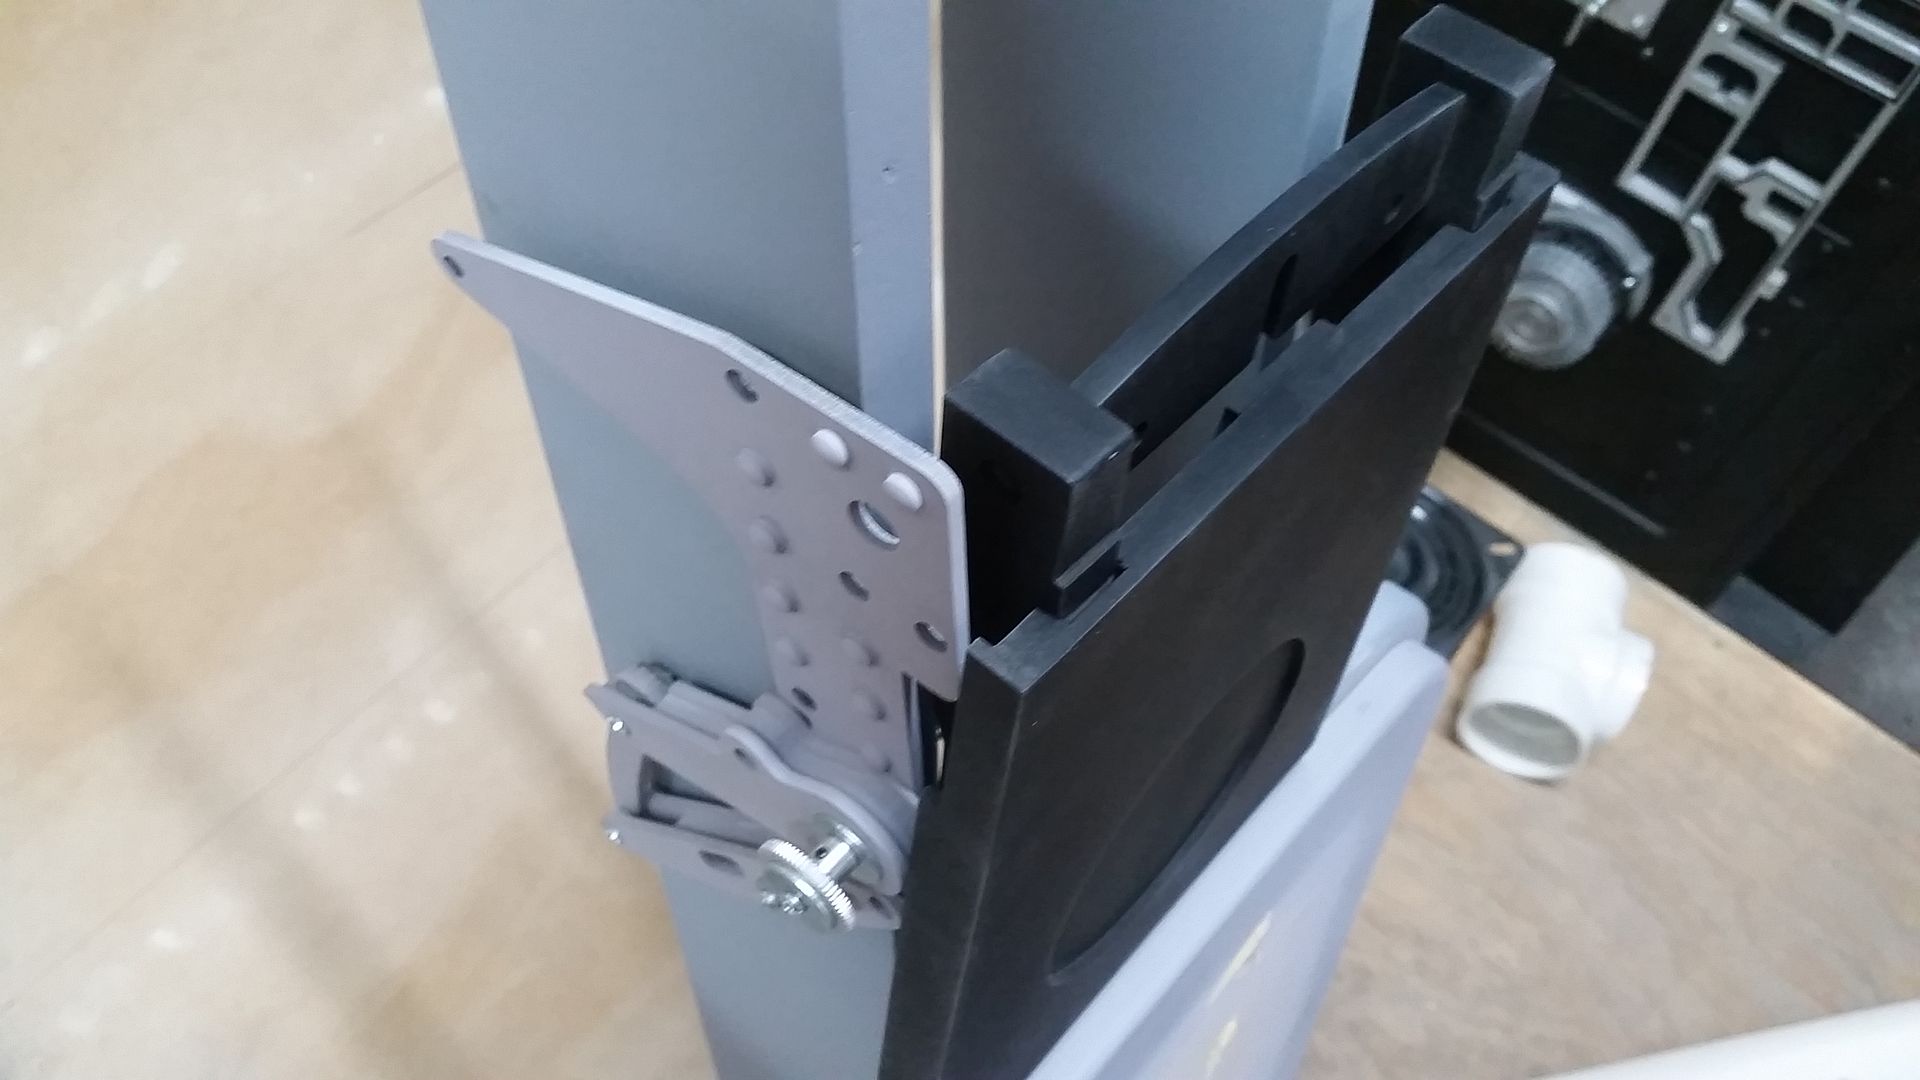
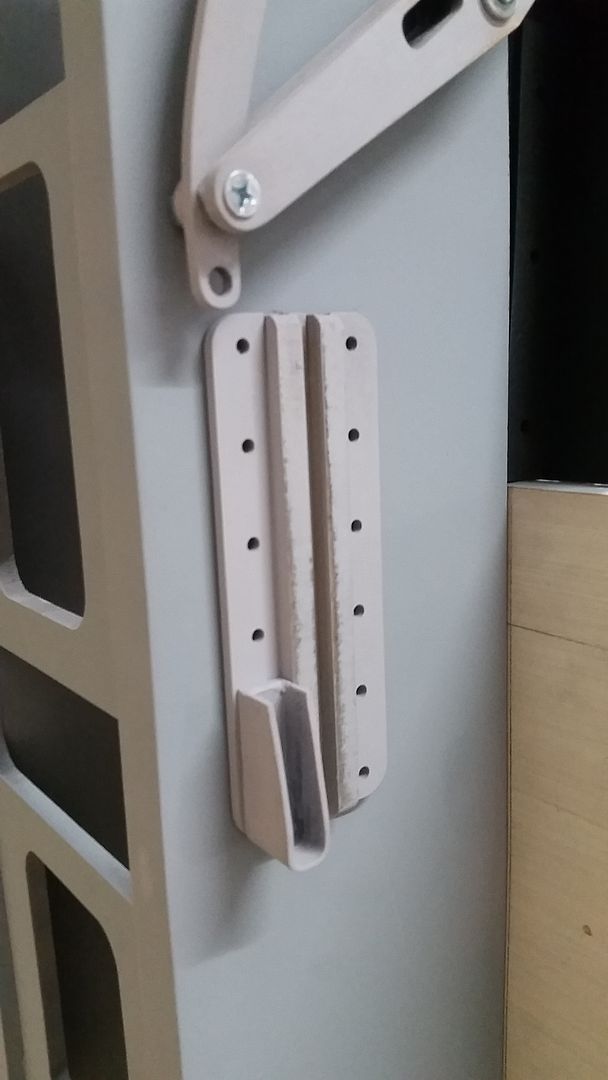
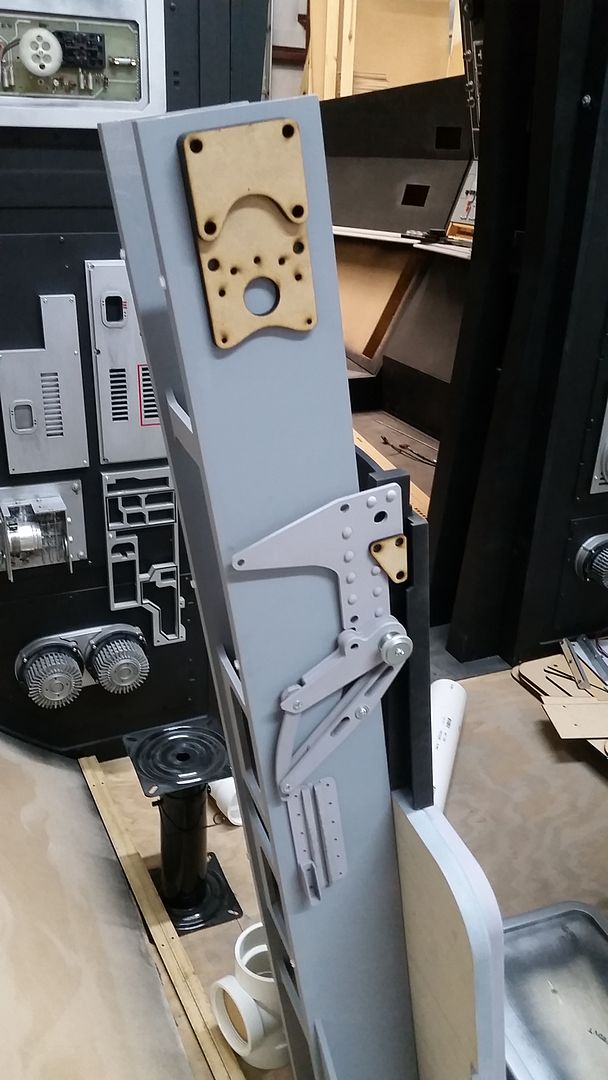
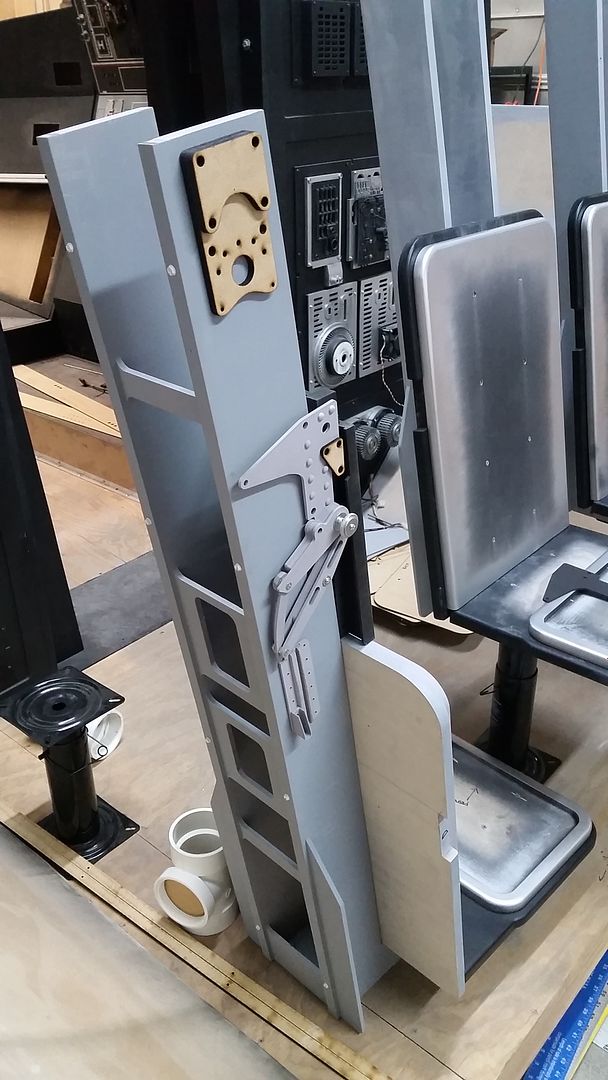
This is the basic final mounting position
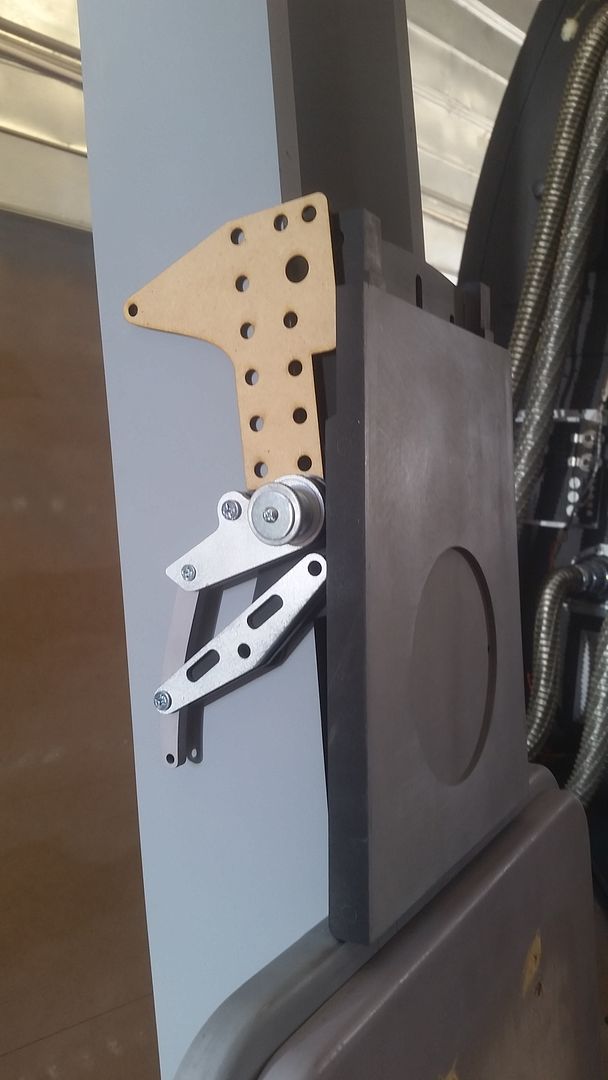
Unfortunately, the pieces look too small because of the mods I had to do to the "Hockey Stick" frame - see above post
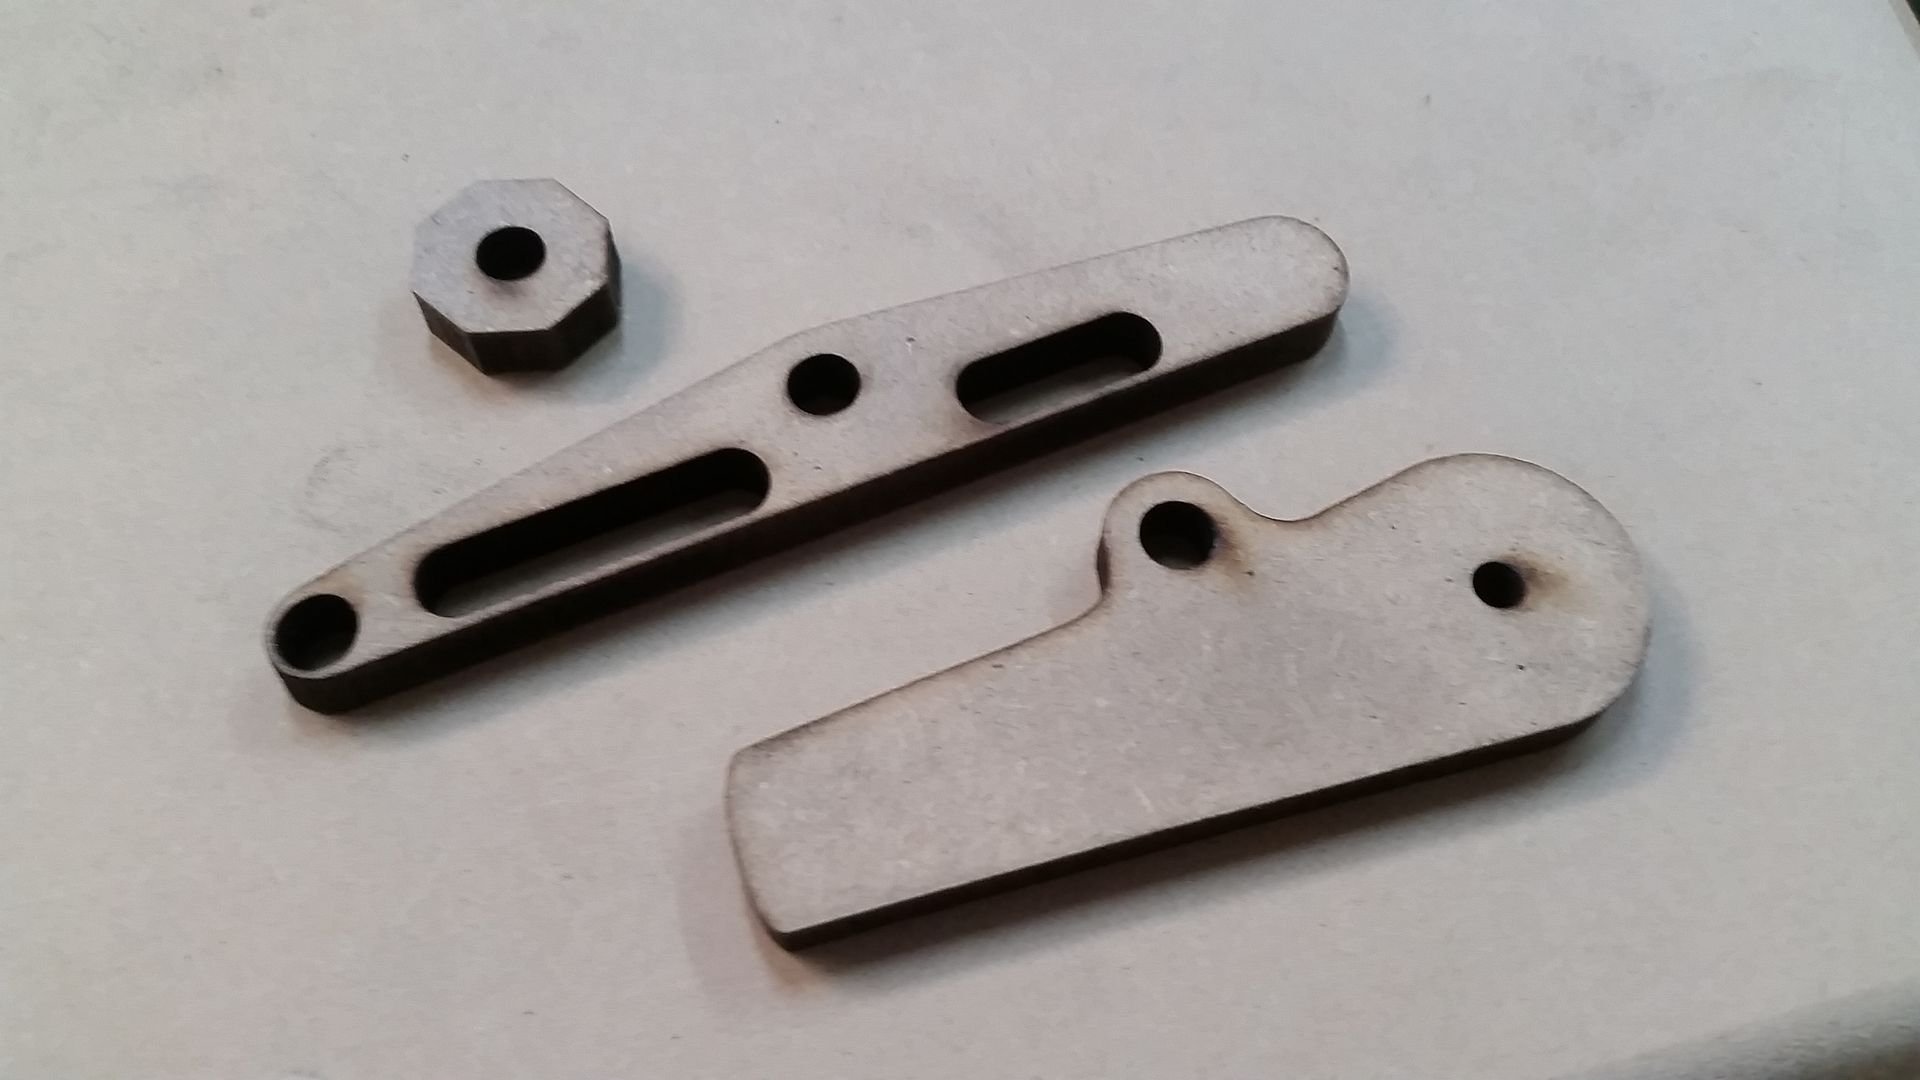
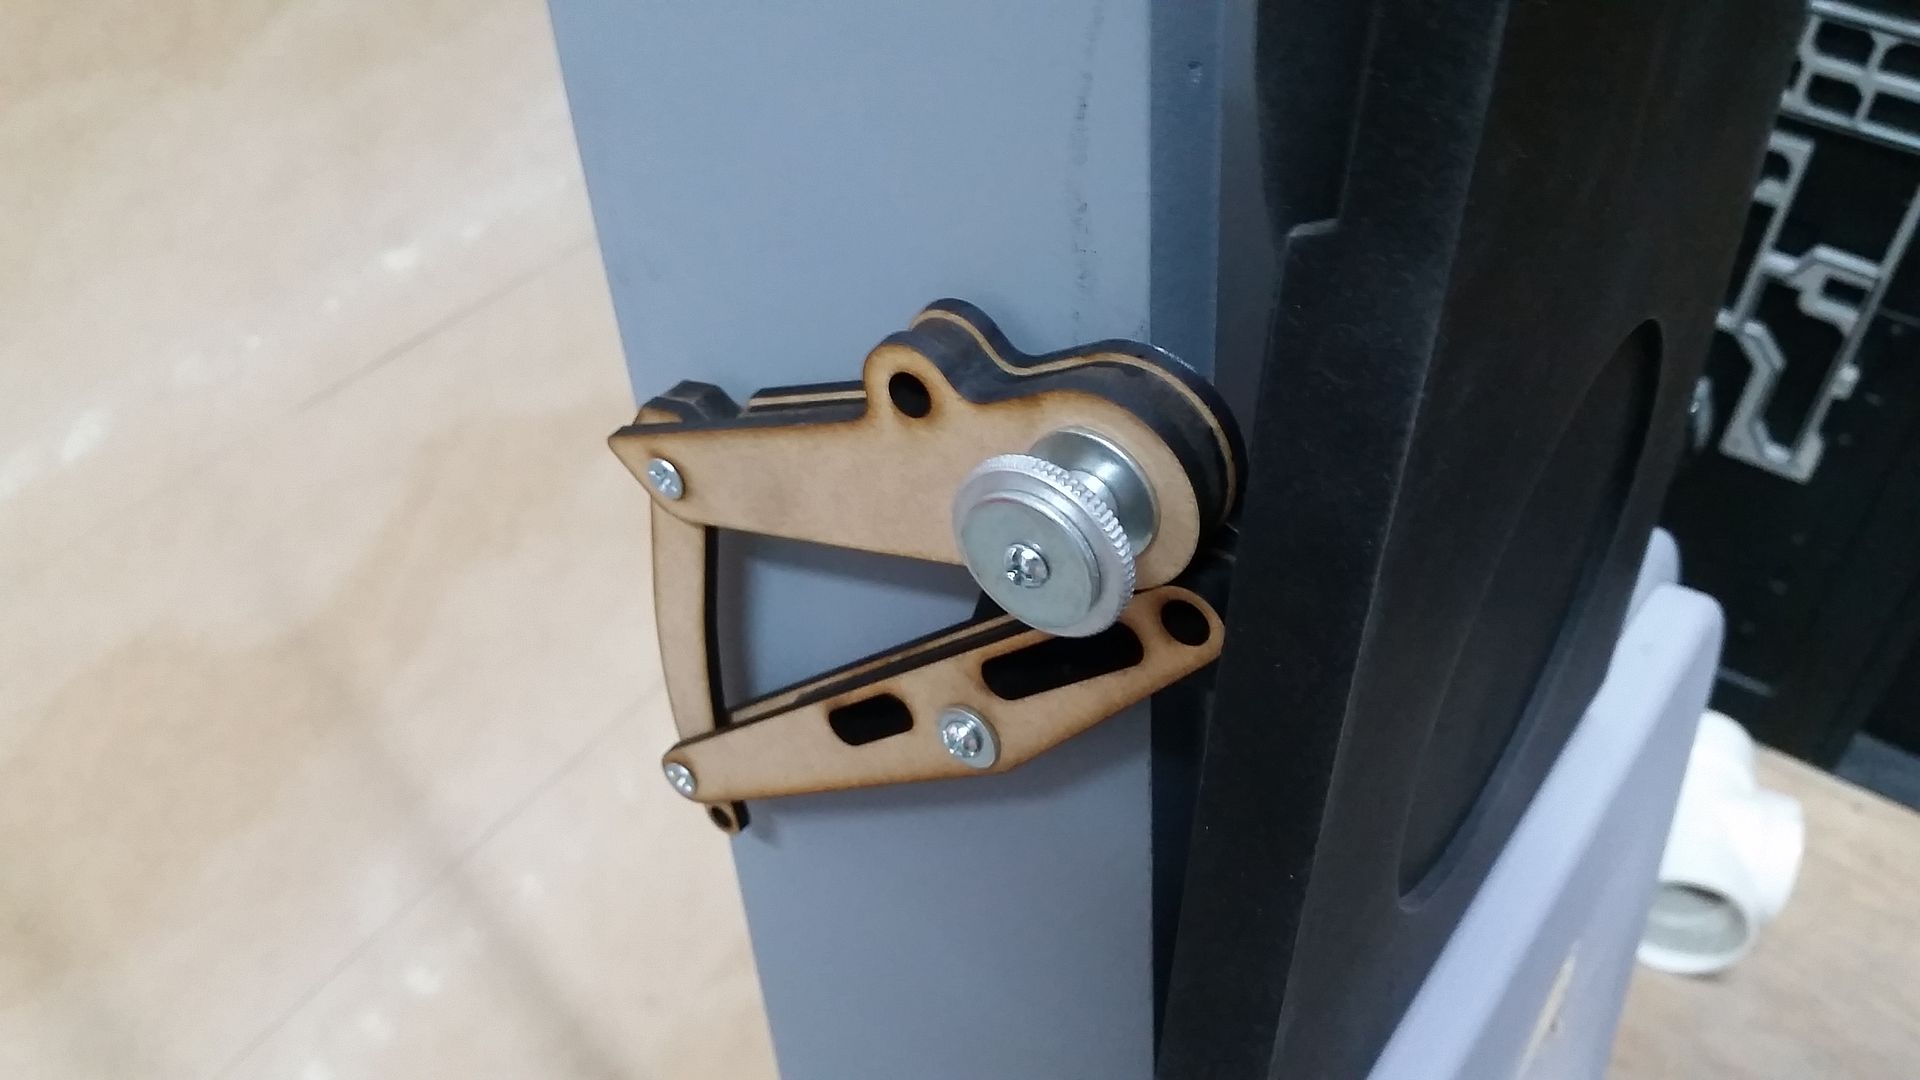
Drilled a hole
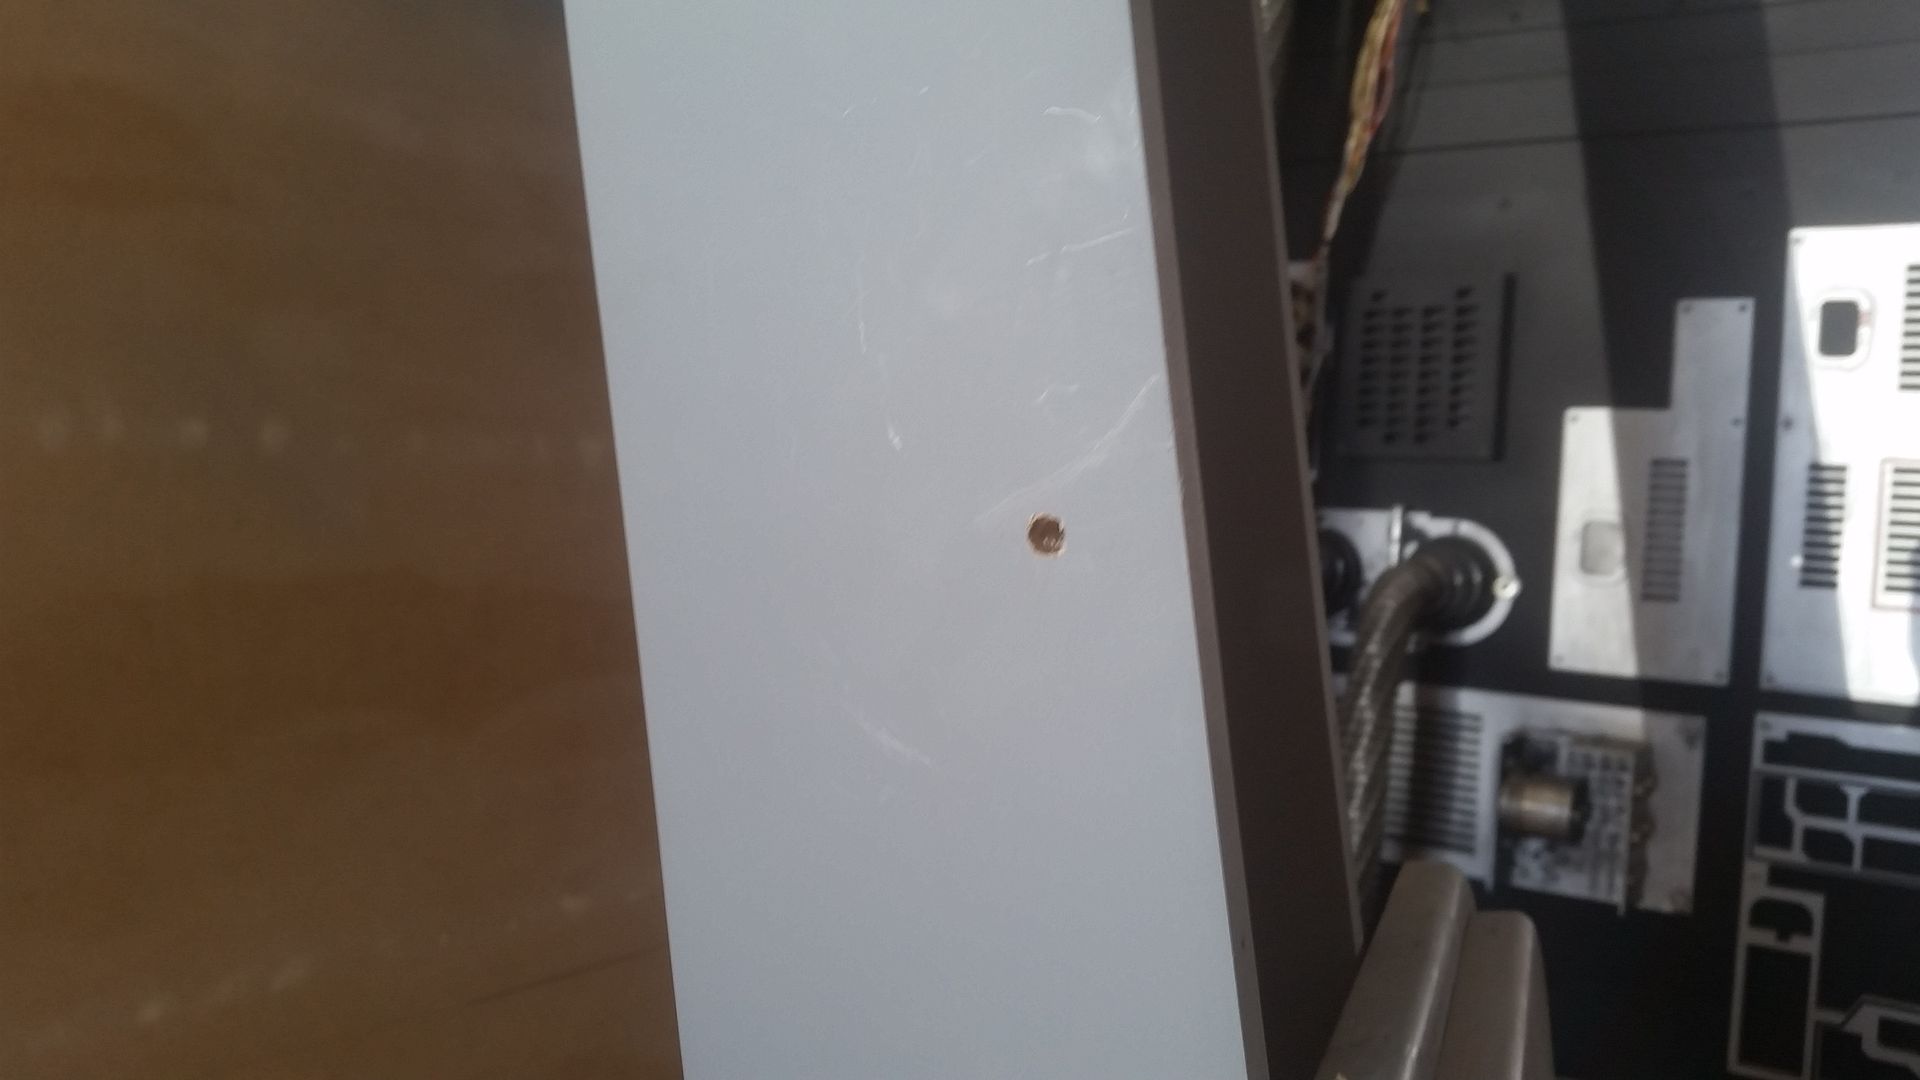
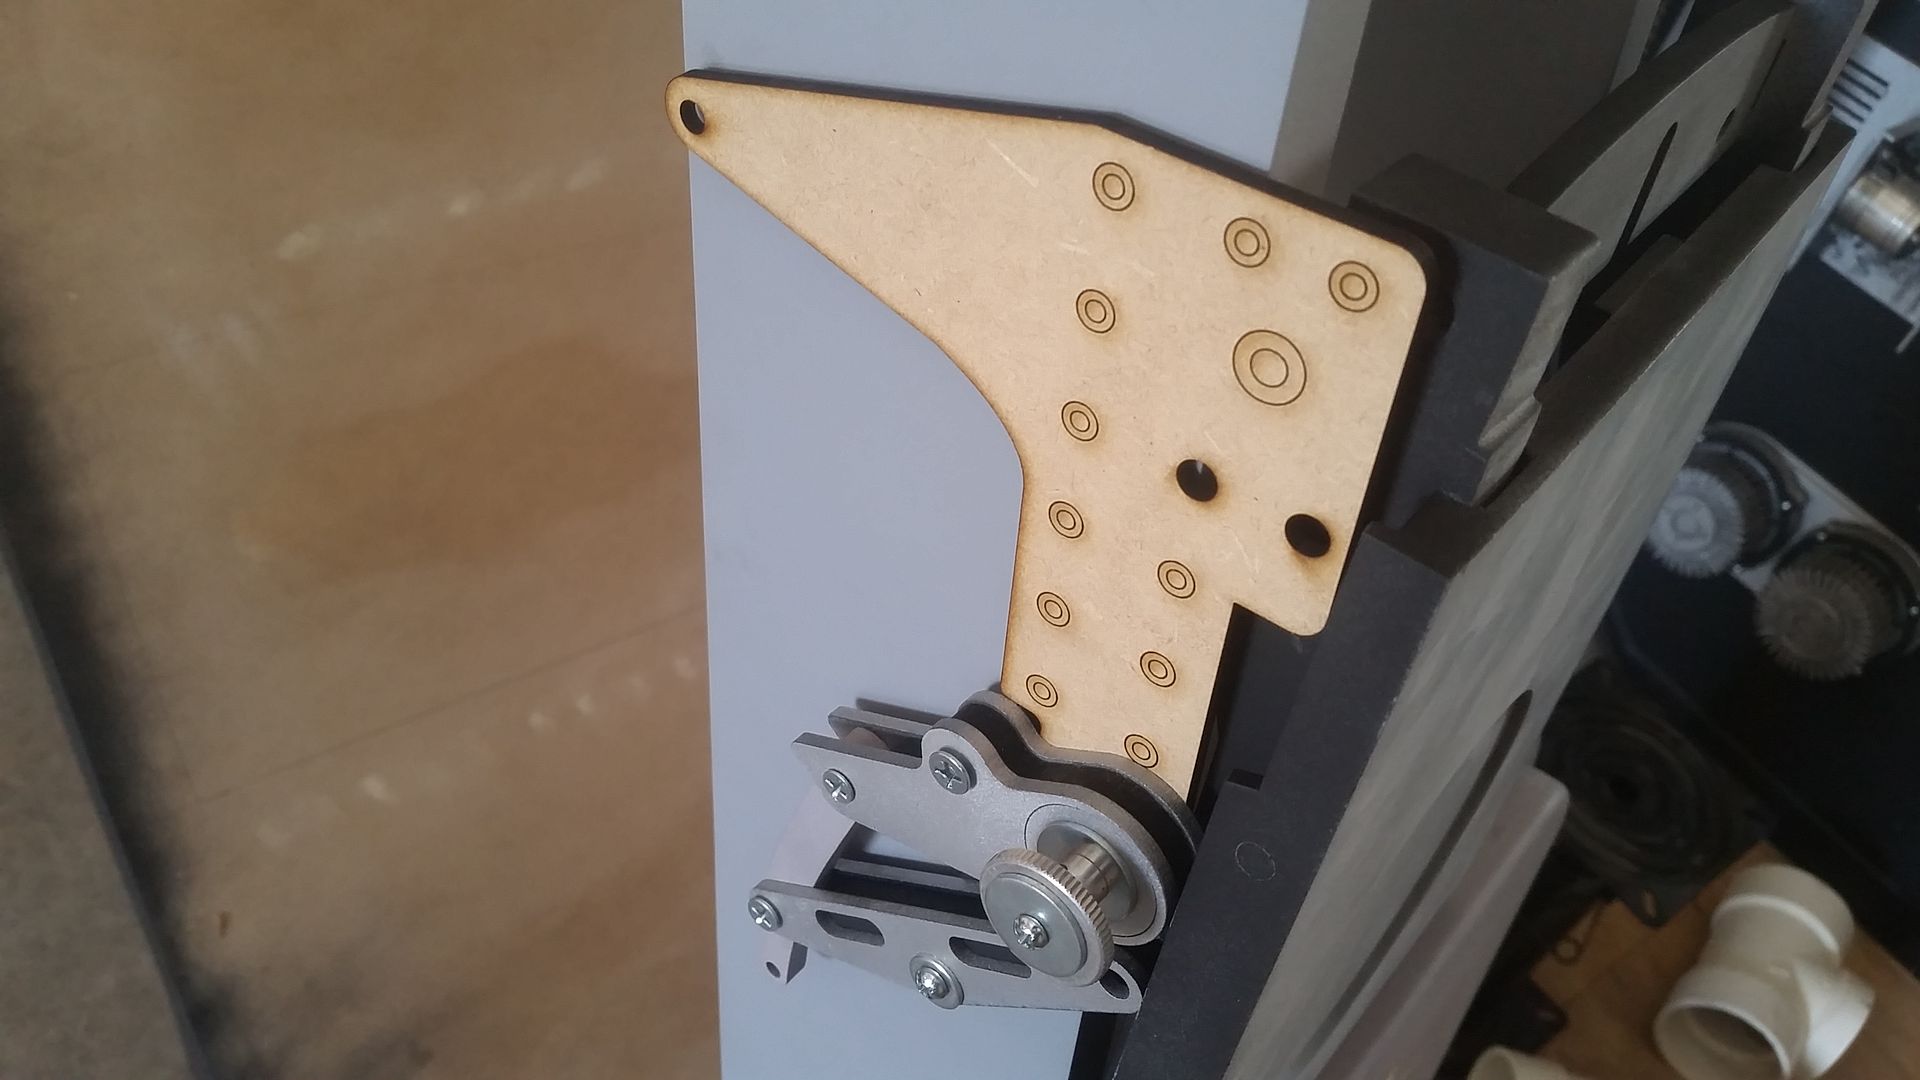
The assembly mounts into the frame through the headrest mounting posts - its very confusing!")
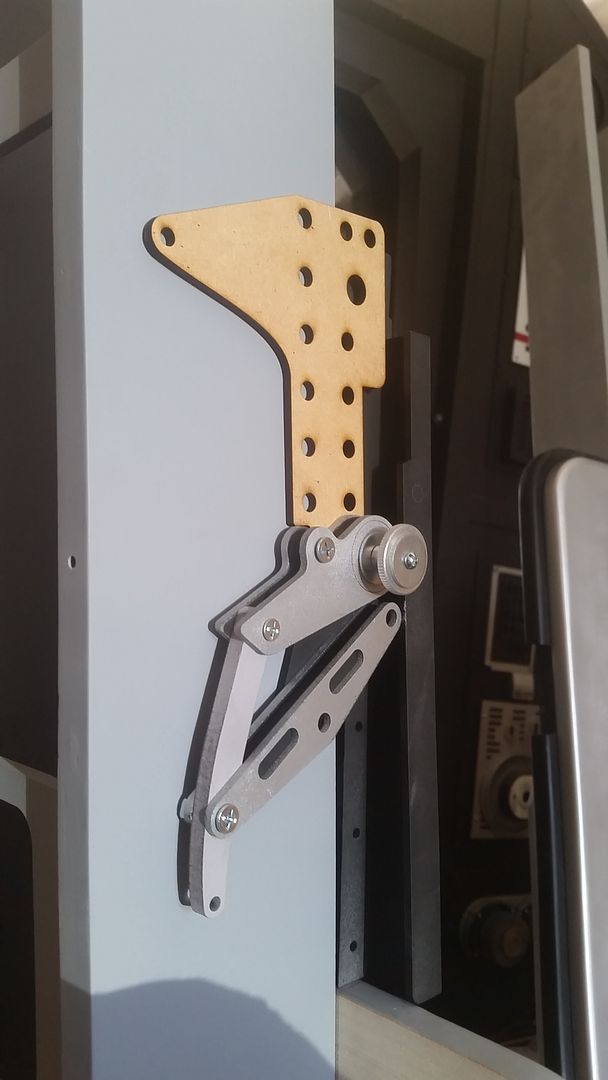
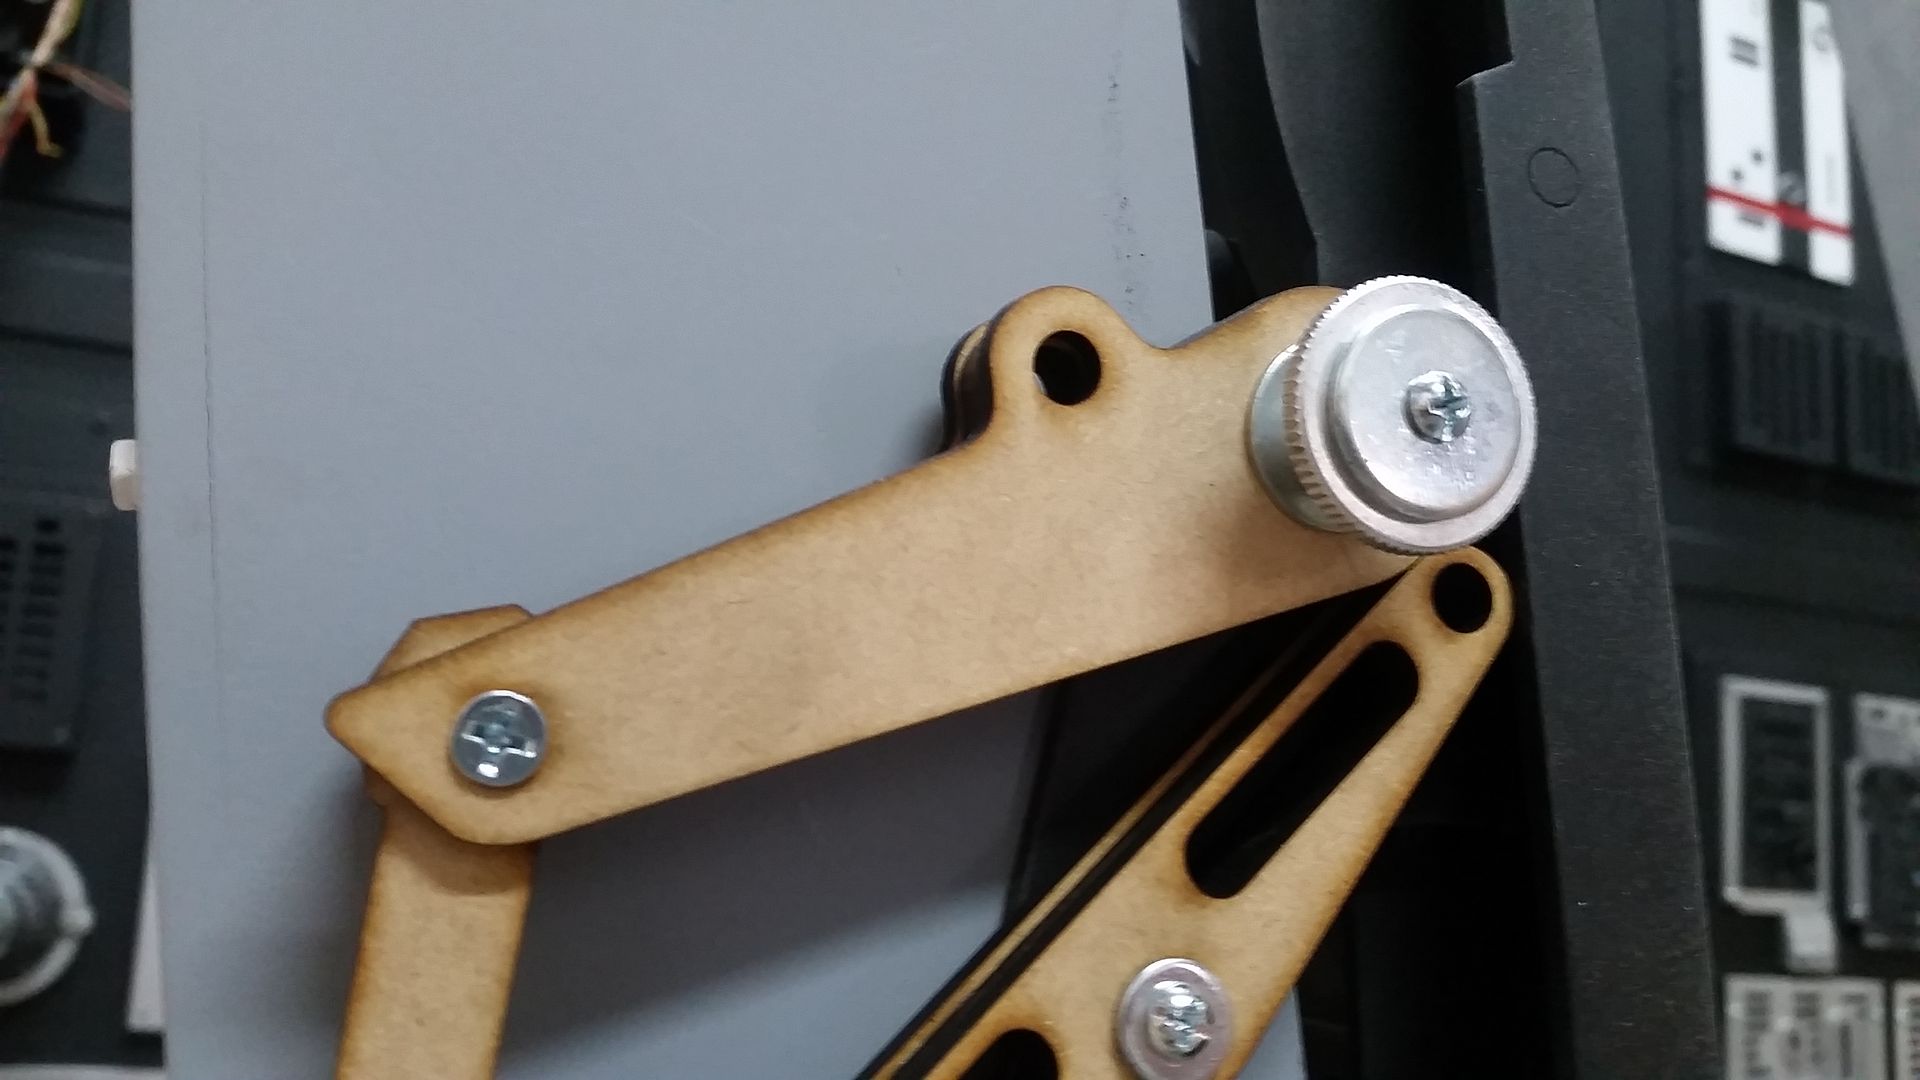
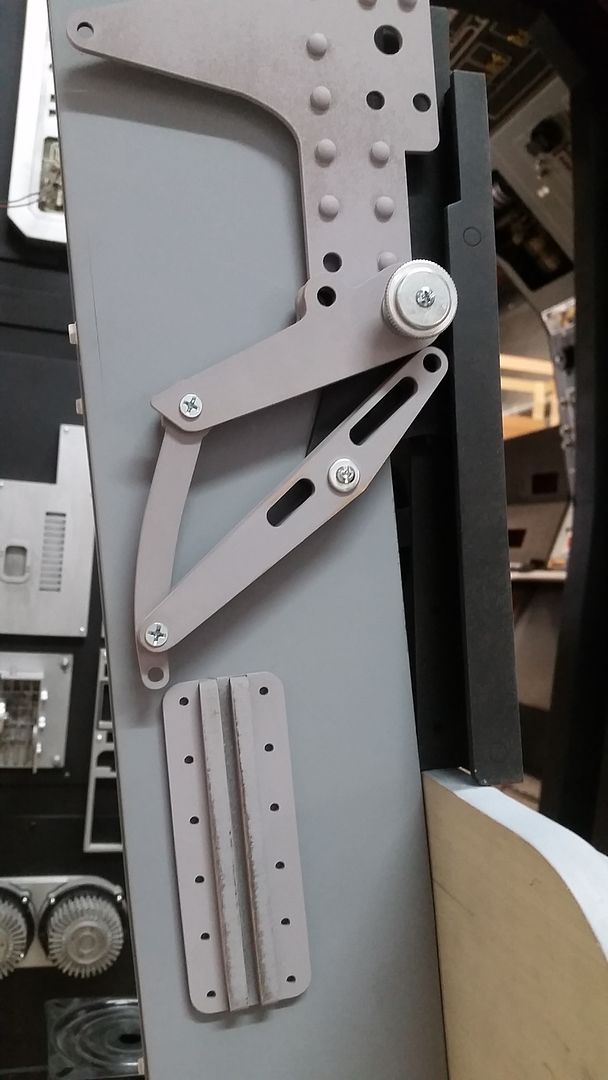
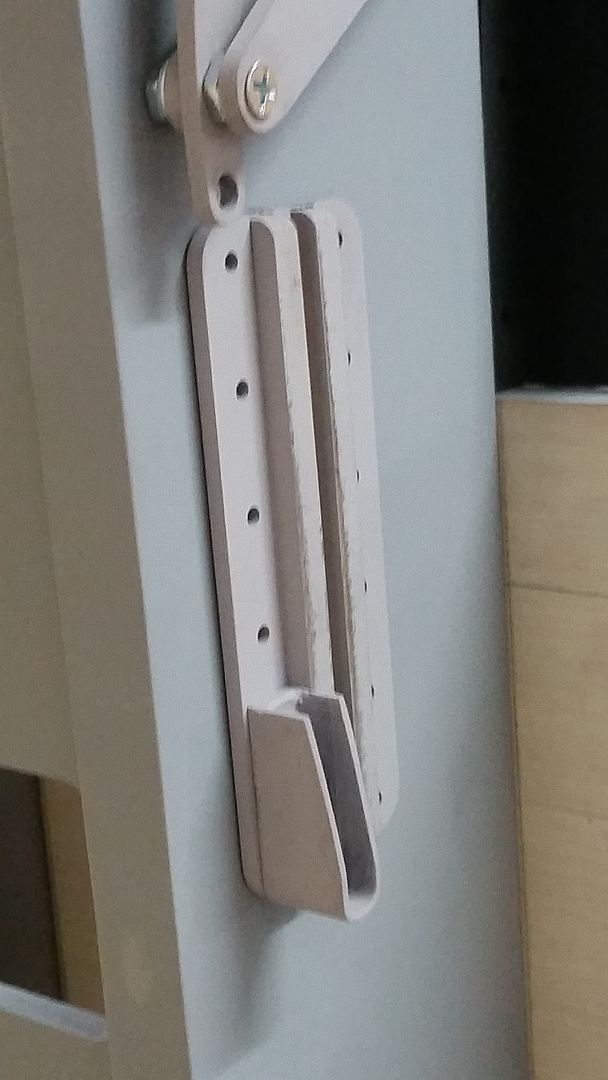
To make it MORE accurate I stretched the piece a bit and etched the details instead of holes. No sure I like the etching, but the 3 silver pieces DEF need to be scaled/tweaked to, again, appear more accurate
I do like how it looks
I added paint to the headrests
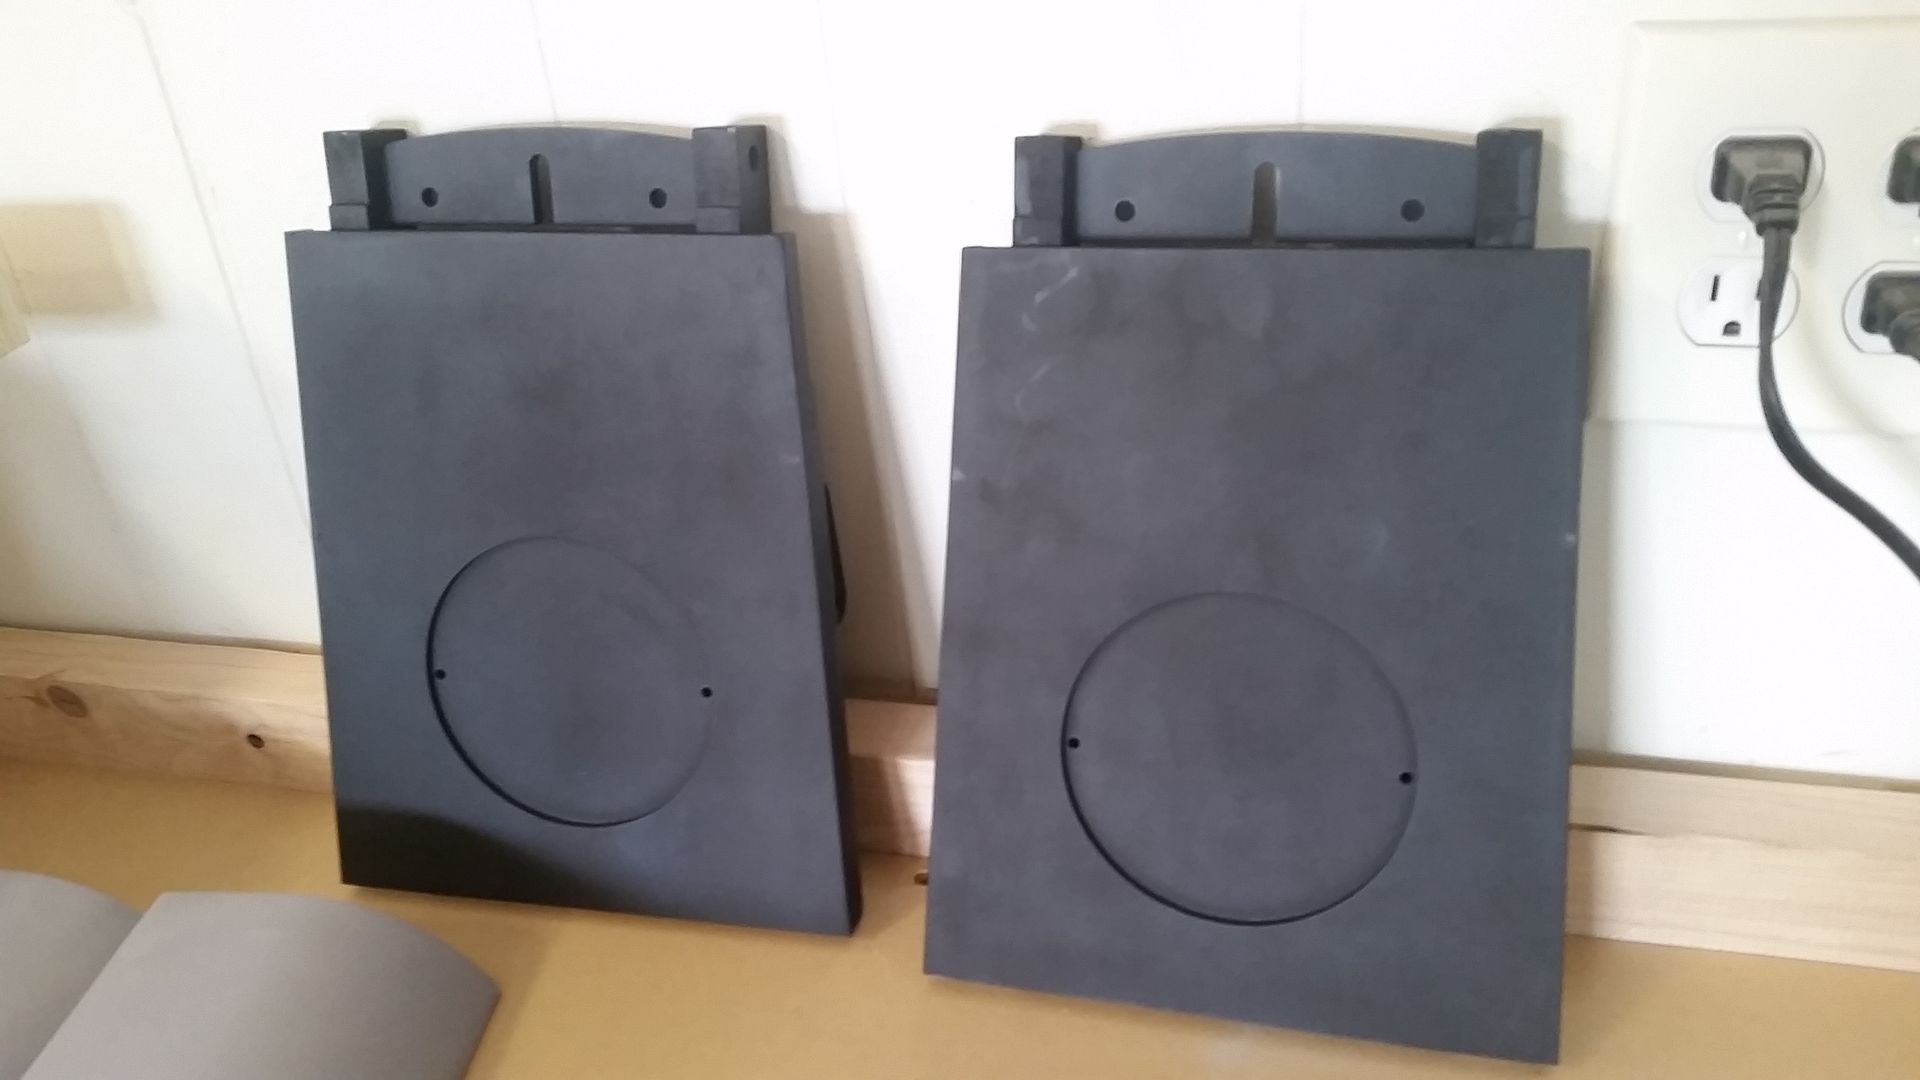
Adding some of the final details
Needs a bit more weathering

More paint
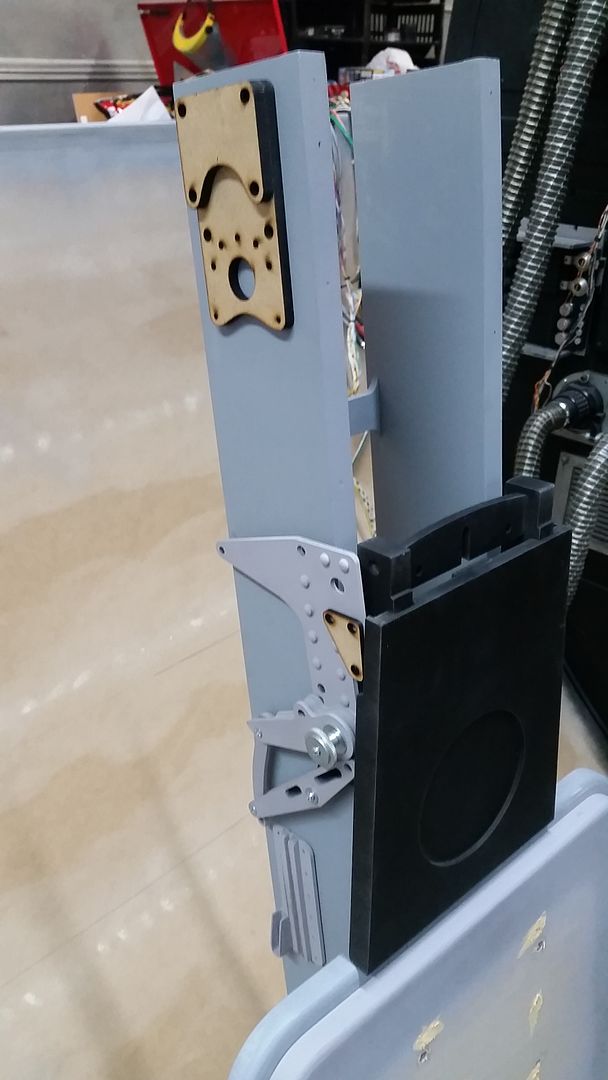
In place
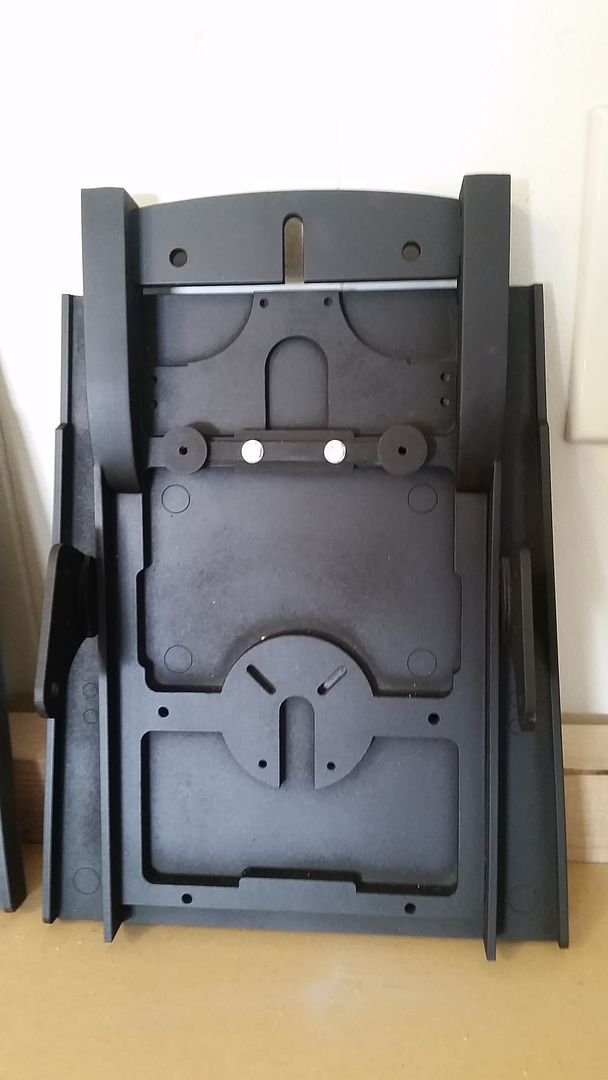
Do you guys think they should be scaled/mod'd to match the wider frame?
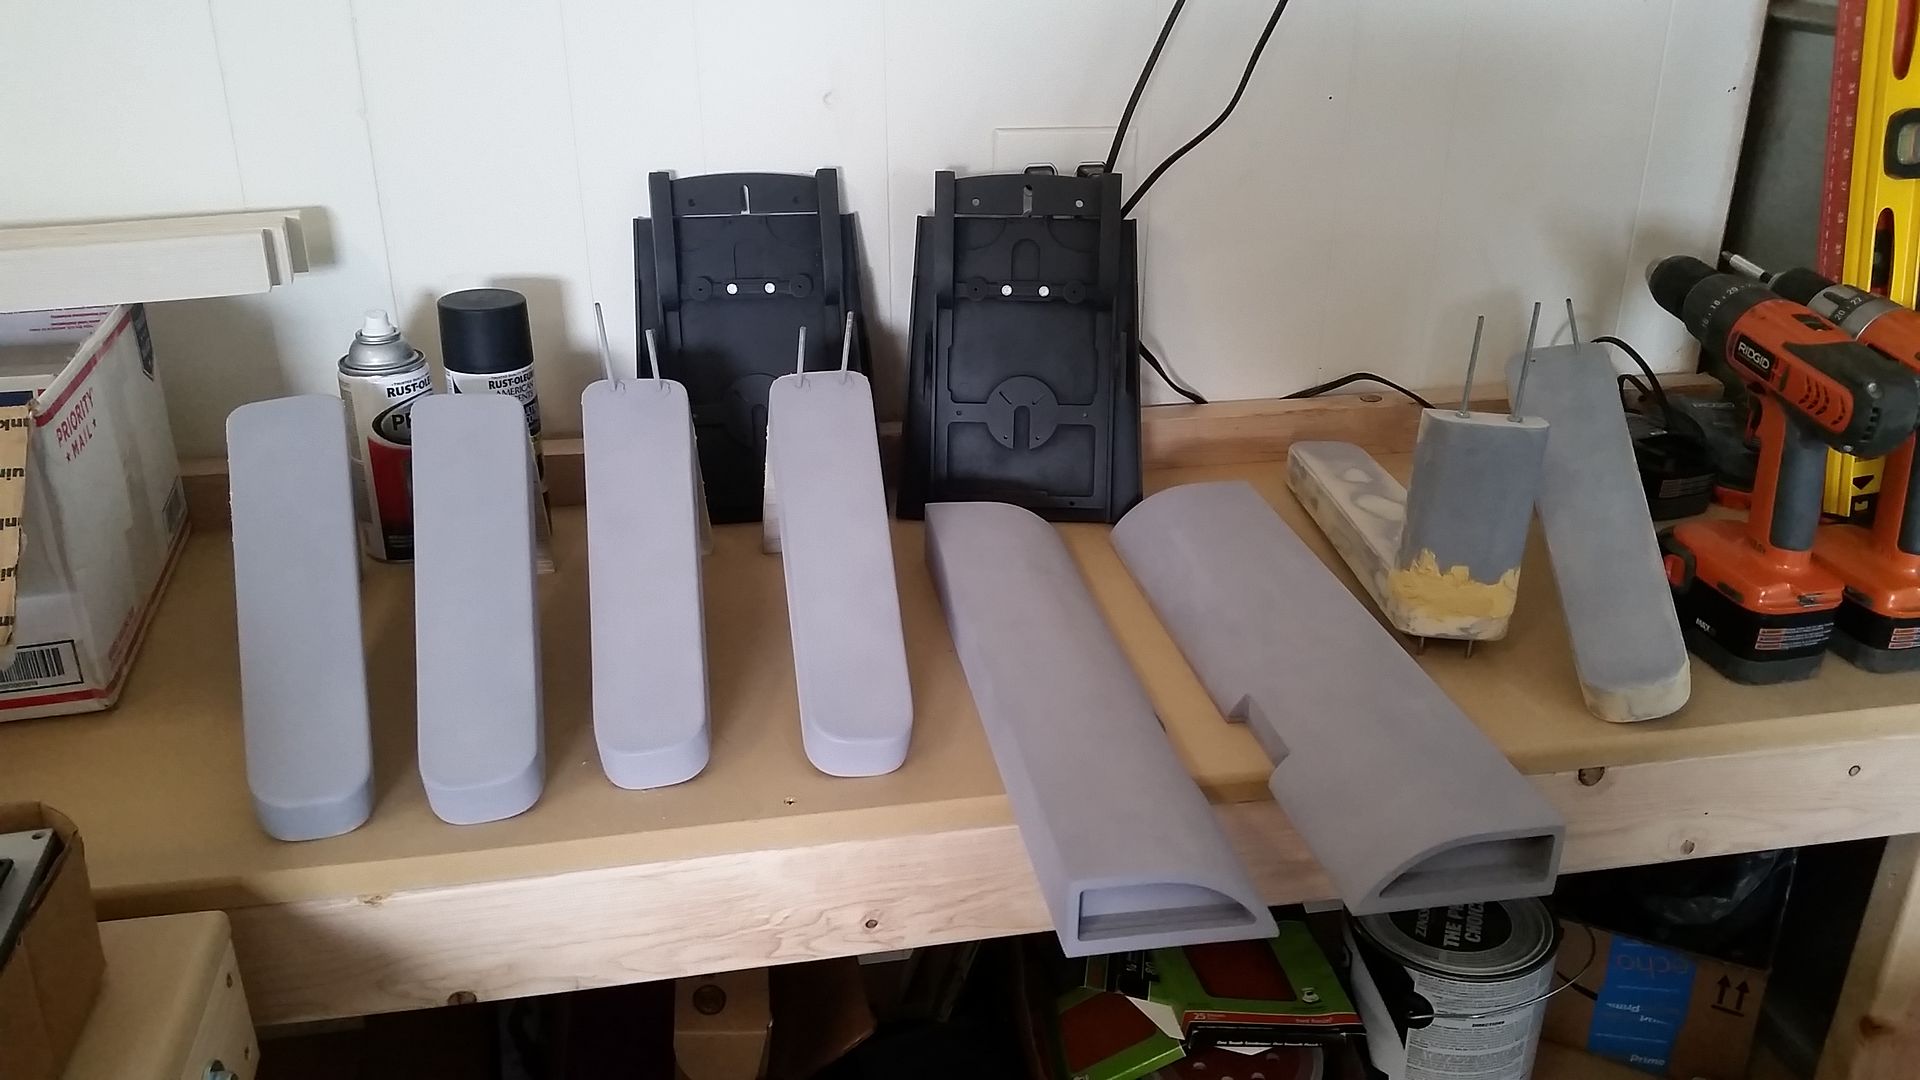
You guys know that my posts aren't complete without some kind of sanding, filler or primer, right?
Sanding
Primer

More Primer
And this where we are... more filler! I love filler. And sanding too...
Stay Tuned! More to Follow!
Quick Monday Night update...
I'm continuing work on all the smaller details on the nav chairs. The photos that Stormy has posted and forwarded of his real Martin Baker ejection seat have been a gold mine of info! As I explained in the post above, all this new information and the use of real world objects forced me to alter things. Basically, I have to work with what I have and what's readily available to me.
I laser cut this new piece
This part mounts to the new piece
After some fiddling I came up with a new basic shape so all the parts fit together
Mounted the pieces together
This is the basic final mounting position
Unfortunately, the pieces look too small because of the mods I had to do to the "Hockey Stick" frame - see above post
Drilled a hole
The assembly mounts into the frame through the headrest mounting posts - its very confusing!
To make it MORE accurate I stretched the piece a bit and etched the details instead of holes. No sure I like the etching, but the 3 silver pieces DEF need to be scaled/tweaked to, again, appear more accurate
I do like how it looks
I added paint to the headrests
Adding some of the final details
Needs a bit more weathering
More paint
In place
Do you guys think they should be scaled/mod'd to match the wider frame?
You guys know that my posts aren't complete without some kind of sanding, filler or primer, right?
Sanding
Primer
More Primer
And this where we are... more filler! I love filler. And sanding too...
Stay Tuned! More to Follow!
So much talent and hard work going into this as usual. Always impressed when I check in on this thread.
Hey P,
Thanks so much! Indeed... lots of work! There is ALWAYS something going on. No rest for the weary!
IzzyMel
Sr Member
Greg,
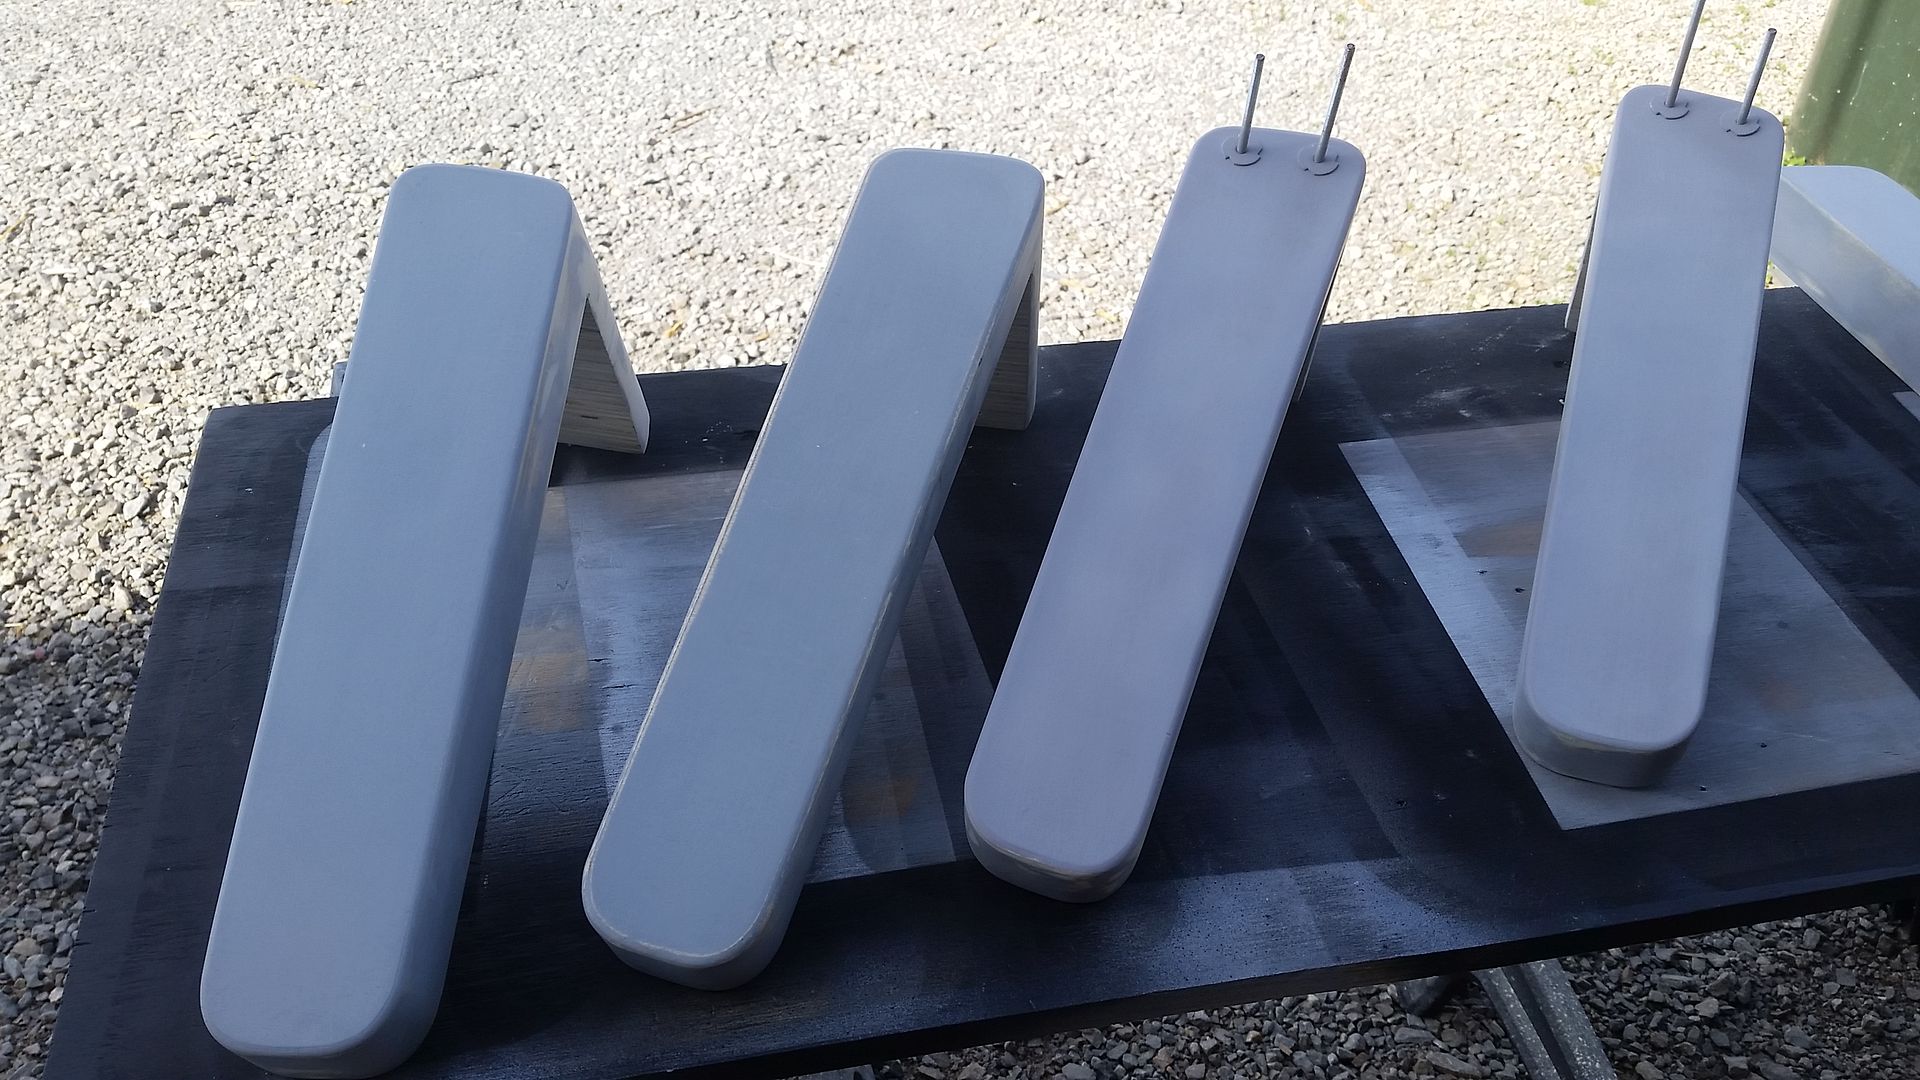
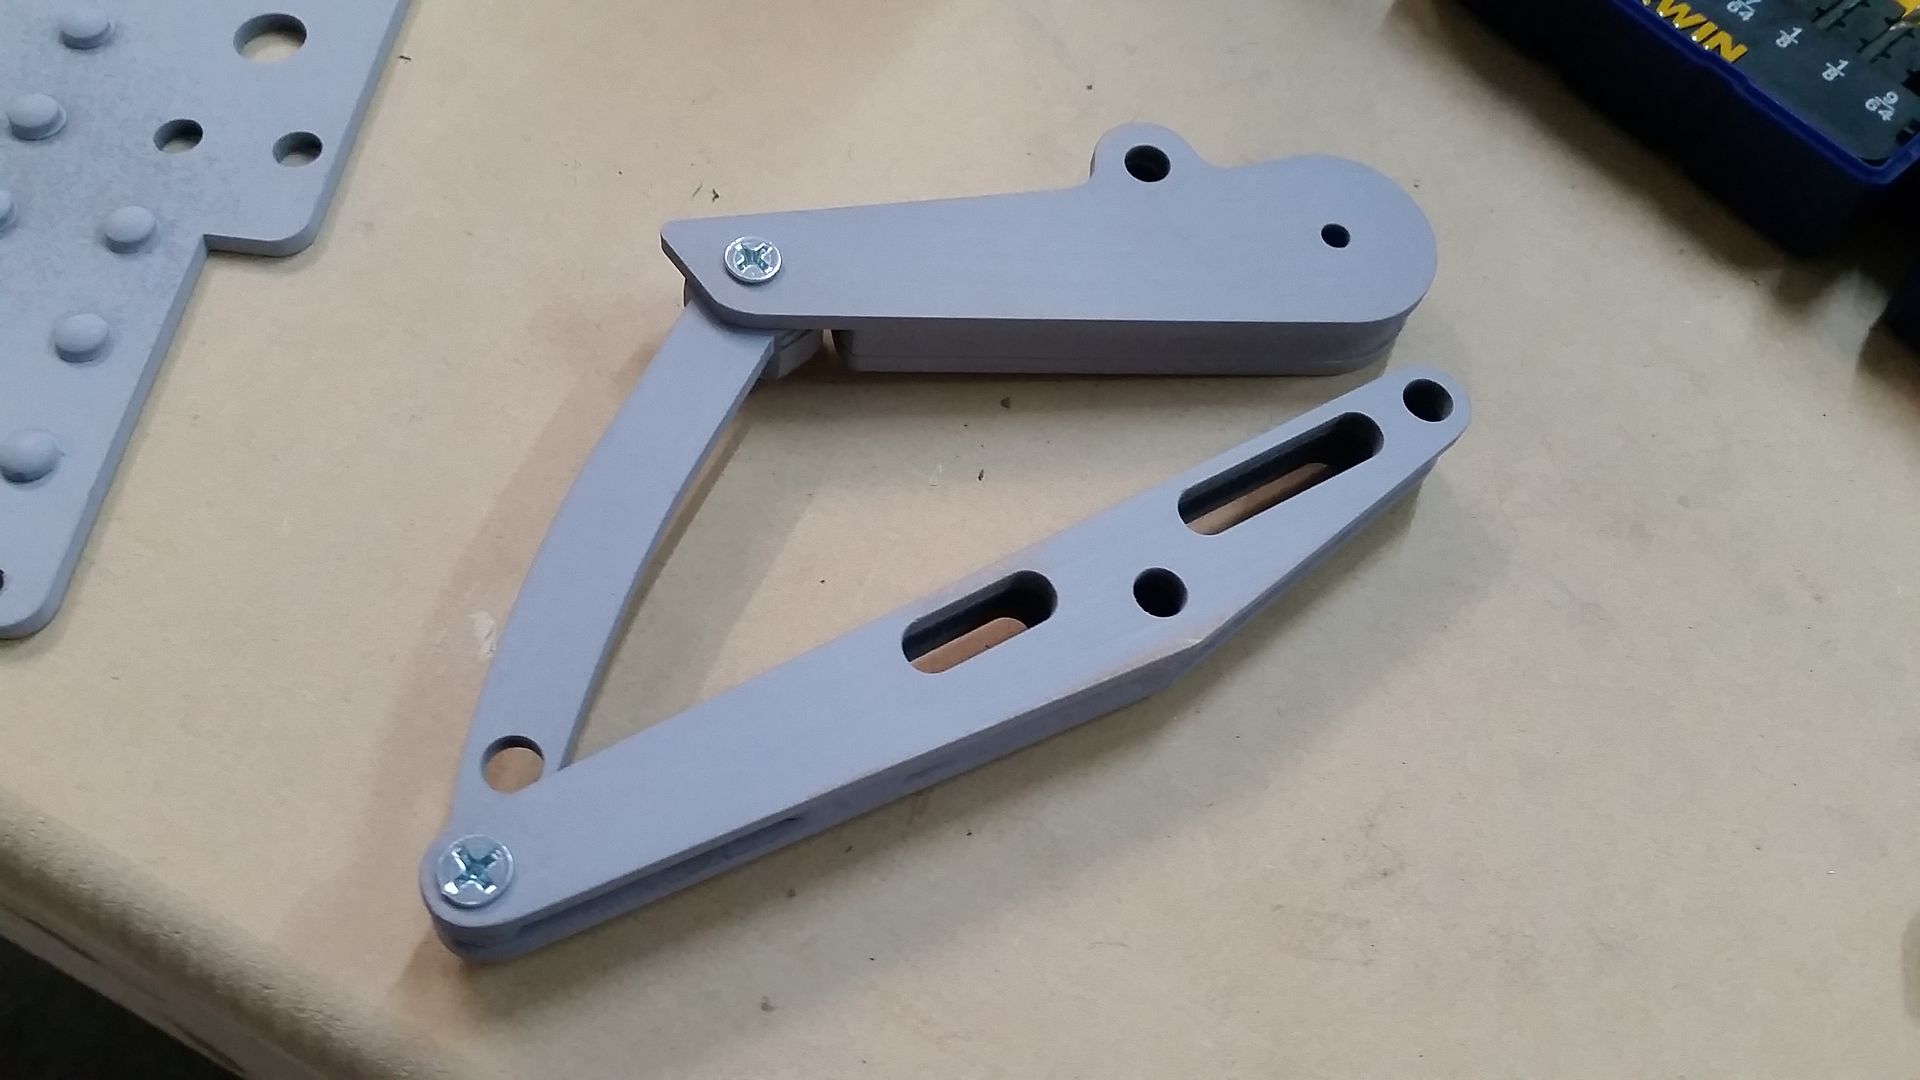
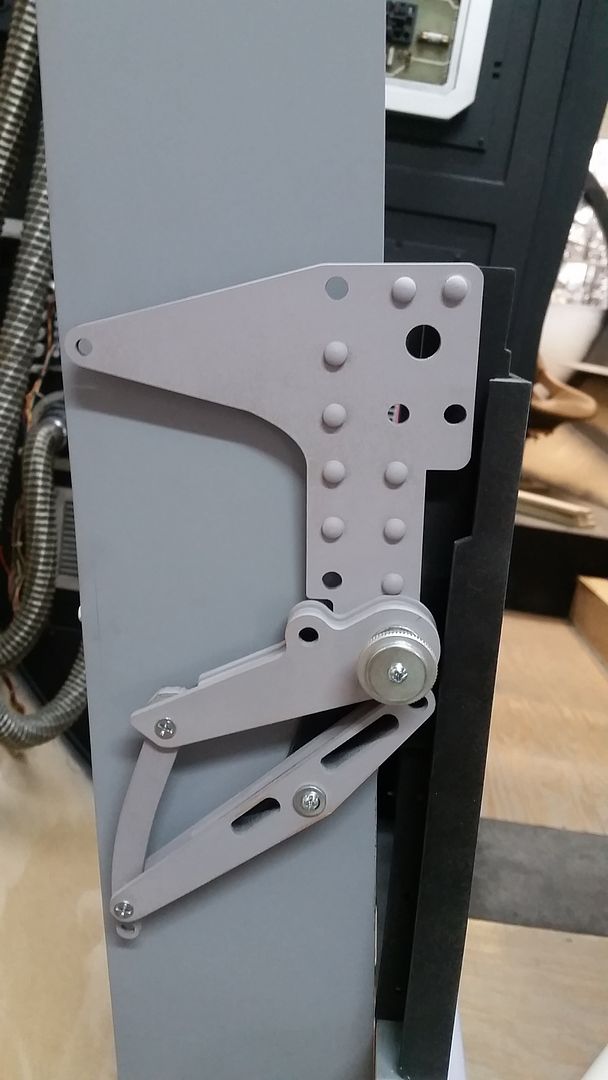
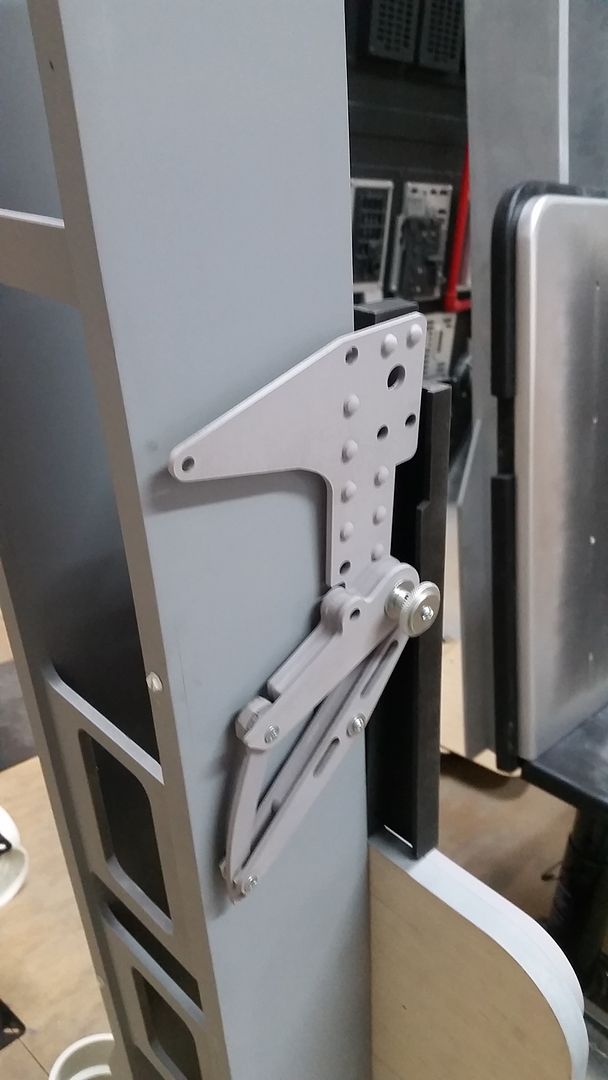
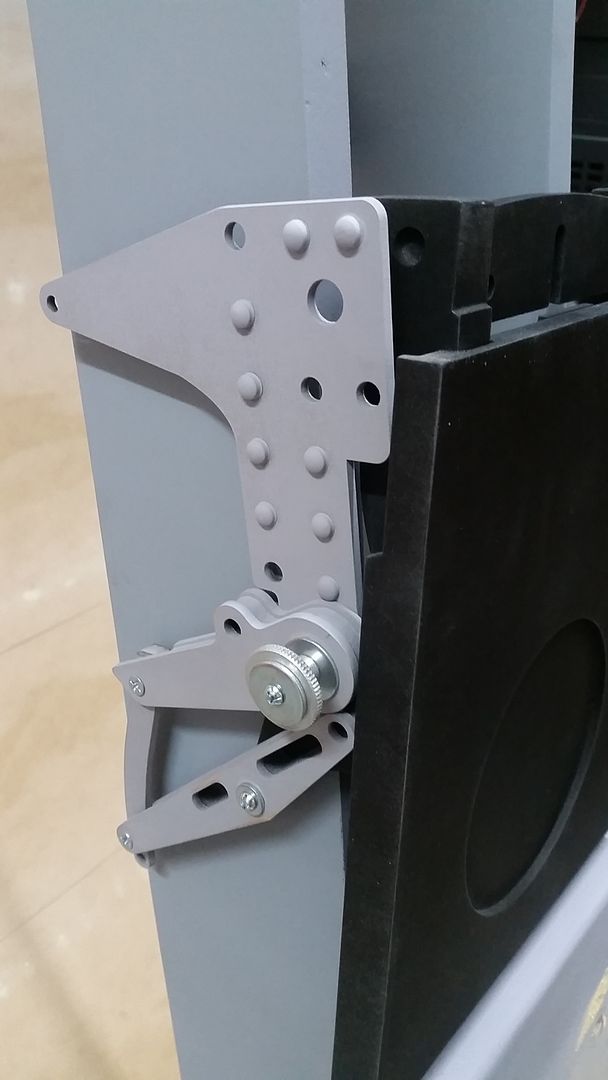
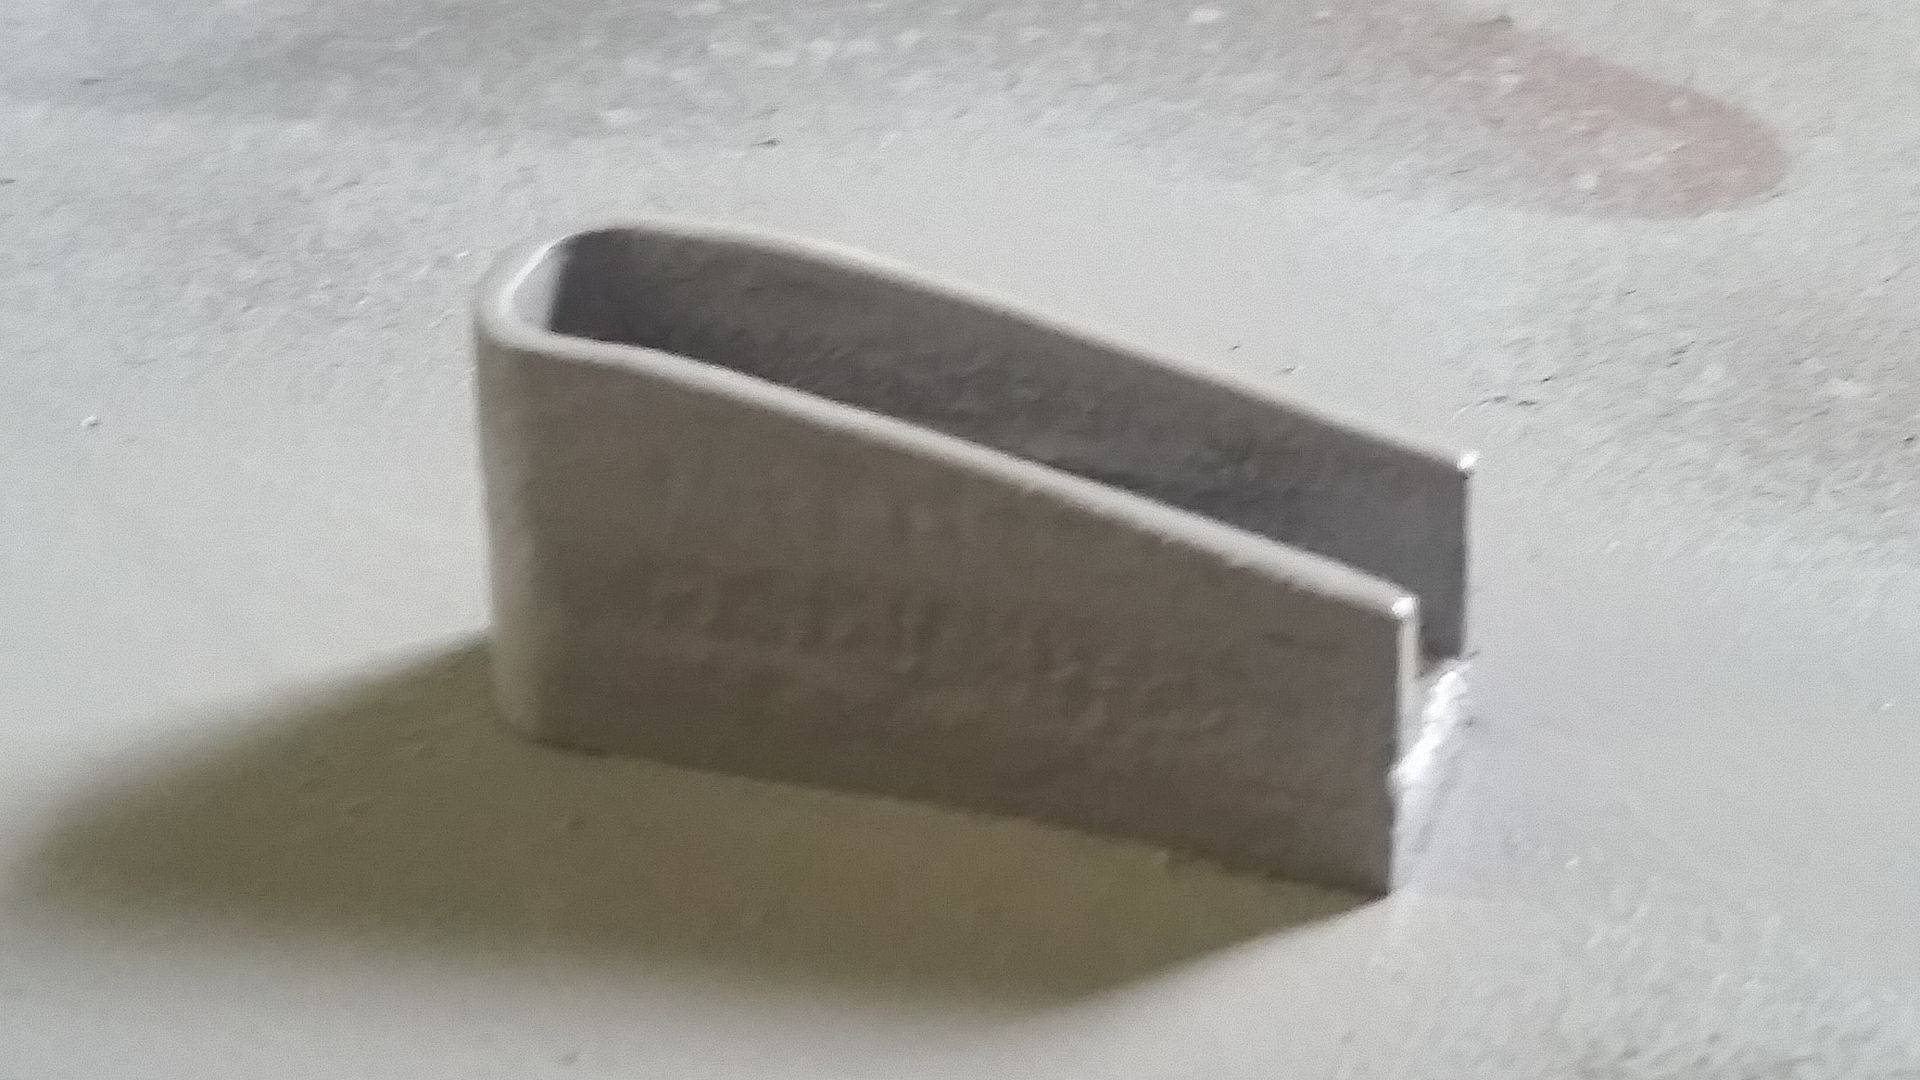
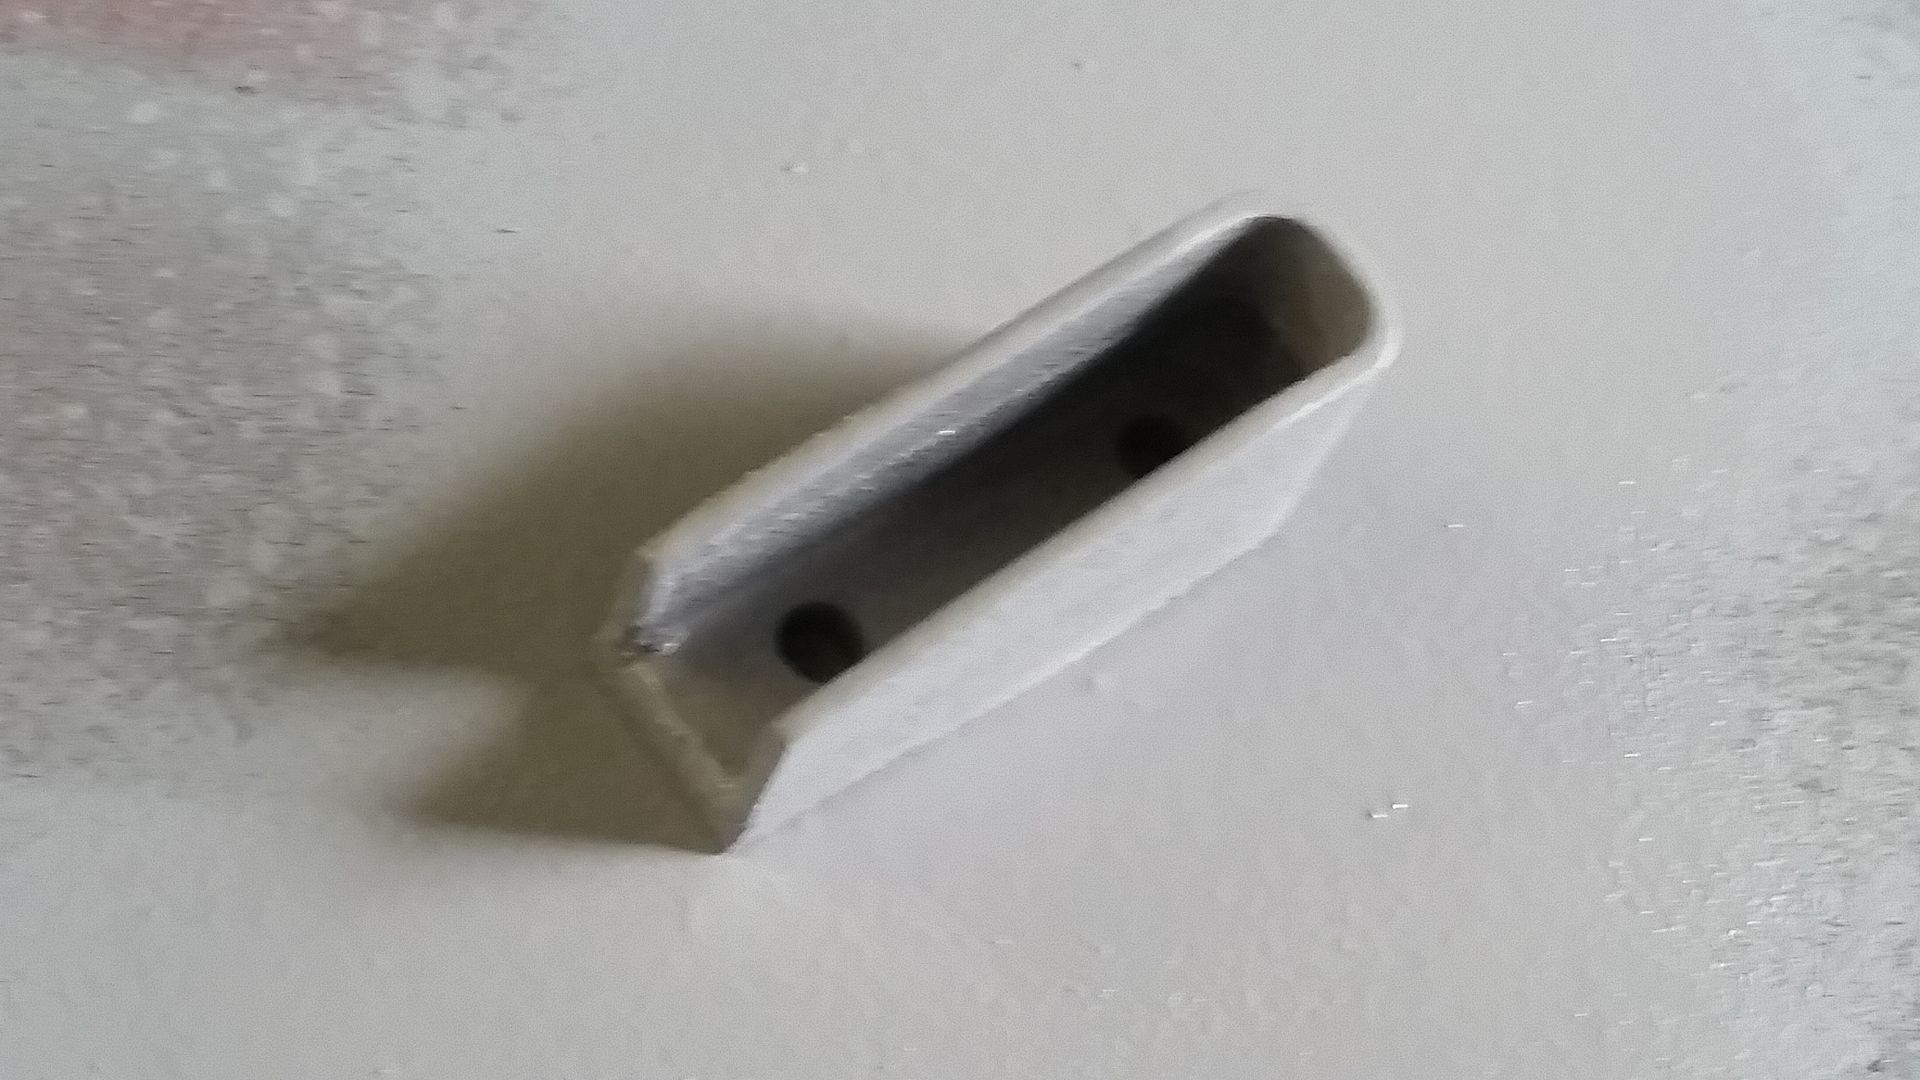
here is what I have so far on the right side piston on the NAV Chair. Have a few more tweaks and it should be done. I left holes at the top and bottom, that way you can use a PVC pipe instead of trying to print a pipe.
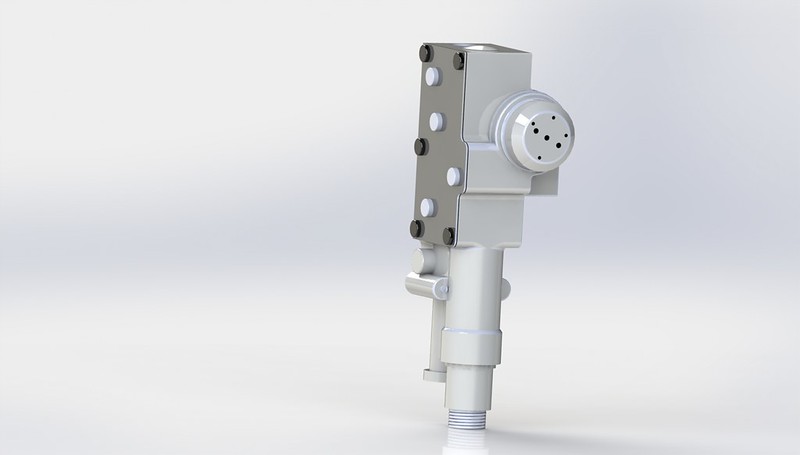 right piston greeblie by Izzy Mel, on Flickr
here is what I have so far on the right side piston on the NAV Chair. Have a few more tweaks and it should be done. I left holes at the top and bottom, that way you can use a PVC pipe instead of trying to print a pipe.
right piston greeblie by Izzy Mel, on FlickrGreg,
here is what I have so far on the right side piston on the NAV Chair. Have a few more tweaks and it should be done. I left holes at the top and bottom, that way you can use a PVC pipe instead of trying to print a pipe.
https://c1.staticflickr.com/3/2849/33121286334_32787ec0a9_c.jpgright piston greeblie by Izzy Mel, on Flickr
BEAUTIFUL!!! I can't wait to have this printed and mounted! BRILLIANT!
SofaKing01 and gang, you are a great inspiration. I've followed you since the beginning and love every update. I've finished work on my own console ANH version, and began working on a small portion of the cockpit with front window. Keep up the great work on the Best prop project ever!
-Eric
Hey C,
Long time no chat! As always, thanks so much for the continued support and kind words. Hope all is well with you and yours? Would enjoy seeing images of your continung adventures!
Hi Gang,
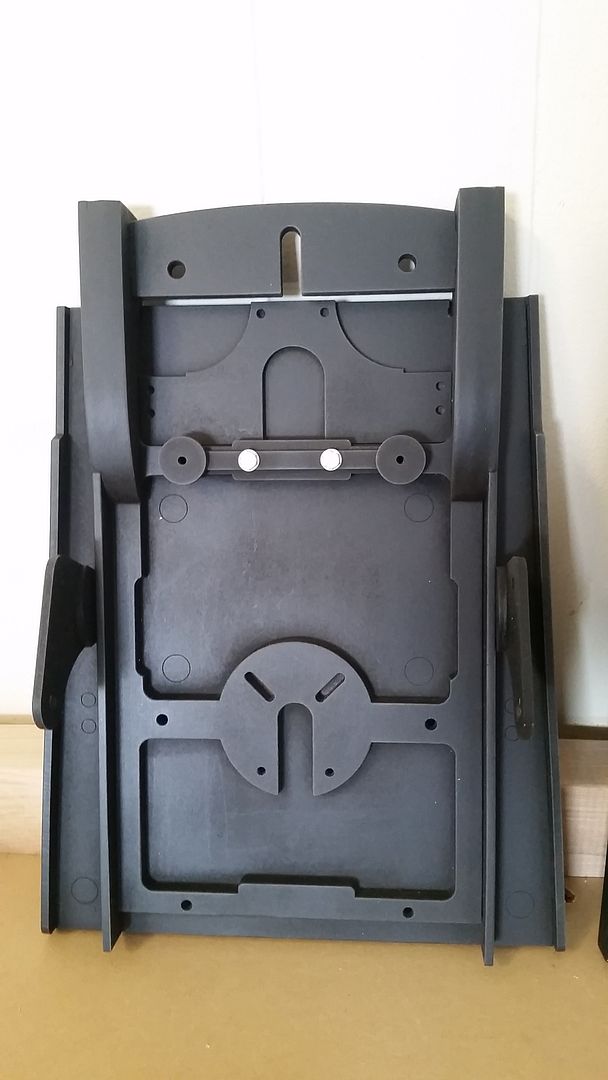
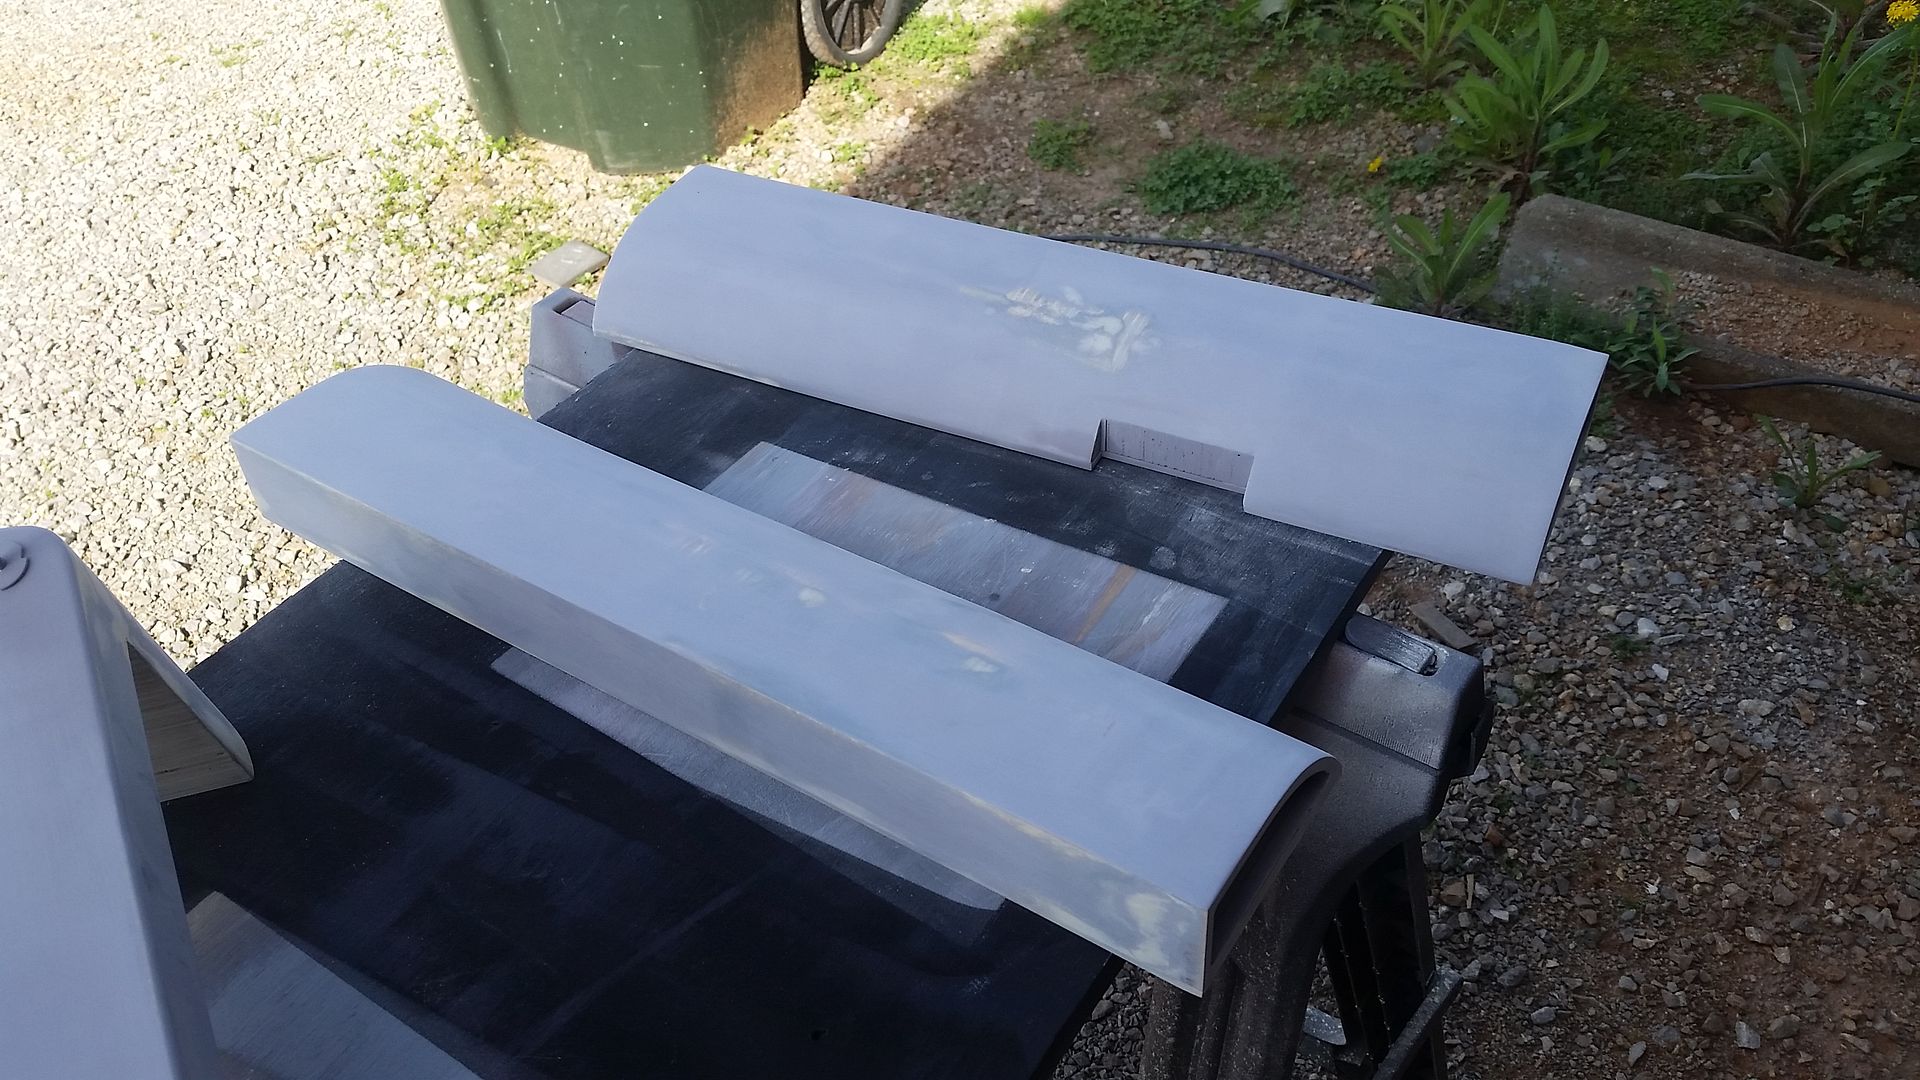
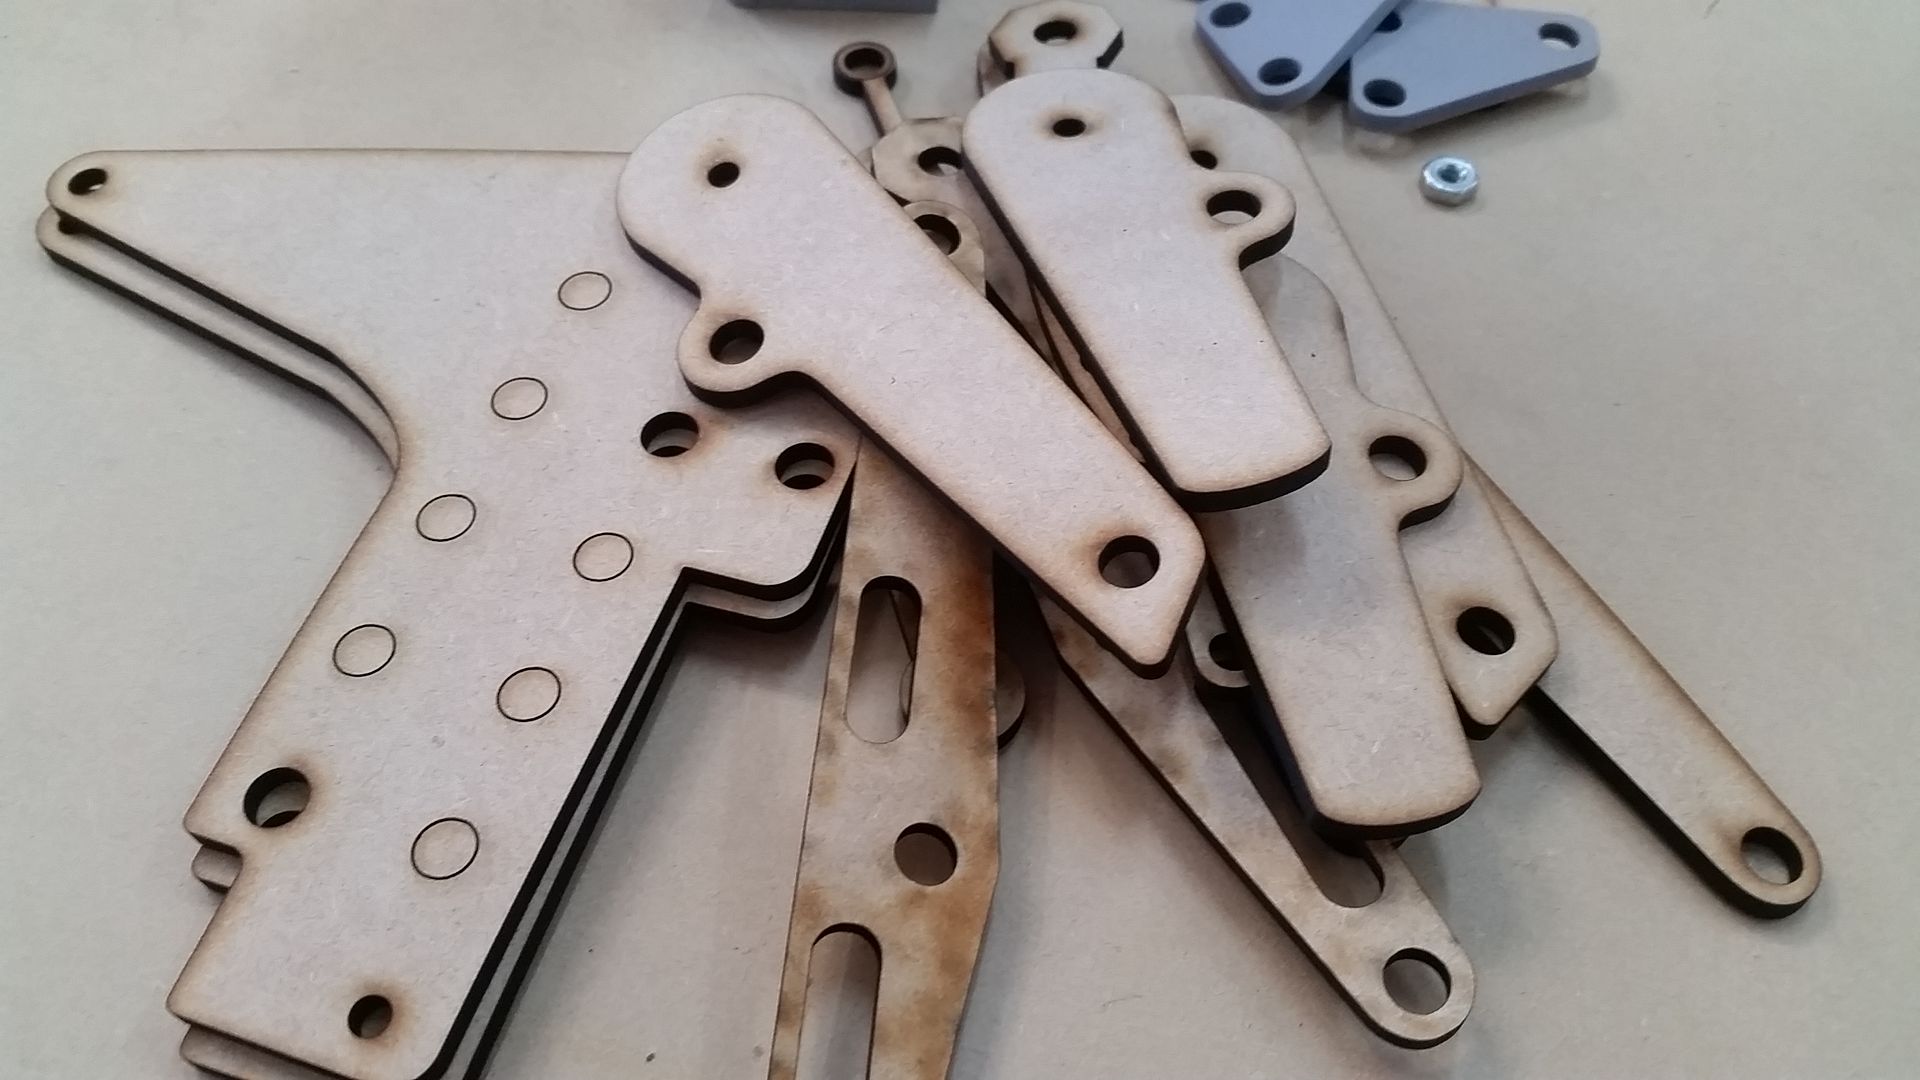
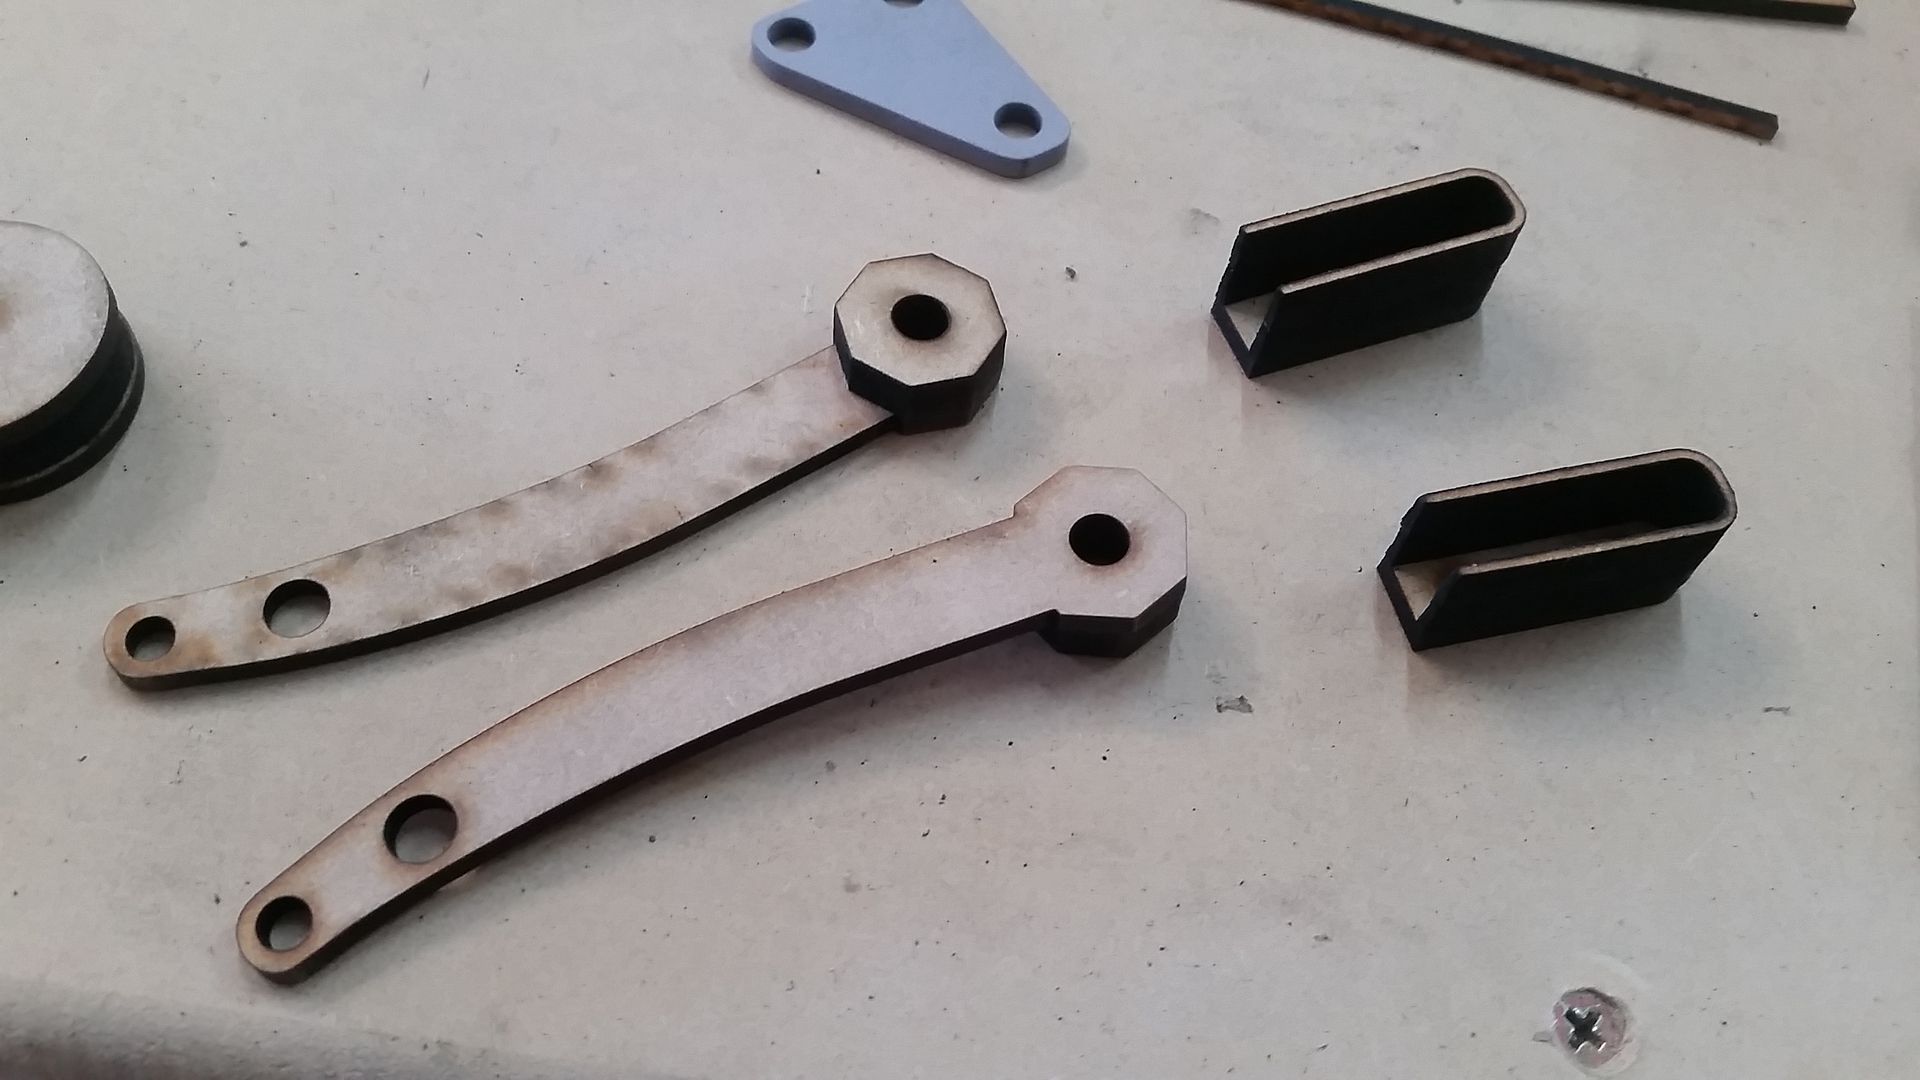
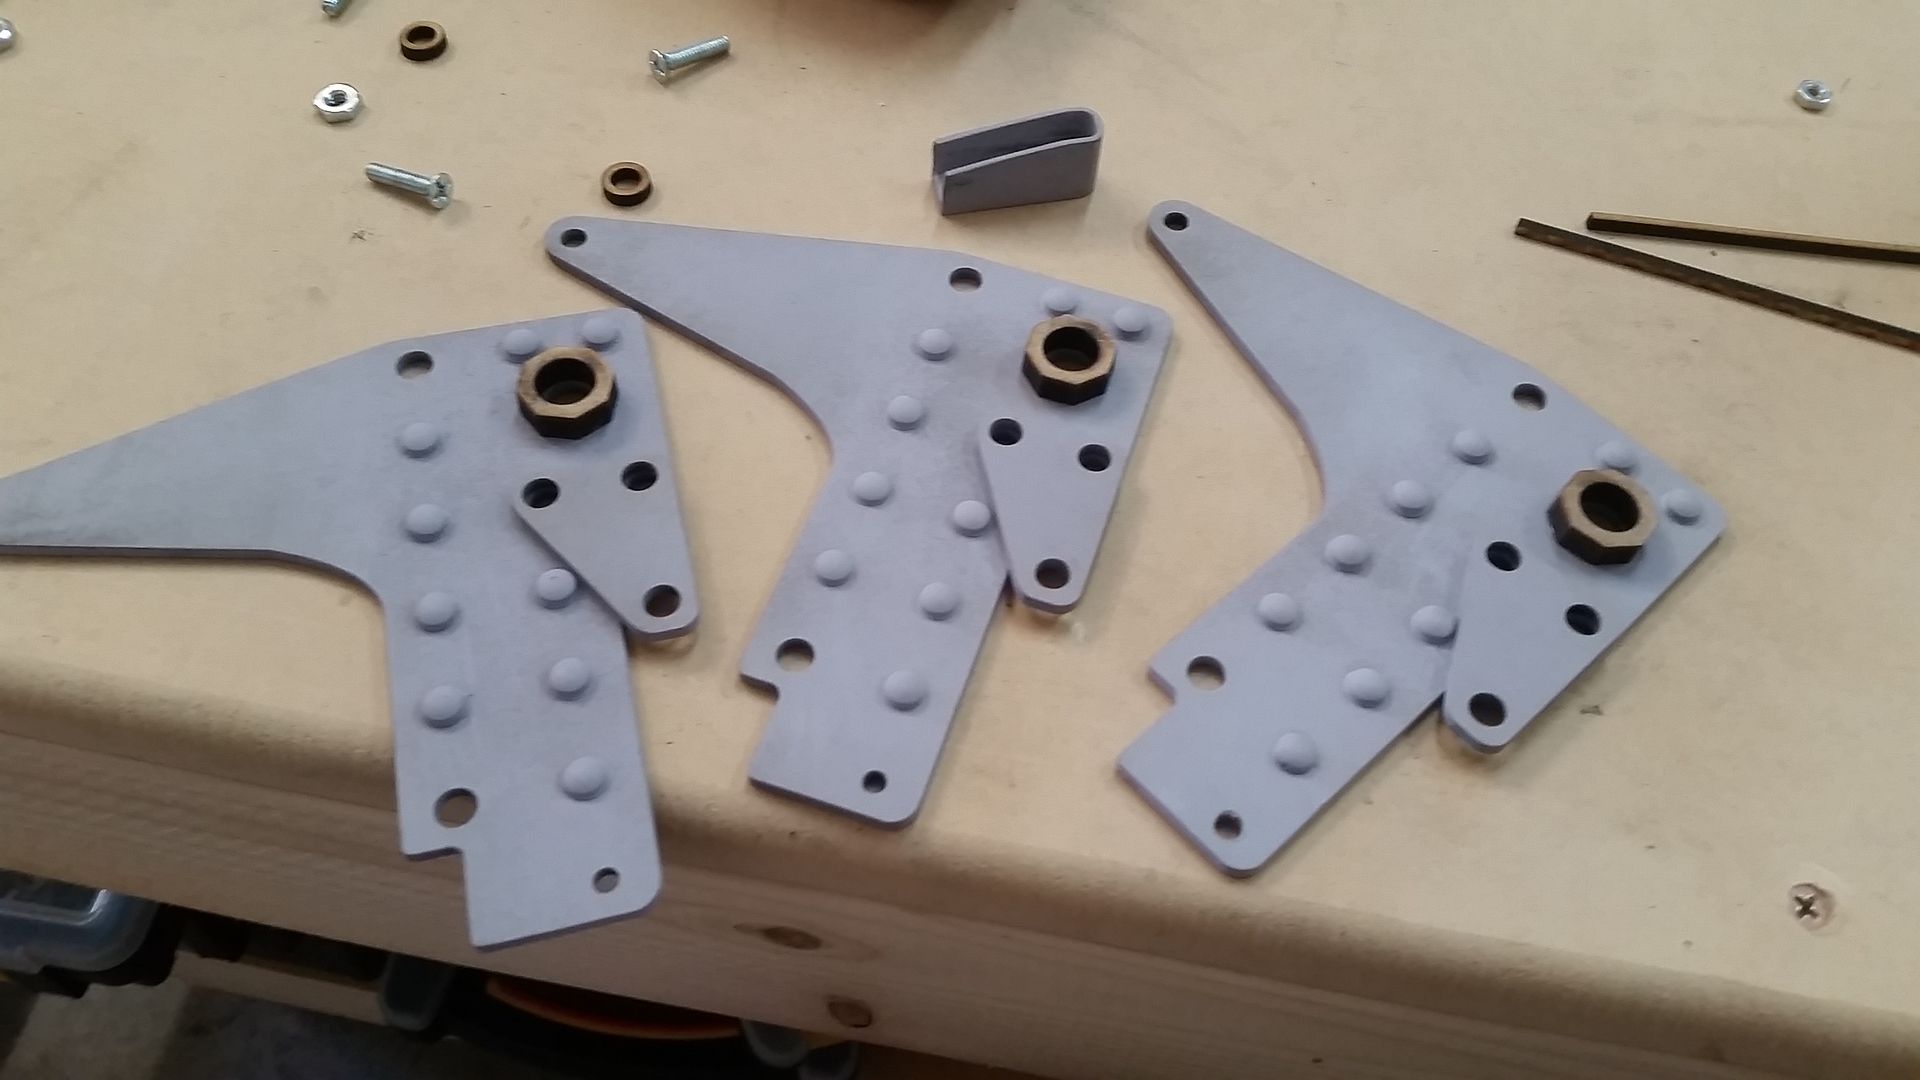
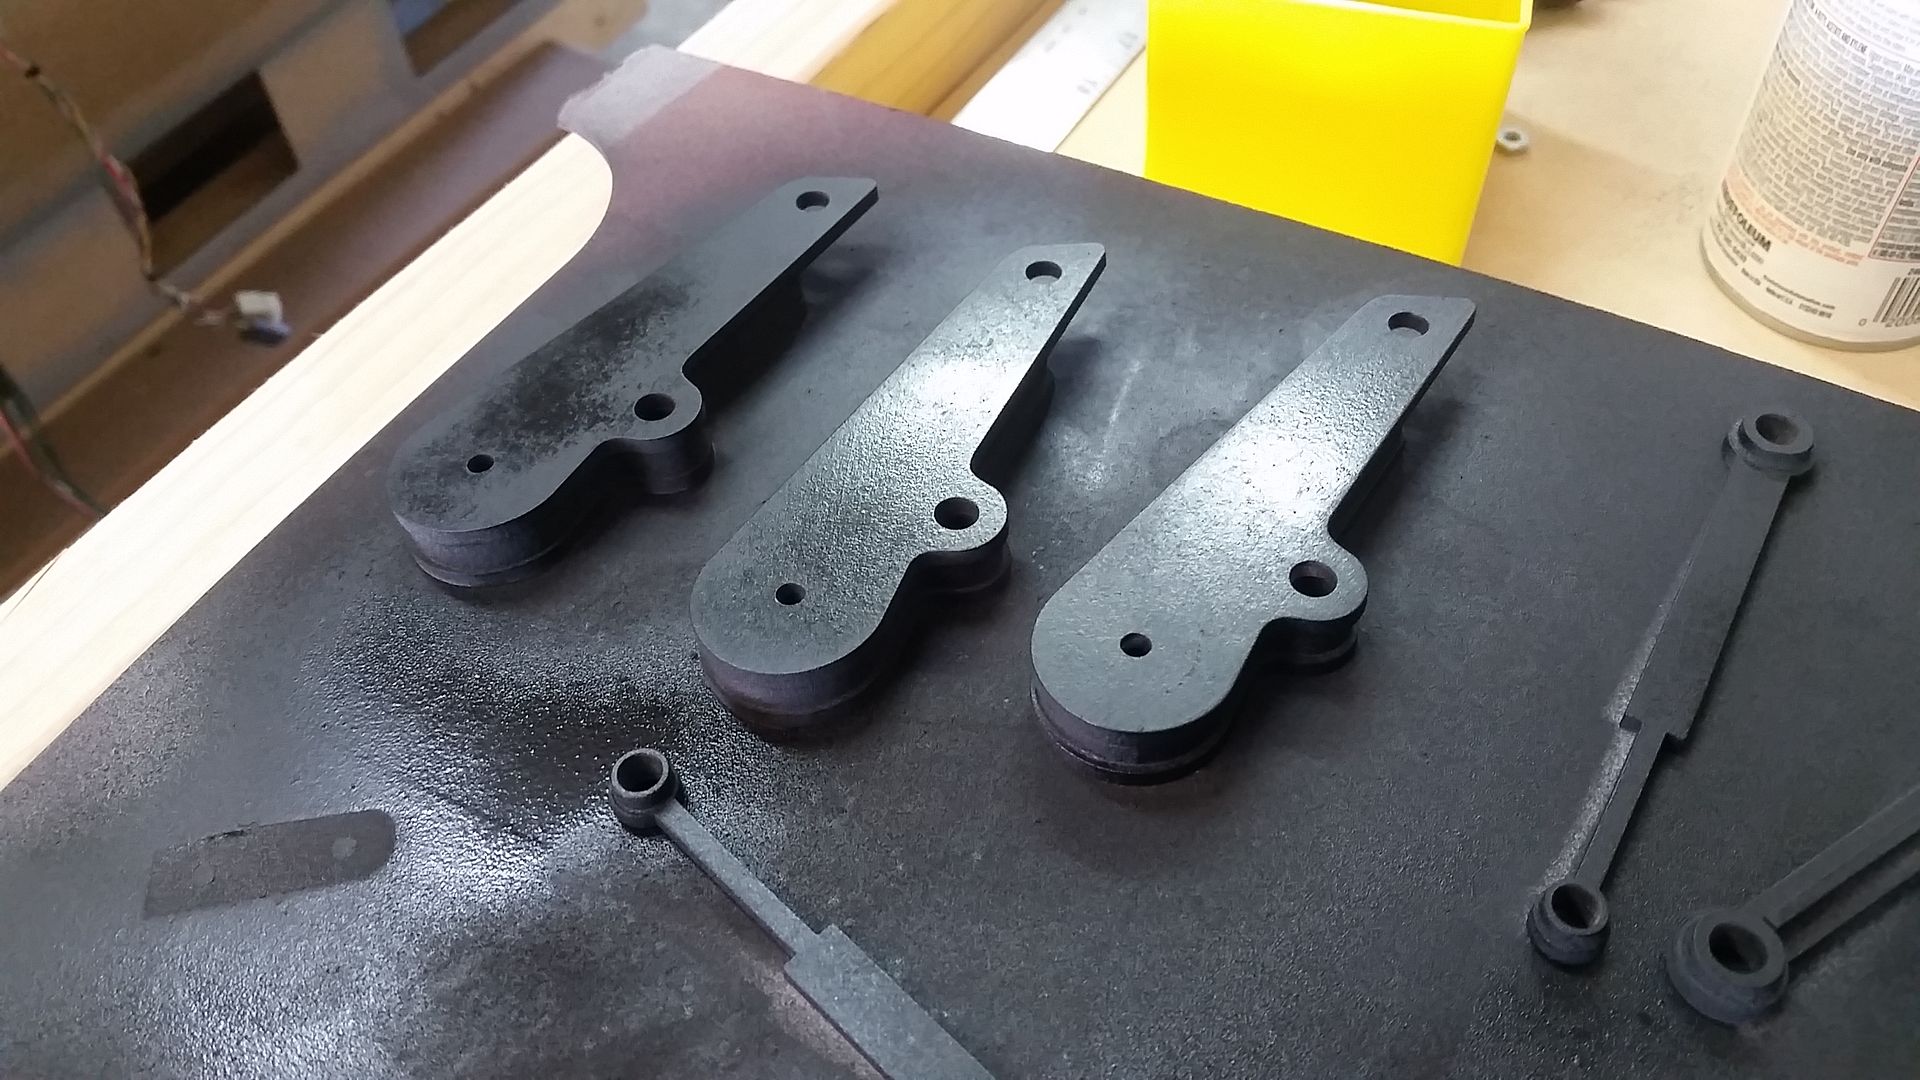
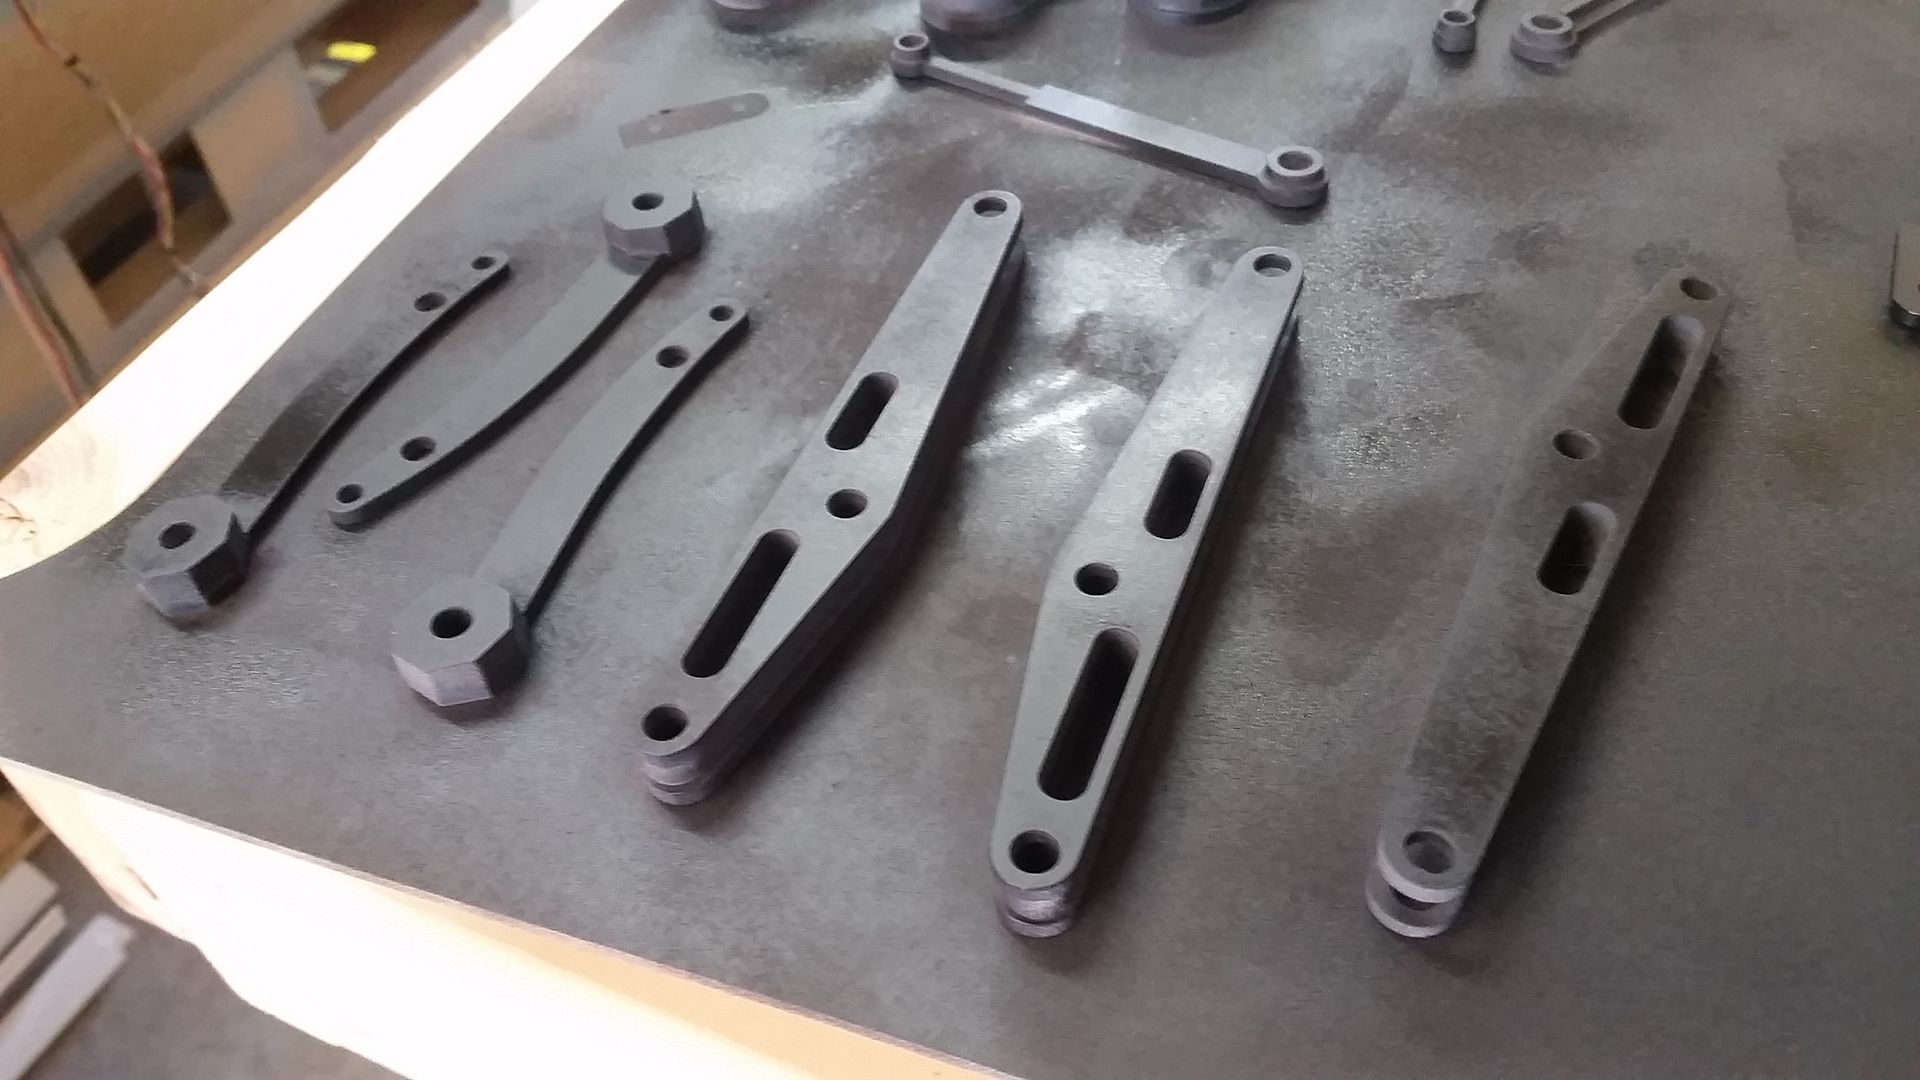
Another early morning update! I shot over to the shop after work to laser cut some test pieces I created earlier yesterday morning. I think these are going to work! What do you all think?
Same basic shape of the originals but slightly wider
More images of the chair came my way so I took advantage!
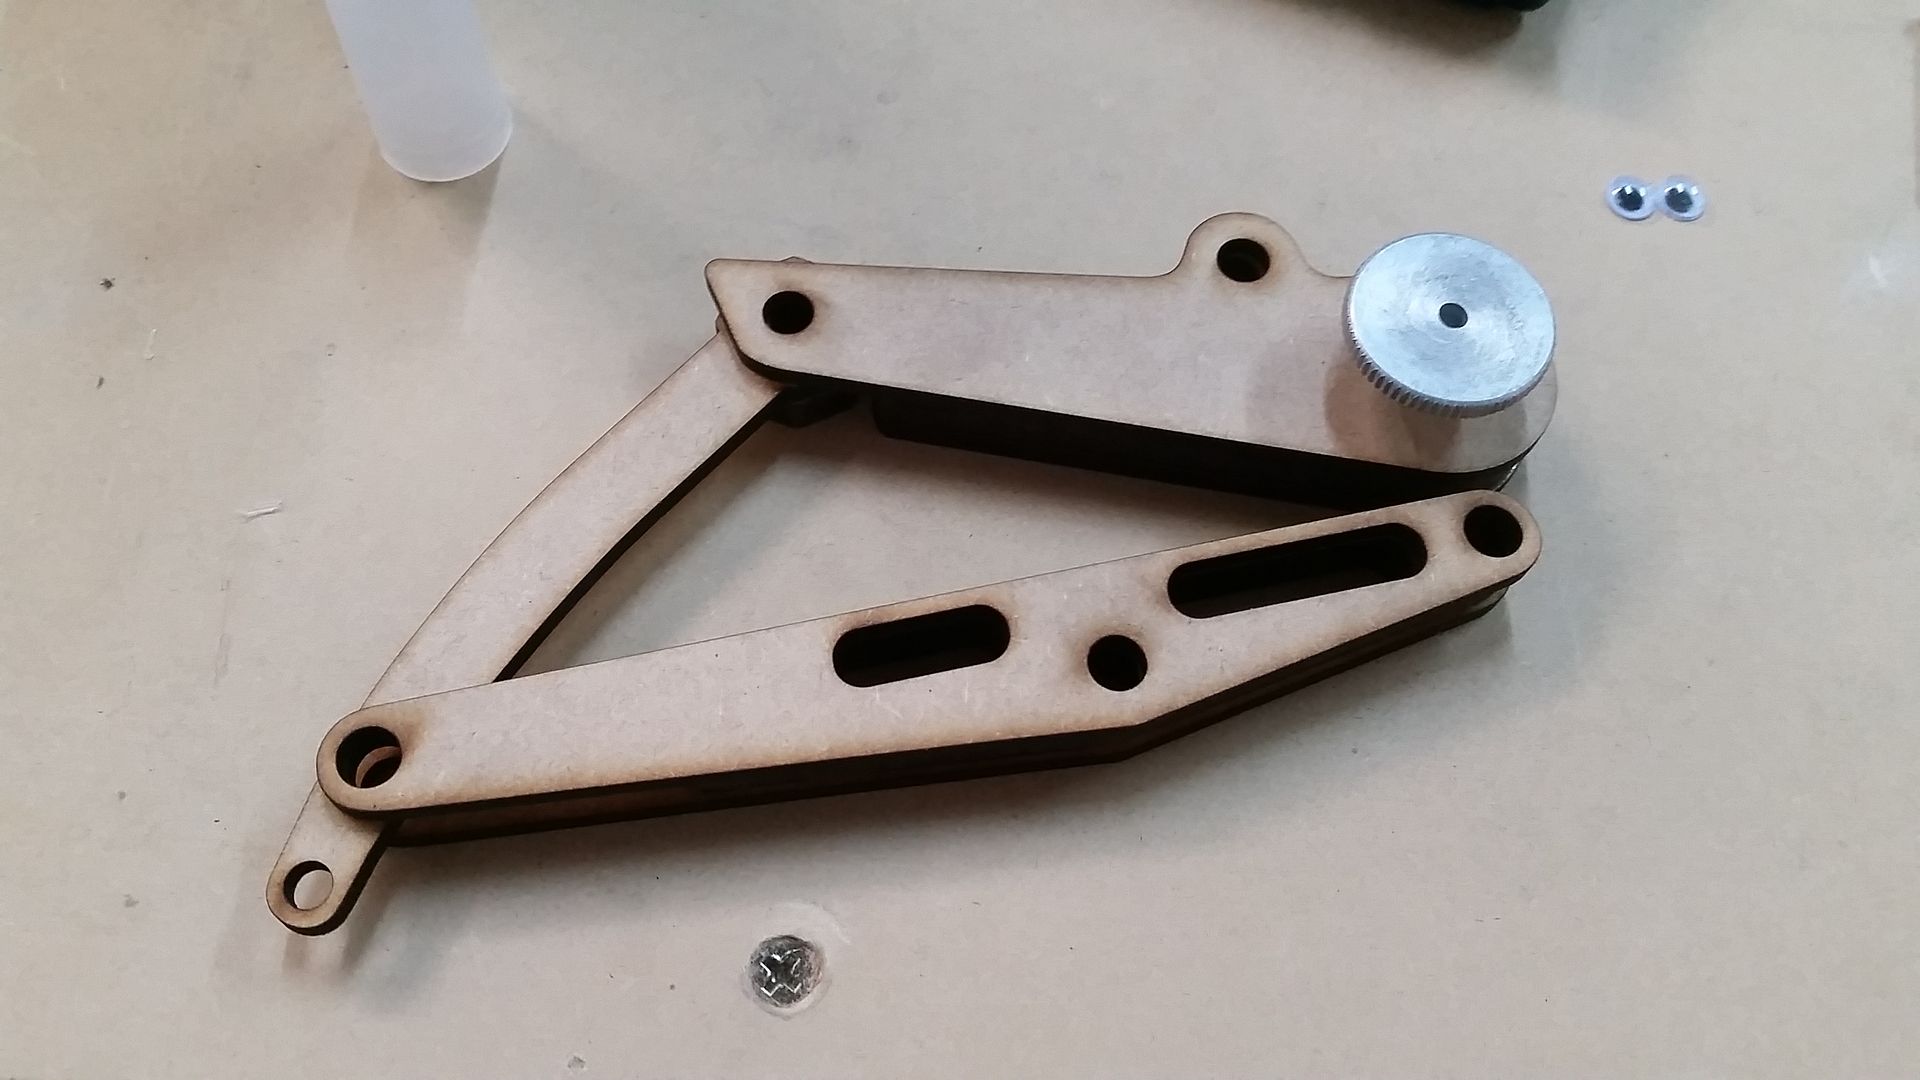
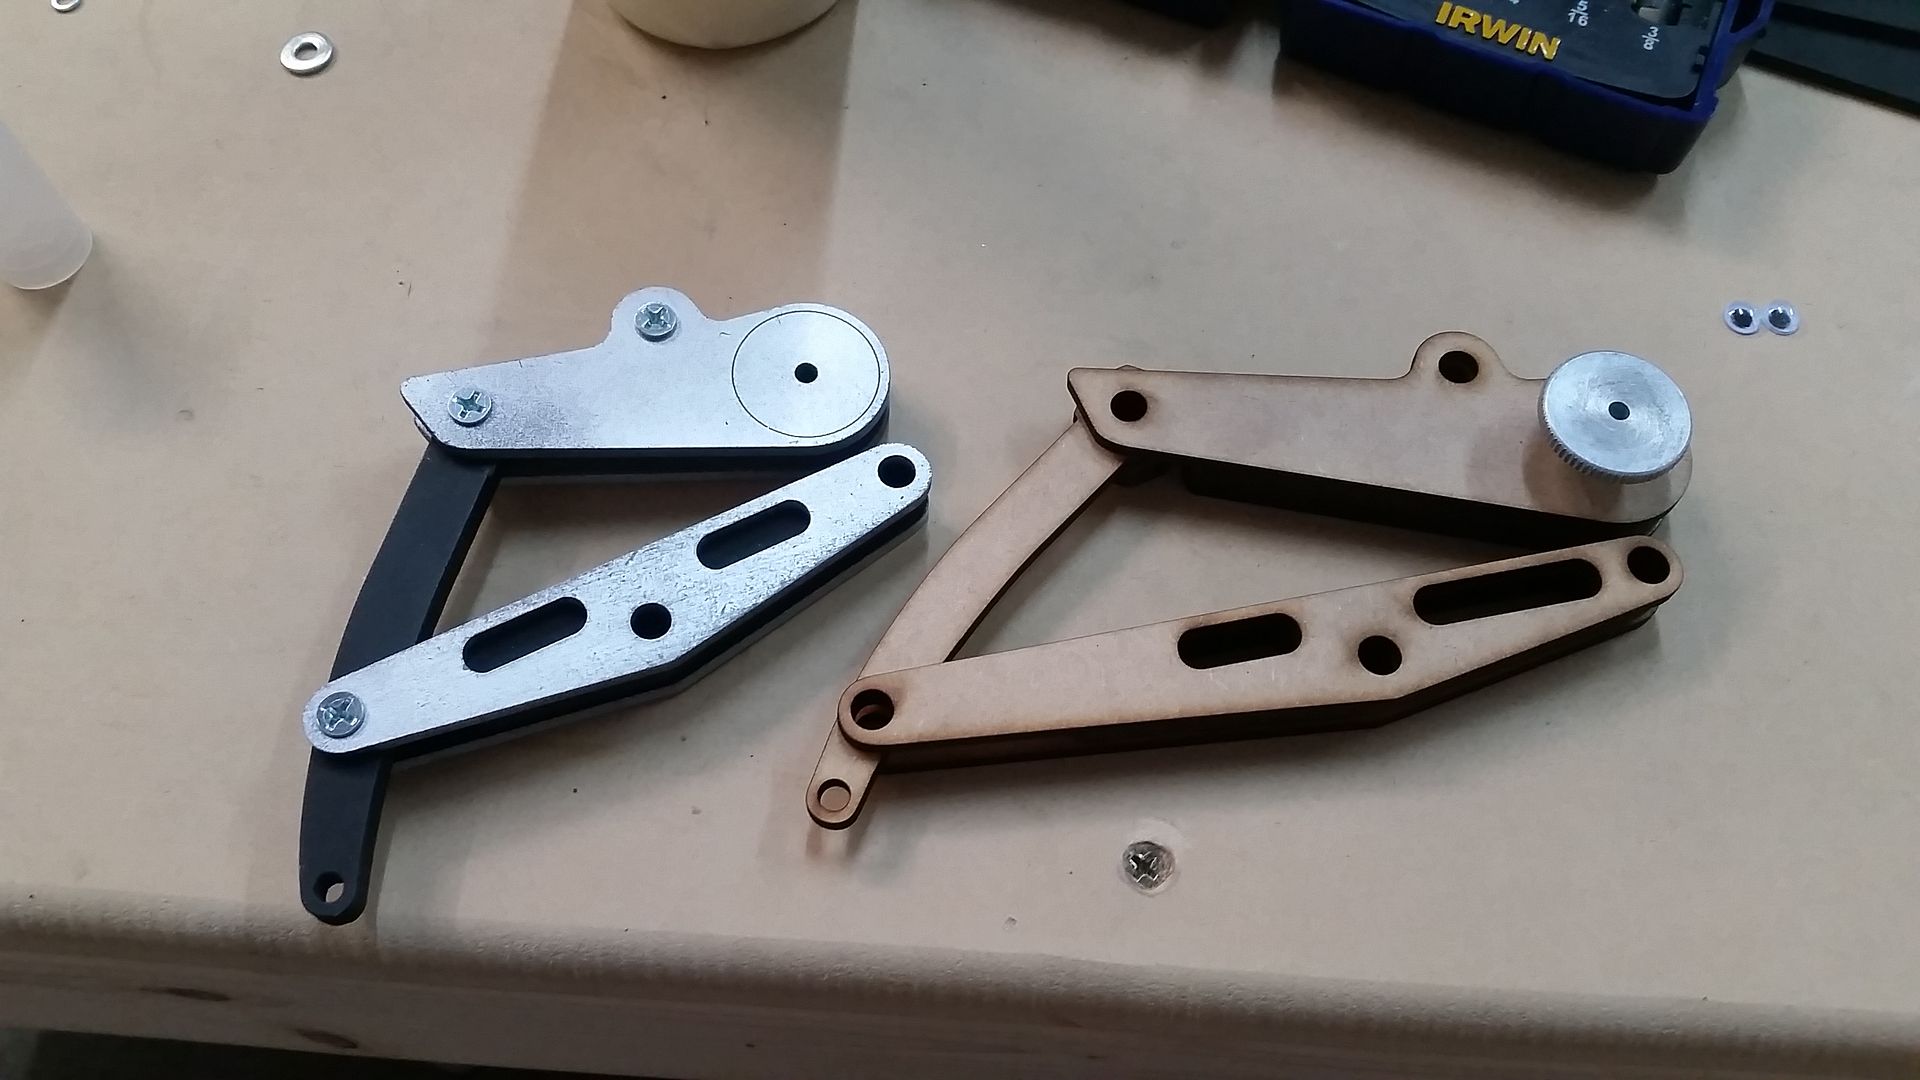
Old vs New
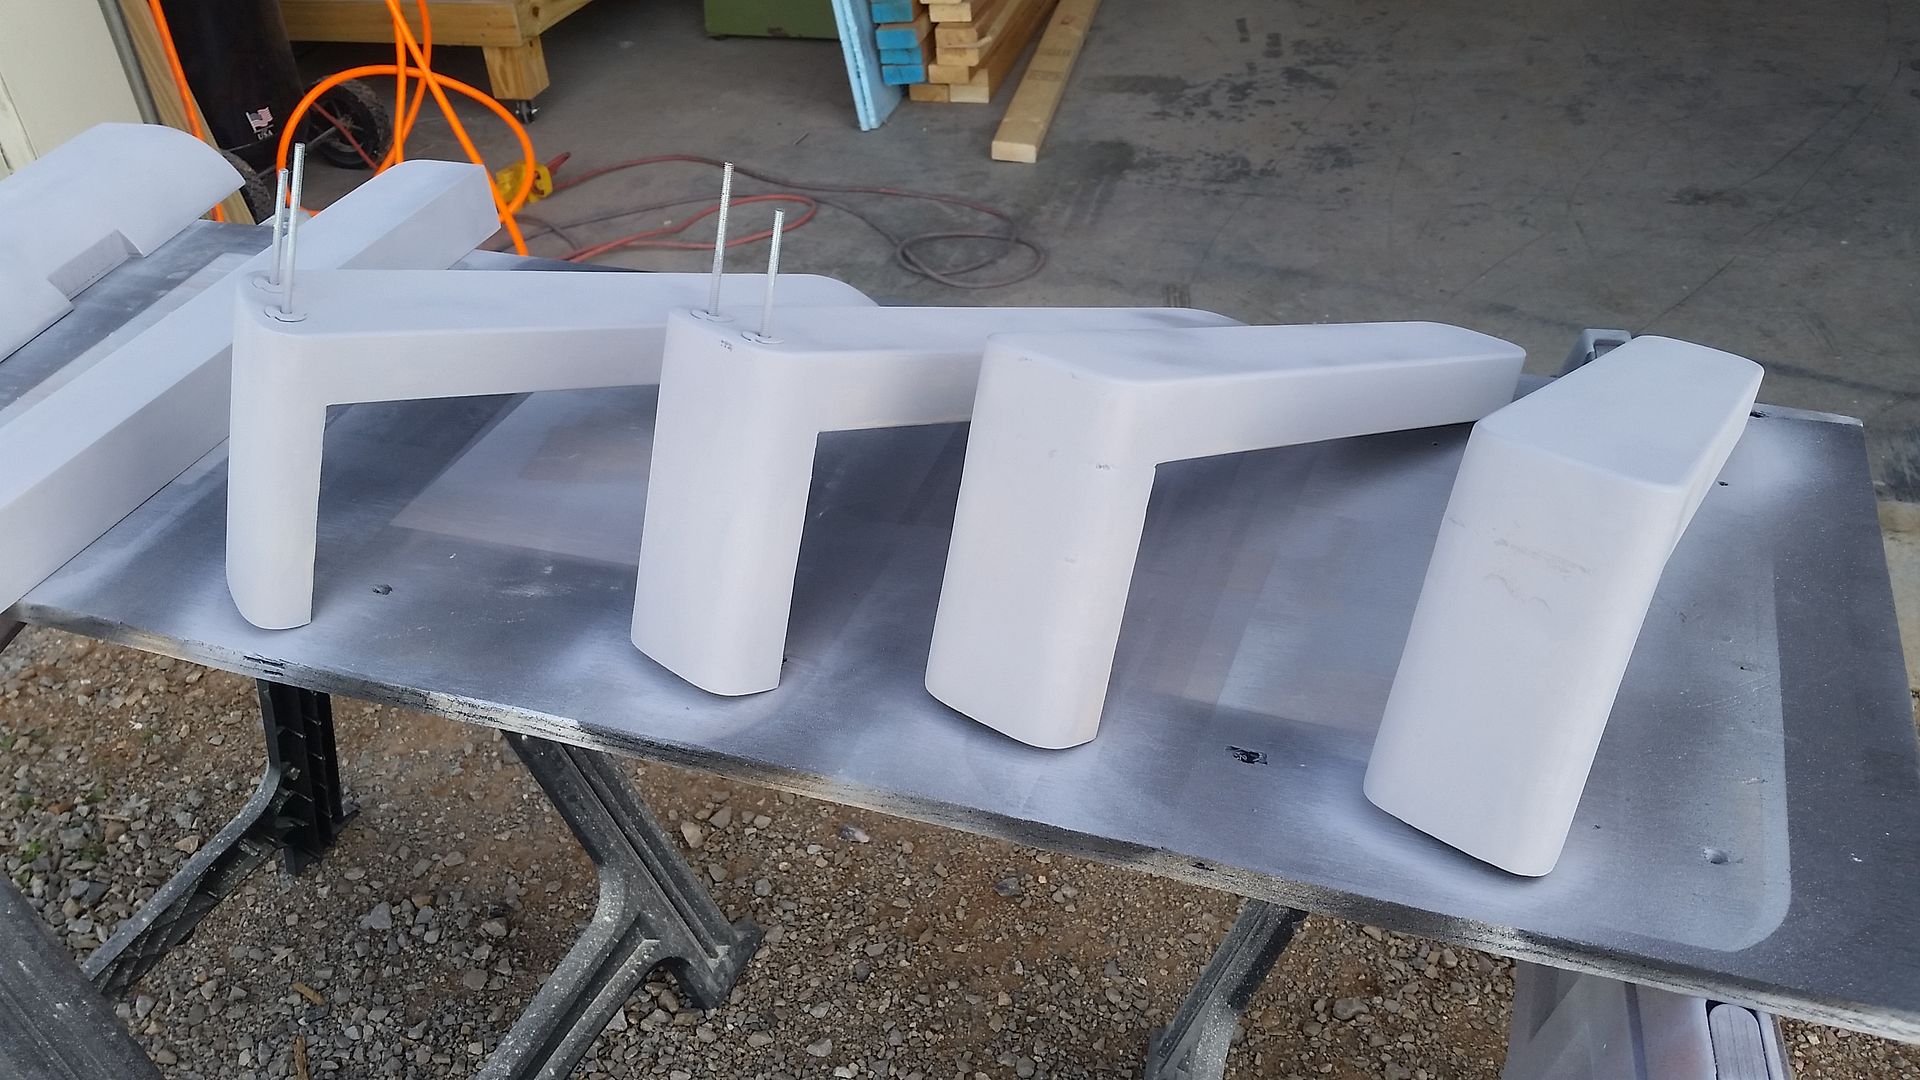
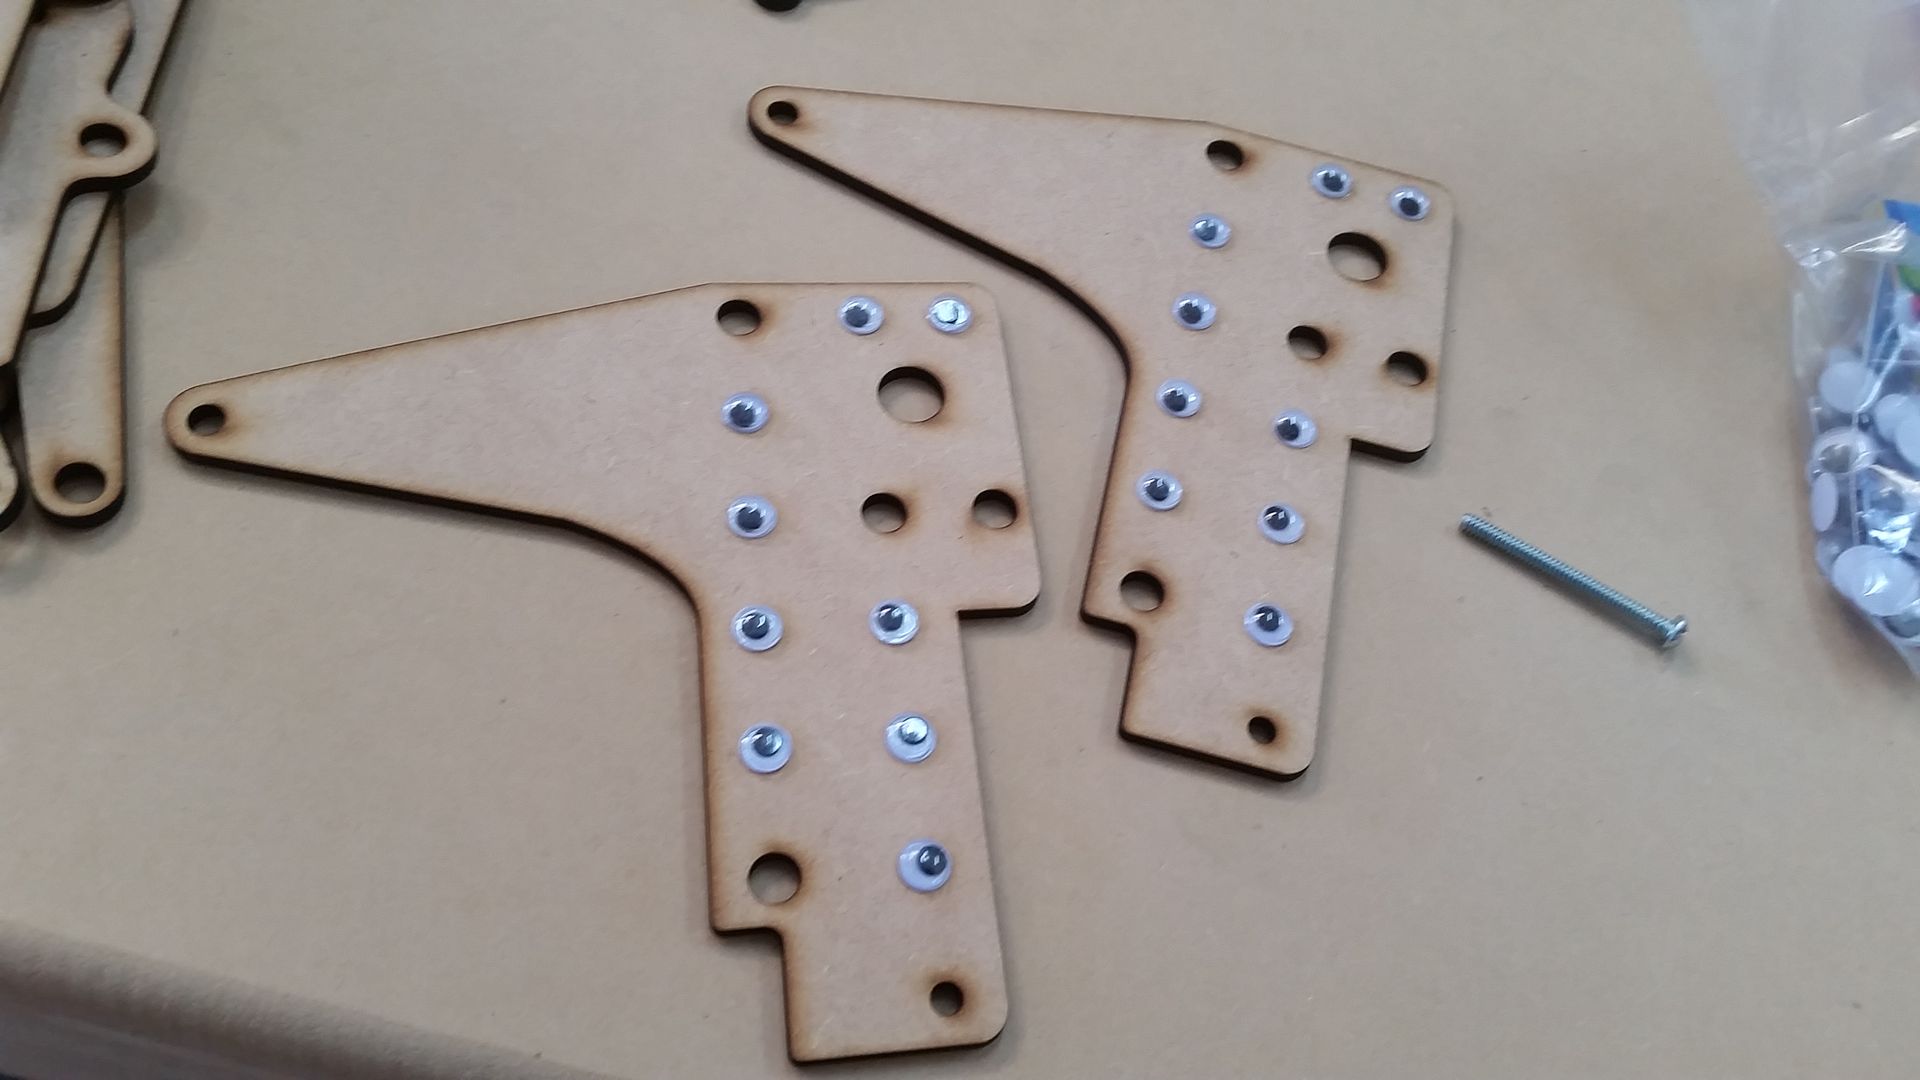
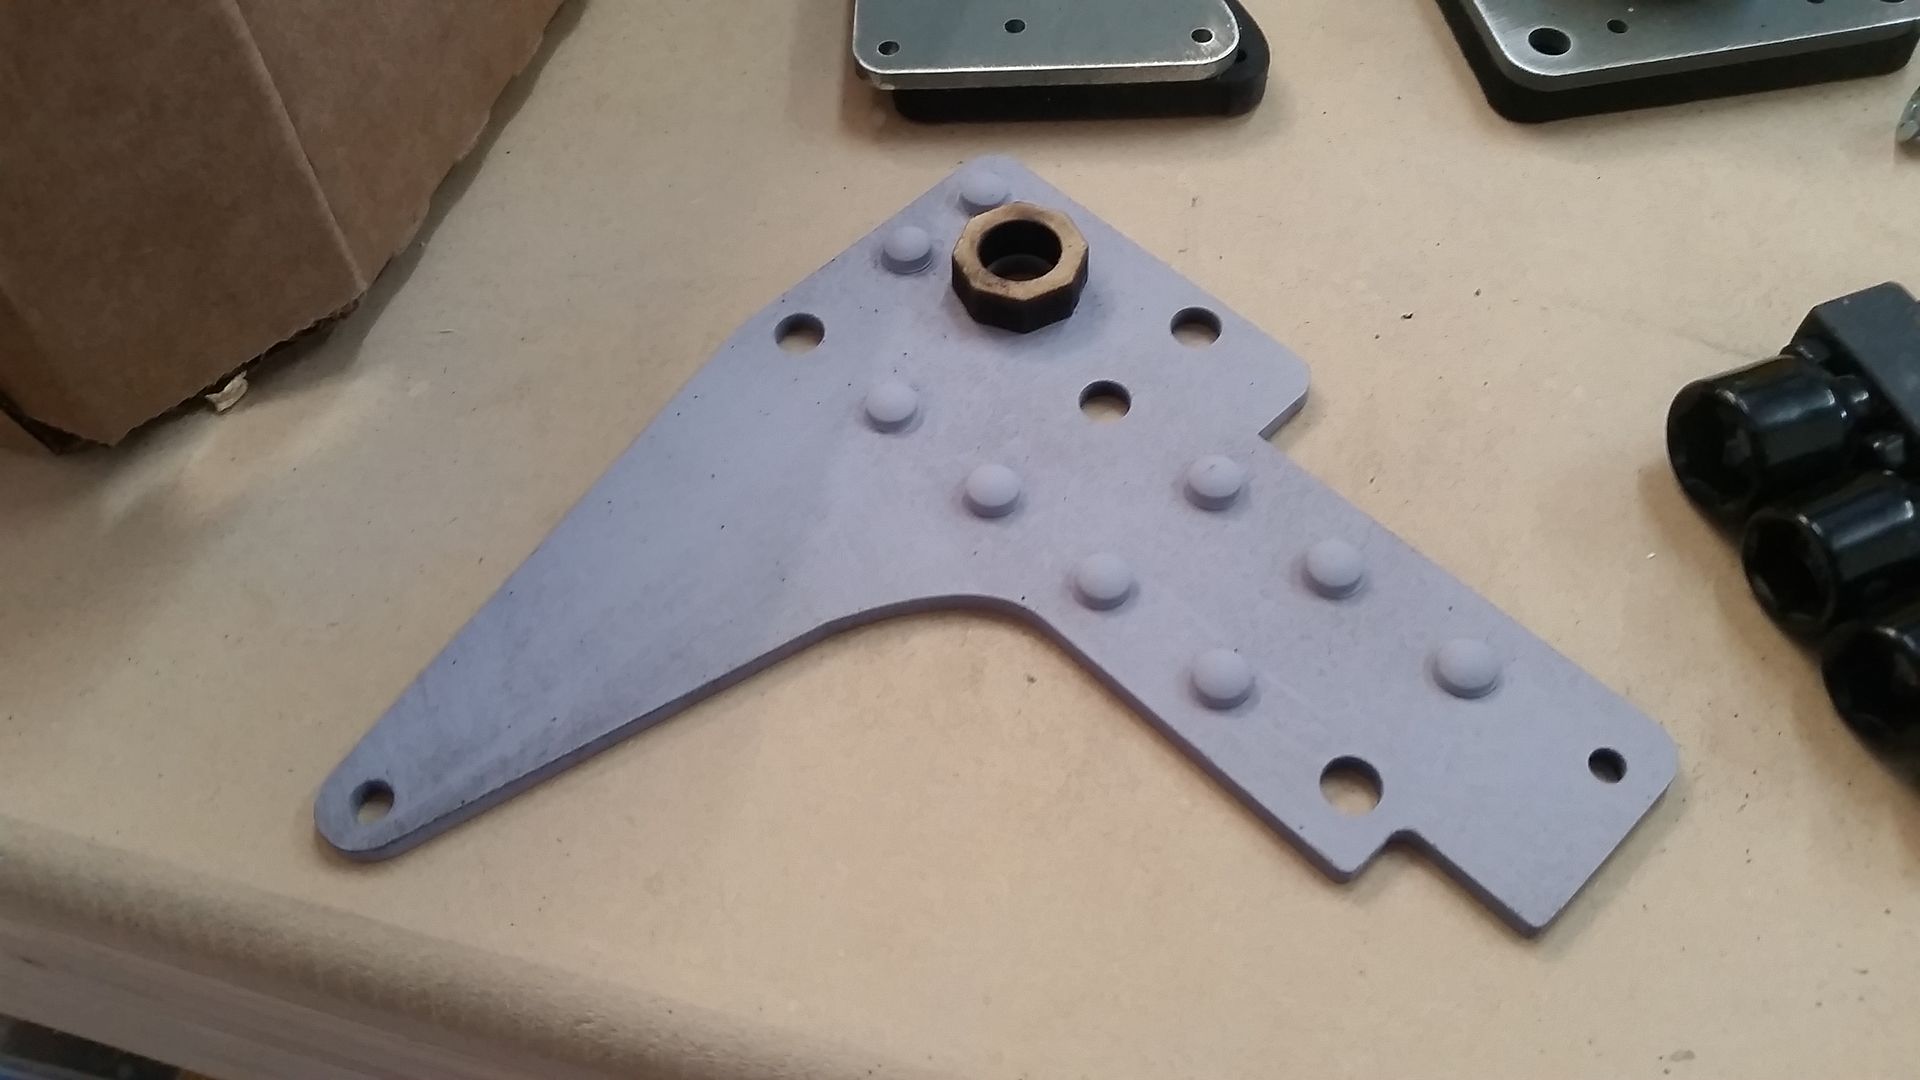
I then broke out the Googlie Eyes! Im hoping these will lend to the appearance of weld points / rivots
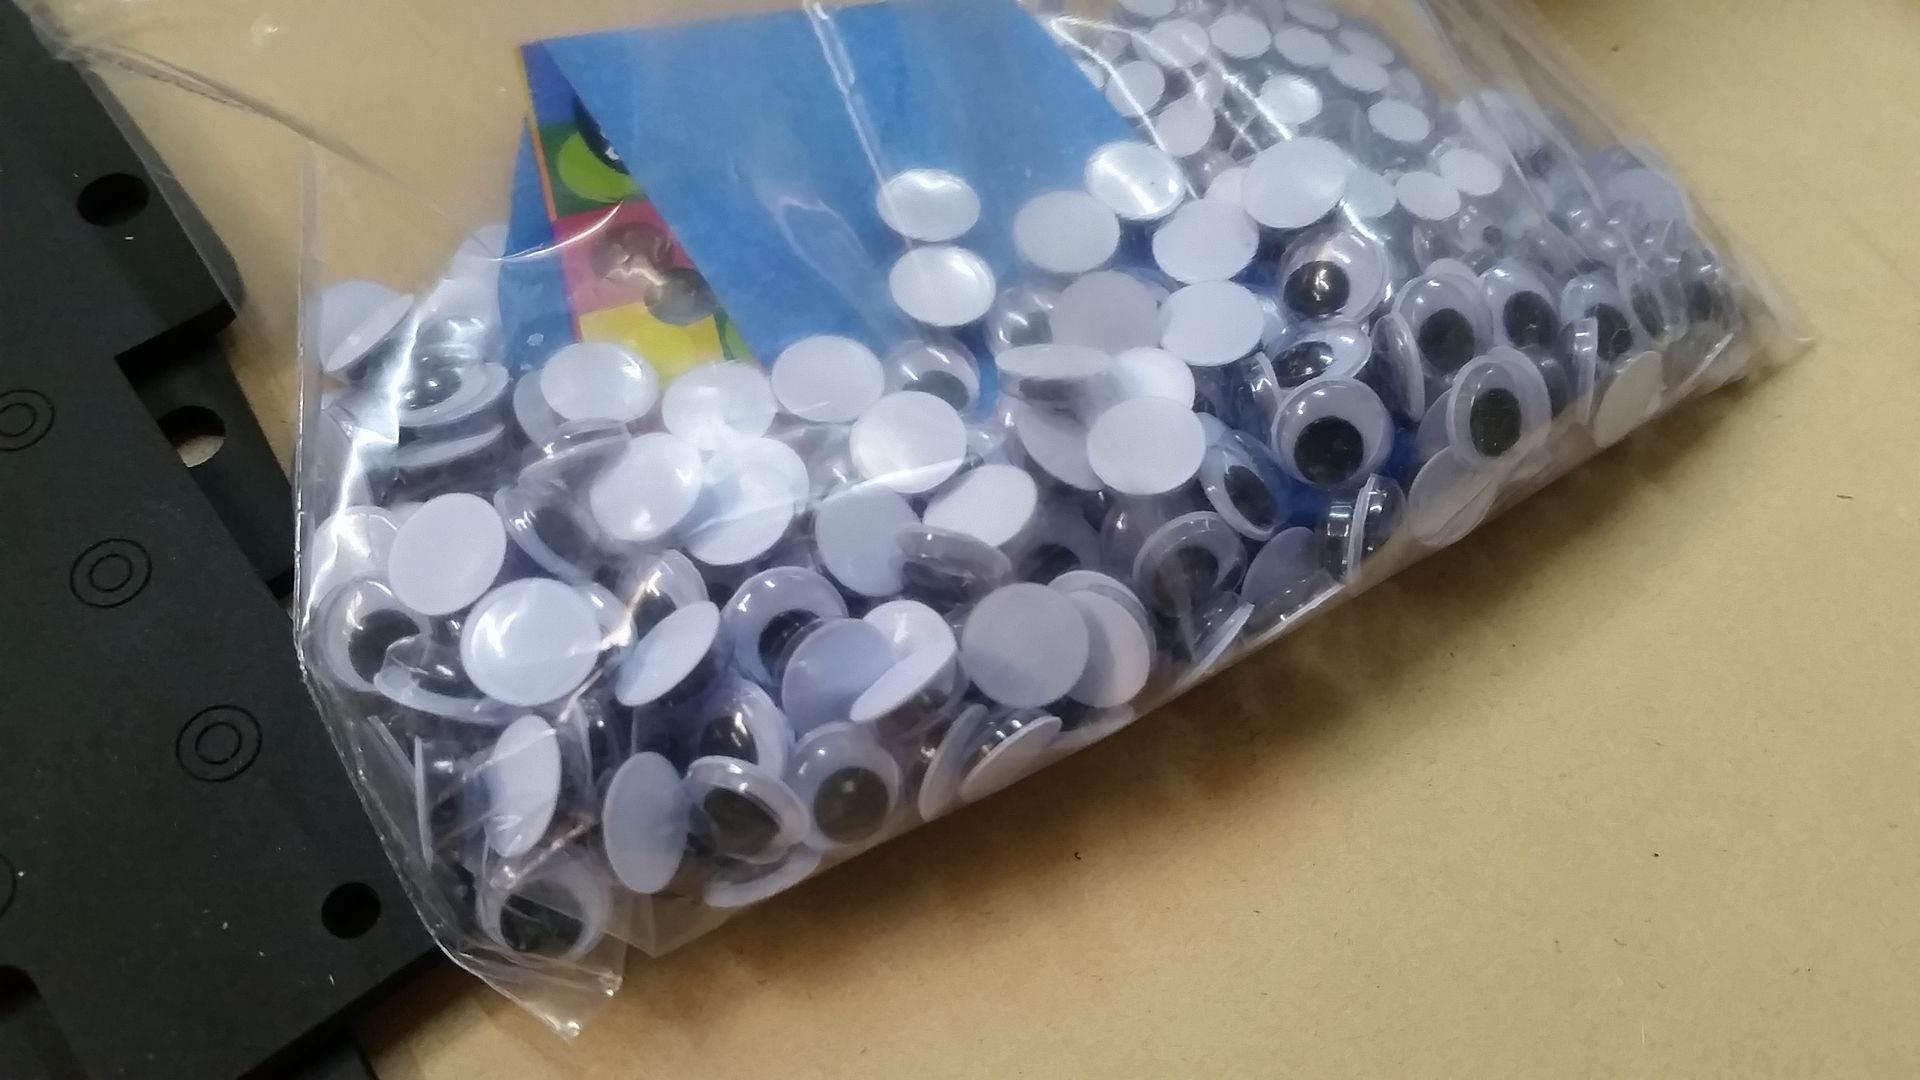
Adhered into place
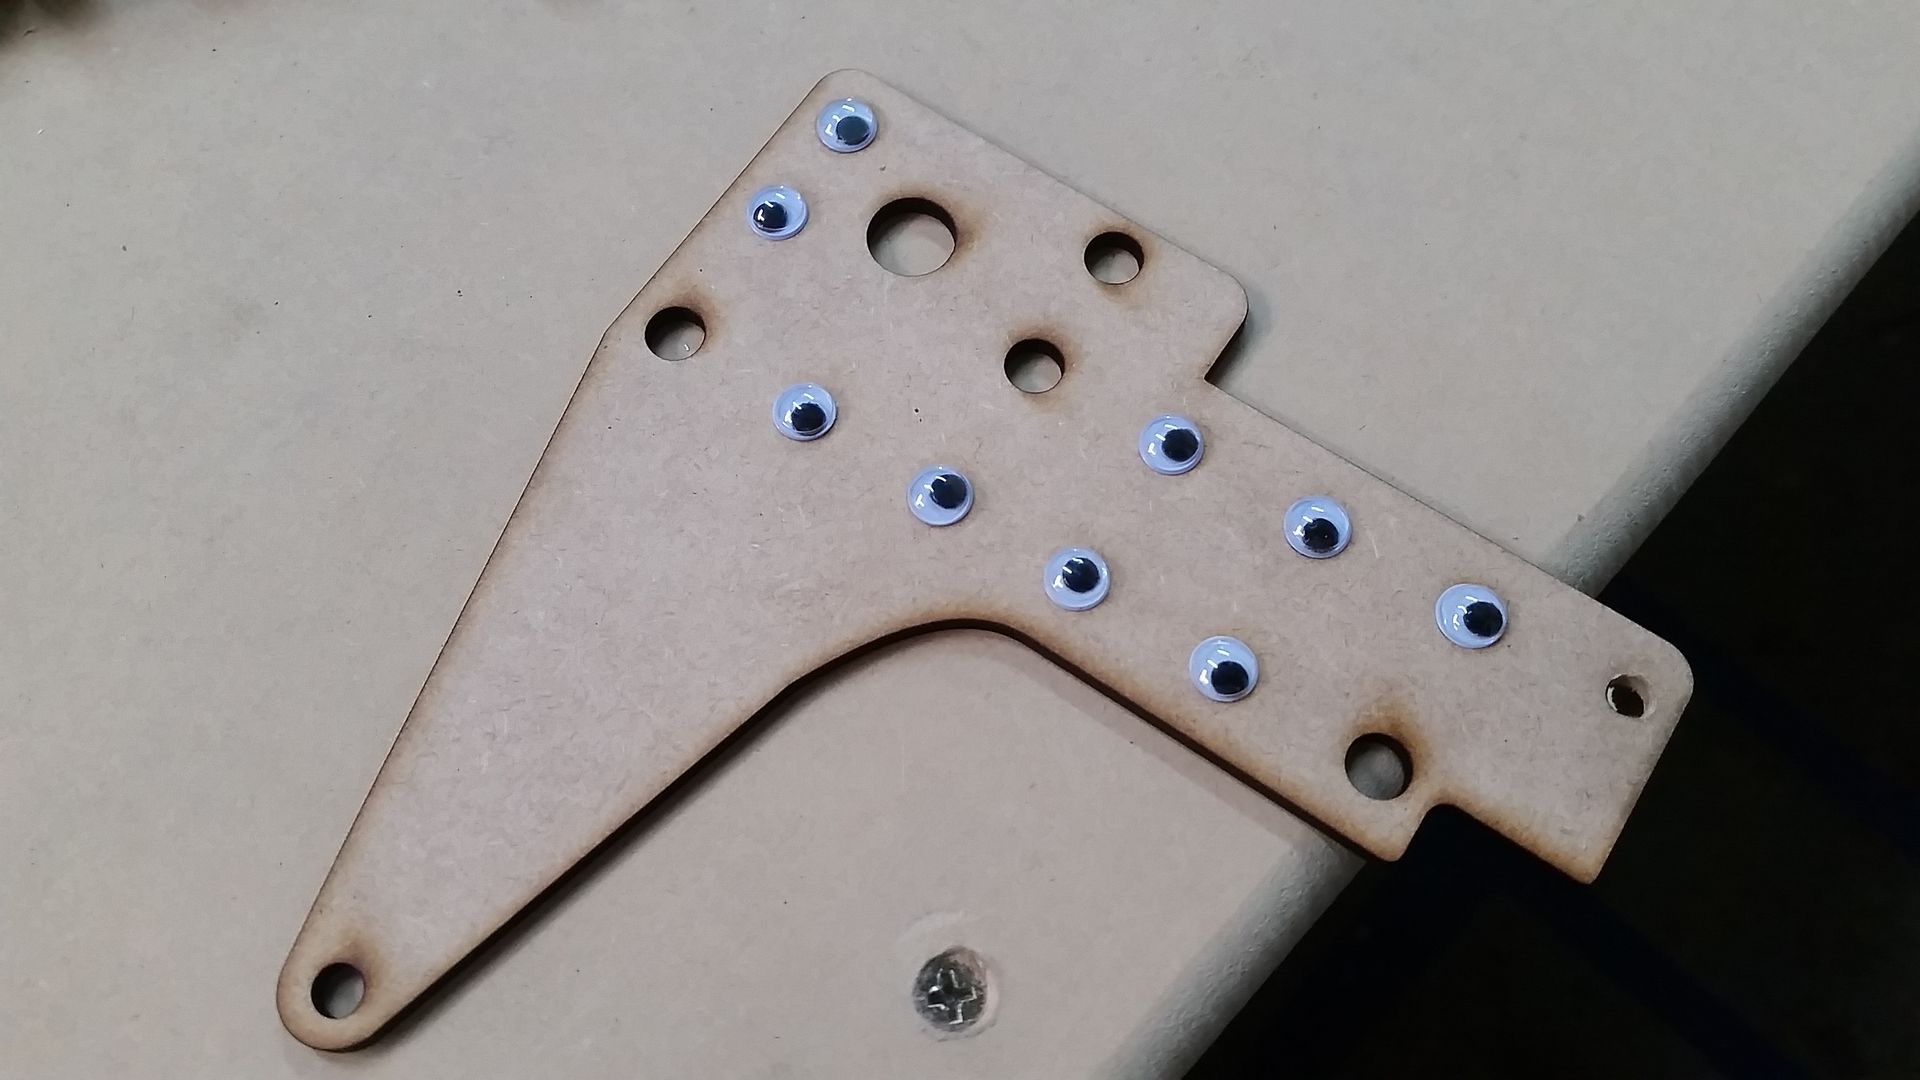
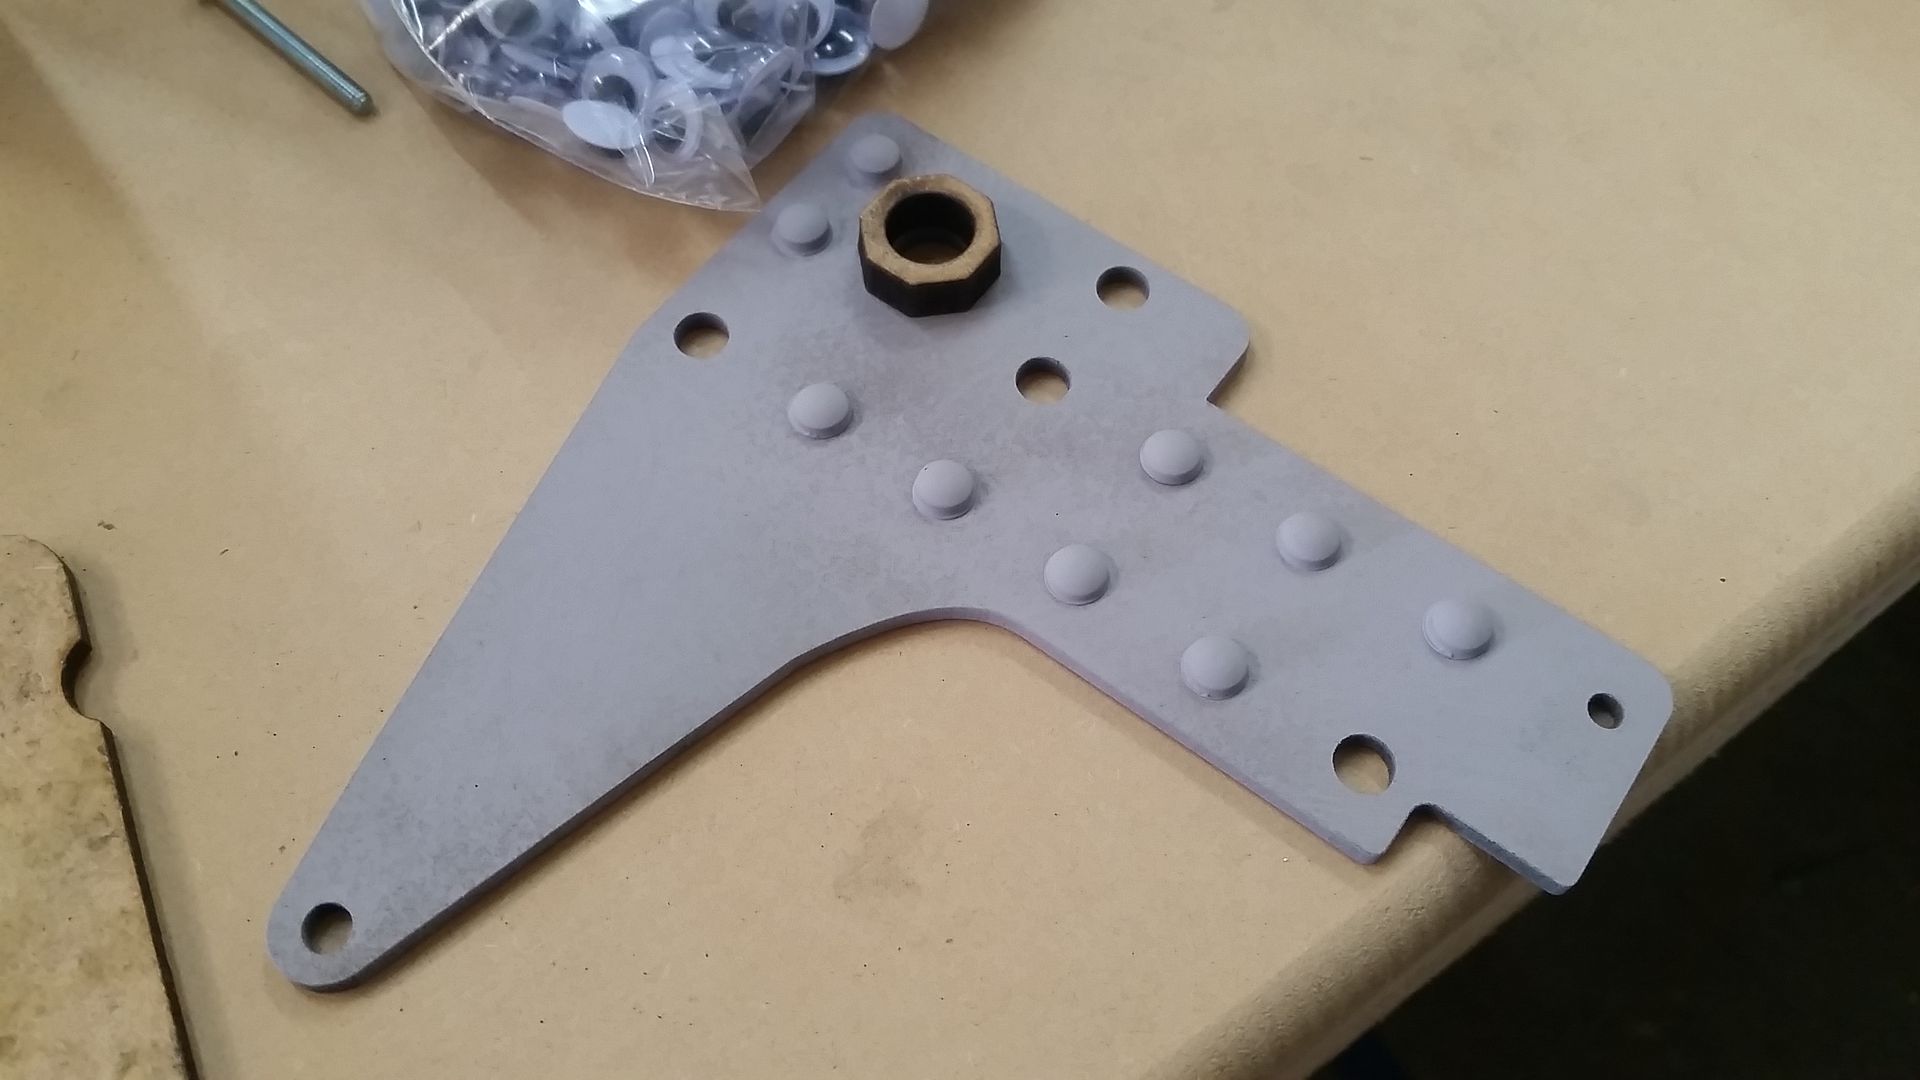
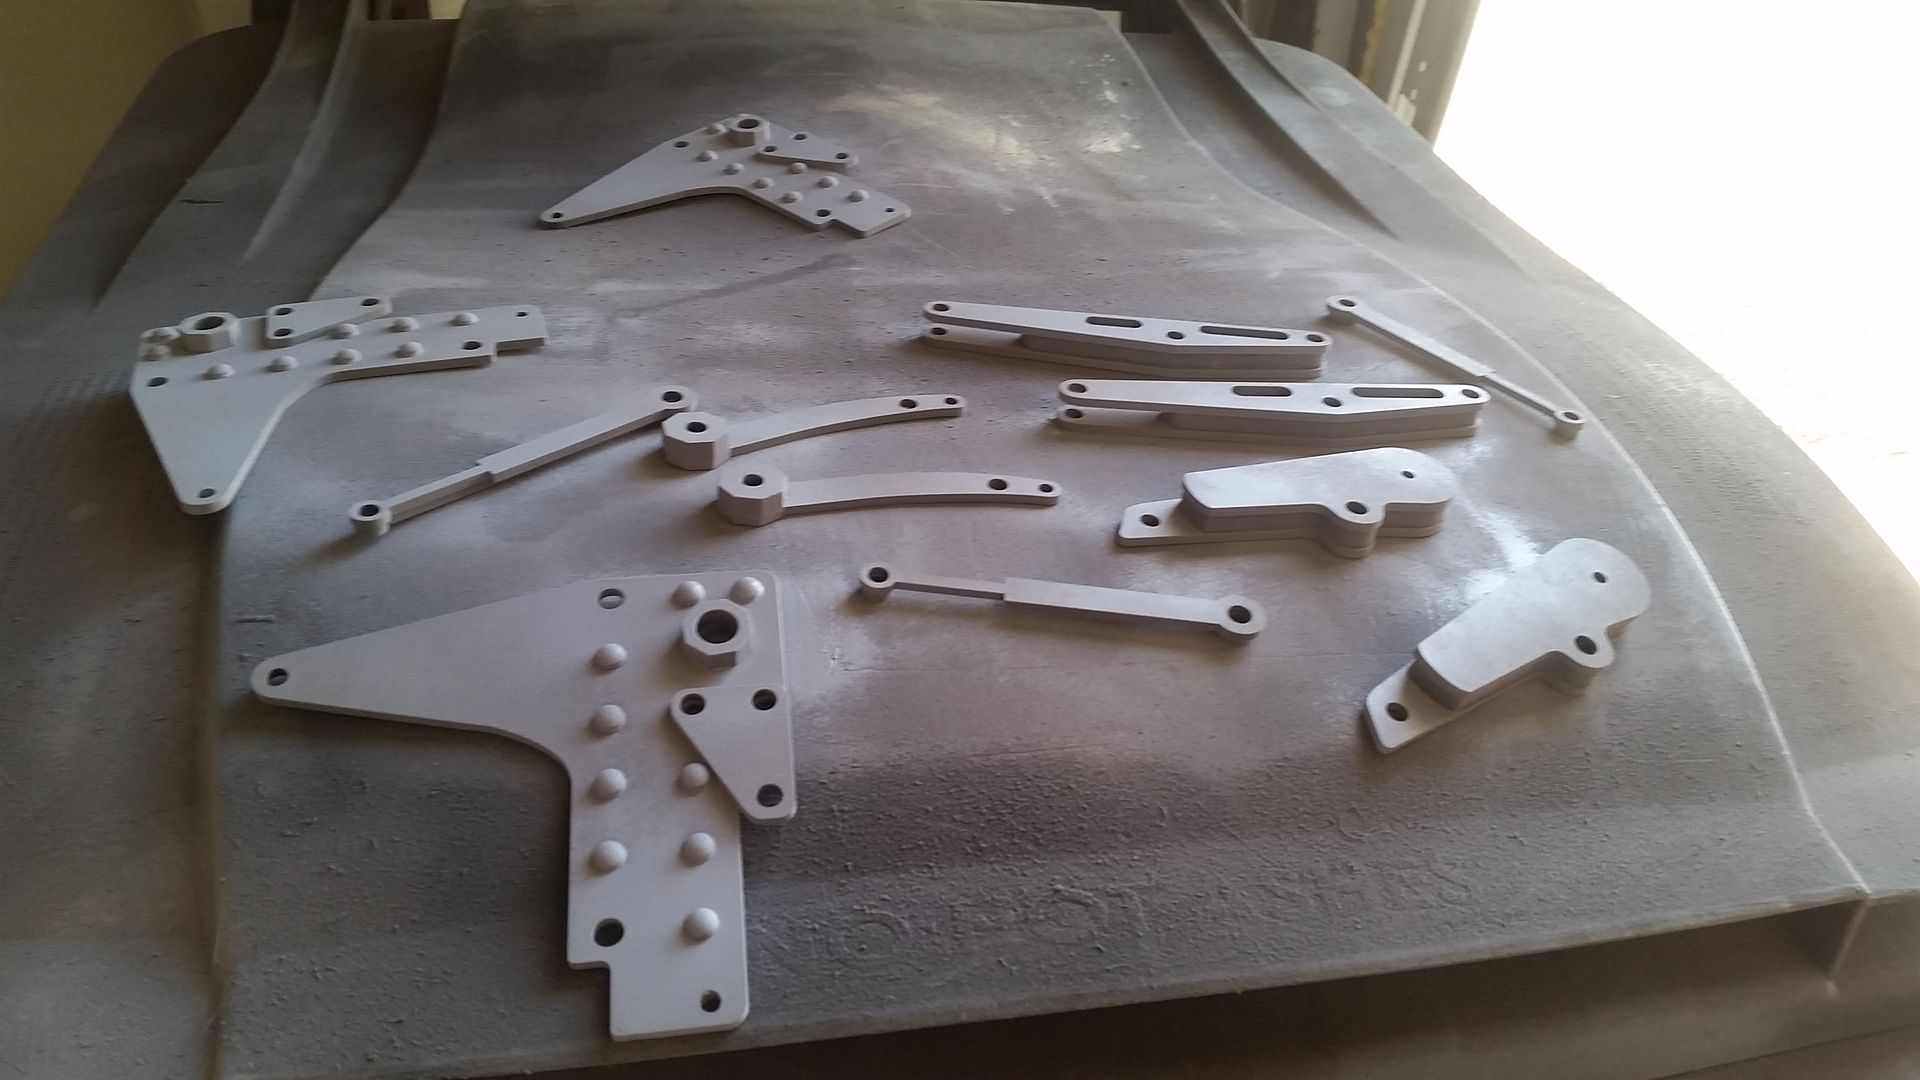
Primer! WOW! This DEF turned out better than I hoped - so far!
Dry fit

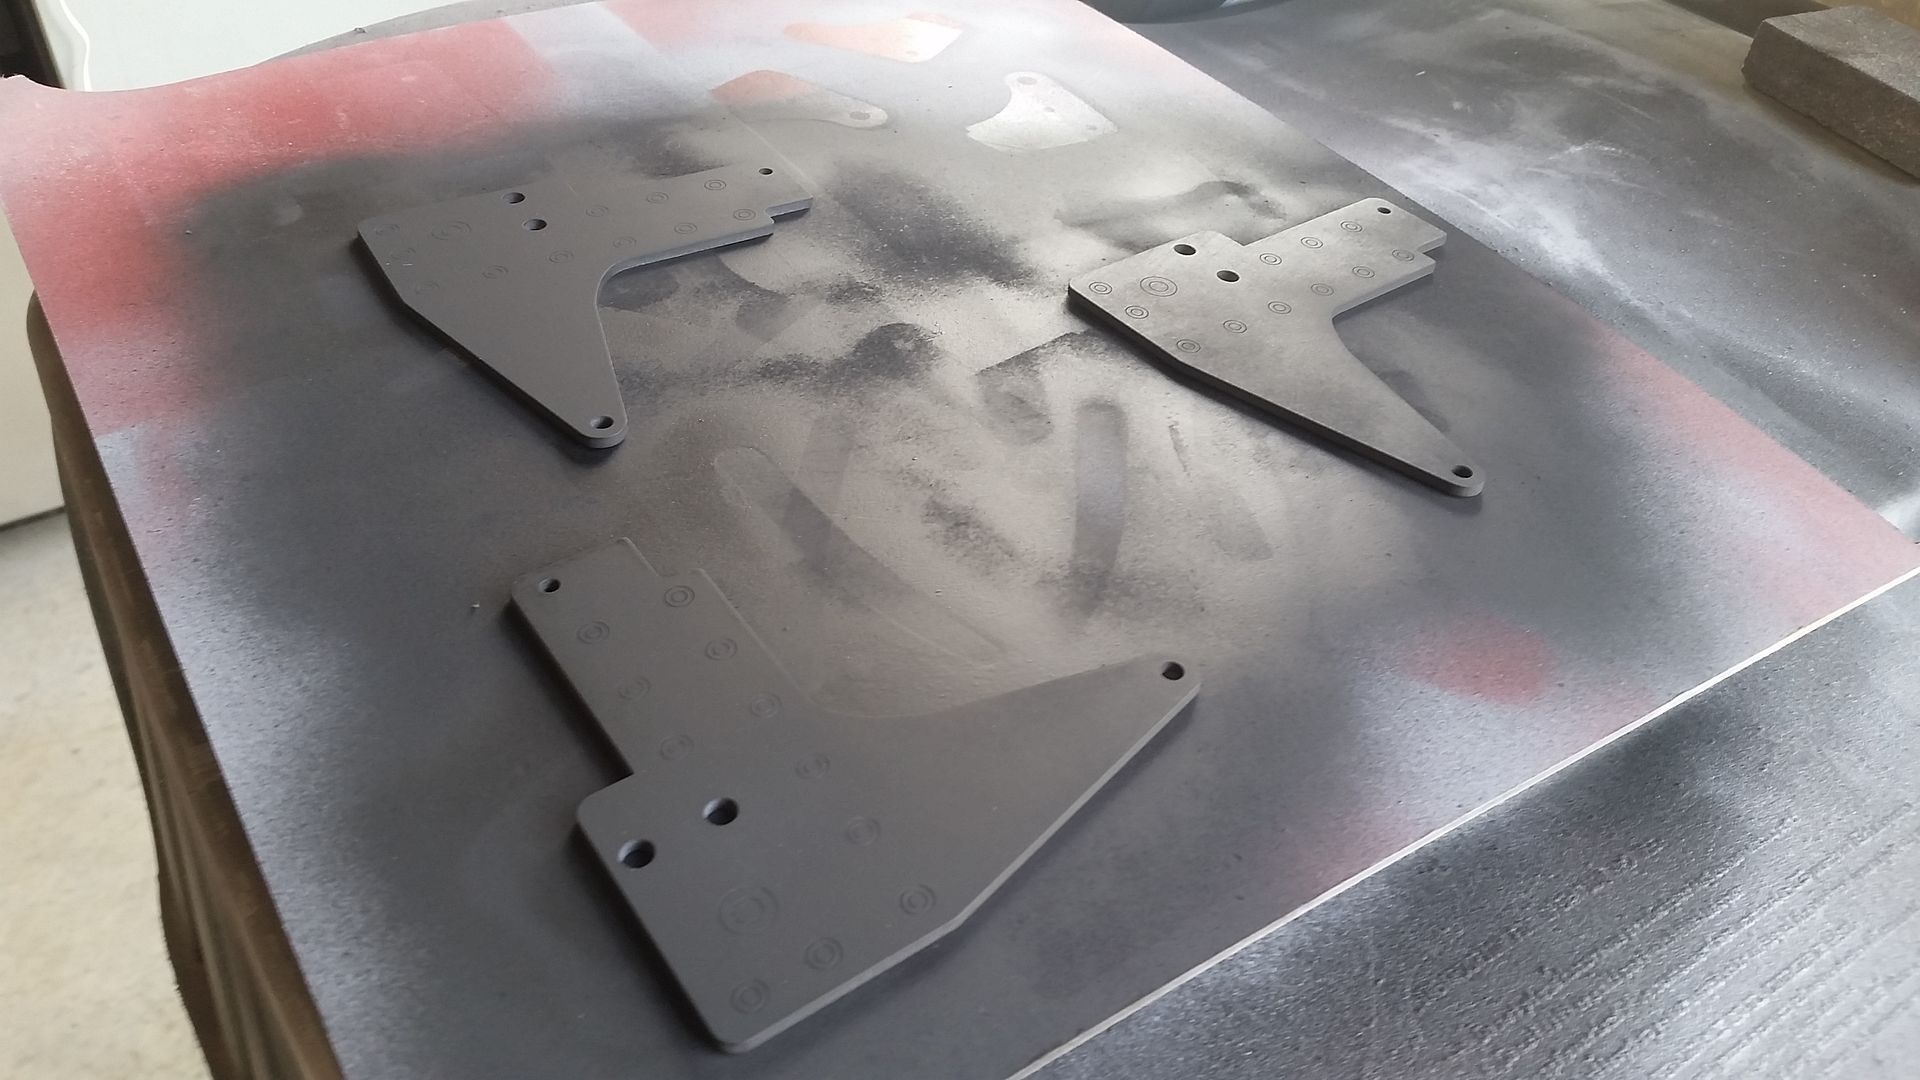
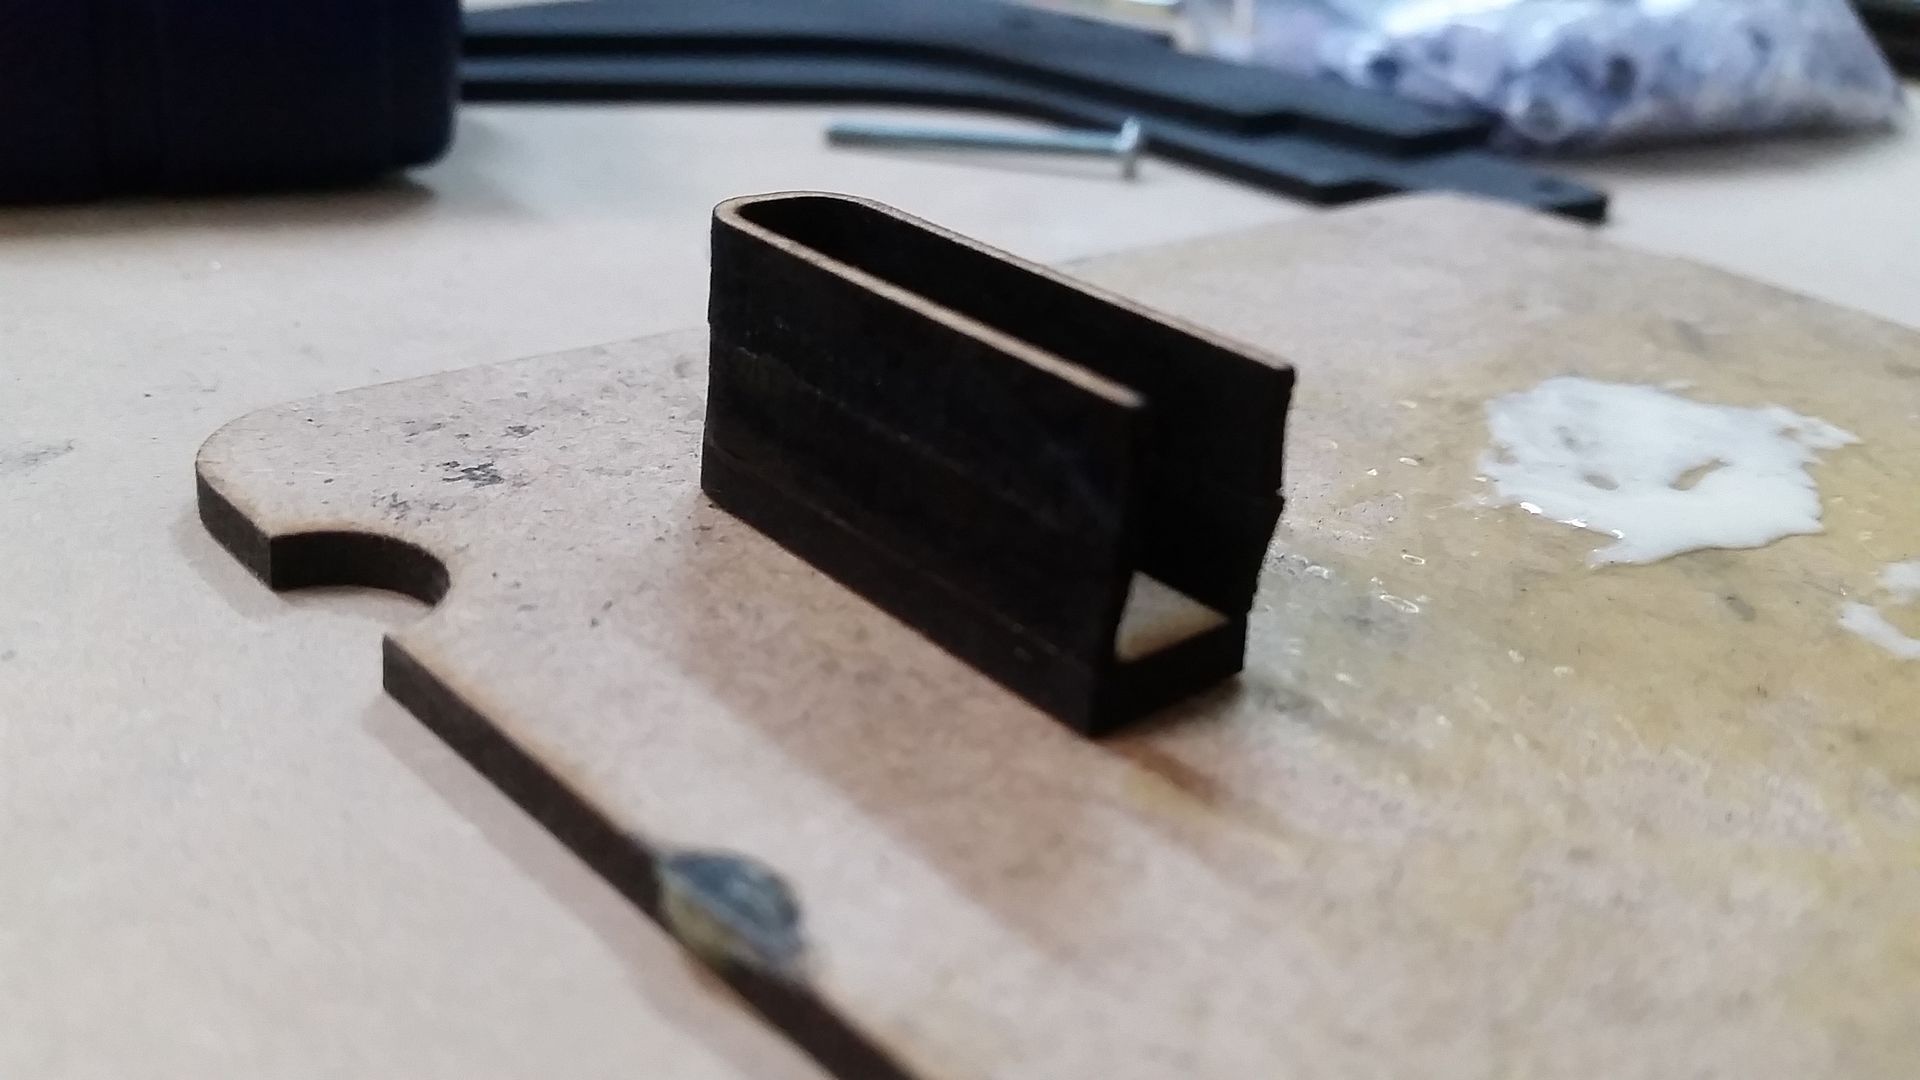
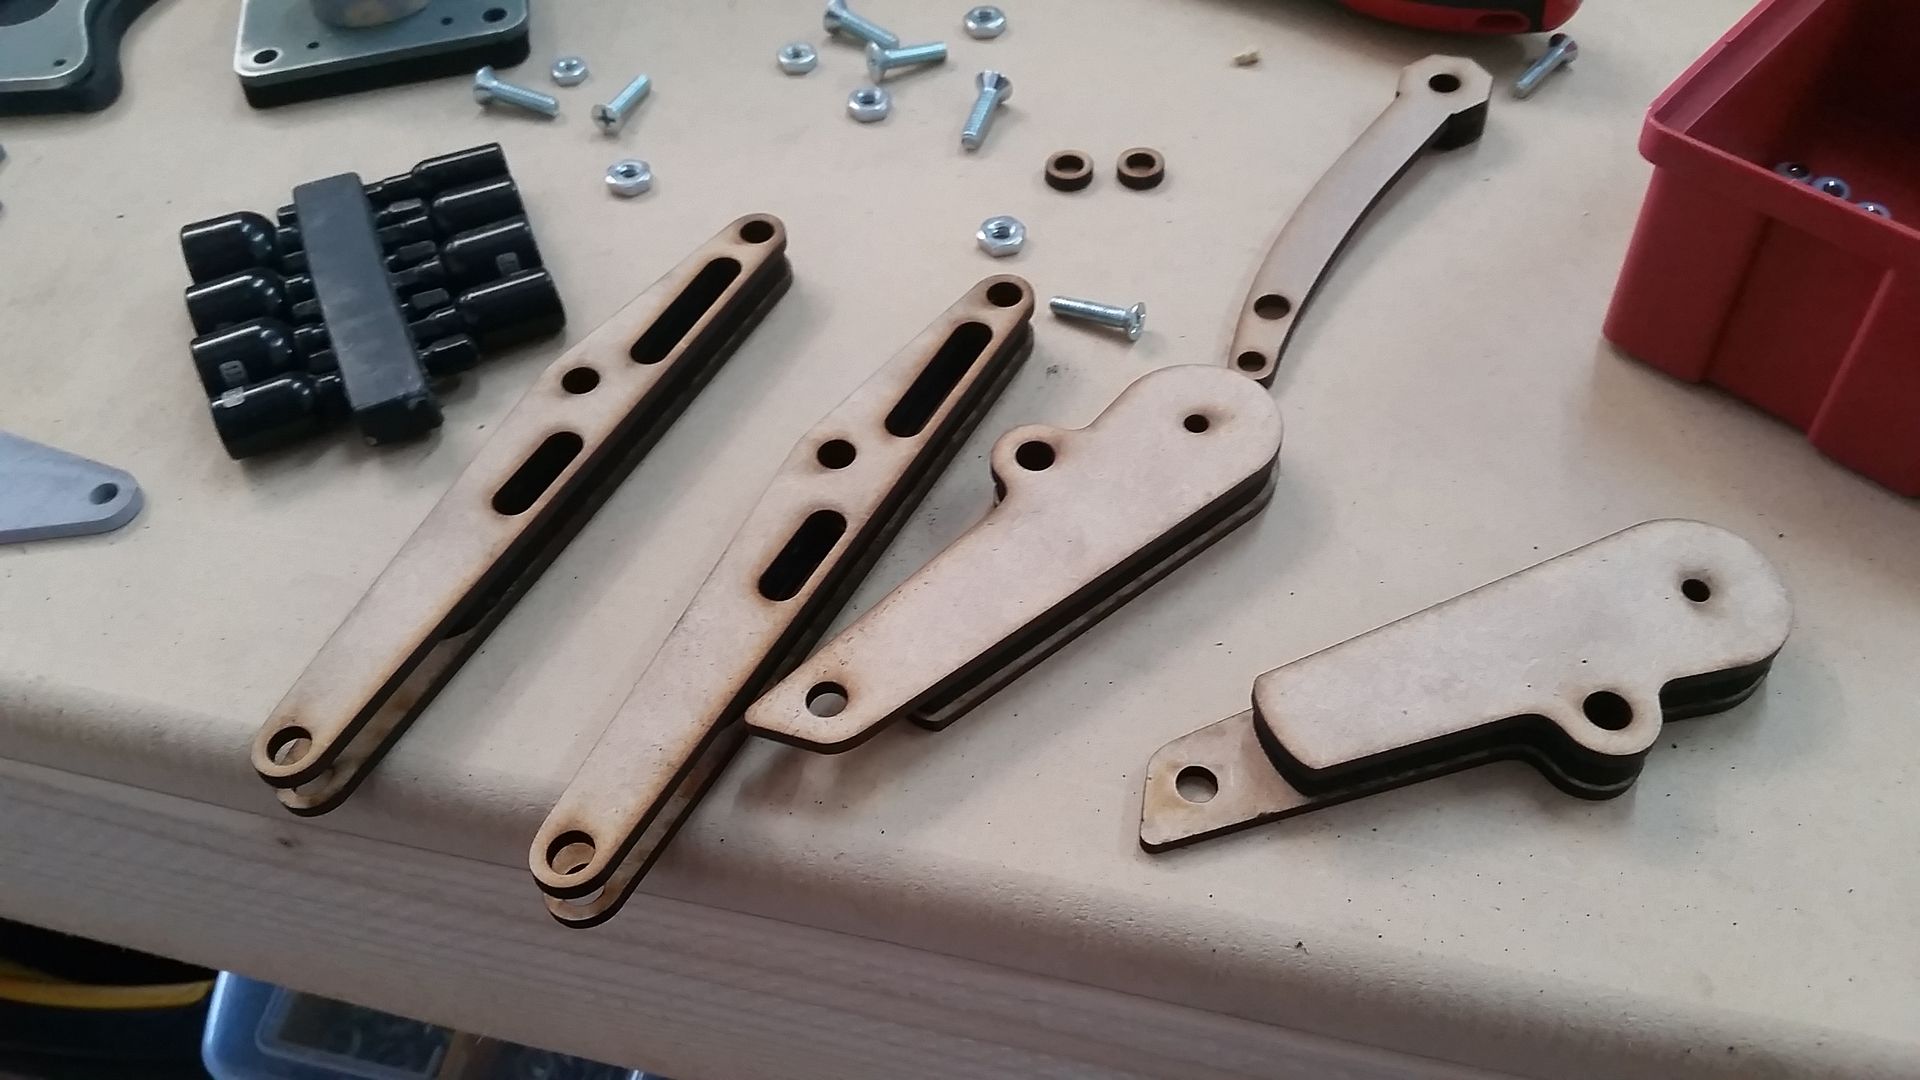
I then added primer to the new cuts but also cut and adhered this interesting shape together
I added LOTS of super glue to the edges adding much strength to the MDF
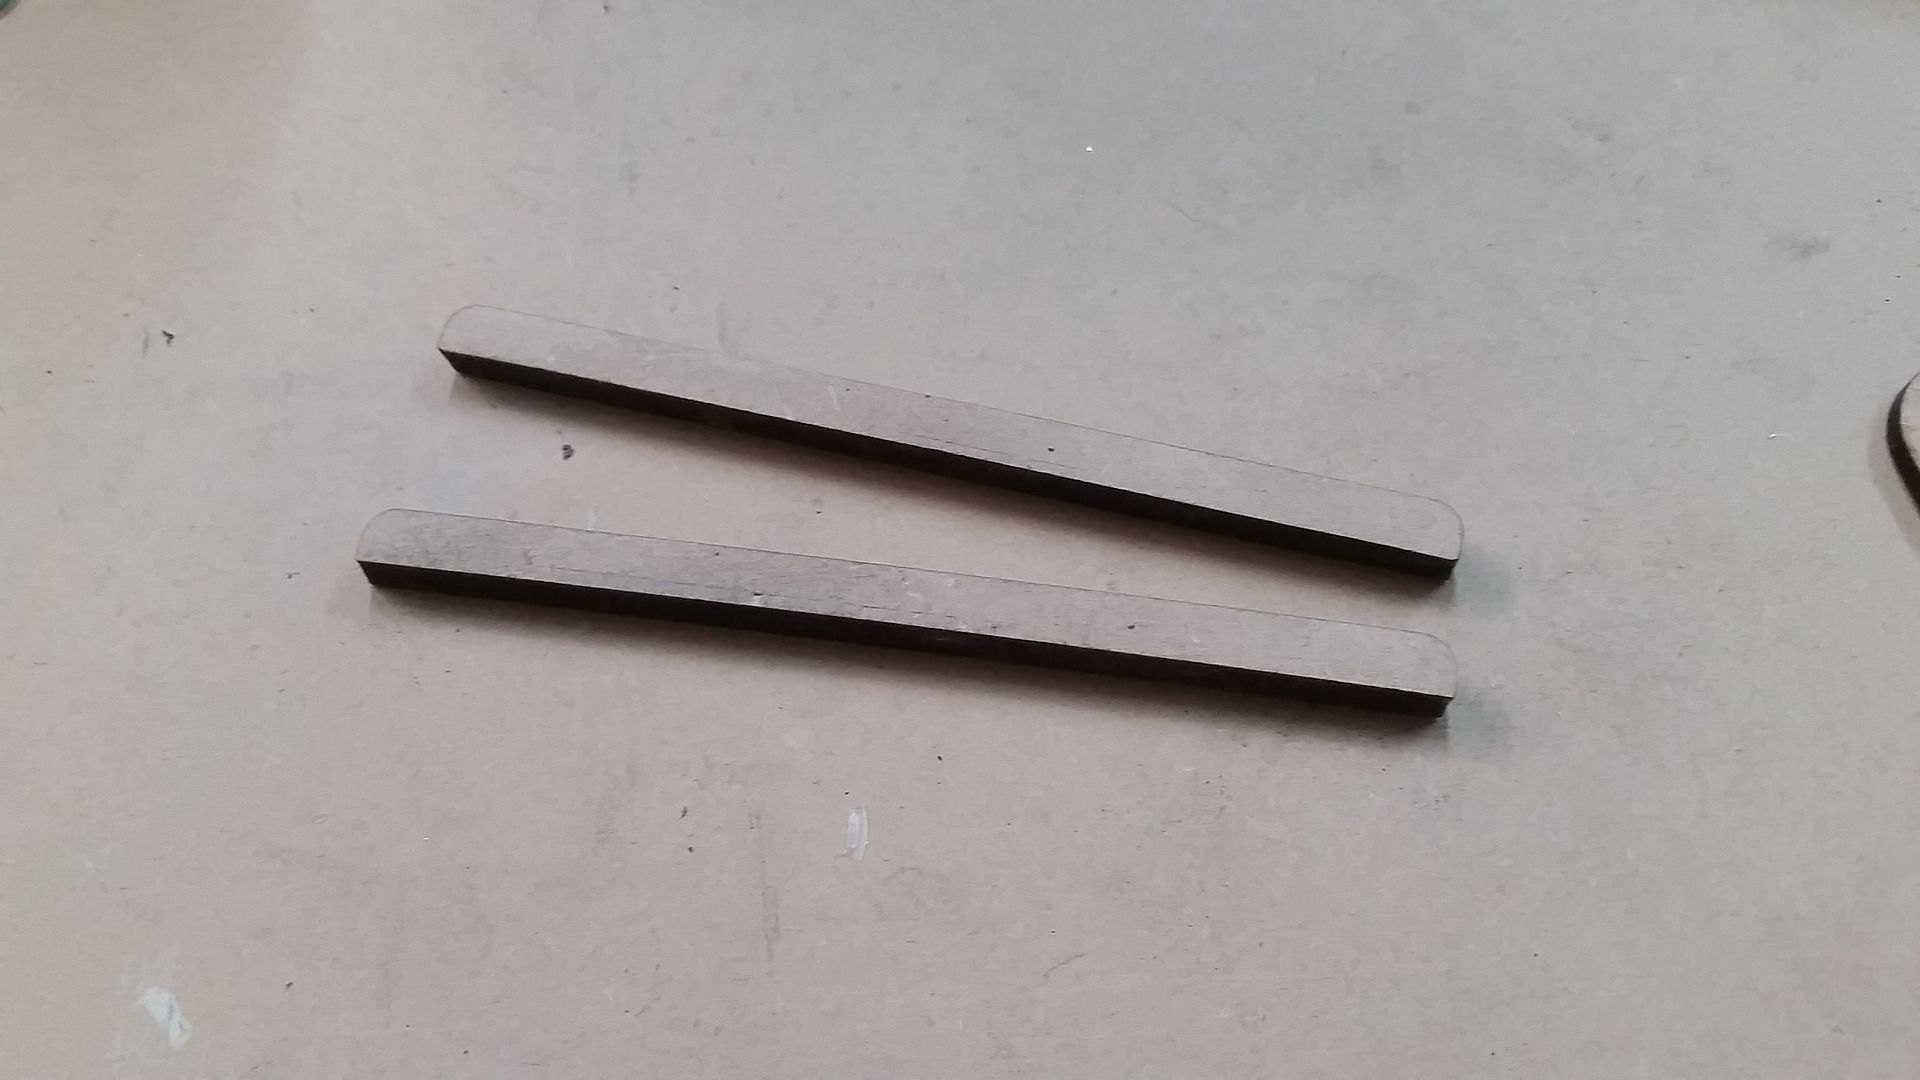
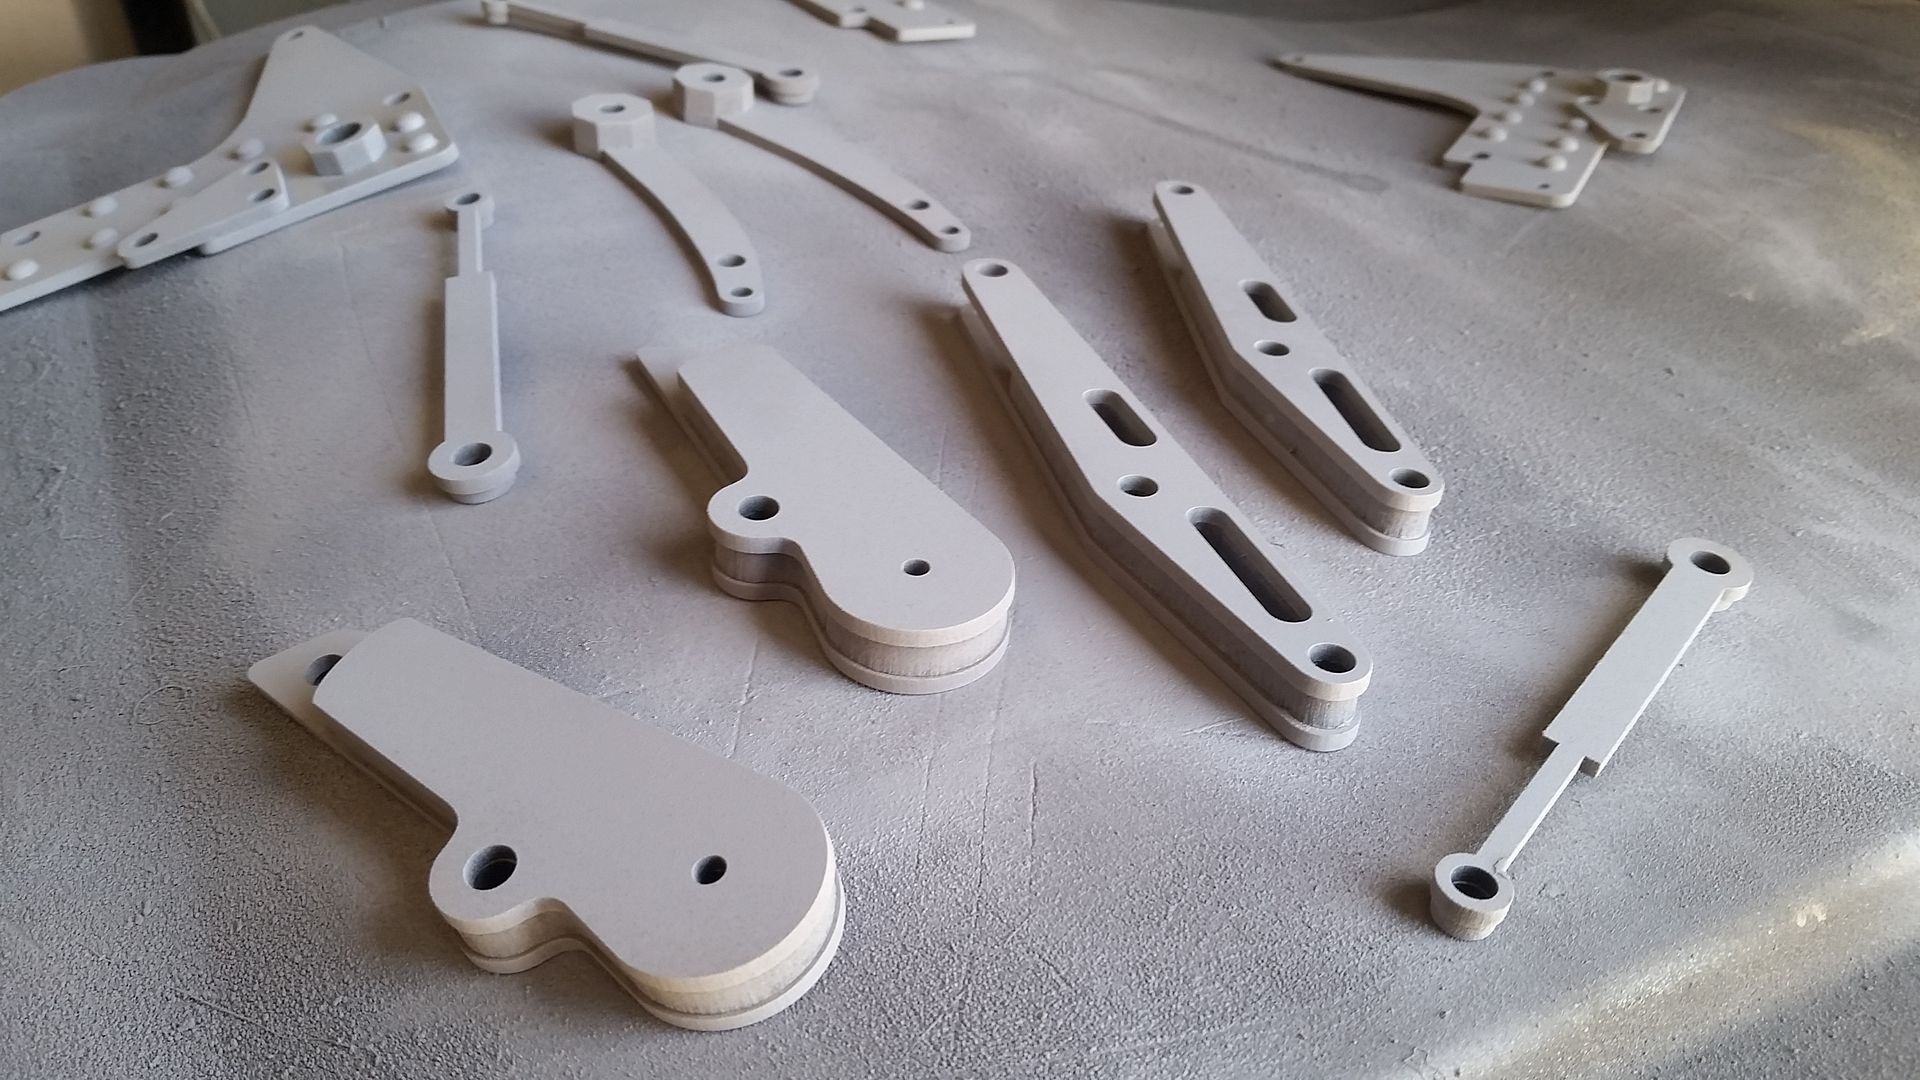
This new piece mounts to the lower corner of this greeblie

Which also gets these two pieces
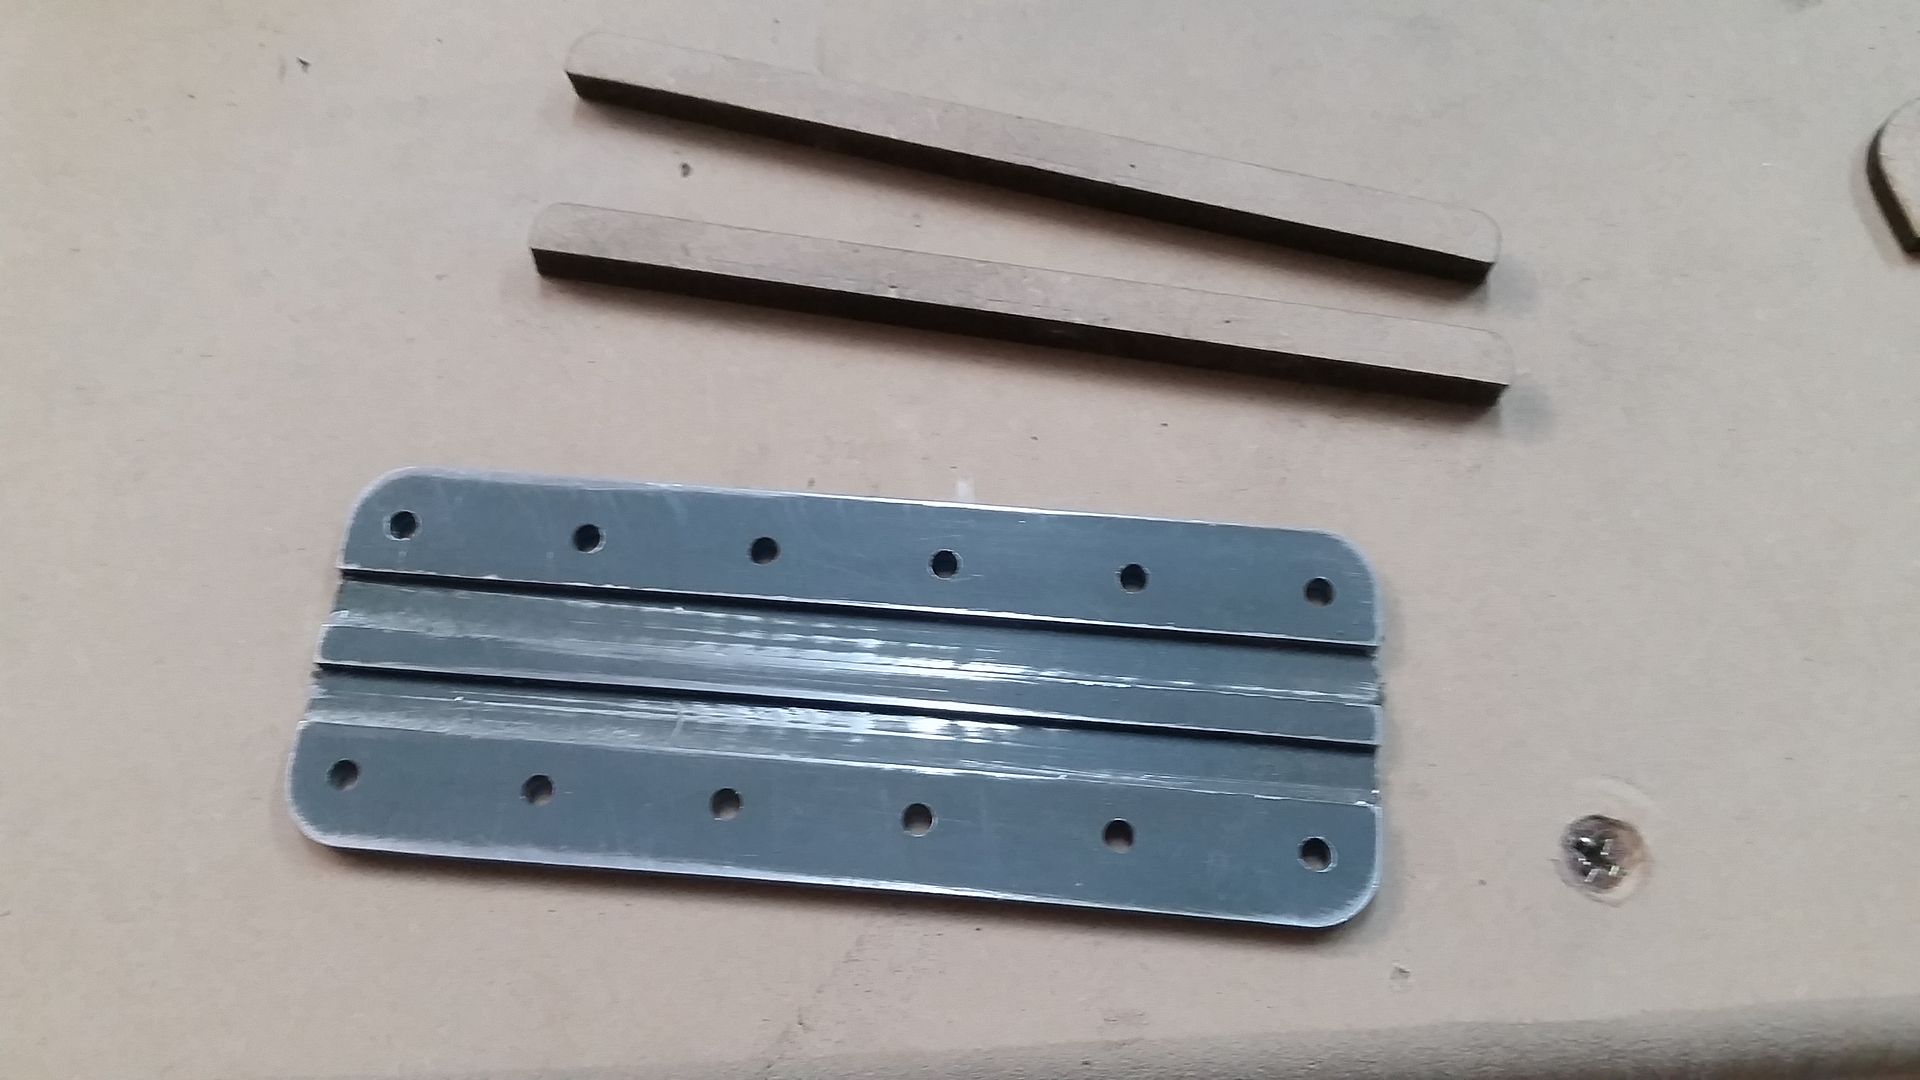
LOTS of sanding to do to get those edges smooth!
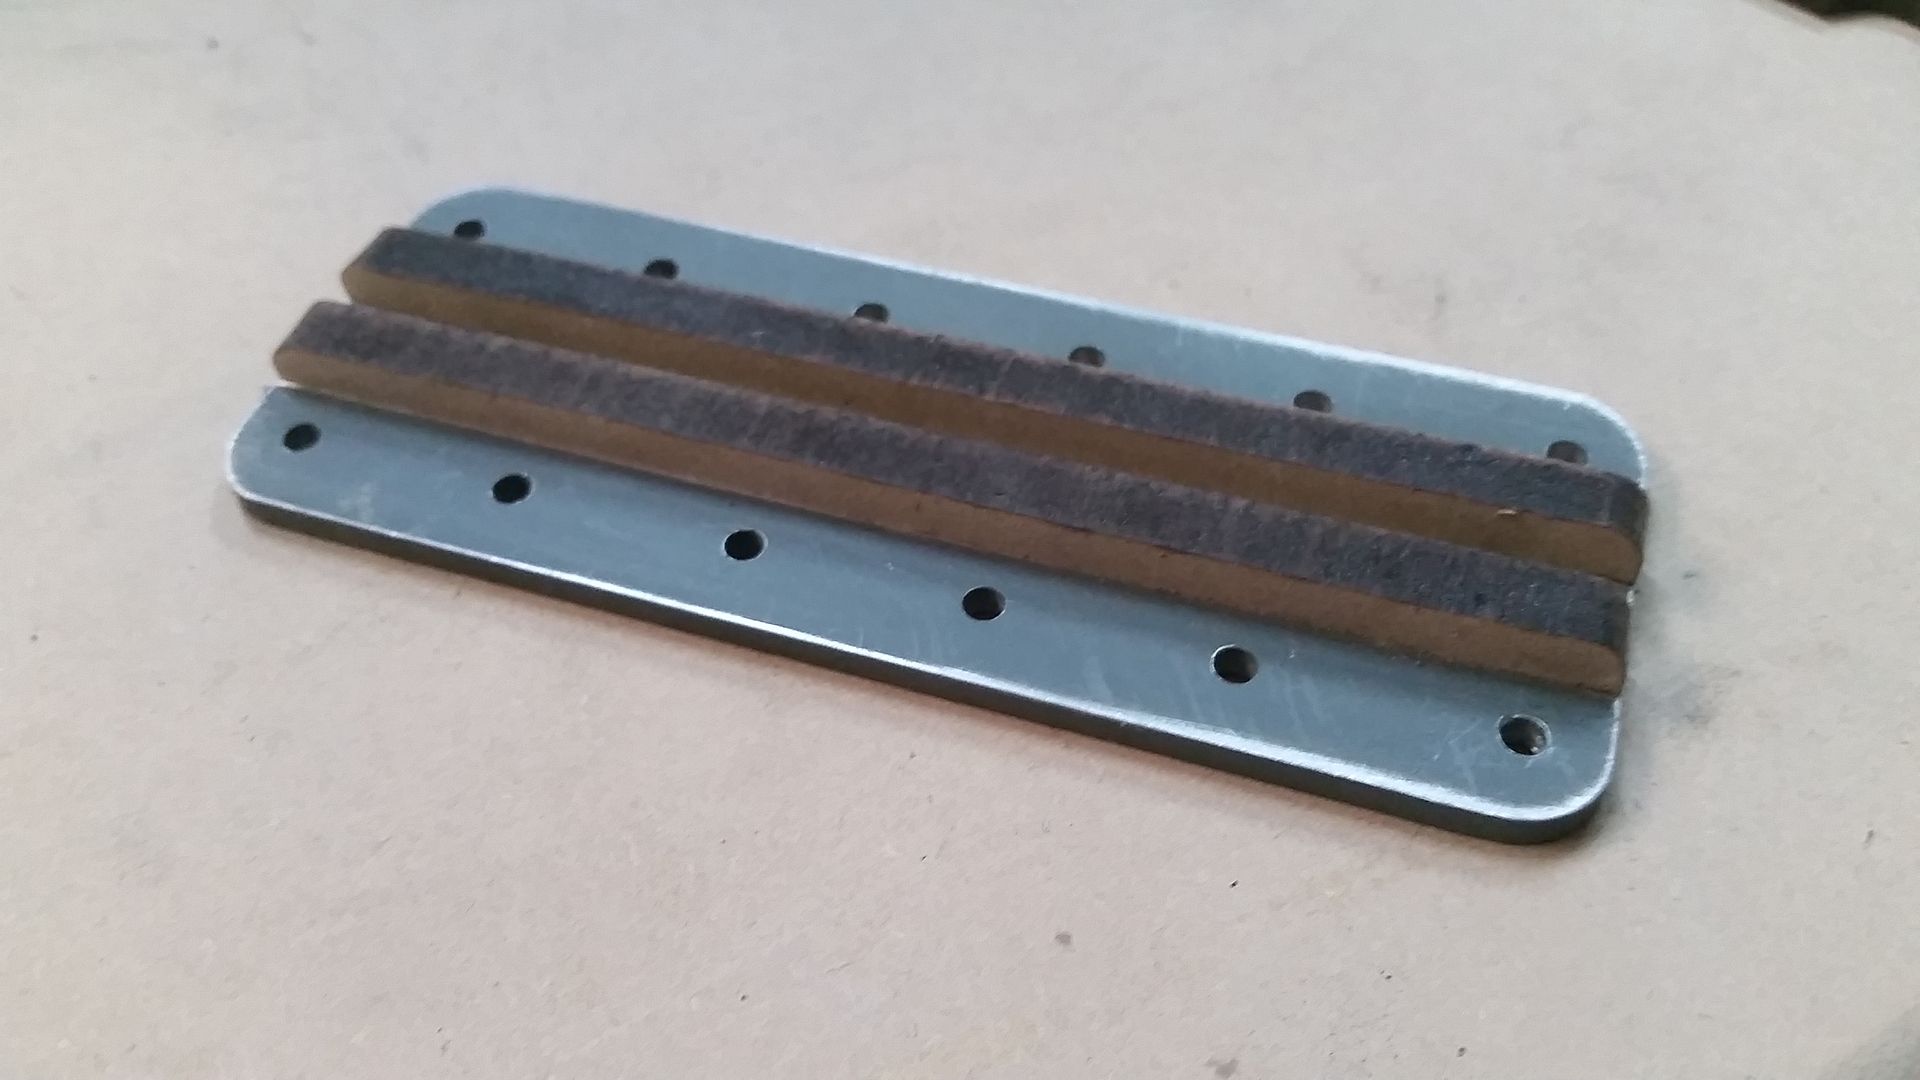
Quick coat of primer is dry
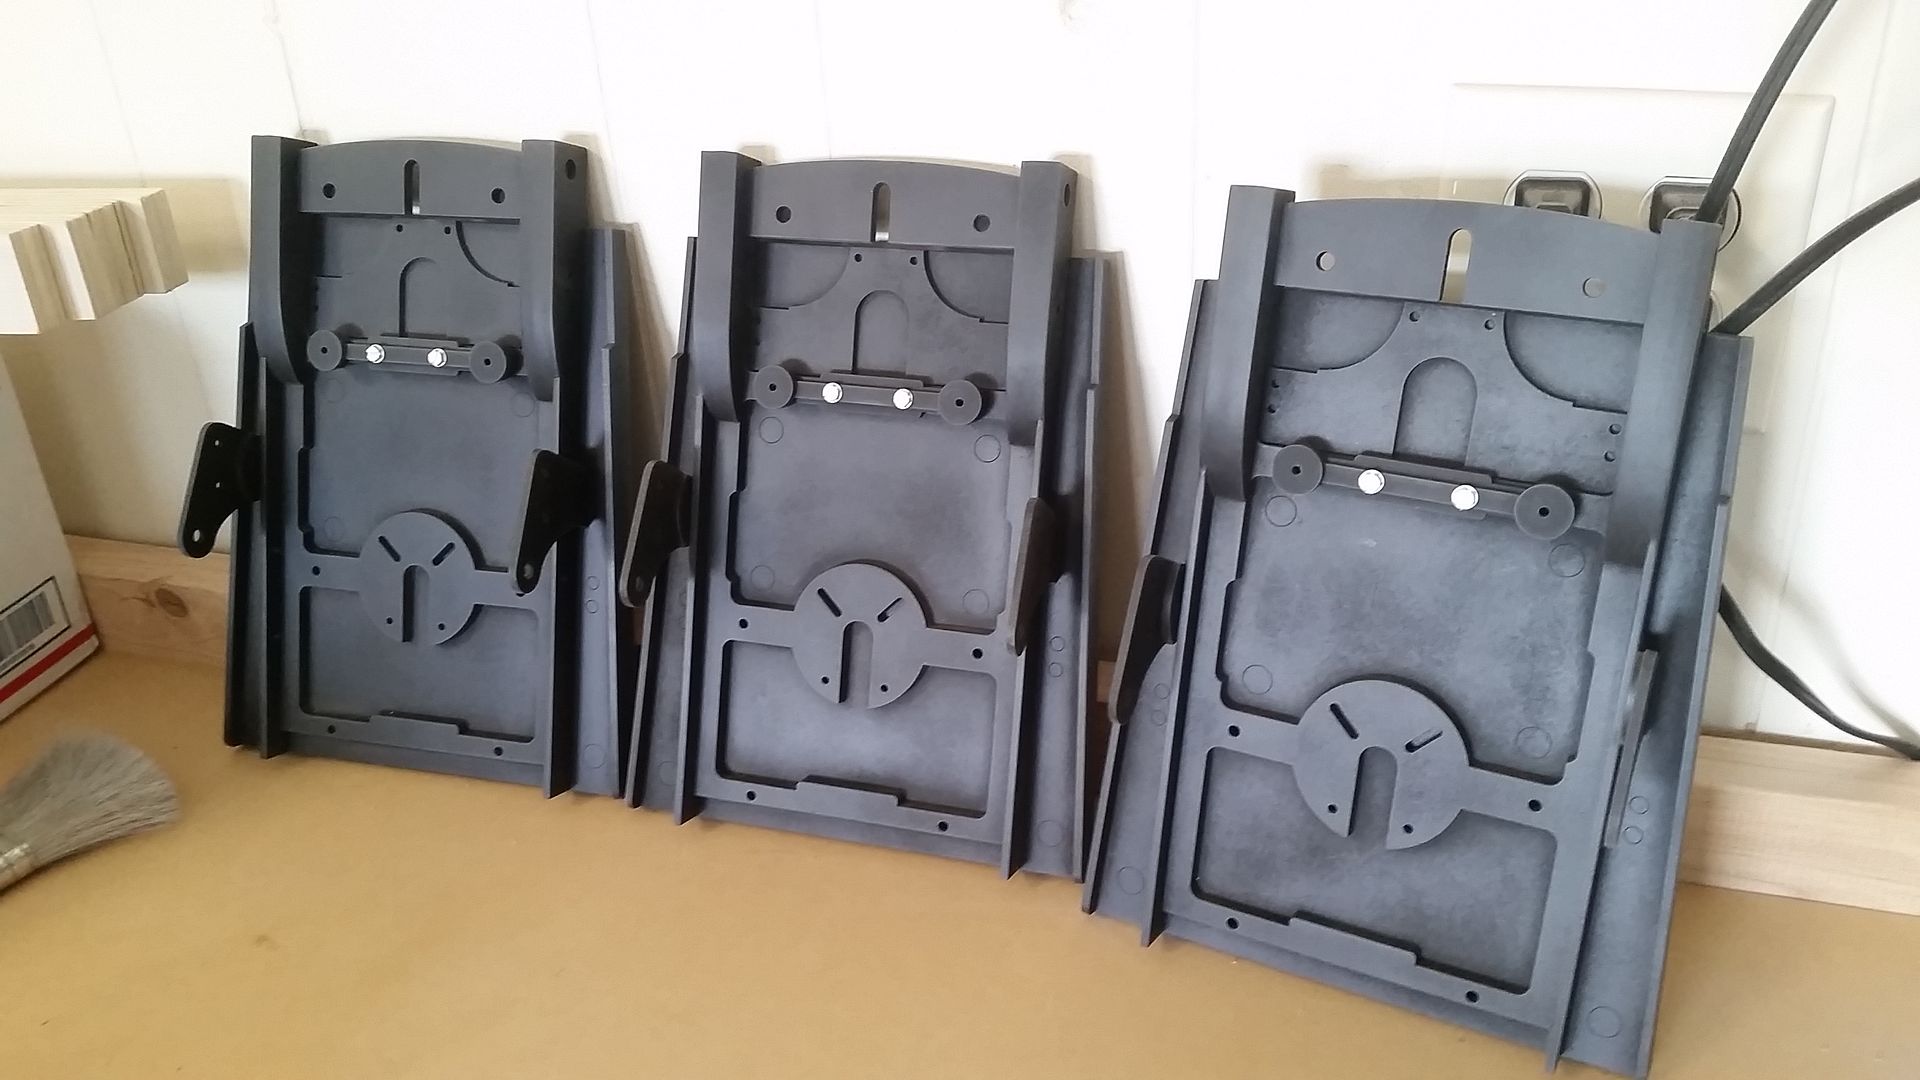
How does it all look?
I like it. The larger pieces DEF fill up the space as it should
Different angles
The other greeblie from above mounts in this basic area
This greeblie still needs to be sanded, primed, etc

This is a interesting little guy
He goes here with another greeblie attached - more on that guy later!
Added primer and sanded down the edges to get the final shape - more sanding required

Looks something like this
We're getting there!
Slowly...
And this is where we are!
I just received a bunch of new photos from Starkiller! I'll be pouring over those images and adding as much detail as I can!
Stay Tuned!
Another early morning update! I shot over to the shop after work to laser cut some test pieces I created earlier yesterday morning. I think these are going to work! What do you all think?
Same basic shape of the originals but slightly wider
More images of the chair came my way so I took advantage!
Old vs New
I then broke out the Googlie Eyes! Im hoping these will lend to the appearance of weld points / rivots
Adhered into place
Primer! WOW! This DEF turned out better than I hoped - so far!
Dry fit
I then added primer to the new cuts but also cut and adhered this interesting shape together
I added LOTS of super glue to the edges adding much strength to the MDF
This new piece mounts to the lower corner of this greeblie
Which also gets these two pieces
LOTS of sanding to do to get those edges smooth!
Quick coat of primer is dry
How does it all look?
I like it. The larger pieces DEF fill up the space as it should
Different angles
The other greeblie from above mounts in this basic area
This greeblie still needs to be sanded, primed, etc
This is a interesting little guy
He goes here with another greeblie attached - more on that guy later!
Added primer and sanded down the edges to get the final shape - more sanding required
Looks something like this
We're getting there!
Slowly...
And this is where we are!
I just received a bunch of new photos from Starkiller! I'll be pouring over those images and adding as much detail as I can!
Stay Tuned!
Last edited:
BigBigDave
Active Member
Very cool! I'm amazed (well, at everything you've done, as usual, but also) at how much the googly-eye rivets really heightens the look of that thing. Can't wait to see them all over it. And Wavey's right about the older look of the top piece, IMHO.
Wavey
Sr Member
Good news! Starkiller and Izzy are working to match the head piece to the ESB version!
....based very heavily on Starkiller and Maruska's original 3D model
Stormy's recent photos have certainly changed EVERYTHING I'm doing.
That's the best news of the week! All those ingredients plus the necessary hybridisation are going to make for some very tasty seats indeed.
And you're really tapping into those spinal greeblies, outstanding work Sir!!!
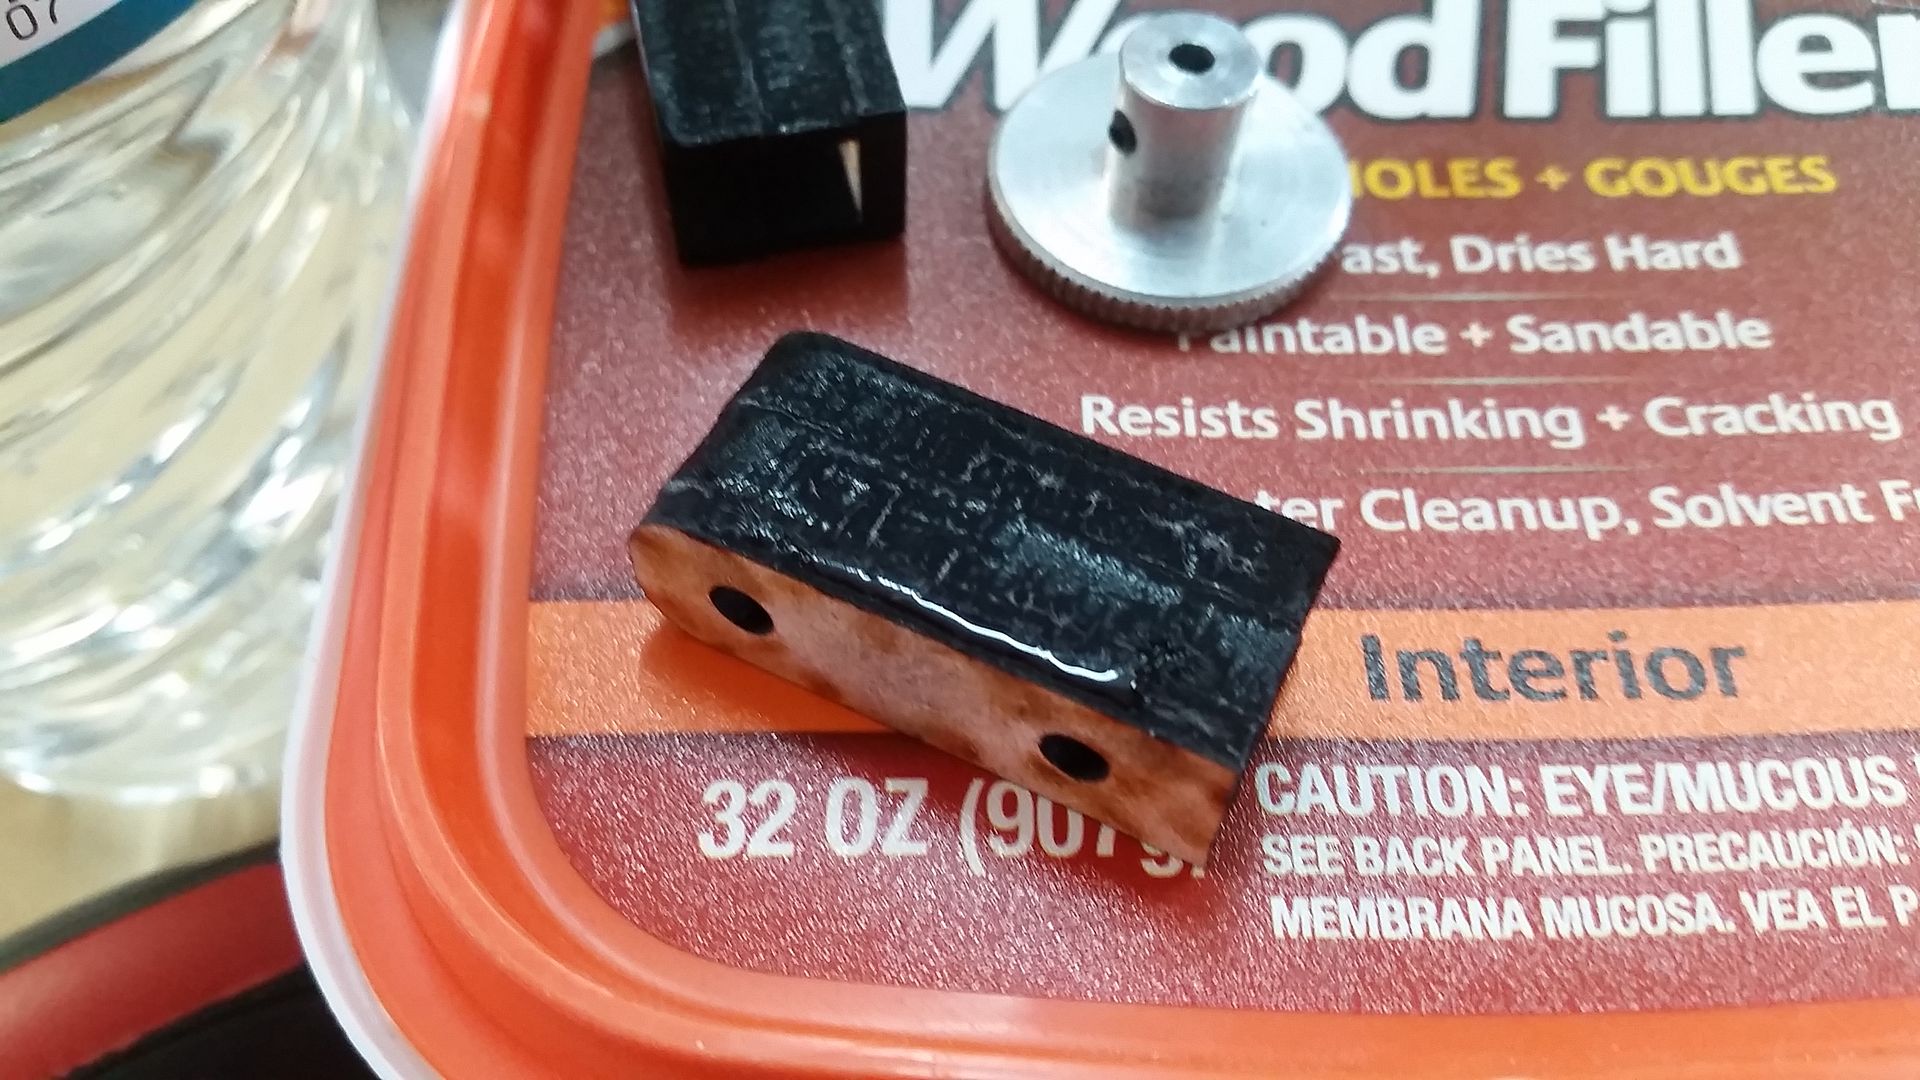
Ooh, and for your next gig.... Another part crossed off the list. It's a slightly earlier pump for later-year Spitfires (I think, still doing the info homework on it).

Last edited:
IzzyMel
Sr Member
That's the best news of the week! All those ingredients plus the necessary hybridisation are going to make for some very tasty seats indeed.
And you're really tapping into those spinal greeblies, outstanding work Sir!!!
Ooh, and for your next gig.... Another part crossed off the list. It's a slightly earlier pump for later-year Spitfires (I think, still doing the info homework on it).
[url]http://i1189.photobucket.com/albums/z423/WaveyDD/Odds%20And%20Zods/101_4211EDIT3.jpg~original[/URL]
Wavey you are the man. I'M always impressed with how you keep finding these parts. Awesome as always.
Hi Gang,
Another early morning update! I shot over to the shop after work to laser cut some test pieces I created earlier yesterday morning. I think these are going to work! What do you all think?
Same basic shape of the originals but slightly wider
http://i778.photobucket.com/albums/...n Build 01166/20170411_164003_zpsmmam7gyt.jpg
More images of the chair came my way so I took advantage!
http://i778.photobucket.com/albums/...n Build 01166/20170411_164341_zpskagkjib2.jpg
http://i778.photobucket.com/albums/...n Build 01166/20170411_165155_zpsjpumcxgu.jpg
Old vs New
http://i778.photobucket.com/albums/...n Build 01166/20170411_165202_zpsquoegljh.jpg
I then broke out the Googlie Eyes! Im hoping these will lend to the appearance of weld points / rivots
http://i778.photobucket.com/albums/...n Build 01166/20170411_164010_zpsl3pjcr7x.jpg
Adhered into place
http://i778.photobucket.com/albums/...n Build 01166/20170411_164015_zps6oztn710.jpg
Primer! WOW! This DEF turned out better than I hoped - so far!
http://i778.photobucket.com/albums/...n Build 01166/20170411_165446_zpslnmexc3h.jpg
Dry fit
http://i778.photobucket.com/albums/...n Build 01166/20170411_165609_zpsugtl5bff.jpg
http://i778.photobucket.com/albums/...n Build 01166/20170411_165615_zpsdhz13ltd.jpg
http://i778.photobucket.com/albums/...n Build 01166/20170411_165621_zpsxmporljs.jpg
http://i778.photobucket.com/albums/...n Build 01166/20170411_165631_zpsvymzbour.jpg
http://i778.photobucket.com/albums/...n Build 01166/20170411_165746_zpsw0ggb9q4.jpg
http://i778.photobucket.com/albums/...n Build 01166/20170411_165753_zps4tc8nsgz.jpg
http://i778.photobucket.com/albums/...n Build 01166/20170411_165800_zps8sapnli3.jpg
I then added primer to the new cuts but also cut and adhered this interesting shape together
http://i778.photobucket.com/albums/...n Build 01166/20170411_170526_zpszvihqfb3.jpg
I added LOTS of super glue to the edges adding much strength to the MDF
http://i778.photobucket.com/albums/...n Build 01166/20170411_170530_zpssyo5uuou.jpg
This new piece mounts to the lower corner of this greeblie
http://i778.photobucket.com/albums/...n Build 01166/20170411_170554_zpsqssdtw8k.jpg
Which also gets these two pieces
http://i778.photobucket.com/albums/...n Build 01166/20170411_171822_zps4uszf9dc.jpg
http://i778.photobucket.com/albums/...n Build 01166/20170411_171831_zpscobqrymm.jpg
LOTS of sanding to do to get those edges smooth!
http://i778.photobucket.com/albums/...n Build 01166/20170411_171915_zpsrmlwcnpm.jpg
Quick coat of primer is dry
http://i778.photobucket.com/albums/...n Build 01166/20170411_172542_zpsqjinokya.jpg
How does it all look?
http://i778.photobucket.com/albums/...n Build 01166/20170411_172949_zpsn7xln4tq.jpg
http://i778.photobucket.com/albums/...n Build 01166/20170411_172954_zpsq6zadaj0.jpg
I like it. The larger pieces DEF fill up the space as it should
http://i778.photobucket.com/albums/...n Build 01166/20170411_173009_zpsjijloeb4.jpg
Different angles
http://i778.photobucket.com/albums/...n Build 01166/20170411_173017_zpsog0kfqtm.jpg
The other greeblie from above mounts in this basic area
http://i778.photobucket.com/albums/...n Build 01166/20170411_173316_zpsvjha79pv.jpg
This greeblie still needs to be sanded, primed, etc
http://i778.photobucket.com/albums/...n Build 01166/20170411_173515_zps7bjqysse.jpg
http://i778.photobucket.com/albums/...n Build 01166/20170411_173321_zpszpfg7k4y.jpg
This is a interesting little guy
http://i778.photobucket.com/albums/...n Build 01166/20170411_173348_zpsbta4cfit.jpg
He goes here with another greeblie attached - more on that guy later!
http://i778.photobucket.com/albums/...n Build 01166/20170411_173428_zpsse2nfx17.jpg
Added primer and sanded down the edges to get the final shape - more sanding required
http://i778.photobucket.com/albums/...n Build 01166/20170411_174000_zps9vymitrp.jpg
http://i778.photobucket.com/albums/...n Build 01166/20170411_174005_zpswowk8amd.jpg
http://i778.photobucket.com/albums/...n Build 01166/20170411_174016_zpsvlvx5w9d.jpg
Looks something like this
http://i778.photobucket.com/albums/...n Build 01166/20170411_175104_zpsijkrffzm.jpg
http://i778.photobucket.com/albums/...n Build 01166/20170411_175125_zpsk6tv2bh8.jpg
http://i778.photobucket.com/albums/...n Build 01166/20170411_175132_zps7ume19ef.jpg
We're getting there!
http://i778.photobucket.com/albums/...n Build 01166/20170411_175140_zpsd6xwanq5.jpg
Slowly...
http://i778.photobucket.com/albums/...n Build 01166/20170411_175147_zpseil62kky.jpg
http://i778.photobucket.com/albums/...n Build 01166/20170411_175155_zps0atcbcdr.jpg
And this is where we are!
http://i778.photobucket.com/albums/...n Build 01166/20170411_175205_zpsnfugor63.jpg
I just received a bunch of new photos from Starkiller! I'll be pouring over those images and adding as much detail as I can!
Stay Tuned!
You guys are amazing. This is impressive.
Let me know if you need more pictures or dimensions.
Those Nav chairs look the bomb!! I cannot wait to see them into the cockpit! Great work once again Sofa:cool
Hey J,
Thanks so much! I'm really excited as well! Had a few personal things to take care of last night but I'm going to the shop tonight to finish cutting the parts for the other two chairs!
Very cool! I'm amazed (well, at everything you've done, as usual, but also) at how much the googly-eye rivets really heightens the look of that thing. Can't wait to see them all over it. And Wavey's right about the older look of the top piece, IMHO.
Hey BBD,
Thank you! I was really surprised how well the googly eyes worked out as well. I did NOT think they would have matched that rivet look I was hoping for. After adding paint and some weathering, I hope they really "pop" and simply blend in with all the other details.
I'm going to use carriage bolts for some of the larger rivet heads that are scattered about the frame. Should be VERY interesting. I just hope I can get the holes aligned! Fingers crossed!
Starkiller and Izzy are working really hard to ensure we get the head piece right. We're currently dancing between 3D printing and CNCing foam and taking molds. Either way will be A LOT of work! Another "fingers crossed" on that one!
That's the best news of the week! All those ingredients plus the necessary hybridisation are going to make for some very tasty seats indeed.
And you're really tapping into those spinal greeblies, outstanding work Sir!!!
Ooh, and for your next gig.... Another part crossed off the list. It's a slightly earlier pump for later-year Spitfires (I think, still doing the info homework on it).
http://i1189.photobucket.com/albums/z423/WaveyDD/Odds And Zods/101_4211EDIT3.jpg~original
Hey W,
Thank you, Sir! Unfortunately, the hybridization is necessary only because we done have very good photos of the original prop chairs. But hopefully I can pull it off! We're getting more detailed images from Stormy of the chairs so more modeling is in the works! Things are really ramping up!
I LOVE that pump! Is that located on the Nav Computer? EXCELLENT FIND!
- - - Updated - - -
You guys are amazing. This is impressive.
Let me know if you need more pictures or dimensions.
Thanks, S!
We owe you an incredible thanks for sending this images!
Email sent re: more images
SteveStarkiller
Sr Member


Wavey
Sr Member
Awesome
EXCELLENT
Cheers! I got lucky lol. I was looking for the part on the side of the Navcom that sits between the two pumps, then like a dry slap round the back of the neck with a soggy kipper, it struck me that it's the inside of the cover plate from this pump - yay! There's two in the quad-room also.

Turns out this pump type is for use with Bristol engines from approx 1945 to 1960 but fit a number of other engine makes.
Last edited:
Lt Washburn
Sr Member
Wavey can you share how you find out the specific use history of the pumps? Is there a website with engine pictures, or a pump aficionado?
Lt Washburn
Sr Member
SteveStarkiller, I'm so happy you're doing that!
Hi Gang,
Time for a Mini Morning Update! I shot over to the shop after work and laser cut a few more greeblies!
This is how the process starts... design in a drawing app or CAD app
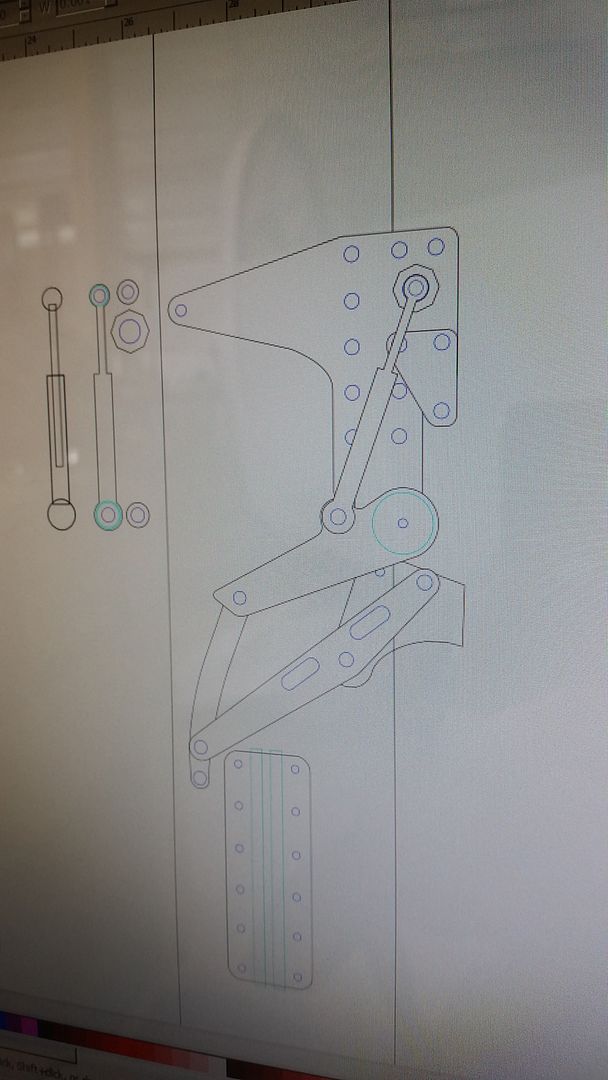
Separate everything out and export as a DXF file
Import into LaserCad - the laser cutter software
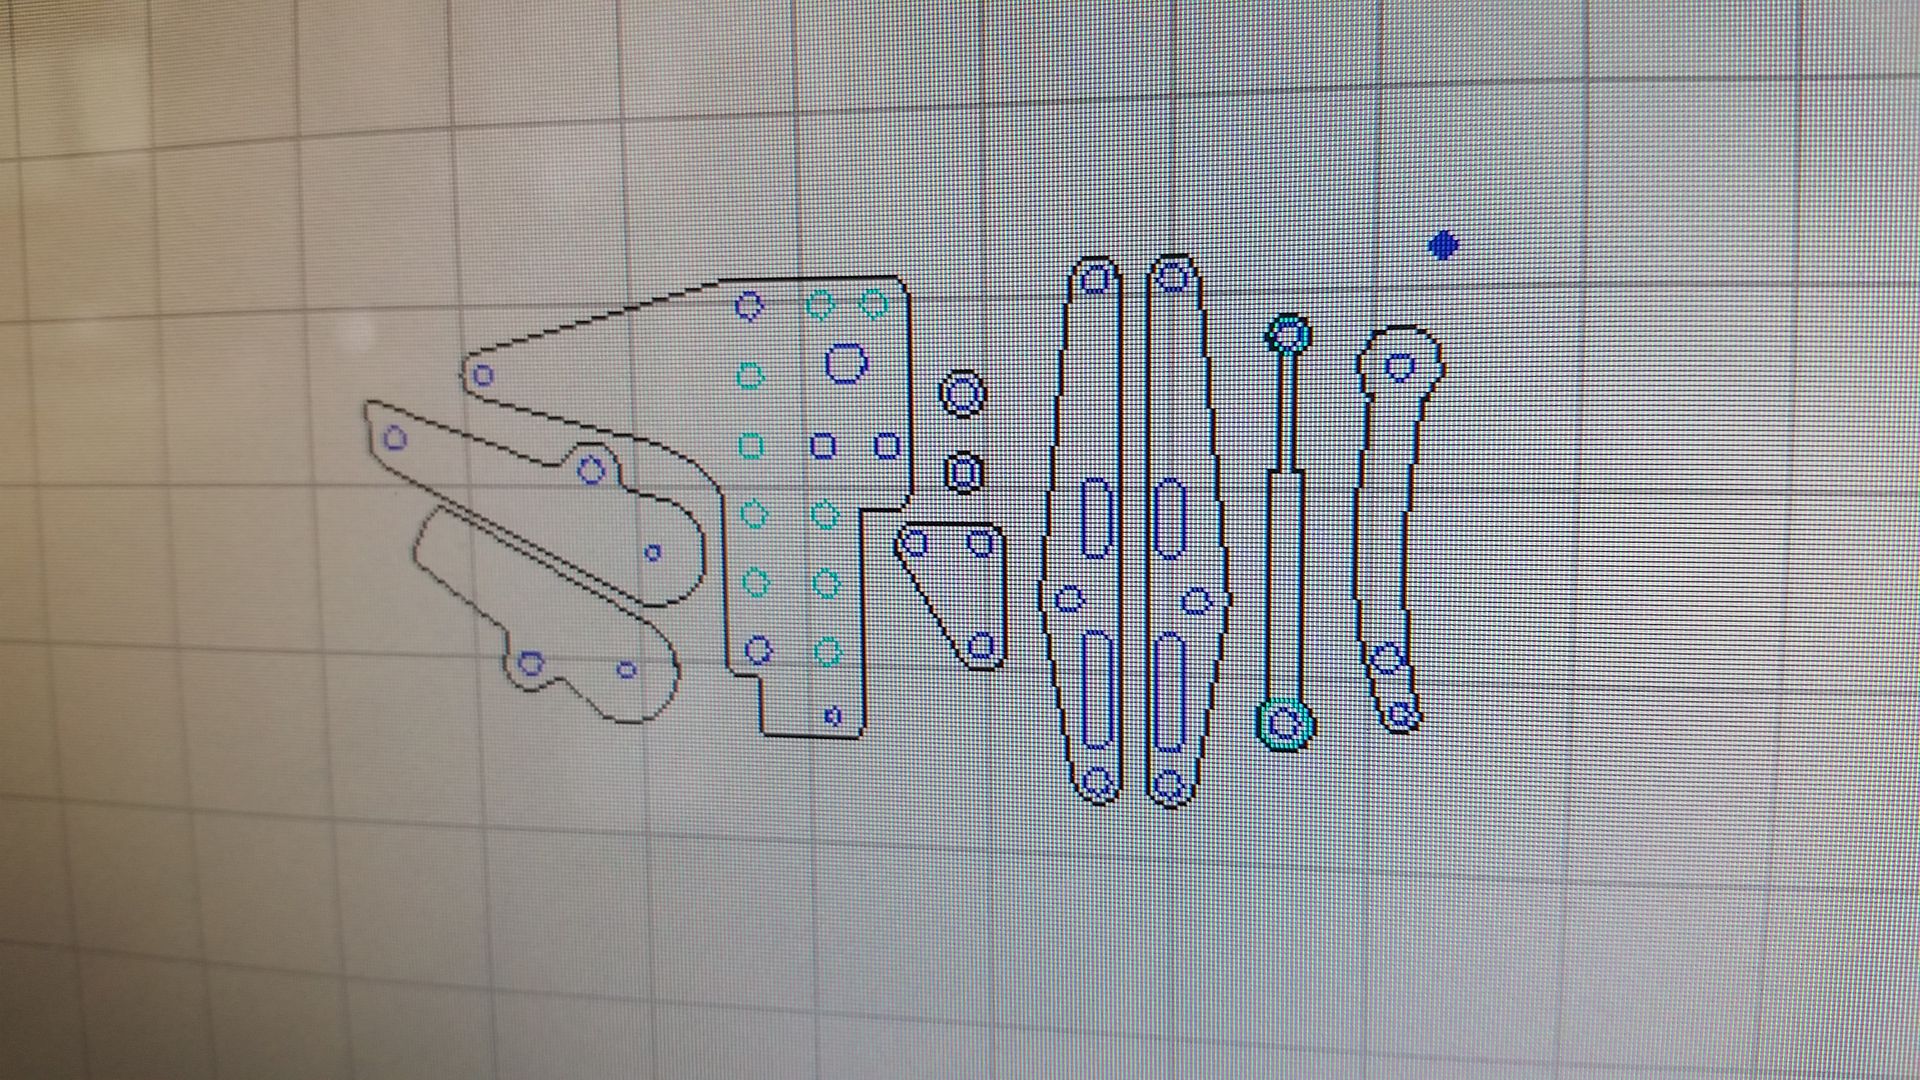
And cut!
Applied more Googly Eyes!
Adhering all the pieces together
Applied super glue to these thin edges to add strength
Primer!
And paint!
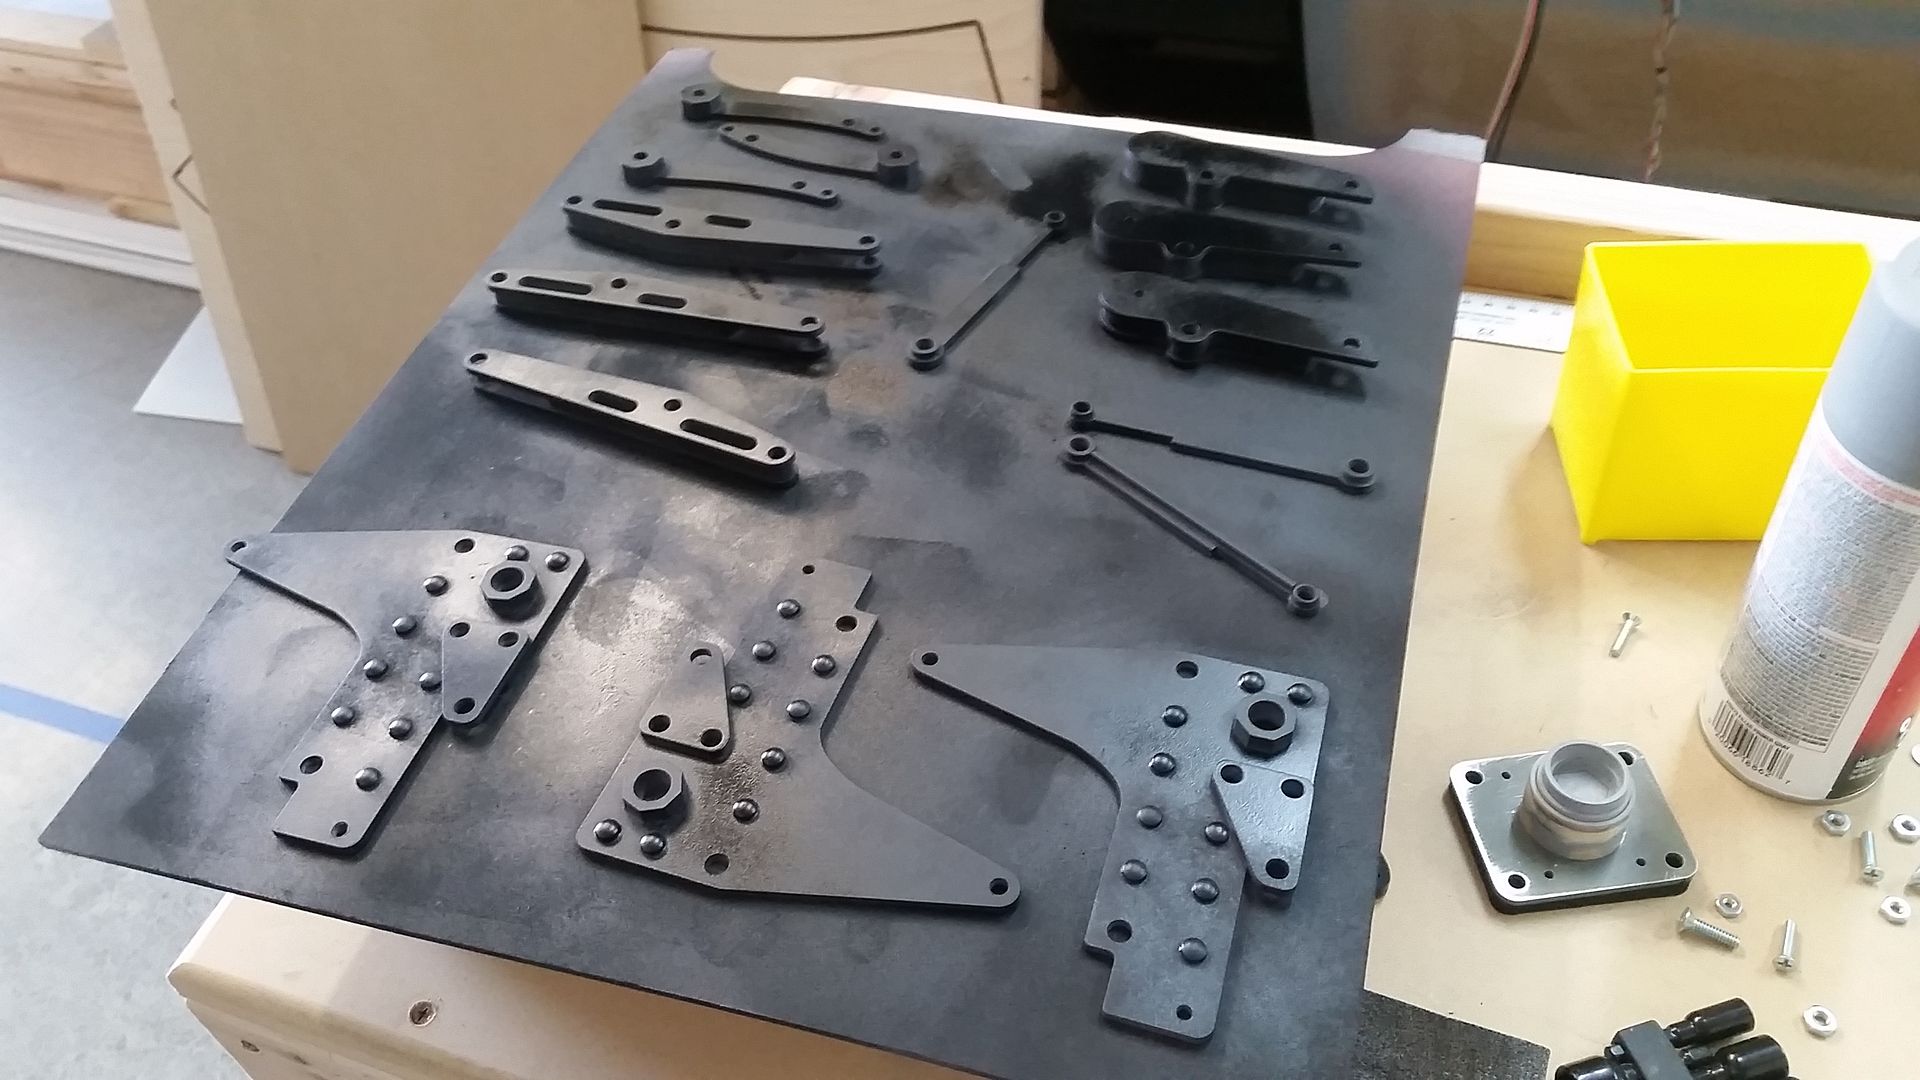
Couldn't go any further... had to wait for the paint to dry
And this is where we are!
More to Follow!
Time for a Mini Morning Update! I shot over to the shop after work and laser cut a few more greeblies!
This is how the process starts... design in a drawing app or CAD app
Separate everything out and export as a DXF file
Import into LaserCad - the laser cutter software
And cut!
Applied more Googly Eyes!
Adhering all the pieces together
Applied super glue to these thin edges to add strength
Primer!
And paint!
Couldn't go any further... had to wait for the paint to dry
And this is where we are!
More to Follow!
Similar threads
- Replies
- 2
- Views
- 984
- Replies
- 6
- Views
- 783
- Replies
- 8
- Views
- 734
- Replies
- 20
- Views
- 1,768
- Replies
- 4
- Views
- 2,438