Wonder woman-now finished w/pics!!!

Re: foam wonder woman-learn from my mistakes

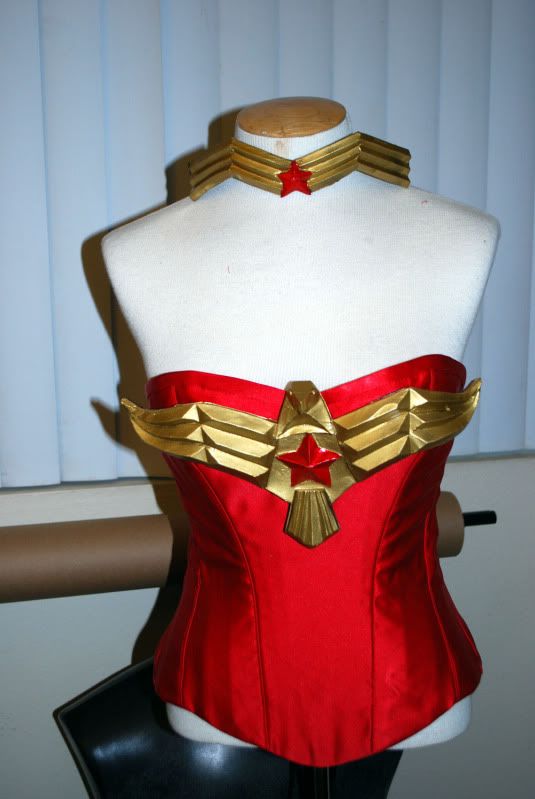
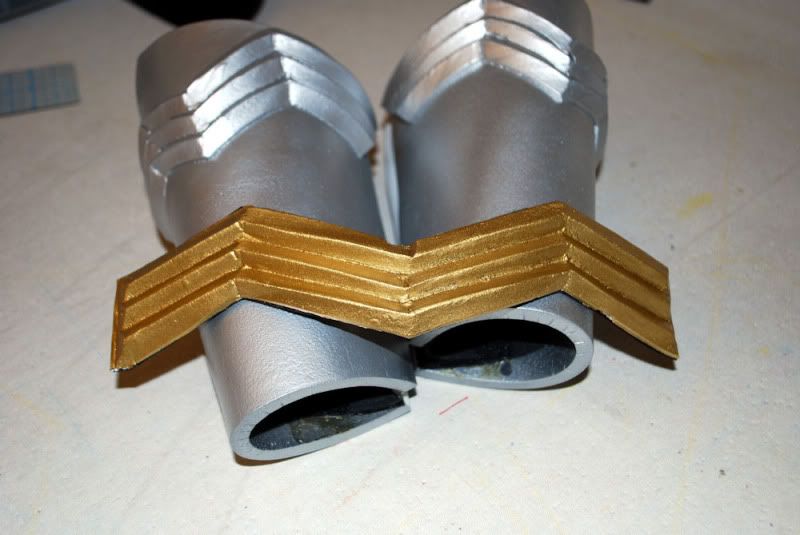
Some quick update photos. A BIG THANK YOU SHOUT OUT TO WONDERSQUID!!!!
He met up with me and spent all day helping me out with my foam cutting technique and showing me tips and tricks. Then he basically cut out all the shapes for me to take home and glue together and paint. I basically took all day to carve out one of those stars. They were really hard!!!!!!!! Lol but I got one in the end that was decent and useable so I was excited about that.

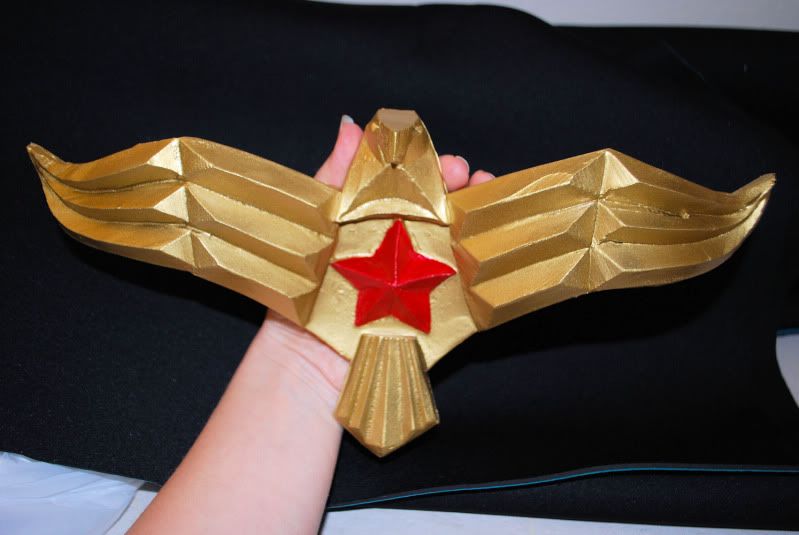
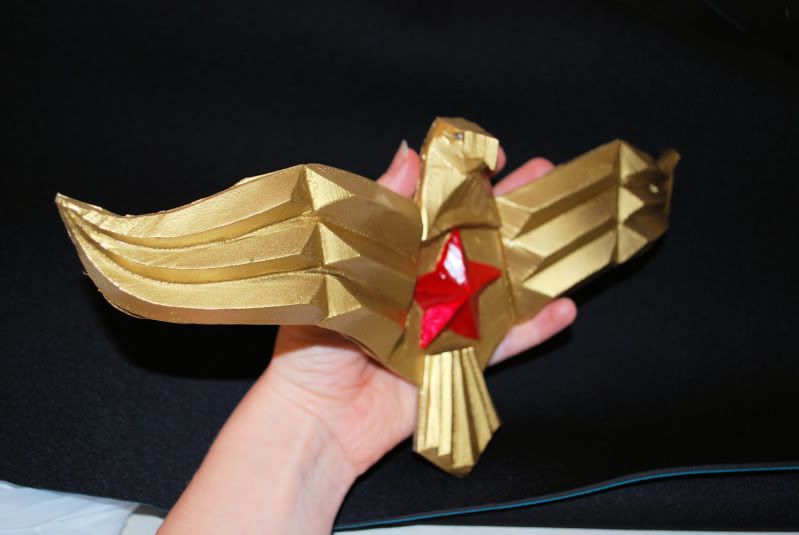
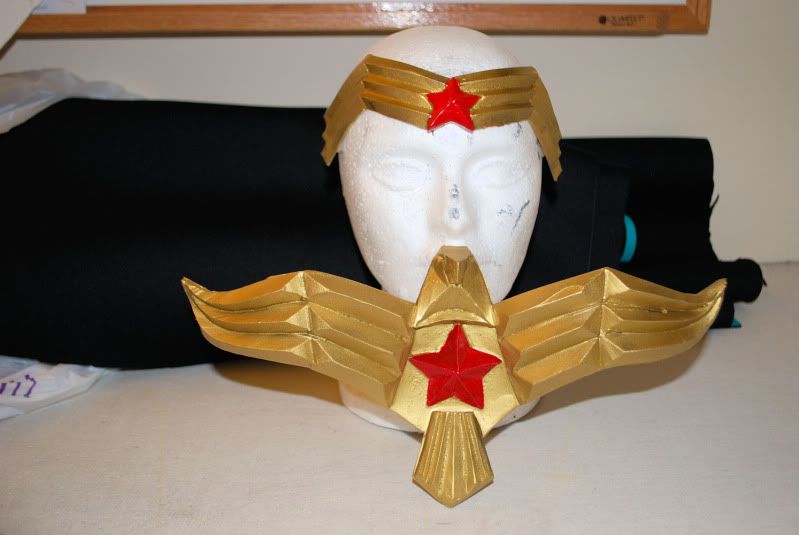
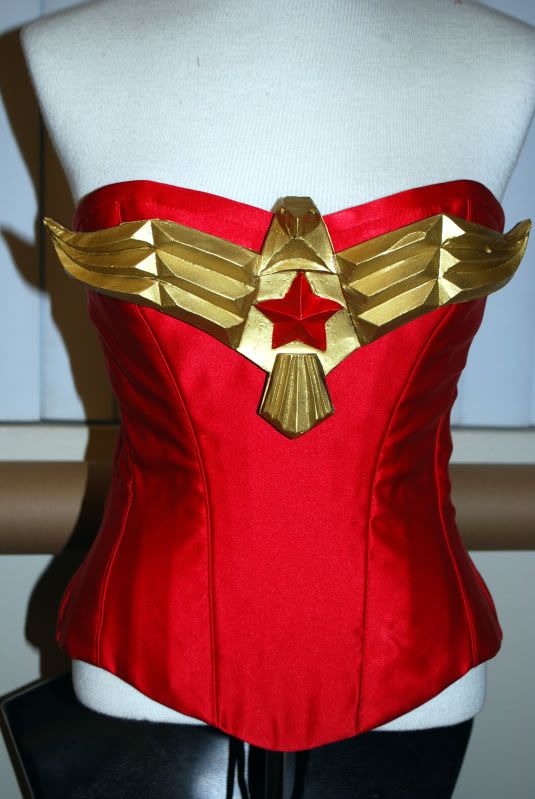
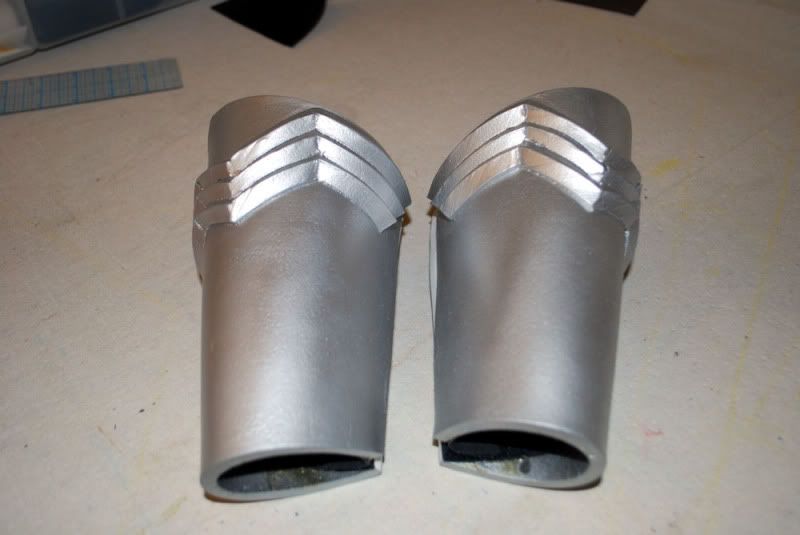
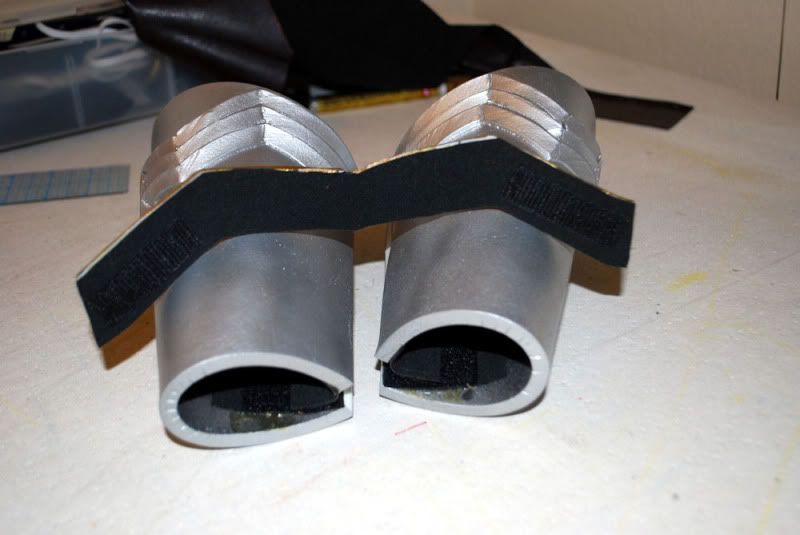
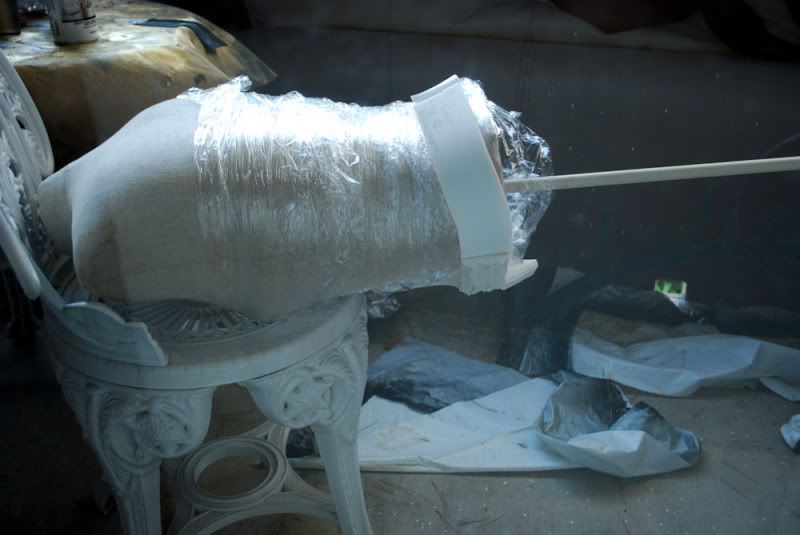
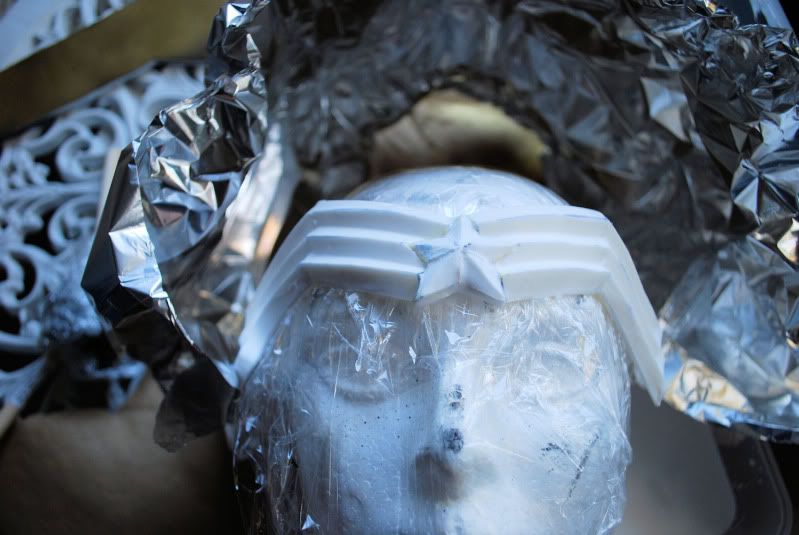
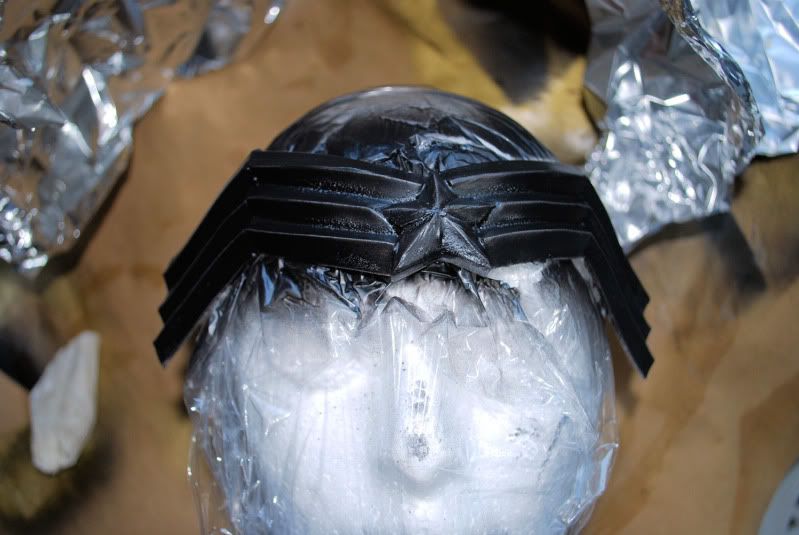
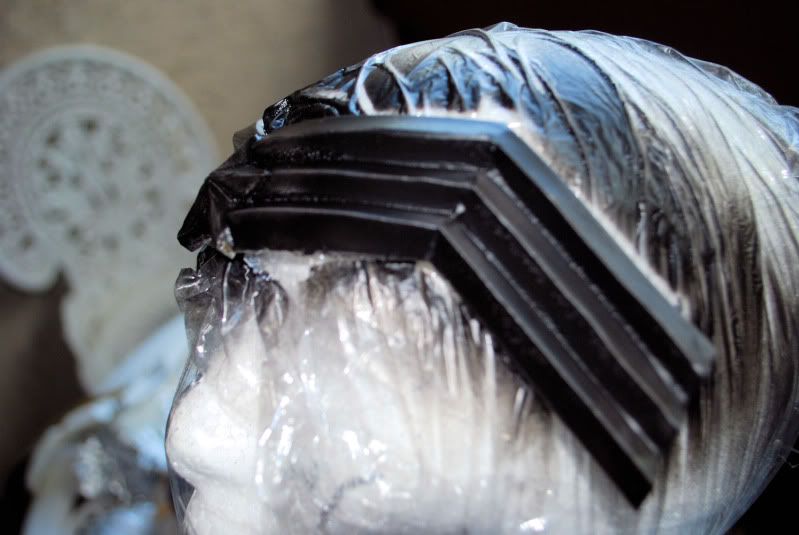
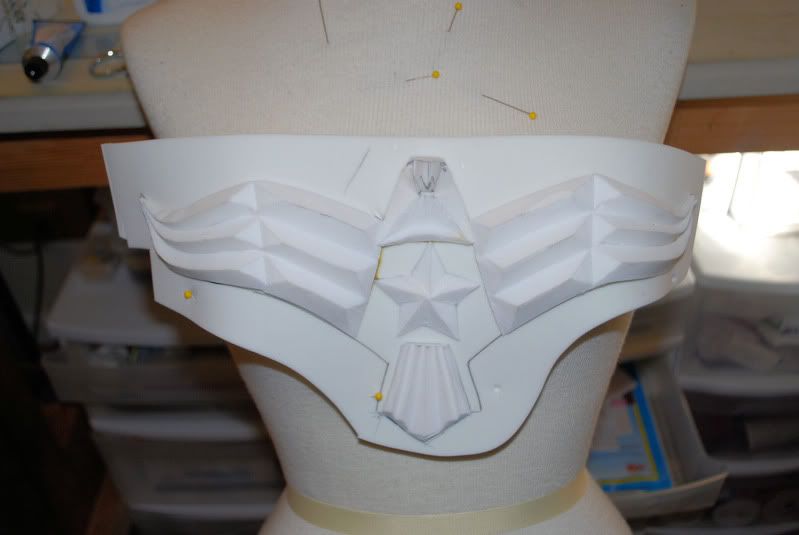
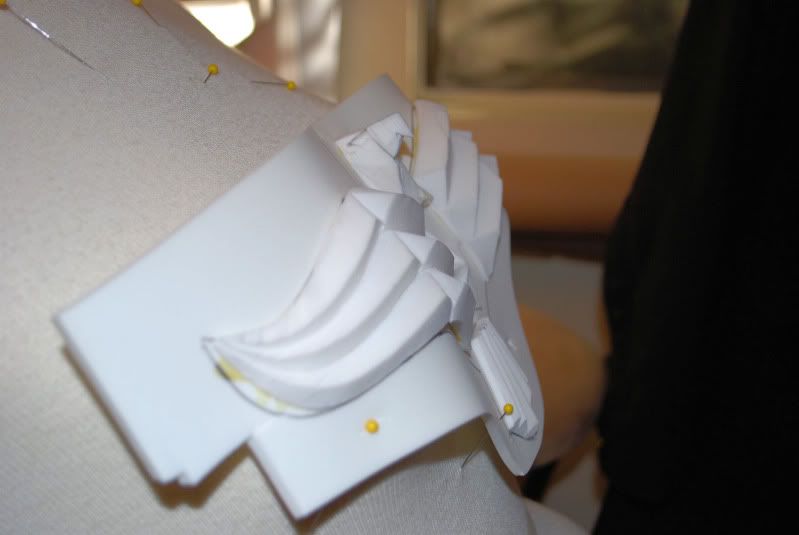
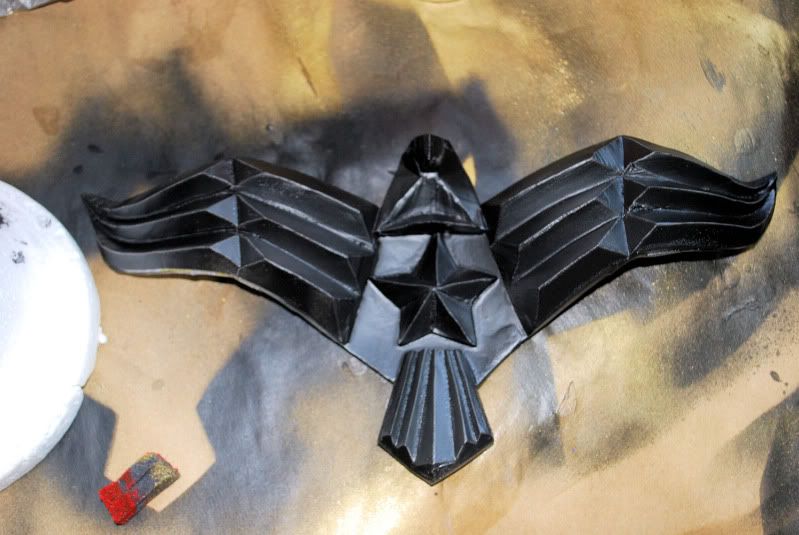
So once I got home I took the eagle base and molded it over my body form by pinning it and then gluing the extra pieces on top. Then I cut the eagle out. Right now I'm working on the head piece and the eagle. Both of them I coated in some thinned down in a 1 part elmer glue/1 part stretchy fabric glue/1 part water. After about 3 or 4 coats of that I did one spray coat of plasti dip. The headband I have all spray painted and gloss sealed so now I'm moving onto the eagle to start spray coloring. The hardest part was getting the red to cover the black plasti dip. Obviously if I had the time and budget I would have gone for the clear plasti dip and dyed it a color buuuuuuttt....I think this is good enough lol.

DSC_0065.jpg

DSC_0067.jpg

DSC_0068.jpg

DSC_0074.jpg

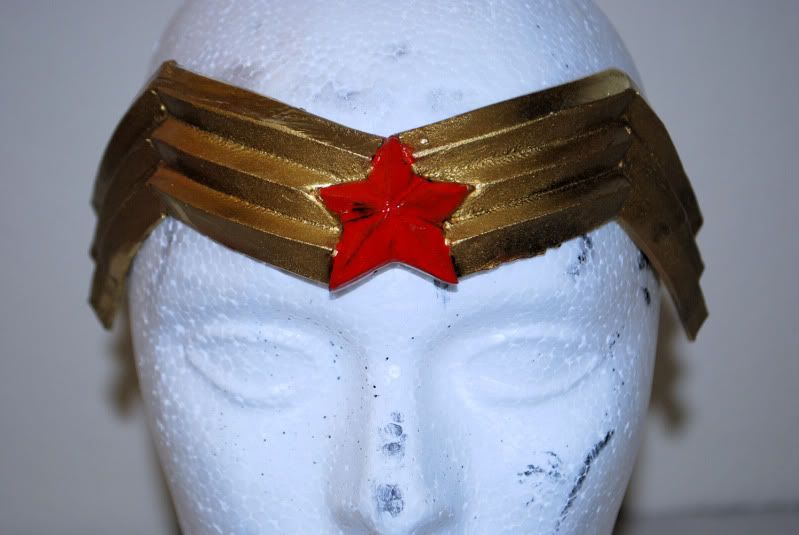
You can see that for some reason, even after 4 coats of red spray paint there is one section that is still kinda black. So I took some actual acrylic paint and dabbed that area. Hopefully it holds.
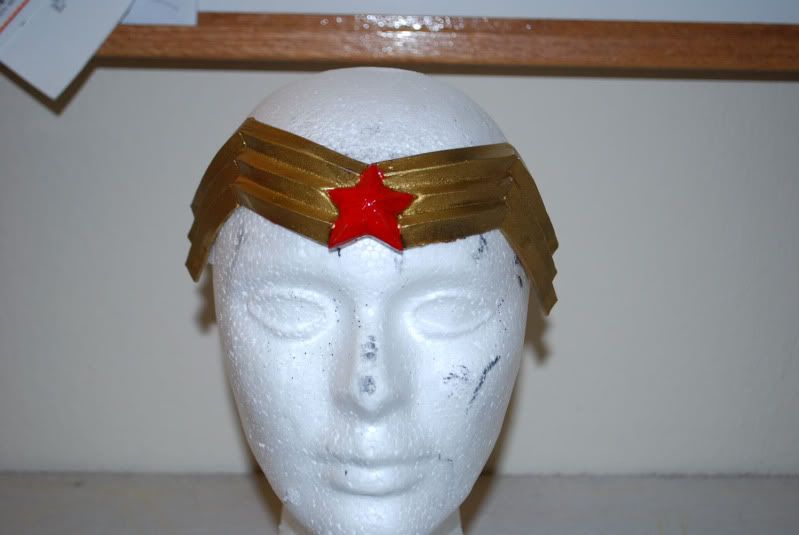
DSC_0077-1.jpg

After I fixed it

DSC_0061.jpg

DSC_0062.jpg

DSC_0075.jpg


Once again Wondersquid, you're awesome!
 
Re: foam wonder woman-learn from my mistakes

You are very welcome EveningArwen, it was a pleasure to meet you and I hope you enjoyed your private foam tutor lessons.:love I like your coating idea, I'll have to get with you and get that formula to try on my Cyberman costume. Stuff looks great so far, can't wait to see it on the outfit. As to your red problem, that's interesting because I use Design master and yes when I paint a lighter color I usually base it with white first, but in this case I would have painted the red over the gold color instead of the black, less hassle I imagine. Next time, don't hesitate to call, I love helping out! Oh and you better not cancel your party!:behave
 
Re: foam wonder woman-learn from my mistakes

I have found that an inexpensive scroll saw greatly speeds up the process of "rough cutting" the initial foam pieces. Trace the pattern onto the foam (I'm speaking of EVA foam mats) and cutting it out can take only minutes.

The table of the saw tilts so cutting the edges to make an angle is fairly easy.

It's no noisier than a sewing machine as there is no whine from cutting wood.

You can cut a LOT of foam before the blade gets dull.

I have one like this, regular price in the US is $119:

64a8dddf-7515-4346-b9fc-c506c29385ef_300.jpg


SC164VS 16 in. Scroll Saw-SC164VS at The Home Depot
 
Re: foam wonder woman-learn from my mistakes

This is great stuff! I am looking at doing some gauntlets in foam and this is helpful to see what doesn't work and how I can hopefully make it easier on myself LOL! Thanks Becky for posting this thread!
 
Re: foam wonder woman-learn from my mistakes

Definitely!! If you look earlier in the thread I posted the link from the original person who talked about using the glue parts to seal first. Although they didn't use plasti dip, they (he? I think actually) painted right over the layers of glue.

And the party is for sure on! Halloween RPF party at my place folks! Hhehehe.

You are very welcome EveningArwen, it was a pleasure to meet you and I hope you enjoyed your private foam tutor lessons.:love I like your coating idea, I'll have to get with you and get that formula to try on my Cyberman costume. Stuff looks great so far, can't wait to see it on the outfit. As to your red problem, that's interesting because I use Design master and yes when I paint a lighter color I usually base it with white first, but in this case I would have painted the red over the gold color instead of the black, less hassle I imagine. Next time, don't hesitate to call, I love helping out! Oh and you better not cancel your party!:behave

I have found that an inexpensive scroll saw greatly speeds up the process of "rough cutting" the initial foam pieces. Trace the pattern onto the foam (I'm speaking of EVA foam mats) and cutting it out can take only minutes.

I'd love to have something like this and will probably have it in the future but unfortunately I live in an apartment right now so my space is limited. :(

This is great stuff! I am looking at doing some gauntlets in foam and this is helpful to see what doesn't work and how I can hopefully make it easier on myself LOL! Thanks Becky for posting this thread!

No worries! It was why I decided to post all this! Hoping that someone could see my trial and errors and either avoid them or improve upon them so they work!

And on that note here is the eagle all painted! It's funny you mentioned spraying the red over the gold wondersquid because I decided to do that for the eagle star so I sprayed the whole thing gold and then taped everything off but the star and sprayed it red. But unfortunately the red still bled underneath the tape and then the tape lifted up some of the plasti dip. So I re sprayed a layer of plasti dip in the center and let it dry over night and then re sprayed the eagle gold. Then I bought some acrylic red paint and used a paint brush to paint the star. Then about 2 reallllllllly good coatings of clear coat spray paint. So far so good.

I'd definitely say that the metallic spray is working pretty good but if you bend foam to far it will crack. But you'd have to be treating it pretty rough and when it goes back to it's form you don't see the crack (you do see a crease) and it doesn't peel..........................so far...........lol!

DSC_0085.jpg

DSC_0084-1.jpg

DSC_0086.jpg
 
Re: foam wonder woman-learn from my mistakes

Roadkiller, I have used Bandsaws to cut foam, but never a Scrollsaw, how do you keep the foam from "jumping" as the blades cuts upward? I know with bandsaws the blades is cutting downward constantly, so it's cleaner, and yes I have done beveling that way as well, it just gets complicated when you get into tight corners because, again, the blade loves to grab the foam and "yank" it out of your hands if your not careful. But I would love to see some of what you've cut on scrollsaws, if it is clean enough, that is a great idea.
 
Re: foam wonder woman-learn from my mistakes

Hi Wondersquid:

There is a "U" shaped guard or foot that adjusts up and down near the blade. I just lock it at the thickness of the foam to keep it from jumping up.

I find the edge to be quite smooth. If an area is messed up, a quick going over with a palm sander and 60 grit evens it up. I am away from my work space until the middle of next week. If someone hasn't shown their own scroll saw work by then, I'll take some pics and put them up.

I've also laid two pieces of foam back to back to cut out left/right pieces at the same time. Or placing two, face to back, will allow cutting two of the same piece at the same time. Just fasten the foam at two corners and raise the 'foot' to the height of both pieces of foam.
 
Re: foam wonder woman-learn from my mistakes

Some more pics! I'm almost done with this project!!! Halleluiah!

DSC_0323.jpg

DSC_0327.jpg

DSC_0328.jpg

DSC_0324.jpg

DSC_0325.jpg


The bracers and one of the boot tops
DSC_0329.jpg


The back of the boot tops so you can see how most of all the other backs look.
DSC_0330.jpg


The last thing to do is seal and paint the belt so right now here is a pic of the belt being sealed with the thinned white glue first.
DSC_0326.jpg
 
Re: foam wonder woman-learn from my mistakes

This is a truly brilliant thread. I am sooo grateful to you and everyone who has commented. This is how we learn people. It's good to share our successes and .our mistakes, so we can all have a better ( and cheaper) journey
 
Re: foam wonder woman-learn from my mistakes-NOW FINISHED!!

Hey all! I updated my first posting with pics of the finished product on me. My customer is so sweet and amazing and she said it was ok to take photos for my portfolio and website etc. So thought I'd post the end result here as well! Enjoy!
 
Looks great! Fantastic job and fast too! Just a question, no stars on the jeans? Better that way I think. So what are you making for the party?
 
Looks great! Fantastic job and fast too! Just a question, no stars on the jeans? Better that way I think. So what are you making for the party?

Lol fast!!?!?!? Holy cow....this project took me about 3 months hahahaha! That's so painstakingly sloooooooooooow. But I'm glad you liked the way it came out! There were still little flaws here and there that I wish were better but overall it looks good and I'm so glad it's done. Also no stars on the pants mostly because I didn't have time and because I couldn't quite figure out where and how to put them. I didn't really want to put them down the side seam. I thought it would be cool to find a way to do one giant star that started mostly on the left leg and then the tips of the star extended over onto the other leg....a sort of asymmetrical look. But again no time.

As for the party we are making Tron costumes, so the lead Siren and Castor aka Ziggy Stardust hahahaha.

That is some great work right there.

Wow! Looks awesome.

Thanks so much! I'm excited for the love for it!
 
As for the party we are making Tron costumes, so the lead Siren and Castor aka Ziggy Stardust hahahaha.

DUUUUHHH!! :behaveYou told me about that, how could I forget, oh that's right I've been trying to finish my Cyberman in time and I have NO BRAIN! :lol
 
DUUUUHHH!! :behaveYou told me about that, how could I forget, oh that's right I've been trying to finish my Cyberman in time and I have NO BRAIN! :lol

Dude, I'm trying to throw together two light up tron costumes in about a weeks time that I haven't even reaaaalllllyyy started yet....yeah.......I'm right there with you hahaahahahhaha!
 
I posted some more detail shots of the foam pieces so folk could see the paint and carving more. Also I didn't intend for the photos to align in that really weird way but it made me laugh really hard so I'm leaving it hahahahah!
 
Back
Top