wiring problem, beating my head on this one

Sulla

Sr Member
RPF PREMIUM MEMBER
Well, This is the second tricorder I have put together. This time around I am of course going more slowly, implementing the lessons I learned the first time around, and was so happy with my progress.

I got all my painting and assembly of the body done and was just beginning the fit of the door to the body today, and while filing the hinge leaves, I felt something fall out of my hand and into my lap. It was one of the door wires!

The wire was soldered to the leaf that got screwed and puttied into the door. Is there any way I can re-attach the wire without drilling out the putty and paint, and re-soldering it through that drilled hole? It took me weeks to putty/sand and putty/paint and sand/paint this thing.
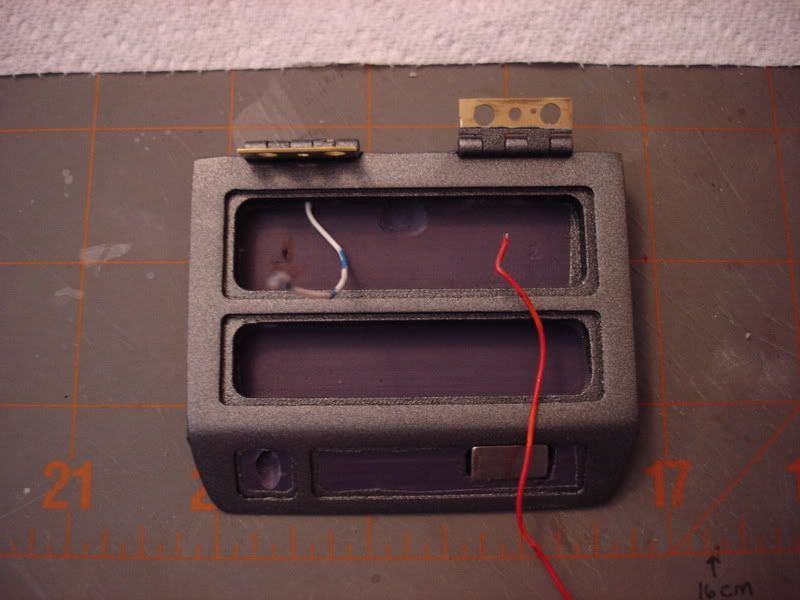
DSC03493.jpg
 
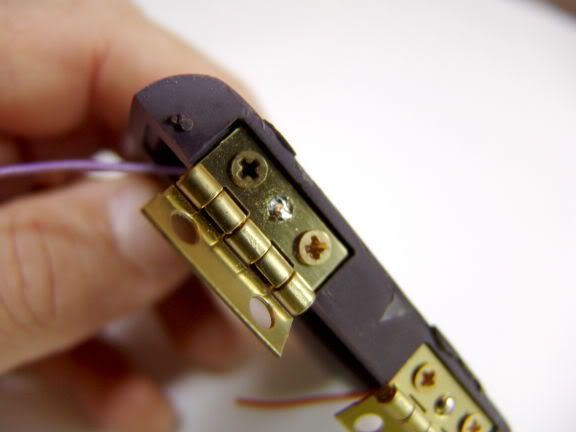
Here is a photo curtousy of D. Stines, showing the welded wire on the hinge prior to puttying. I am thinking that I have to drill through my sanded, painted, puttied, perfect surface through the deffective weld, re-weld it and re putty/sand/paint/repeat. :confused

CanI avoid that somehow? Pack the interior hole with metal shavings and drop solder into it and attach the wire to that, or anything else?


mkx9.jpg
 
I feel your pain. I have built up about 4 Dstines kits, and have faced this problem before.

unfortunately, the most reliable fix will be to do the unthinkable and drill, solder, sand, putty etc. it's not so bad when you think about it, you really only need a very small hole, and if you are gentle, the patch job will be easy, and then do a quick pass with the rattle can again.

Failing that, you can try a heatless electrical repair kit like the ones used to repair the window defoggers in car's. Just go to your auto parts store and see what they have. I have never done this, since I feel that the reliability will be cut in half unless its soldered, and the adhesion in those kits is not even close to that of good ol' lead solder.

Best bet once the repair is done is to tuck all of the wires into the little pocket in the door, and tape them down so you wont move them at all until its time to install the door boards.

Here is one of mine.

DSCN0018.jpg


Cam
 
Thanks for the advice, and that tric of yours looks nice.

The problem was, I did have the wires taped down. I took the tape off to install the door electronics, but for some reason I decided to file the hinges while the soldering iron got hot, and that must have broke the wire off. But if it was probably going to break anyhow when I got around to stripping them for soldering the board in.

Out of curiosity, how did you attach the D.Stines graphics? I was thinking of using Super 77 3M spray glue, but am unsure of the effects it will have on the LED cut outs. Like will it "splotch" them up or somethig?
 
I've already clear-coated the thing with Testors Dull Cote 1260 Flat Lacquer Overcoat. If I drill out the the hole for soldering, then putty and sand it, do I need to sand the laquer off the whole door before re-painting, or can I just paint over the lacquer with my Duplicolor DSGM347, and re-lacquer it when finished?
 
The wires in the door always made me sweat. I made sure they were stripped and ready for board mounting before I closed up the hinge end. One thing I did was after the wires were in, I'd fill up the hole with epoxy so the only stress point was in the accessible part of the door, and would make any repairs a bit simpler than drilling out the whole assembly.

I used 77 as well. I sprayed it first onto some newspaper and let it bubble out for a min, then used a brush to spread it all over the graphics, taking care not to get any near the LED cutouts. The main screen graphics need to be worked in a little before you set them in place. Try and put a small bend in them where they arc up to the top of the tricorder before you glue them down or they may start to pull up later on.

Man now I want to build another one of these! its been a while!


Cam
 
I've already clear-coated the thing with Testors Dull Cote 1260 Flat Lacquer Overcoat. If I drill out the the hole for soldering, then putty and sand it, do I need to sand the laquer off the whole door before re-painting, or can I just paint over the lacquer with my Duplicolor DSGM347, and re-lacquer it when finished?

Since both the paint and lacquer use the same base chemicals, I'd just go over it with some fine grit and then hit it with the paint again. All I would be worried about is having too much paint build up, but if you used nice thin coats, it shouldn't be an issue.


Cam
 
Since both the paint and lacquer use the same base chemicals, I'd just go over it with some fine grit and then hit it with the paint again. All I would be worried about is having too much paint build up, but if you used nice thin coats, it shouldn't be an issue.


Cam

Just do it over - I've built over 100 and it does happen. But the only real fix is to do it right. If that means doing it over, so be it.

You can mask off the back edge of the door so you won't have to repaint the entire thing.

Hope that helps, you're not alone.:thumbsup

:)
 
Thanks all! I will drill it out, re-solder it and mask it off so I only have to do the back end. AND I'll do the epoxy filled hole thing too. Great idea!
 
Well, I fixed the weld, taped the wires down for now, and epoxied both wires into their resin holes, which all worked great. I bubbled the paint a bit with my soldering iron, which will make my patching it up a bit more troublesome, but once I decided to take the plungh and drill it out, that did not bother me.

However, after fixing the weld, I did some testing and I now find that the hinges are not conducting electricity from one leaf to the other!

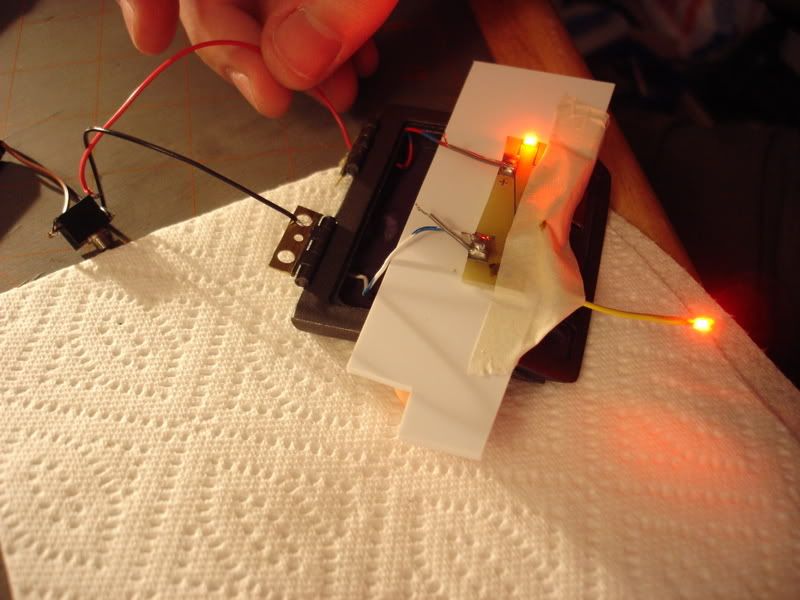
I tested the welds on both hinges. The hinge leaf embedded in the back of the door is conducting the charge to the wires and on to the bords that light up with no problem, but when I apply the power to the hing leaf that will sit in the tric body, no power is getting through!

:cry

Both the hinges tested fine before the repair, and the Negative hinge/wire assembly was carrying the current fine while I fixed the weld on the positive hinge/wire weld.

What do you suppose the problem is now? Can some paint or resin dust have made it into the barrel of both hinges keeping the leaves from contacting one another directly or through the hinge pin? I will play with it a bit today, but I'd love to hear if anyone has any advice.
 
The hinges suck.. they always have and always will haha.

They are finicky things and will need to be played with. Once the door is mounted into the tricorder and there is some pressure on the hinges, they should work a lot better.

To test them without mounting, attach the power wire to the hinges and apply current. Hook on a test light or the bottom board to the door wires, and then play with it a bit. Pull the hinges a bit and move them around, and you should see intermittent current flowing as you move them around.

Before i mounted my hinges on the door, I would gently hammer the joining pieces with a center punch to tighten them up a little, I know its too late for this now, but just in case you decide to build another one... and believe me, you WILL build another one. heh heh.


Cam
 
Well, I fixed the weld, taped the wires down for now, and epoxied both wires into their resin holes, which all worked great. I bubbled the paint a bit with my soldering iron, which will make my patching it up a bit more troublesome, but once I decided to take the plungh and drill it out, that did not bother me.

However, after fixing the weld, I did some testing and I now find that the hinges are not conducting electricity from one leaf to the other!

I tested the welds on both hinges. The hinge leaf embedded in the back of the door is conducting the charge to the wires and on to the bords that light up with no problem, but when I apply the power to the hing leaf that will sit in the tric body, no power is getting through!

:cry

Both the hinges tested fine before the repair, and the Negative hinge/wire assembly was carrying the current fine while I fixed the weld on the positive hinge/wire weld.

What do you suppose the problem is now? Can some paint or resin dust have made it into the barrel of both hinges keeping the leaves from contacting one another directly or through the hinge pin? I will play with it a bit today, but I'd love to hear if anyone has any advice.

You can tighten the hinge with duck bill/flat nose pliers, just pinch the hinge a bit to more tightly grip the pin. You may also try a conductive lubricant...
 
Last edited by a moderator:
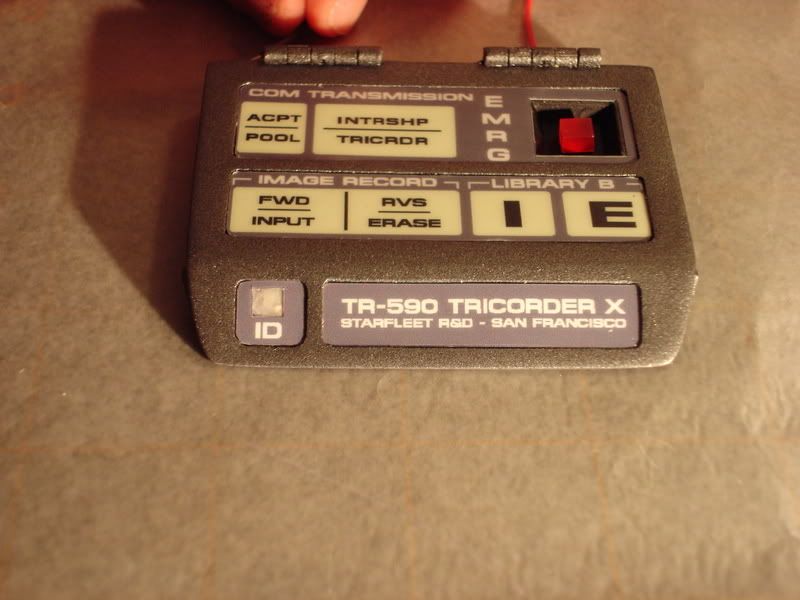
Well, I fixed all my problems. I need to strip the hinge barrels and re-paint them (you can see in the pix that they look aweful) but at least I have the electronics working.

I really hate the close up paint job, but it reallt does look good and clean despite the fact that my camera picks up all detail no matter how unflattering. And it seems to get easily confused (focus) by the turning on of lights when setting the timer for picture taking.

DSC03506.jpg

DSC03507.jpg

DSC03508.jpg
 
Back
Top