You are using an out of date browser. It may not display this or other websites correctly.
You should upgrade or use an alternative browser.
You should upgrade or use an alternative browser.
WIP ANH Darth Vader - Update with Photos
- Thread starter masterstumpy
- Start date
masterstumpy
Well-Known Member
Re: WIP ANH Darth Vader - Photo Update Post #26
Thanks Markus :thumbsup
To be honest, I don't find it too hard working with only one hand. Sure, there are a few things that I've stuggled with and needed a helping hand, but I try my best to do it all on my own. I think it'll make it a bigger accomplishment in the end :cool
Thanks for your kind words,
Cameron
masterstumpy
Well-Known Member
Re: WIP ANH Darth Vader - Photo Update Post #43
Quick update:
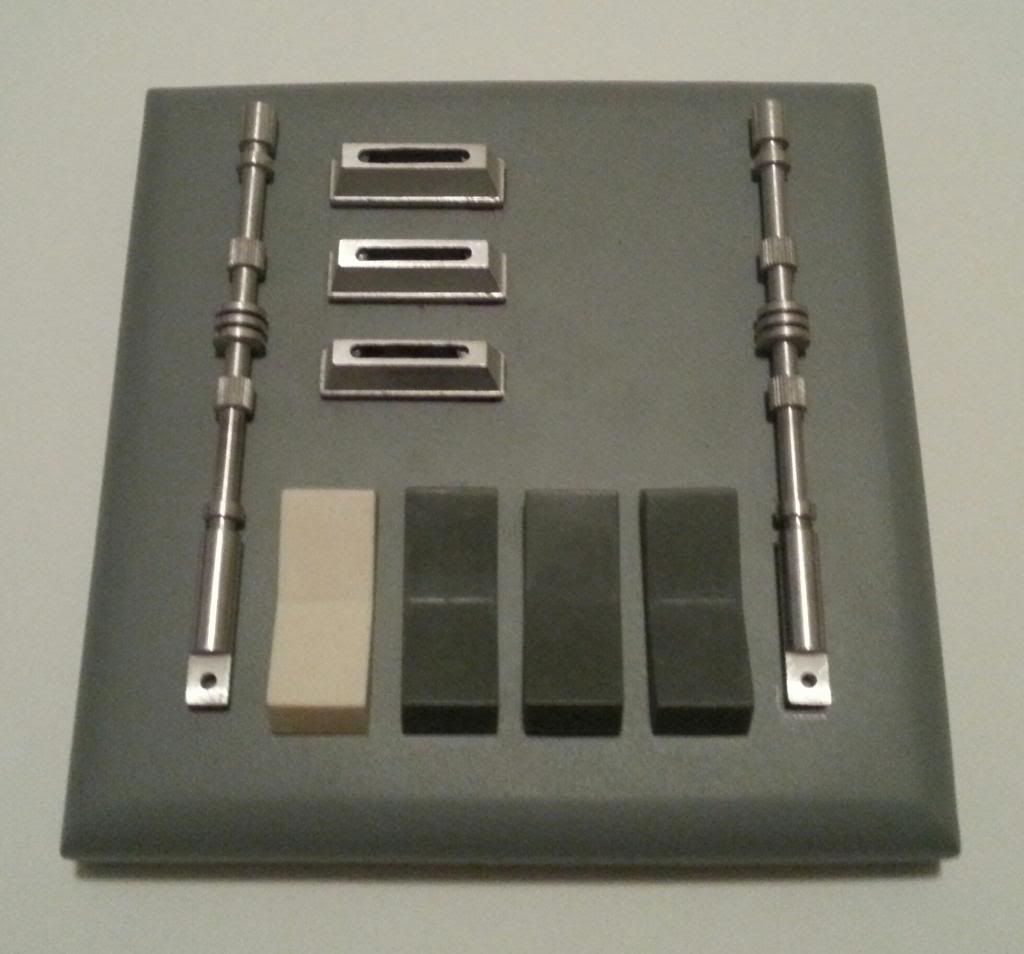
I received my awaited chestbox parts, which were some new rocker switches and some aluminium coin slots. I still need to find some accurate red and green squares then I'll have all of my chest box parts
The pic attached shows the planned layout of my chest box. The switches and coin slots are held on with bluetack for the moment. My chest box lighting (I know its not accurate, but I wanted my Vader to have flashing lights :lol) also fits nicely behind the coin slots :cool
Let me know what you all think :thumbsup
Thanks for reading,
Cameron
Quick update:
I received my awaited chestbox parts, which were some new rocker switches and some aluminium coin slots. I still need to find some accurate red and green squares then I'll have all of my chest box parts
The pic attached shows the planned layout of my chest box. The switches and coin slots are held on with bluetack for the moment. My chest box lighting (I know its not accurate, but I wanted my Vader to have flashing lights :lol) also fits nicely behind the coin slots :cool
Let me know what you all think :thumbsup
Thanks for reading,
Cameron
masterstumpy
Well-Known Member
Re: WIP ANH Darth Vader - Photo Update Post #44
Quick update:
Its been a few months now since I posted anything because there hasn't been anything to post. I moved out of home, so my Vader got packed away and moved, and its only now that I've been able to start working on my project again.
Not long ago I received my capeset, which is absolutely amazing!!! You can feel the quality in the weight of it. I'm looking forward to seeing it on my Vader. I need to work on my mannequins padding before I can start putting everything on, which hopefully will happen in the next few months. Padding out my mannequin has so far been the most challenging part of the project....
Thanks for reading,
Cameron
masterstumpy
Well-Known Member
Re: WIP ANH Darth Vader - Photo Update Post #43
Hi all,
Just thought I'd share something with you. For ****s and giggles one night, I put my helmet and chest armor on one of my mates, who is a bigger bloke then I.
I couldn't believe how well if fitted on him. He's a bit bigger than the usual Vader, but trying the pieces on him solidified in my mind that my "inner helmet system" was going to work. The helmet sat well on his head, and in my opinion, the gap between the neckline of the faceplate and the top of the armour was spot on.
Now I just have to get my ass into gear, spend a bit more money, and get my Vader finished!!!!
Thanks for reading,
Cam
Re: WIP ANH Darth Vader - Photo Update Post #43
Looking good! You've got to practice your Vader posing...
I find it almost impossible not to go around force choking people when I'm in costume. :lol
Looking good! You've got to practice your Vader posing...
I find it almost impossible not to go around force choking people when I'm in costume. :lol
Too Much Garlic
Master Member
Re: WIP ANH Darth Vader - Photo Update Post #43
You're right, that fits him rather well. How about paying him to be your full-time mannequin?
You're right, that fits him rather well. How about paying him to be your full-time mannequin?
Ghost Host
Sr Member
Re: WIP ANH Darth Vader - Photo Update Post #43
Great progress!
Great progress!
masterstumpy
Well-Known Member
Re: WIP ANH Darth Vader - Photo Update Post #43
Thanks everyone.
Hopefully it'll be finished in the next few months.
I've been working on it since may last year so hopefully its not too long from completion.
Thanks everyone.
Hopefully it'll be finished in the next few months.
I've been working on it since may last year so hopefully its not too long from completion.
masterstumpy
Well-Known Member
Re: WIP ANH Darth Vader - Photo Update Post #51
Ok.
Update.
Since my last post, I've moved again, which means my vader was packed away, again. I still haven't unpacked him completely, but my New Years resolution is to finish him.
A few months ago I ordered some really nice belt boxes from russ at RB Replicas, and I finally got round to putting them together the other night.
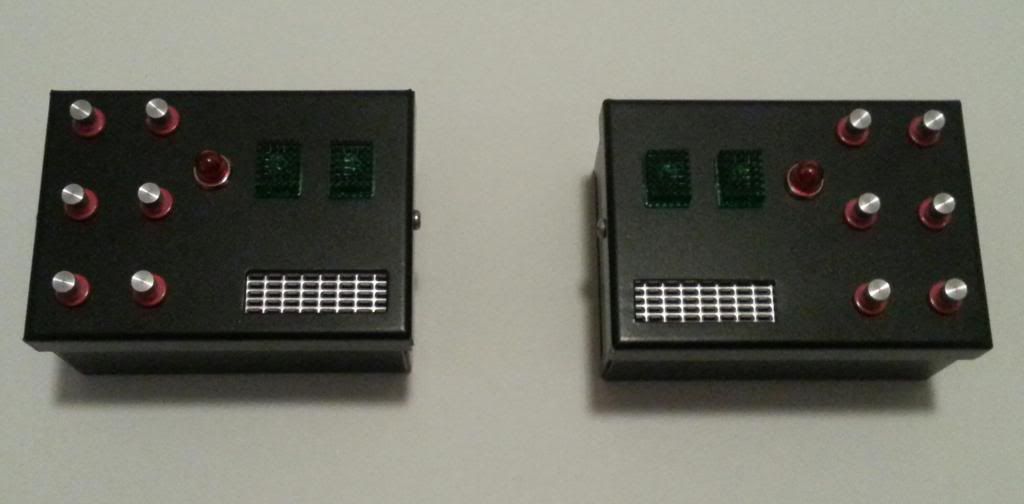
I haven't permanently secured the mesh yet, and I still need to set up a wiring circuit for the lights, but I am so wrapped with them. I have a belt buckle and lightsaber hook also made by russ, so all I need now is a belt, and then that part of my costume will be complete.
In this update, I thought I'd also include a picture of my chest box wip. I still need to buy the missing red and green squares. I want to start working on the strap system for it soon, with accurate leather and details.
My next goal is to make/find a padded under suit that I can wear, but something that will fit my mannequin (which is a similar size to myself), to bulk me up a little. I also plan on going back and refining all my armor; filling, sanding, filling and sanding until its ready for paint. But I don't want to paint it until I can test fit the whole costume, just in case I have to modify something.
Hopefully I can achieve my New Years resolution.
Thanks for reading,
Cameron
Ok.
Update.
Since my last post, I've moved again, which means my vader was packed away, again. I still haven't unpacked him completely, but my New Years resolution is to finish him.
A few months ago I ordered some really nice belt boxes from russ at RB Replicas, and I finally got round to putting them together the other night.
I haven't permanently secured the mesh yet, and I still need to set up a wiring circuit for the lights, but I am so wrapped with them. I have a belt buckle and lightsaber hook also made by russ, so all I need now is a belt, and then that part of my costume will be complete.
In this update, I thought I'd also include a picture of my chest box wip. I still need to buy the missing red and green squares. I want to start working on the strap system for it soon, with accurate leather and details.
My next goal is to make/find a padded under suit that I can wear, but something that will fit my mannequin (which is a similar size to myself), to bulk me up a little. I also plan on going back and refining all my armor; filling, sanding, filling and sanding until its ready for paint. But I don't want to paint it until I can test fit the whole costume, just in case I have to modify something.
Hopefully I can achieve my New Years resolution.
Thanks for reading,
Cameron
Last edited:
masterstumpy
Well-Known Member
Re: WIP ANH Darth Vader - Photo Update Post #51
Quick update:
I unboxed my vader this morning after moving house, and as I was inspecting the imperfections in my armor that I need to fix because it is still quite rough, I found a small crack in my GH armor :cry
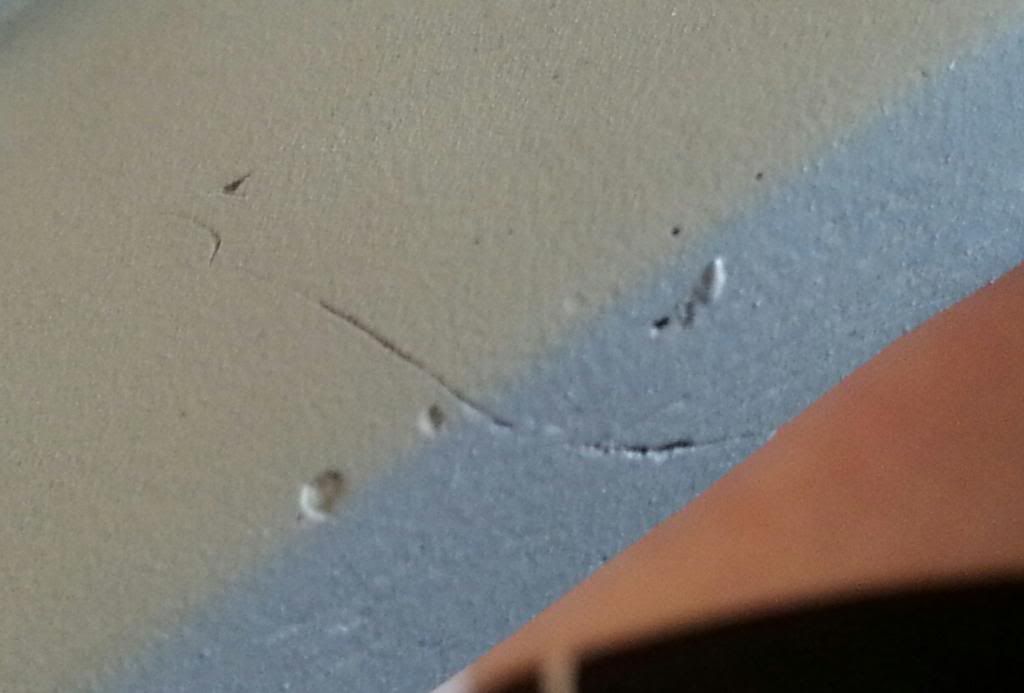
It's on the back of the armor, so you wouldn't see it if the soft goods were over the top of it, but I want to fix it. I've caught it early, and its only small, so I think I'll be able to repair it.
This was the way I was going to go about it; if its not the best way let me know. My plan is to drill a small hole at the end of the crack to stop it from spreading. Then I'll widen the crack with a dremel wheel and fill it with fibreglass resin. Hopefully that will fix it. Then I'll smooth it with bondo and give it another coat of primer.
If you guys have any advise, I want to hear it :cool
Quick update:
I unboxed my vader this morning after moving house, and as I was inspecting the imperfections in my armor that I need to fix because it is still quite rough, I found a small crack in my GH armor :cry
It's on the back of the armor, so you wouldn't see it if the soft goods were over the top of it, but I want to fix it. I've caught it early, and its only small, so I think I'll be able to repair it.
This was the way I was going to go about it; if its not the best way let me know. My plan is to drill a small hole at the end of the crack to stop it from spreading. Then I'll widen the crack with a dremel wheel and fill it with fibreglass resin. Hopefully that will fix it. Then I'll smooth it with bondo and give it another coat of primer.
If you guys have any advise, I want to hear it :cool
MAKE BELIEVE
Master Member
Re: WIP ANH Darth Vader - Photo Update Post #51
Very nice work bud
It'll be great when finished
Pls keep posting pics
Very nice work bud
It'll be great when finished
Pls keep posting pics
Too Much Garlic
Master Member
Re: WIP ANH Darth Vader - Photo Update Post #51
Yeah, fiberglass cracks doesn't spread like that. That's vac-formed plastic you are thinking of. Once you fill the crack it's fixed.
And it looks like a very easy fix.
Yeah, fiberglass cracks doesn't spread like that. That's vac-formed plastic you are thinking of. Once you fill the crack it's fixed.
And it looks like a very easy fix.
vaderdarth
Master Member
Re: WIP ANH Darth Vader - Photo Update Post #51
You don't need to mess with fiberglass resin, just rough up the crack with a dremel, put a few drops of CA glue in the crack and move back and forth in the depth of the crack with a straight pin, let dry, take bondo spot filler, smear it in the crack, let dry, sand and paint over it with primer.
You don't need to mess with fiberglass resin, just rough up the crack with a dremel, put a few drops of CA glue in the crack and move back and forth in the depth of the crack with a straight pin, let dry, take bondo spot filler, smear it in the crack, let dry, sand and paint over it with primer.
masterstumpy
Well-Known Member
Re: WIP ANH Darth Vader - Photo Update Post #51
Thanks for all of the tips everyone.
It looks like it's going to be easier to fix then I first thought
I was a little worried when I noticed it, but now I'm glad that it should be easy to repair.
I've grown quite attached to my Vader. Even though it's still incomplete, I still love it to pieces. If any of it were to get damaged I would be heart broken.
Once I get my working area set up it'll be the first thing I fix
masterstumpy
Well-Known Member
Re: WIP ANH Darth Vader - Photo Update Post #51
Update:
A few things have been happening with my Vader build.
Firstly, I ordered a Rambo muscle costume to pad out my mannequin. Hopefully it will serve the purpose that I want it for. If not, then I'll just modify it. It should arrive in the next few days.
I've also been working on my chest armor more. I fixed the crack earlier found, but as I was smoothing out a section, I found another crack that will need to be fixed. It's no problem, I'd rather fix them now, before its painted, rather than having to start the piece again later on. It's a pain in the butt, but after fixing the last crack, I'm more than comfortable fixing any others that I find
I've also been working on my dome mounting system again. You'll be able to see it in previous posts that I made, and I also showed how it works in a video.
This is what it looked like:
Video:
ANH Darth Vader Project - Update 1 - YouTube
Now, it's been quite a while since I created that setup, and since then, I've always had a small worry in the back of my mind that it wouldn't be strong enough. I didn't want to finish the suit, troop a few times in it and have one of the mounts snap off. They work brilliantly to keep the dome in its correct position, but me, being the worry wart that I am, wanted to strengthen it now to save possible heartache and work in the future.
The modifications that I've made to it are almost complete; I'll post a photo of it hopefully in the next couple of days, when I'm happy with how it looks. What I did was this: I sanded back the primer on and around the mounts and applied fiberglass mat and resin. Pretty simple. I cut the mat into shapes that I thought would provide the most strength, and so far, I'm pretty happy with it
They shouldn't be breaking off anytime soon now :thumbsup
Hopefully, when the padded costume arrives, I can do a test fitting and show you all what it looks like.
Thanks for reading,
Cam
masterstumpy
Well-Known Member
Re: WIP ANH Darth Vader - Photo Update Post #51
Quick update:
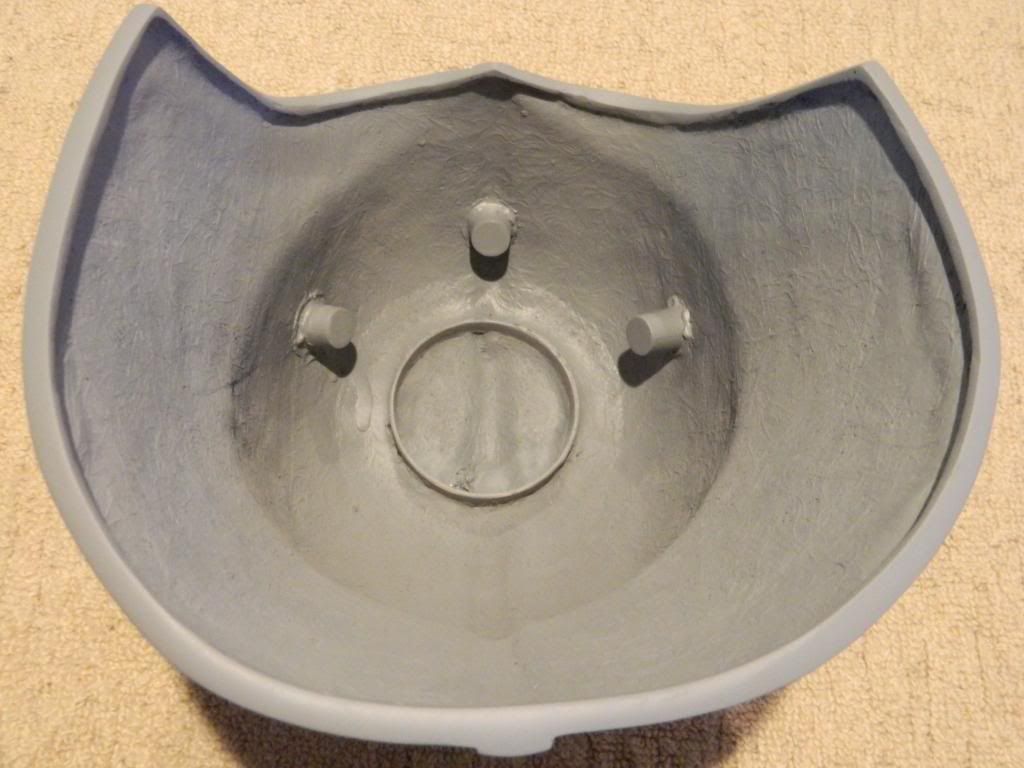
In my previous post I mentioned that I was in the process of strengthening my dome mounting system. It doesn't look that different, but its heaps stronger, and I feel now that I don't have to worry about it anymore.
Here is what it now looks like:
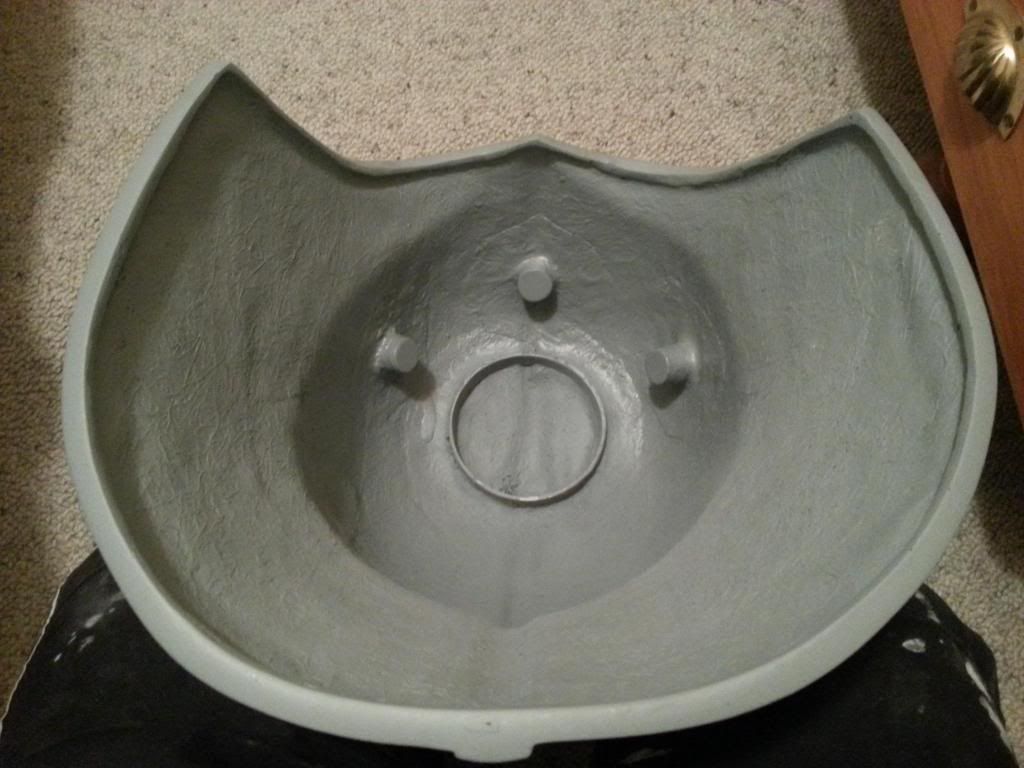
You can just see where I applied the new fiberglass mat. If I was to do it again, it would do things a bit differently, for example, strengthening the mounts before priming the inside of the dome. It's not as pretty as I'd like it to be, but in the end, you won't see any of this stuff. I'll most likely upgrade my helmet in the future for something more accurate, so in a way I'm using this helmet to test ideas out; my test subject. I'll never get rid of it though, its one of my children, my first Vader lid.
I've also been working on my GH armor more, going through and tidying parts, looking for any cracks, and if I find some, fixing them. I'm so glad that I managed to find this set; I'm really happy with it.
I've been working on the top of the faceplate as well. I wanted to make the top "circle" mount look neater, and I've come up with something that I like a lot. I'll share photos when its finished
Thanks for reading,
Cam
Quick update:
In my previous post I mentioned that I was in the process of strengthening my dome mounting system. It doesn't look that different, but its heaps stronger, and I feel now that I don't have to worry about it anymore.
Here is what it now looks like:
You can just see where I applied the new fiberglass mat. If I was to do it again, it would do things a bit differently, for example, strengthening the mounts before priming the inside of the dome. It's not as pretty as I'd like it to be, but in the end, you won't see any of this stuff. I'll most likely upgrade my helmet in the future for something more accurate, so in a way I'm using this helmet to test ideas out; my test subject. I'll never get rid of it though, its one of my children, my first Vader lid.
I've also been working on my GH armor more, going through and tidying parts, looking for any cracks, and if I find some, fixing them. I'm so glad that I managed to find this set; I'm really happy with it.
I've been working on the top of the faceplate as well. I wanted to make the top "circle" mount look neater, and I've come up with something that I like a lot. I'll share photos when its finished
Thanks for reading,
Cam
masterstumpy
Well-Known Member
Re: WIP ANH Darth Vader - Photo Update Post #51
I have a question that hopefully someone will be able to answer for me.
I have a set of ABS plastic shin armor. I can't remember where I purchased them from, and I was wondering if anyone could tell who made them, and how far away from accuracy they are.
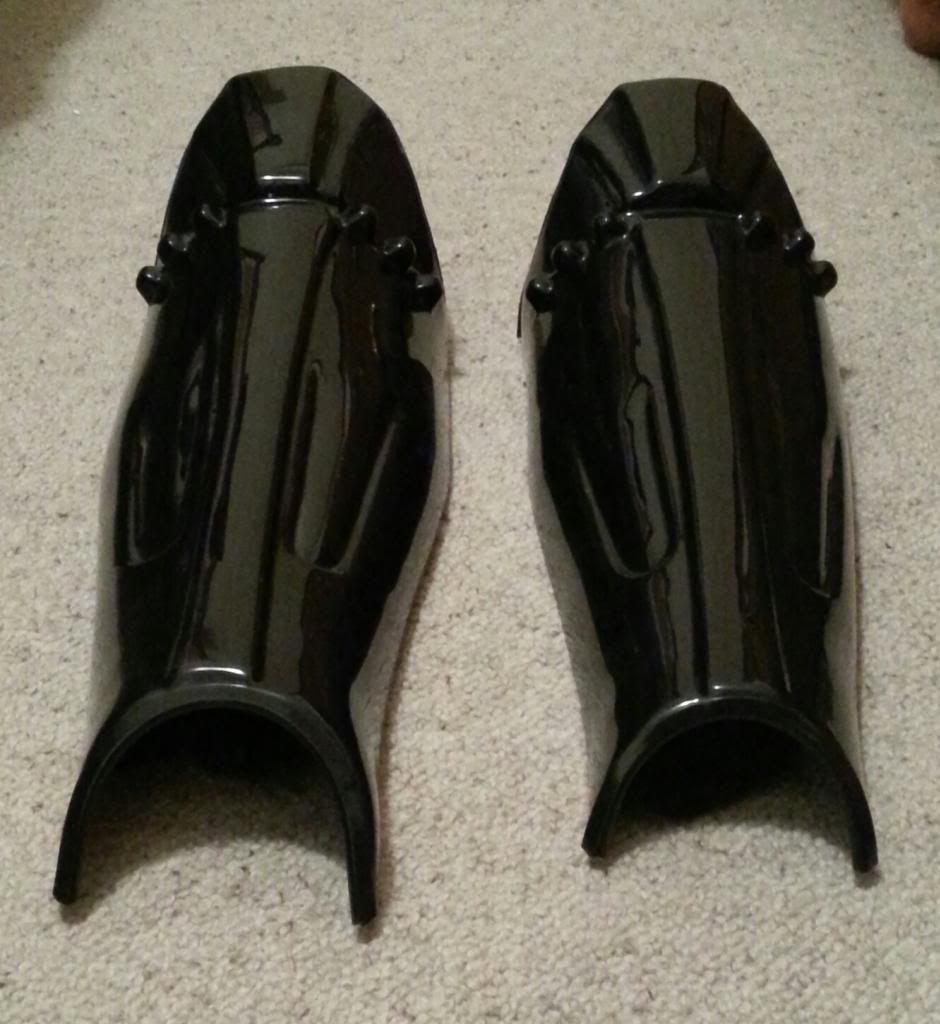
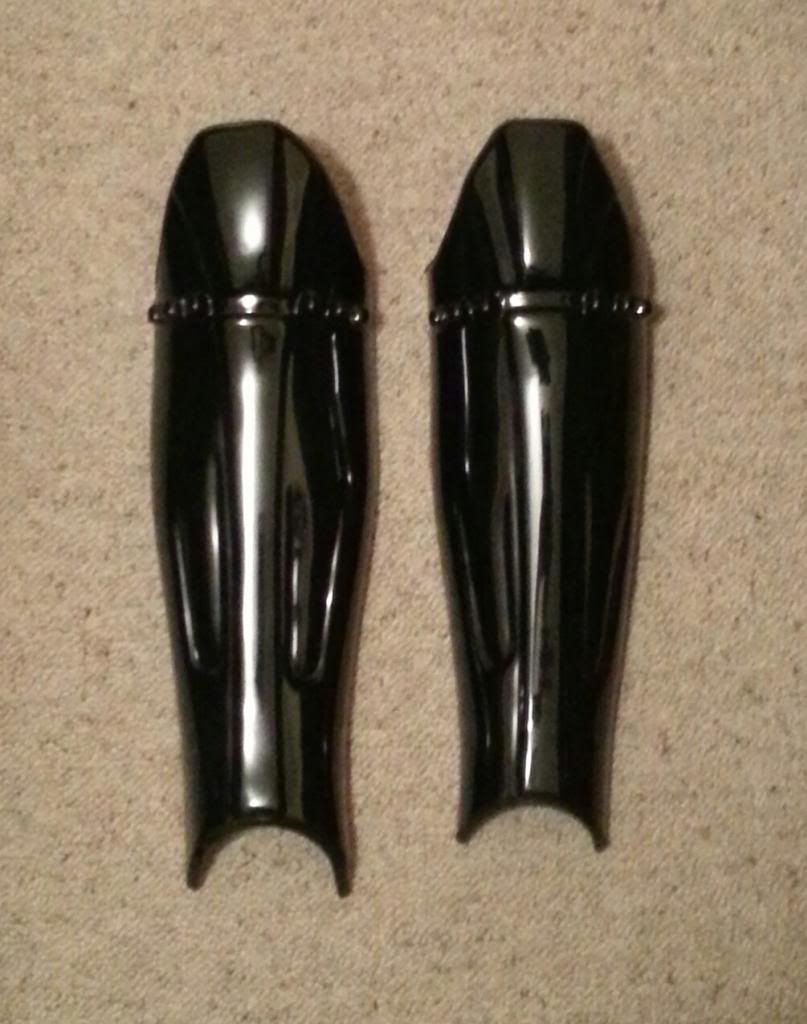
Apologies for the crap photos; it's getting late in Australia and the lights in my house aren't bright enough to take good pictures.
Correct me if I'm wrong, but I think I read somewhere that the original shins were made from plastic, not fiberglass, but I still like the idea of owning a set made out of fiberglass.
Does anyone know where I would find a set made from fiberglass that are accurate?
Thanks,
Cam
I have a question that hopefully someone will be able to answer for me.
I have a set of ABS plastic shin armor. I can't remember where I purchased them from, and I was wondering if anyone could tell who made them, and how far away from accuracy they are.
Apologies for the crap photos; it's getting late in Australia and the lights in my house aren't bright enough to take good pictures.
Correct me if I'm wrong, but I think I read somewhere that the original shins were made from plastic, not fiberglass, but I still like the idea of owning a set made out of fiberglass.
Does anyone know where I would find a set made from fiberglass that are accurate?
Thanks,
Cam
Similar threads
- Replies
- 8
- Views
- 463
- Replies
- 9
- Views
- 3,146
- Replies
- 0
- Views
- 248