Tessa Cosplay
New Member
I have started making Widowmaker Noir skin from overwatch! So far it is going really well. Here is the progress so far!

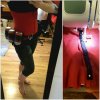
Belt, bags, and grenades I made out of real leather, vinyl that looks like leather, foam, soda cans, and worbla. I used an automotive spray filler that I picked up on home depot on the worbla to make it super smooth and shiny. I was really happy with the result and can't wait to try it again on some bigger pieces. One thing I did notice was the worbla needs to be crafted perfect or flaws will stand out when it is so smooth. This part of the costume was actually very time consuming. My leatherworking is very basic as I don't much experience in that department.

Here is the corset progress so far. This is only my third corset I have ever made and I am extremely happy with the result! This one turned out much better than my previous corsets. I added a zipper to the front to make it easier to get in to. I did lace it in the back which is different from the character design. I still need to add the black stripes on the side.

Next is the rifle. I am posting this here since it is part of the costume. I may make a thread in replica props in the future if I want to go more in detail about the construction.
I ordered a fancy high density EVA foam for this beast because I wanted a very smooth final product that required less sanding. I am really happy with the foam. I started by creating a blueprint off the original blizzard design in adobe illustrator and photoshop. I then had the image printed at FedEx to scale. I printed the blueprint and a simple version for the wood core. I then transferred the outline to wood and used a band saw to cut it out.


Here is the final progress I have at this time. I used my blueprint to cut out the different parts. I used three different thickness of foam for the different pieces. I need to go in and dremmel some of the pieces to round it off a bit. I have not glued anything down because I need to map out where the LEDs are going to go. This has been one big puzzle but I am satisfied so far!

Belt, bags, and grenades I made out of real leather, vinyl that looks like leather, foam, soda cans, and worbla. I used an automotive spray filler that I picked up on home depot on the worbla to make it super smooth and shiny. I was really happy with the result and can't wait to try it again on some bigger pieces. One thing I did notice was the worbla needs to be crafted perfect or flaws will stand out when it is so smooth. This part of the costume was actually very time consuming. My leatherworking is very basic as I don't much experience in that department.

Here is the corset progress so far. This is only my third corset I have ever made and I am extremely happy with the result! This one turned out much better than my previous corsets. I added a zipper to the front to make it easier to get in to. I did lace it in the back which is different from the character design. I still need to add the black stripes on the side.

Next is the rifle. I am posting this here since it is part of the costume. I may make a thread in replica props in the future if I want to go more in detail about the construction.
I ordered a fancy high density EVA foam for this beast because I wanted a very smooth final product that required less sanding. I am really happy with the foam. I started by creating a blueprint off the original blizzard design in adobe illustrator and photoshop. I then had the image printed at FedEx to scale. I printed the blueprint and a simple version for the wood core. I then transferred the outline to wood and used a band saw to cut it out.


Here is the final progress I have at this time. I used my blueprint to cut out the different parts. I used three different thickness of foam for the different pieces. I need to go in and dremmel some of the pieces to round it off a bit. I have not glued anything down because I need to map out where the LEDs are going to go. This has been one big puzzle but I am satisfied so far!


