Graymouser
New Member
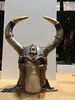
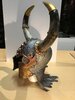
Truly mind blowing work! Put this on the list of "cosplays that are impossible but someone did them anyway". I really want to do more Warhammer props and outfits (heh -- Space Wolf player). Dabbled a little making a Slaves to Darkness fantasy helmet for a buddy. Keep up the truly awe-inspiring work, AdeptMechanic.
")


