Two-Thirds Scale 33 inch TOS Enterprise

Thanks guys!

The model work is looking very good also. If anything, I seem to like the look of the 3 footer saucer contours better then that of the 11 footer. I am not sure why, but I think it is due to the slightly bulkier contours of the saucer below. To me, it is that saucer contour that really sells that it is the three footer.
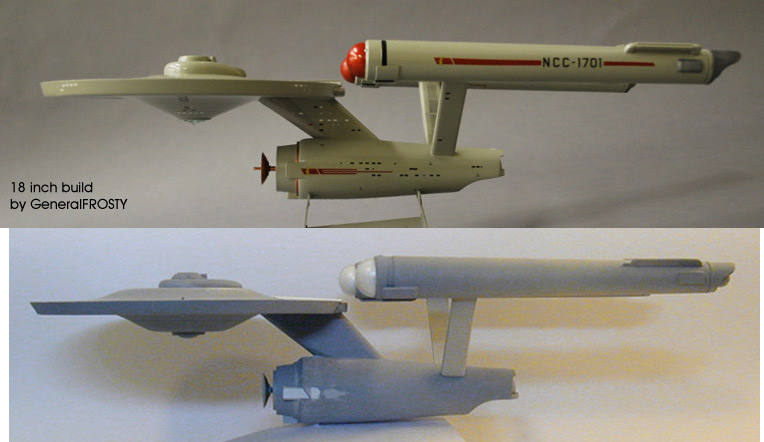
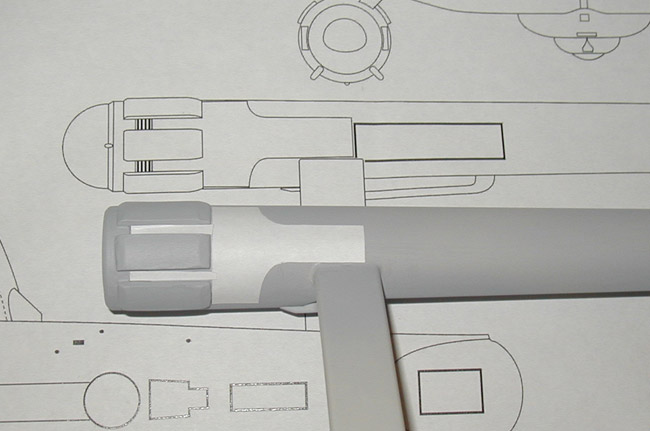
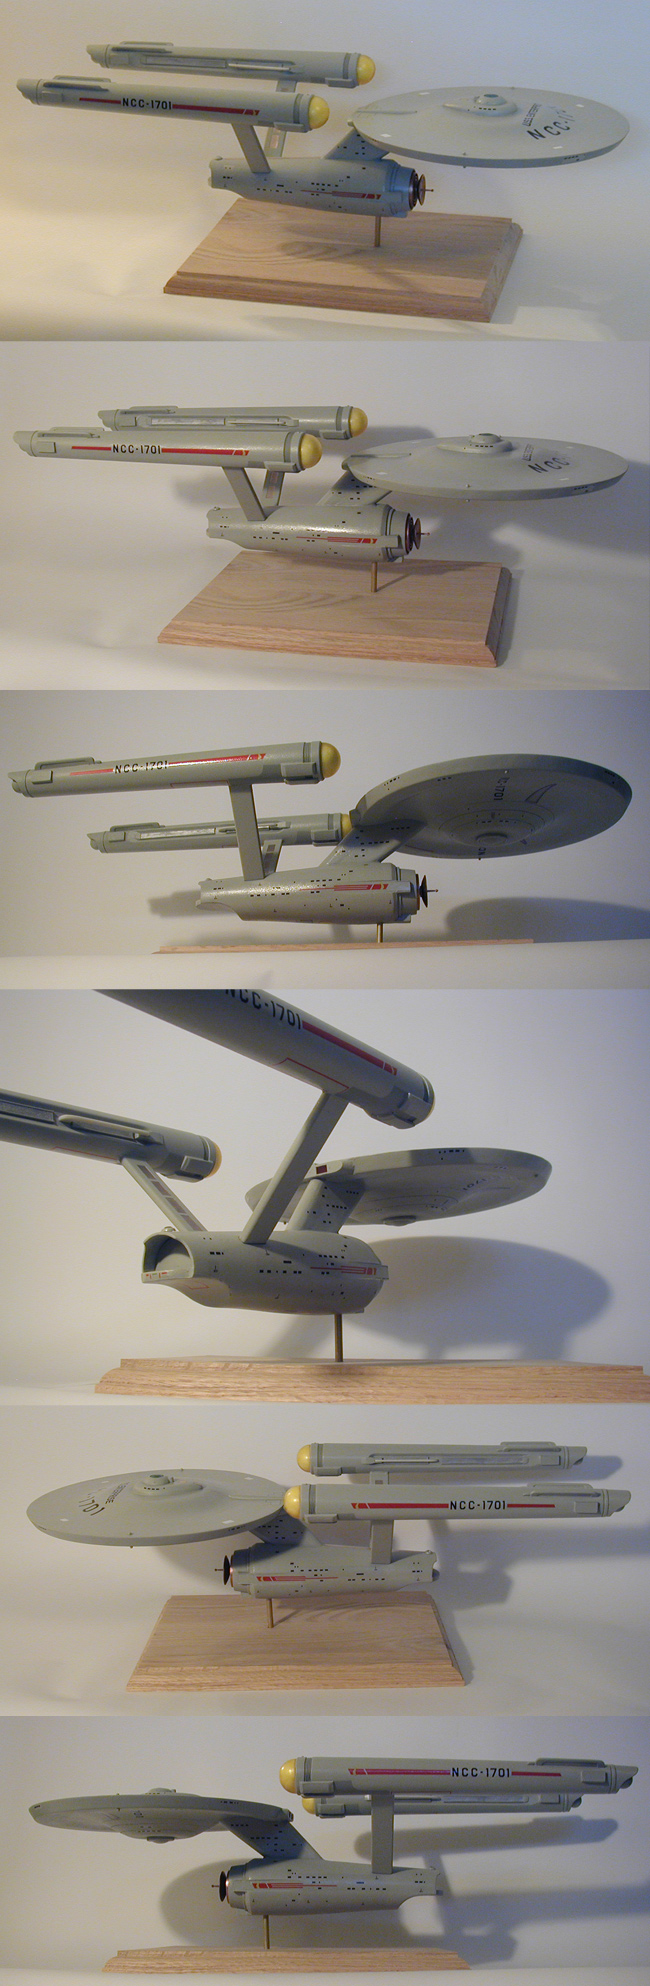
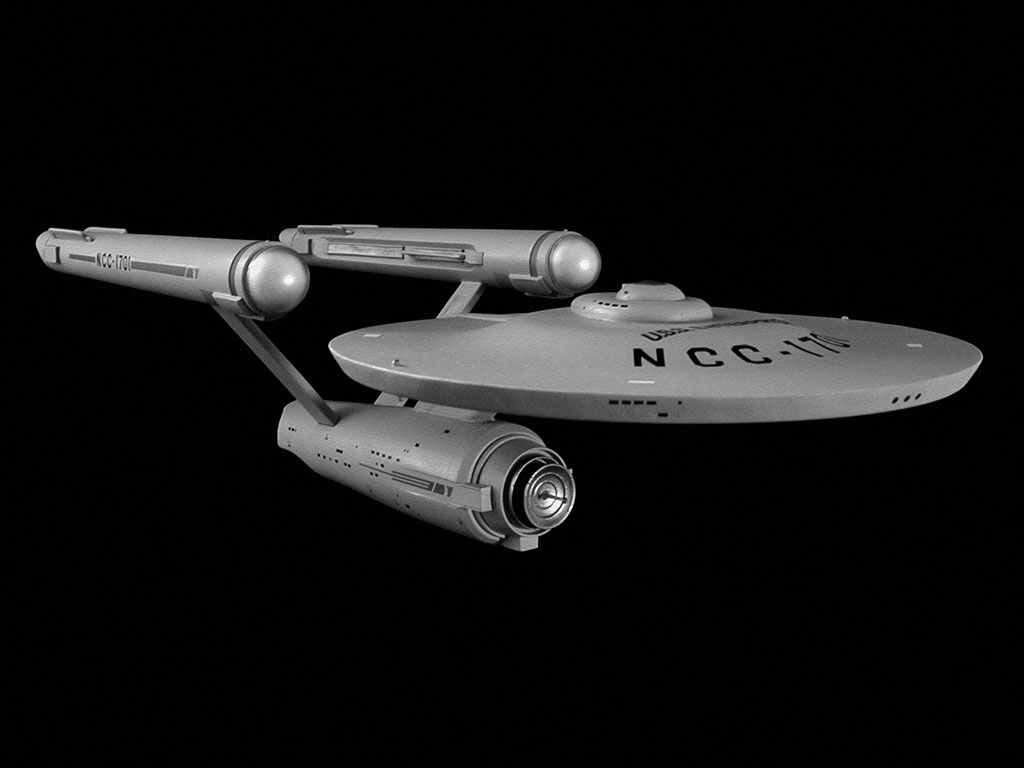
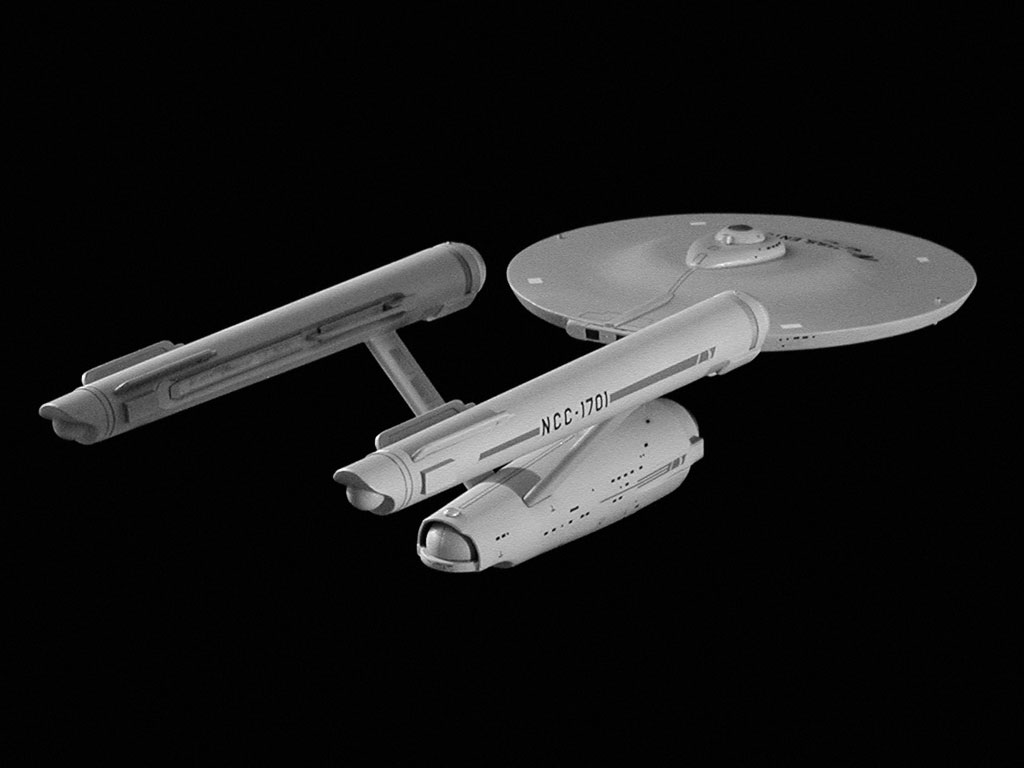
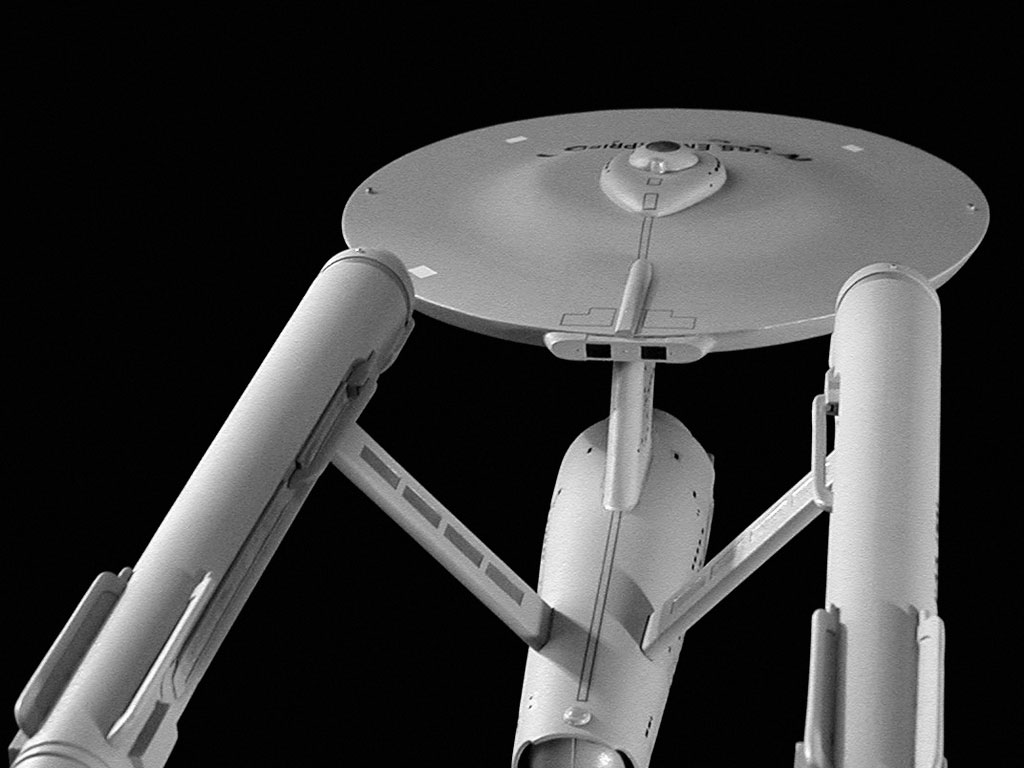
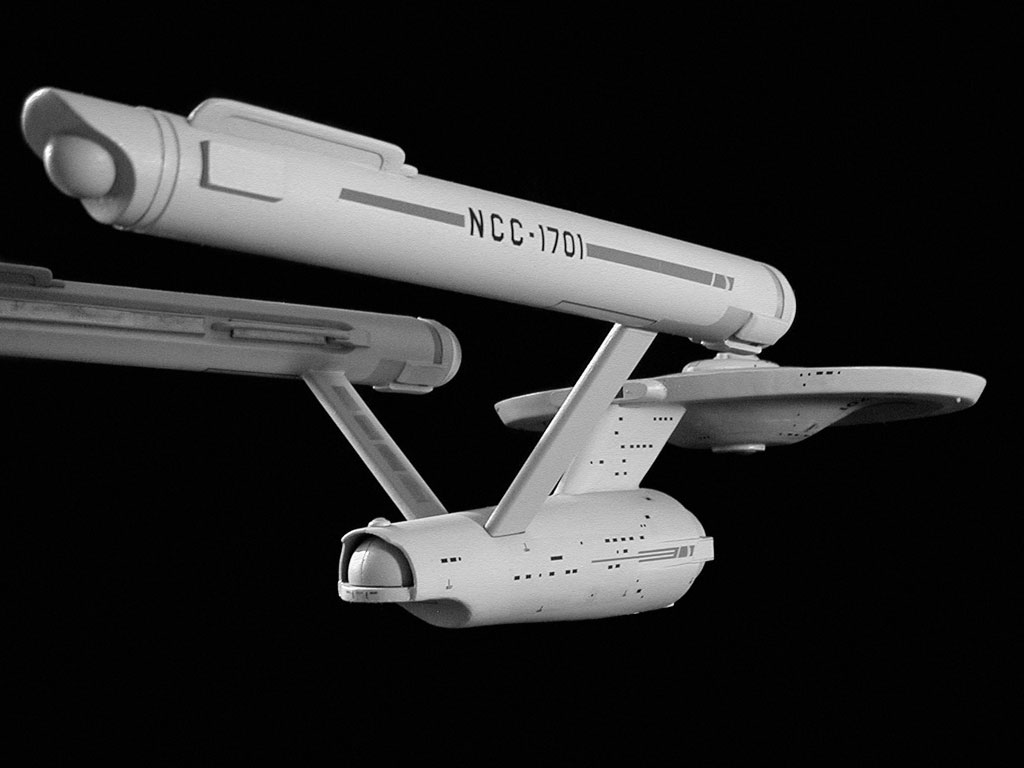
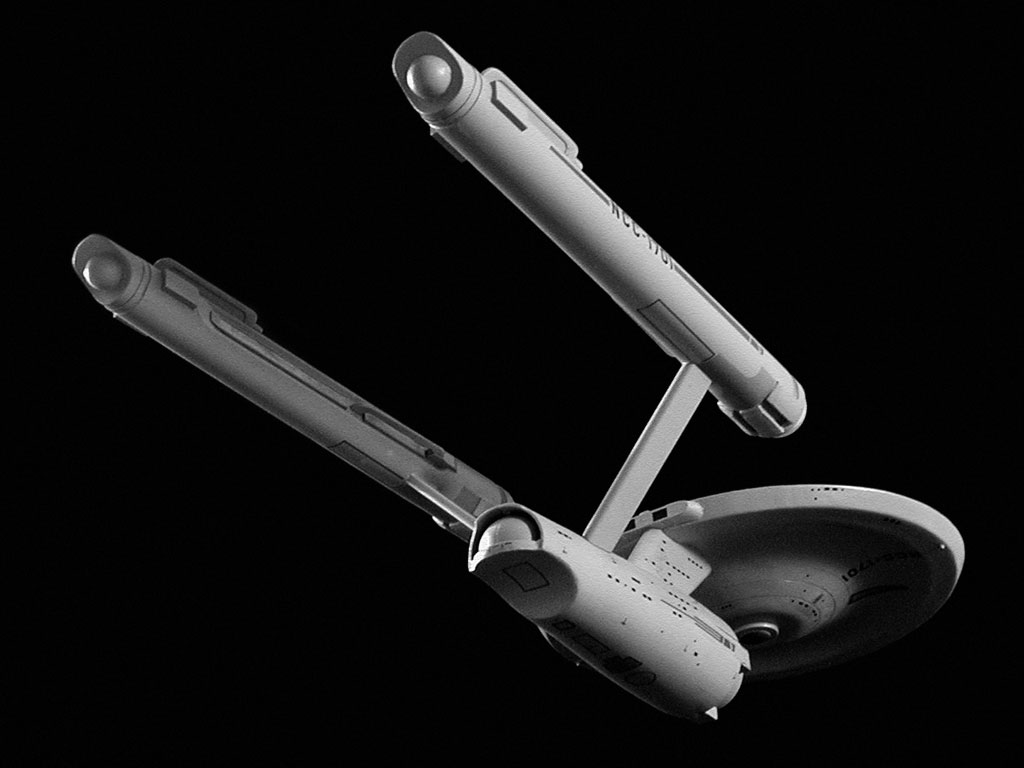
Yeah... I'm still not sure why, but the curvier-curves look really nice on it as a display model for me.
 
It just occurred to me, if you flip the lower saucer on the 33" upside-down, with its flowing curves it looks kind of like the saucer in the original "The Day the Earth Stood Still". Hmmmmm. ;)
 
It just occurred to me, if you flip the lower saucer on the 33" upside-down, with its flowing curves it looks kind of like the saucer in the original "The Day the Earth Stood Still". Hmmmmm. ;)
I hadn't noticed that before... it is kind of cool. I wonder how many other SciFi space craft influenced Jefferies choice of shapes.


While I still have a ways to go on my current model, TOSPHASER has gotten me thinking about working with the 18 inch kit as a foundation (specially as the 22 inch cutaway kit is no longer in production). GeneralFROSTY was kind enough to let me use one of his photos of his build of the 18 inch kit which should be helpful in deciding which parts to change and which to leave unmodified.

Here is GeneralFROSTY's build and my current (unfinished) model from approximately the same angle.

stock_18in_comparison.jpg

One of the first things I noticed is that I think the existing dorsal on the 18 inch model is fine as it is (I replaced that part of the model on the 22 inch kit), and the secondary hull on the whole seems nice as well.

So between the third party parts already available for the 18 inch kit and replacing the primary hull, I think a nice representation of the 33 inch filming model can be made from the 18 inch kit.

I'll still need to grab an 18 inch kit this summer to have a closer look, but this comparison at least gives me a great starting point.
 
If you can find one of the original long box 18" kits, they have a better proportioned secondary hull that was even closer to the studio model's features (rumor has it AMT did have access to the 33" model). The nav deflector mount shape is closer and I believe the dish is better proportioned as well.

Sometime around 1974, AMT retired the original mold and issued the one we know today (which I call the small box version in the article I did for CultTVman.com). The main reason as I understand it was due to the original being tooled up in aluminum and it was really starting to wear out (AMT didn't expect the kit to continue to sell as well as it did). The newer tooling was made in steel. The saucer pieces are almost identical between the two versions, but there were some differences to the nacelles and secondary hull. Of course, the attachment method used for the warp pylons in the small box kit I consider to be far superior to the one(s) used in the long box version as it is so much easier to get the nacelles aligned properly.
 
I'd love to have one of the early long box kits... specially the version with the clear nacelle domes. But if I got one, I'd go GeneralFROSTY's route and build it essentially stock (though I'd go with a current set of replacement decals) as it's features are historic (having been used in the series). That is one of the reasons I like following saarno's re-build... getting to see the kit's original configuration is really cool.

Looking at the screen caps of the Constellation, it doesn't look like the early kit's nacelles were tapered. Is that right? I wasn't sure if the lack of tapering was a product of the new molds (where they introduced the angled off rear nacelle box features to make them easier to pull from the molds).

(which I call the small box version in the article I did for CultTVman.com).
That is the quintessential article on the 18 inch model kit! Thanks for that. :thumbsup
 
Well, having the original and re-issued AMT kits side by side, I can see the original kit does not seem to have the tapered nacell shape. Now that my old kit is almost complete, minus the decals, it is a mirror to the one used in the episode, right down to the misaligned nacelles! Coincidentally, mine are off alignment almost in the identical way to the series model.
 
There is a taper on the original nacelles, but it isn't much of a taper. They also flair out at the rear to meet the endcaps (which have no balls on them, they are flat back there). So when the nacelles are compared with the ones in the later pressings, they sort of look they have no taper at all. So perhaps the best bet might be to combine the early secondary hull with late production nacelles to get the best of both shapes. One thing to keep in mind if you build a model from a long box kit is given the nacelle taper differences, resin rear endcaps for the pilot versions of the ship might not fit properly as they are sized for the later small box tooled versions of the kit.

The only kit with clear nacelles was what I call the Long Box version 2 kit. It was the first version of the kit to have a picture of the completed model on the box. It had orange clear nacelles and lights for those as well as the saucer. They didn't last long though as by the next production batch, the nacelles were white in coloring again (like the first issue, which has the same box art as the current kit reissue).
 
Good to know. Thanks for the info! :thumbsup


I've started in on figuring out how to mask an area of the nacelles that has to be a slightly darker gray. On the first model I did this feature as a raised area (so the whole model was done in a single color), but I've opted for two colors this time around.

1701-II_progress-039.jpg

This is just a test... it is placed on the primer in that image. I just wanted to see how closely I matched my plans (though I shortened the length of the masked area to work better with the decals I am using).

And a little more painting has been done.

The base coat that you see over most of the model in these images is Testors Light Sea Gray. That is not going to be the final color of the model (which will be Gull Gray), but will be the color of a few of the darker gray areas. The key thing for me is that both Light Sea Gray and Gull Gray pull towards green (rather than blue) and are nearly the same... so the dark areas won't be too dark.

I also got a little closer to the model than I normally would in a few shots. So remember that while this is my second try at scratch building, I'm still quite the beginner at this.

1701-II_progress-040.jpg
 
A little more progress (emphasis on progress)... I've done the major painting and added most of the decals, but I haven't finished adding coats of the gloss lacquer yet, nor have I finished painting many of the details and some of the parts. She is far from finished.

I did get the base for the stand, but other than drilling a hole in it, it too is a WIP. I plan on staining it a dark red/brown, but I've already started using it to hold the model.

So here is how it looks today...

1701-II_progress-044.jpg

I'm pretty happy with where it is at currently. I think it would have been better if I had had more experience going into the build. But you have to build models to build experience, I don't think there is a short cut around that.
 
You should be proud of that. She is coming along beautifully. Good heavy platform (looks like Oak). The weight will prevent tip-overs.
 
The model looks dead on in those shots! Nice work!

Only thing you need now is a 2/3rds scale Kirk and Spock to pose with it. ;)
 
Looks fantastic!

As a side note I was digging around in my office and found some blueprints. There are 12 sheets total and each one measures 9" x 30" and they're labeled Paramount Pictures Corporation 1973. They're in really good shape- don't know if they'd be of any use to Star Trek model builders...

Jerome

Constellation1.jpg

Constellation2.jpg

Constellation3.jpg
 
Those are the old Franz Joseph blueprints. While they were good for their time, they have more then a few single bit errors in them, as such they aren't really all that good for somebody trying to make a model accurate to the Trek studio models. Still, they make for a nice glimpse into the past as they were one of the best selling blueprint sets of all time.
 
Yup, I have the same set. My Dad bought them for me back in the mid '70's. I think all these pages are in my set, but I'll check tonight. These were so cool back then as there was not much else to find. The detail is a little fuzzy by today's standards, but a good resource to have.
 
Shaw, thank you for showing this process. Without it I would be unable to do any sort of scratchbuilding today. Thank you.
 
Shaw, fantastic as always! :cool:thumbsup

Ah yes, the old FJ Blueprints. Fond memories. Every deck and level of the fabulous Starship Enterprise! :)

The extra sheet about the interior of the engine pod is not "officially" part of the set I think. Probably a fanmade addition.

Also be sure to check out Franz Joseph's "Star Trek Star Fleet Technical Manual". Also completely inaccurate but fun stuff! :)

K
 
Thanks a ton guys! :thumbsup

Yeah, I have a sentimental place in my heart for the Franz Joseph plans. I still think they are great.


I did take a bunch of additional images to share with my Dad this last weekend. I'll share them here even though they don't show much progress from the previous images.Little bit of progress since those images were taken...

I've painted the lower dome on the primary hull. On my first attempt I had painted the dome steel and gone over it with a green dry erase marker... but I think the steel was a little dark. On this attempt I used silver, and I think the effect is nicer.

I've made a dome substituted for the bridge dome (painting it the same way I did the lower dome), but I haven't been as happy with the fit as I was with the dome I made for my first attempt. It isn't a pressing issue, so I'll keep looking for alternatives.

One of the biggest little changes between this attempt and the previous one is the addition of marker lights on the hull. Much like the ones on the original 33 inch model, these are static physical features, but to give them the illusion of being something more, I painted them silver... and in some cases added a hint of either red or green. I think it looks nice... but it wouldn't really show up in images from my camera, so shots will have to wait for a better camera.

The only other things being done is to start in on a dull coat over the model, I've started in on painting a number of small parts the hull color, and I've sanded the base to get it ready for staining.

That is about it for now.
 
Back
Top