I've been um'ing and ah'ing over that cotton rope. It's not climbing rope, but the texture appears very similar and the single black tracer would need to be hand-painted on. One thing that's put me off getting it is how loose and lumpy the twists are. Not that that's really an issue though.
Love the glow in the dark rope, it would be quite easy to fill in the gaps on the tracer. A shame the colour's a minty green though, it'd be difficult to dye a different shade since it's made of polyprop.
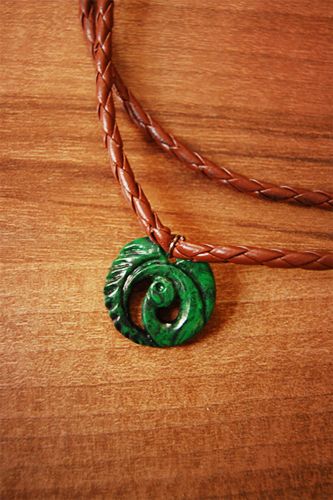
Currently contemplating a deep green and black camouflage rope.
I found some cheap rope that's not super-accurate, but looks similar:
IIT 48710 3/8-Inch x 50-Feet All Natural Cotton Rope - Amazon.com
Amazon.com: IIT 48795 Glow In The Dark Rope - 1/4 inch x 50 feet: Everything Else
The glow in the dark rope can probably be made to look more beige with some artificial weathering.
The cotton rope seems similar in texture to the in-game model, but is missing the black stripe.
I'm in the middle of painting one of my walkies with yellow enamel paint. Hoping it's not going to end up sticky, photos when it's finished
")
Going to spend the next week and a bit looking for fabric for the pants. Haven't found any pants that are accurate, so I'm going to make my own pattern off some cargo pants and make them out of a hard-wearing fabric that will weather well without falling to bits.
I'm ordering a number of samples from
NY Fashion Center Fabrics in olives and browns, one of them is sure to be suitable if nothing can be found locally.
I thought 10oz might be a bit hard-core, but there are some cargo pants out there which are 10oz. (NYFCF also offer just khaki in 7oz, so I'll get that too). Guess we'll play the wait and see game, and see what the samples are like!
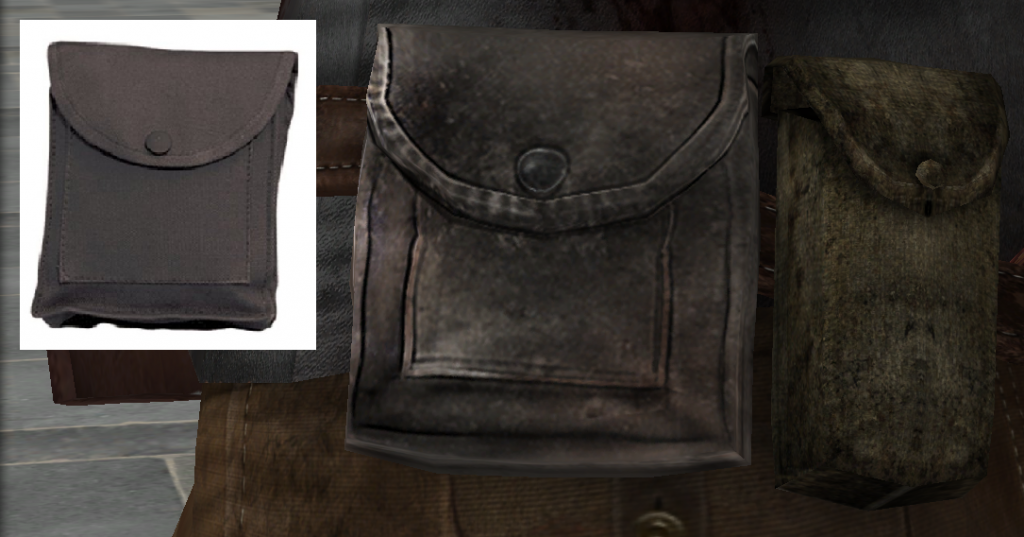
Lara's large black pouch that she wears on the back of her belt is a
Rothco Black Utility Pouch
Haven't figured out exactly where the olive pouch is from though. The only things around seem to have flaps that come too far down, or they have a drainage hole in the bottom. I've made pouches before, so I may just end up making the pouch out of some of the canvas for the pants if one of the samples is a suitable shade.