Thorssoli's Ironman MkIII Build - Finished Suit Pics Page 26!!

Re: Just What This Forum Needs: Another Ironman Build

Yesterday's progress...

First, I poured the next coat of latex into the neck mold:


Then I got to work on the upper for the boot:


Here's about how it'll look with the instep flap in place:


And here's the prototype as it looked last night:


Today I'll be polishing it up a bit more and laying up a mold. Then I'll lay up a couple of fiberglass copies and stuff them with these flexfoam castings of the sole/insole parts:


After a long day spent trimming and sanding and tinkering with boot parts, I decided it was a good idea to see where I stood with my little box of parts:


Once I'd pulled them all out of the box, I laid everything out on the floor and took a step back:


So that's what an almost complete set of parts looks like. There's a lot of it:


There's also another 45 or 50 parts that aren't pictured here. That's the 34 parts that make up the hands, the 6 detail parts that go into the chest, the two detail parts that go into the back, one of the elbows, and four of the boot parts. That, and the linkage pieces I have to make in order to hinge the helmet.

It really felt like I was almost done a couple of days ago...
 
Re: Just What This Forum Needs: Another Ironman Build

I'm drawing towards the end of my own MK3 and I didn't realize they're was this many parts.. nice to see it all sprawled out like this though. You've made some great progress Sean. A lot of hard work.
 
Re: Just What This Forum Needs: Another Ironman Build

Is it just me, or is anyone else wondering where Thorsoli found this much open floor in his shop?

I love seeing it al come together though
 
Re: Just What This Forum Needs: Another Ironman Build

Man, I can't wait to see this thing fully assembled!! It looks impressive just sitting on the floor...
 
Re: Just What This Forum Needs: Another Ironman Build

That is a shockingly high number of parts! Still I'm sure you must be impressed with the progress you've made thus far. I know we all are! :D

Do you have a target completion date, or are you just working on it until it's finished?

Also... Boot jet lights, yes or no?
 
Re: Just What This Forum Needs: Another Ironman Build

The Rustoleum Colonial Red is the same color I'm using with my foam Mark VII build but I am using a black base to paint it on and it makes the red darker than the pic you have. But it does look pretty darn good if I do say so myself :). 2013-06-30 20.53.07.jpg2013-07-28 18.29.00.jpg
 
Last edited:
Re: Just What This Forum Needs: Another Ironman Build

Is it just me, or is anyone else wondering where Thorsoli found this much open floor in his shop?

I almost didn't. If you notice that red thing in the corner of the shots, that's my vacformed table pushed into the corner where all of the mixing and pouring happens. I had almost enough room to walk around the stack of parts on the floor, but only just barely.

I really need to get reorganized sometime soon.

Do you have a target completion date, or are you just working on it until it's finished?

Also... Boot jet lights, yes or no?

I plan on having it done in time to wear it to the premiere of Ironman 3. Um... I mean I guess I'm just working on it until it's finished. Then adding upgrades.

Boot jet lights? Maybe. Probably not right at first, but I've printed out the models for them, so when I get to the point where I'm wiring up the various other parts and making the widgets wiggle I'll probably add lights to the boots as well.

The Rustoleum Colonial Red is the same color I'm using with my foam Mark VII build but I am using a black base to paint it on and it makes the red darker than the pic you have. But it does look pretty darn good if I do say so myself :).

I really like the Colonial Red. For a rattlecan finish it's pretty darned close. It'd be better if it was a bit darker and if it had the slightest bit of metallic to it, but it works in a pinch. That's why I used it on my rough-draft suit.

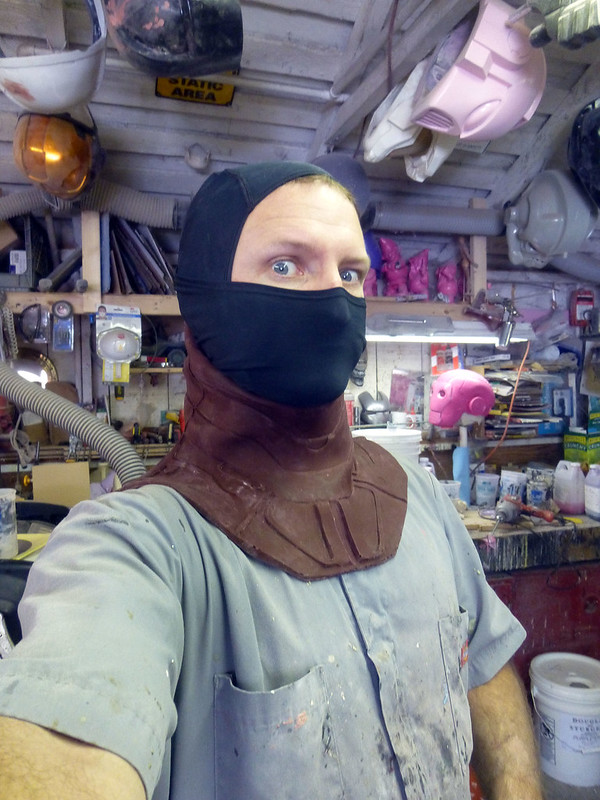
Yesterday I poured the third and final coat of latex into the neck mold. I should be able to pull, trim, and test fit the first copy today. Here's a shot of me pouring out the excess latex:


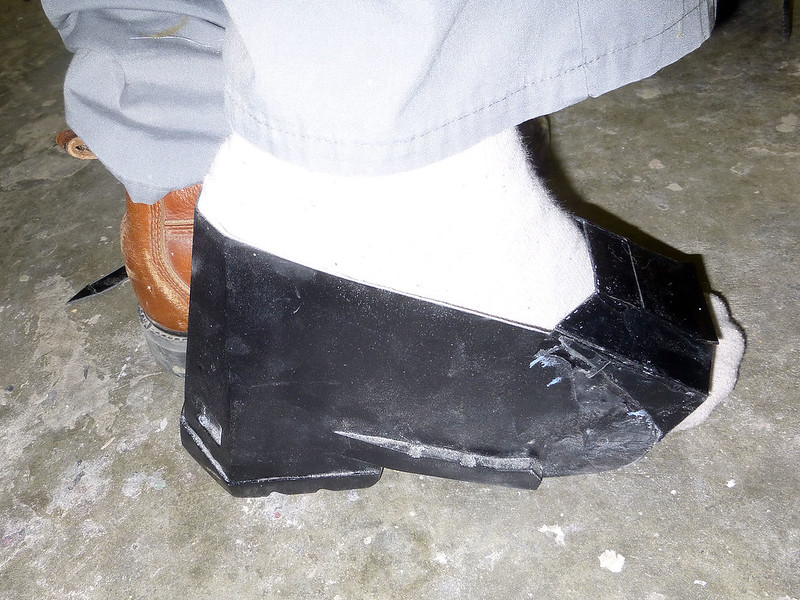
I also prepped the boot upper for molding:


Then I layered up the jacket mold:


Today I'll be making the mothermold and pulling the first pair of boots. After that, it'll be time to do the full assembly for the first pair. Very exciting.

In other news, prep work on the rest of the suit continues. Here's the chest, shoulders, and biceps in the sanding stage:


This thing's gonna be pretty sexy.
 
Re: Just What This Forum Needs: Another Ironman Build

Forgive me if this has been covered ( I've been following since the beginning and, wow, what a build), but what will you be using in between the finger joints?
At first I was trying split loom, but it was too stiff. I was going to try a latex product, but I figured I'd see what you were using.
I also 3D printed my hands and quickly realized that they really limit your range of motion.
 
Re: Just What This Forum Needs: Another Ironman Build

It looks like this version of the hand isn't solid, but multiple piece attached to an under-glove?
 

Attachments

  • ImageUploadedByTapatalk HD1375329709.957296.jpg
    ImageUploadedByTapatalk HD1375329709.957296.jpg
    128.6 KB · Views: 440
Re: Just What This Forum Needs: Another Ironman Build

The first thing I did in the workshop this morning was to pull the new neck piece out of the mold, trim the edges, and try it on:


I think it'll work:


Then I went ahead and laid up the mothermold for the boot upper:


Once the fiberglass had cured, I went ahead and pulled the mold apart:


Then I went ahead and layered up some fiberglass in the new boot upper mold. While it was still nice and soft, I sprayed the original with a liberal coat of mold release and clamped it into the mold as tight as I could:

Pressing the original back into the mold like this ensures that the fiberglass pull will be as thin and strong as possible while also making sure it will fit over the flexfoam wedges that I've been making.

Once the fiberglass had cured, I pulled it out of the mold and peeled it off of the original:


So here's the first pull of the upper fitted to the other boot parts:


533900_10151741449966250_438905756_n.jpg


So now I've got boots...
 
Re: Just What This Forum Needs: Another Ironman Build

2NGTo.gif


Seriously, I'm giddy over here. I can't wait for you to WEAR this whole thing.
 
Re: Just What This Forum Needs: Another Ironman Build

Capt TJ, I used a rubber car floor Mat that I cut into pieces, works well for me.
 
Re: Just What This Forum Needs: Another Ironman Build

This build is coming along so well! wish I had more time to keep working on mine!!
 
Re: Just What This Forum Needs: Another Ironman Build

This is just another one of those freaking awesome builds. You sir are are an inspiration to the community. I just love the quality and the care that has gone into this project...GM
 
Re: Just What This Forum Needs: Another Ironman Build

Forgive me if this has been covered ( I've been following since the beginning and, wow, what a build), but what will you be using in between the finger joints?

I just realized that, in my haste to post yesterday's progress last night, I neglected to answer your question.

For starters I'll probably just be hot-gluing the cast finger parts onto a fabric glove. When I start making upgrades to the suit I'll come up with a smarter way. I was toying with making a glove form and making copies using dipping latex (the same stuff they use to make examination gloves and condoms) but I haven't really given it much thought. I'm also considering doing a thin slipcast glove with the back split open so I can get it on and off easier.

Steve's solution looks pretty good. Not sure if those floormats will take paint though. What say you, Steve?

Also, have you found the color code for the paint on your suit yet?
 
Re: Just What This Forum Needs: Another Ironman Build

So I finally got around to clicking the link to your blog and it resulted in me goofing off of work for like an hour and a half :p It's super fun stuff to read, same as with this thread. It's great to see such humorous and lighthearted commentary to a build this great!

btw I still think that doing what you did for the knees and elbows would be the best way to go with the gloves. I think If you were to then make the casts in the dipping latex you mention in the above post you would get a thing strong and detailed inner glove that would be easy to wear. I'm excited to see where the rest of this build goes!

-Mili
 
Re: Just What This Forum Needs: Another Ironman Build

That neck seal looks great! You have me wanting to start a project where I can do some slip casting.
 
Last edited:
Re: Just What This Forum Needs: Another Ironman Build

I just realized that, in my haste to post yesterday's progress last night, I neglected to answer your question.

For starters I'll probably just be hot-gluing the cast finger parts onto a fabric glove. When I start making upgrades to the suit I'll come up with a smarter way. I was toying with making a glove form and making copies using dipping latex (the same stuff they use to make examination gloves and condoms) but I haven't really given it much thought. I'm also considering doing a thin slipcast glove with the back split open so I can get it on and off easier.

Steve's solution looks pretty good. Not sure if those floormats will take paint though. What say you, Steve?

Also, have you found the color code for the paint on your suit yet?

Just an idea I saw recently some guy building an iron man actually put a tiny rail system in his gloves using cylindrical beads you'd get on a cheap necklace and some piano wire. Doing it like that gave his gloves a solid enough open position but also meant he could just slide a gloved hand in and the fingers would all just hold their place. It seems like a really good way of building the gloves. I'll try find who it was but I cant actually remember sadly.
 
Back
Top