The Star-Lord/Peter Quill Sling Bag thread

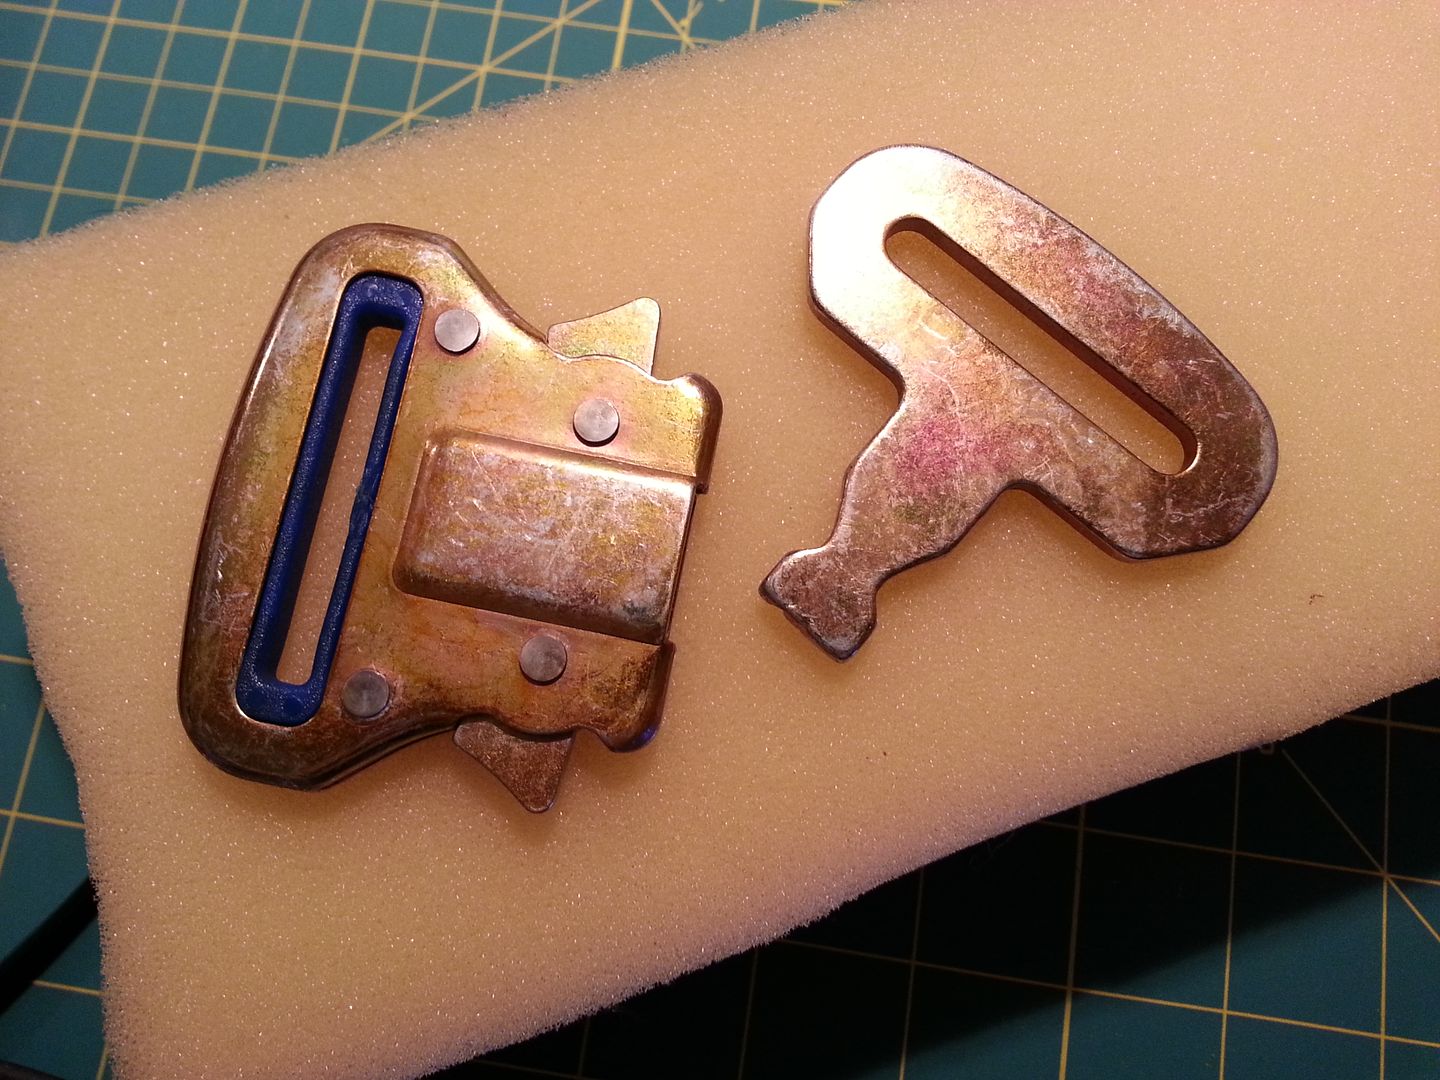
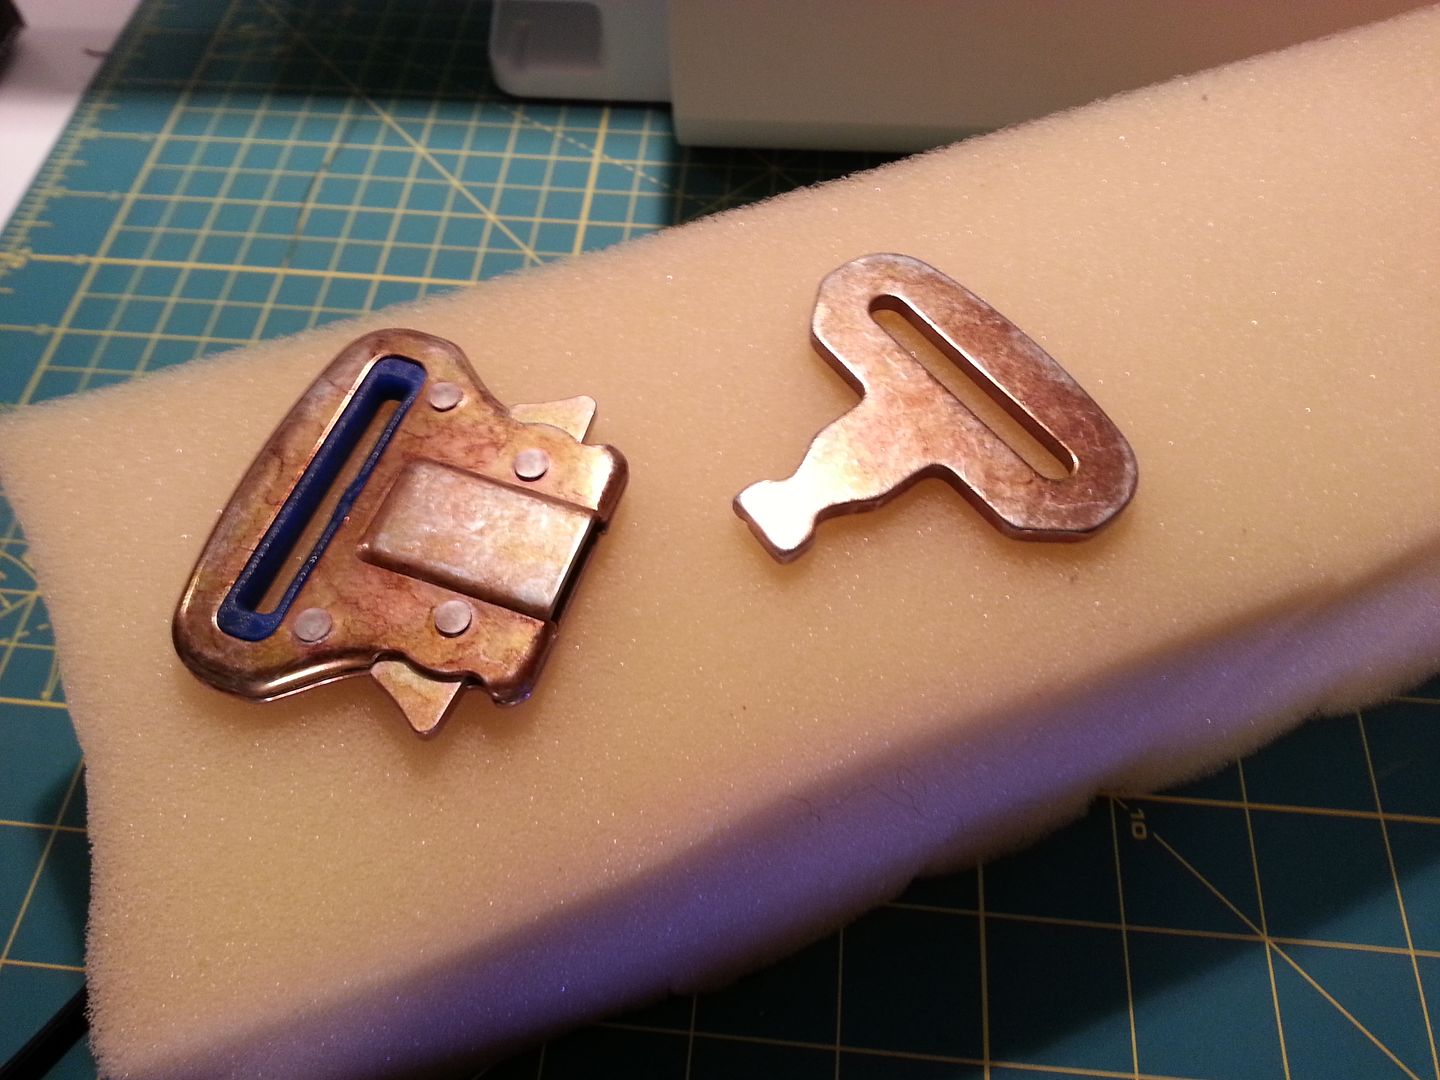
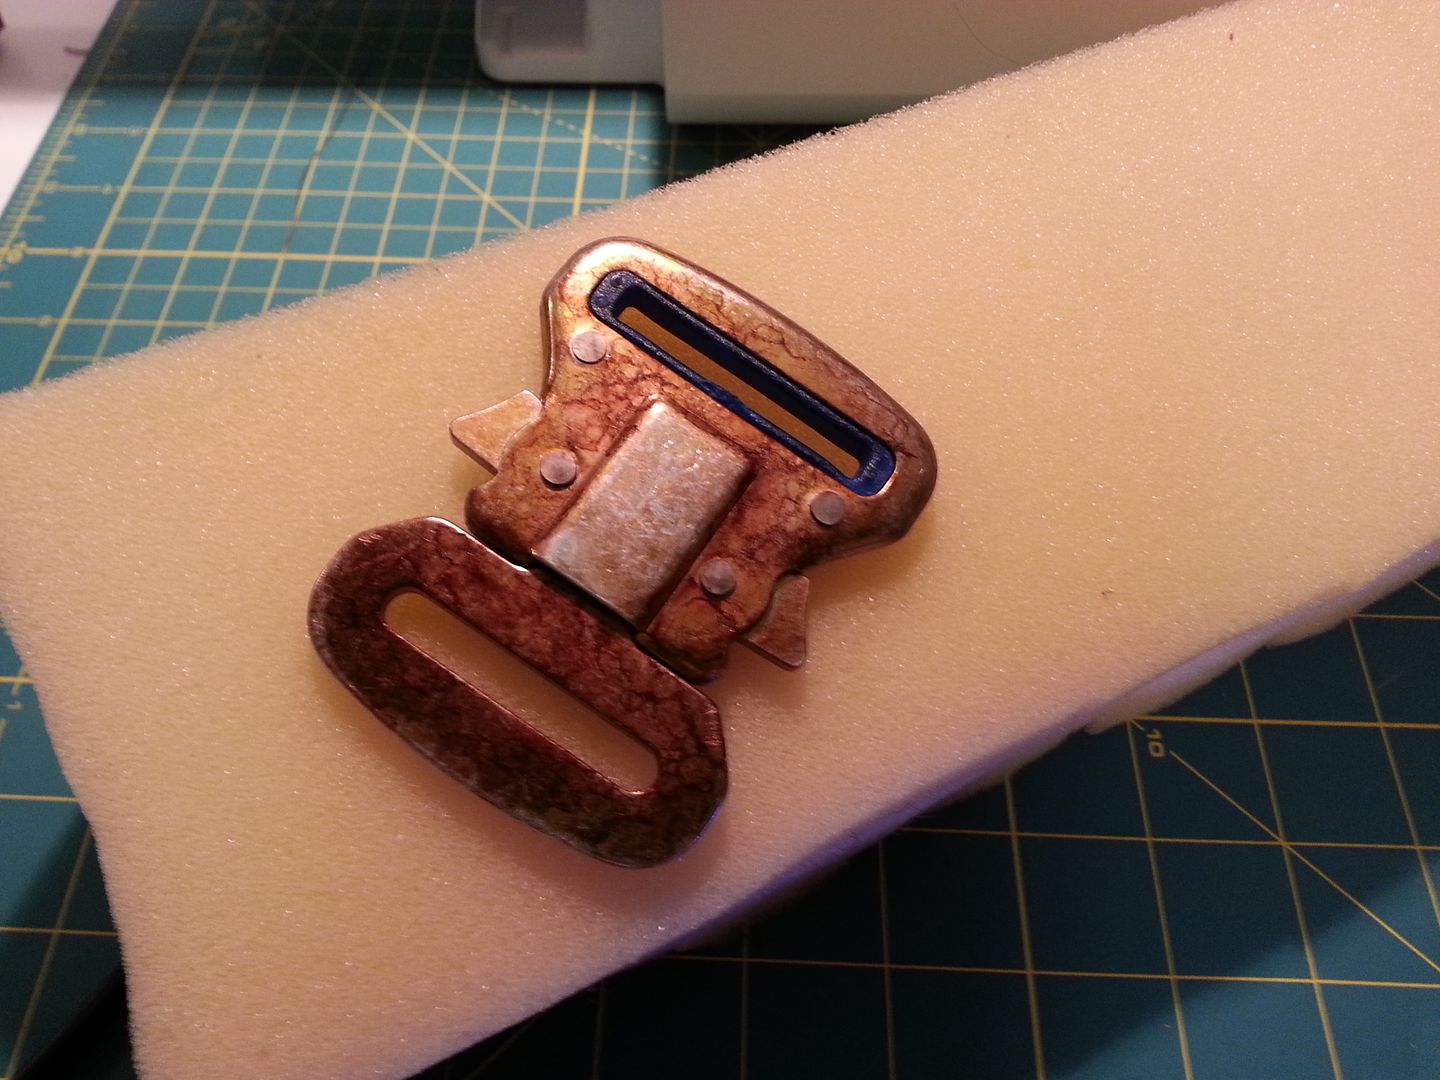
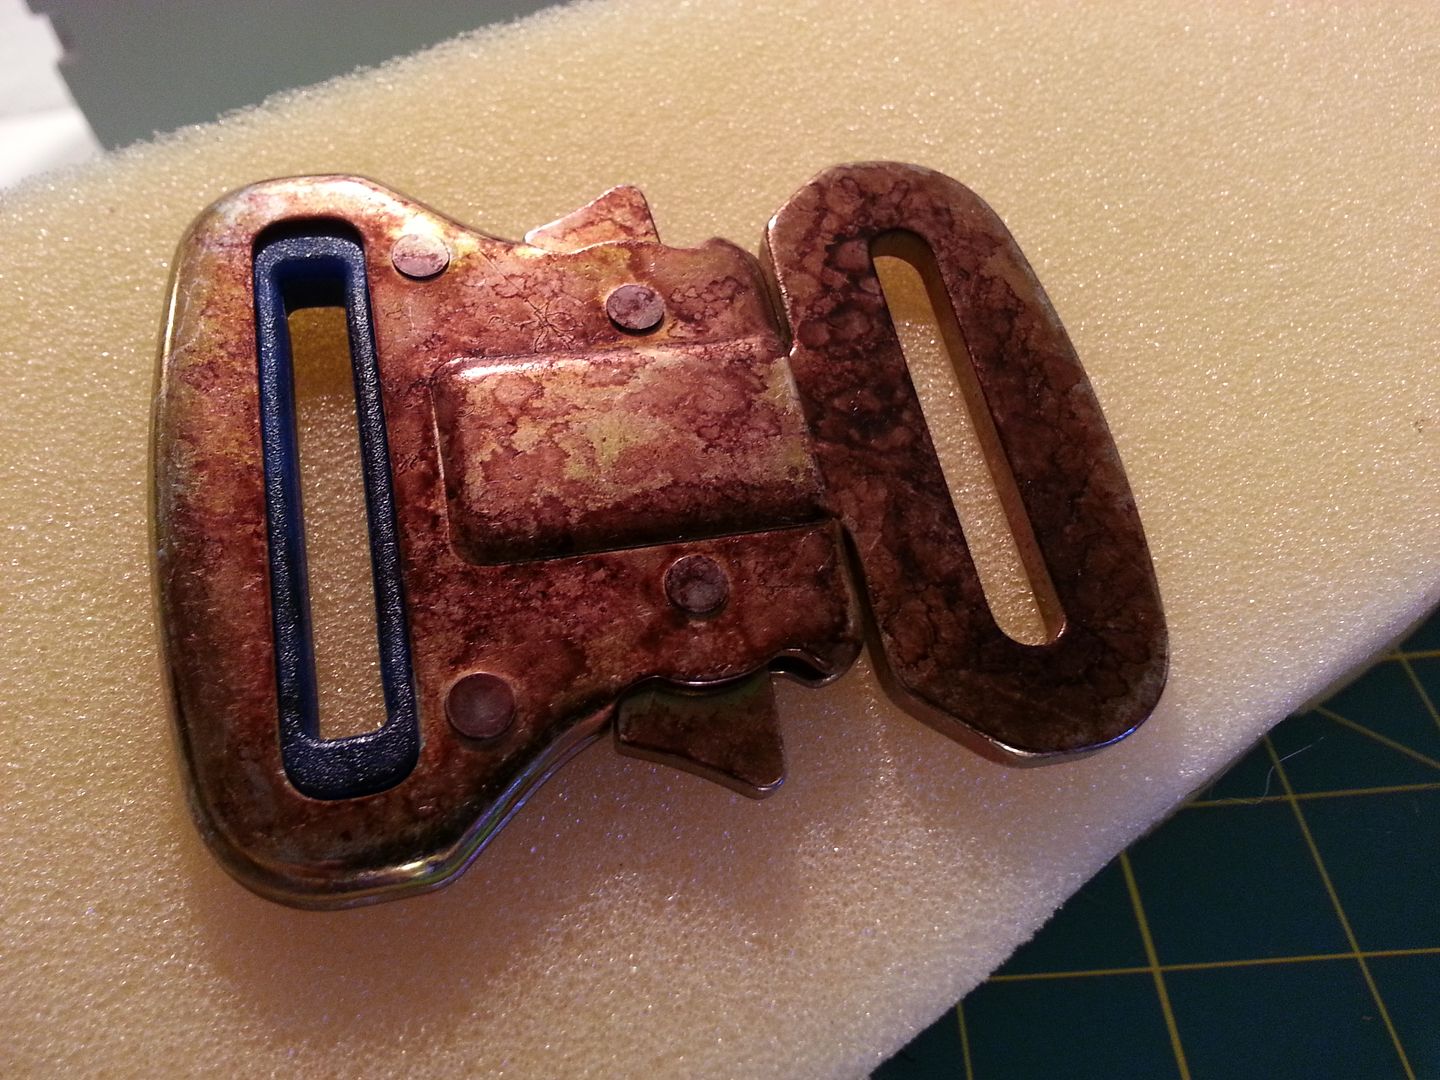
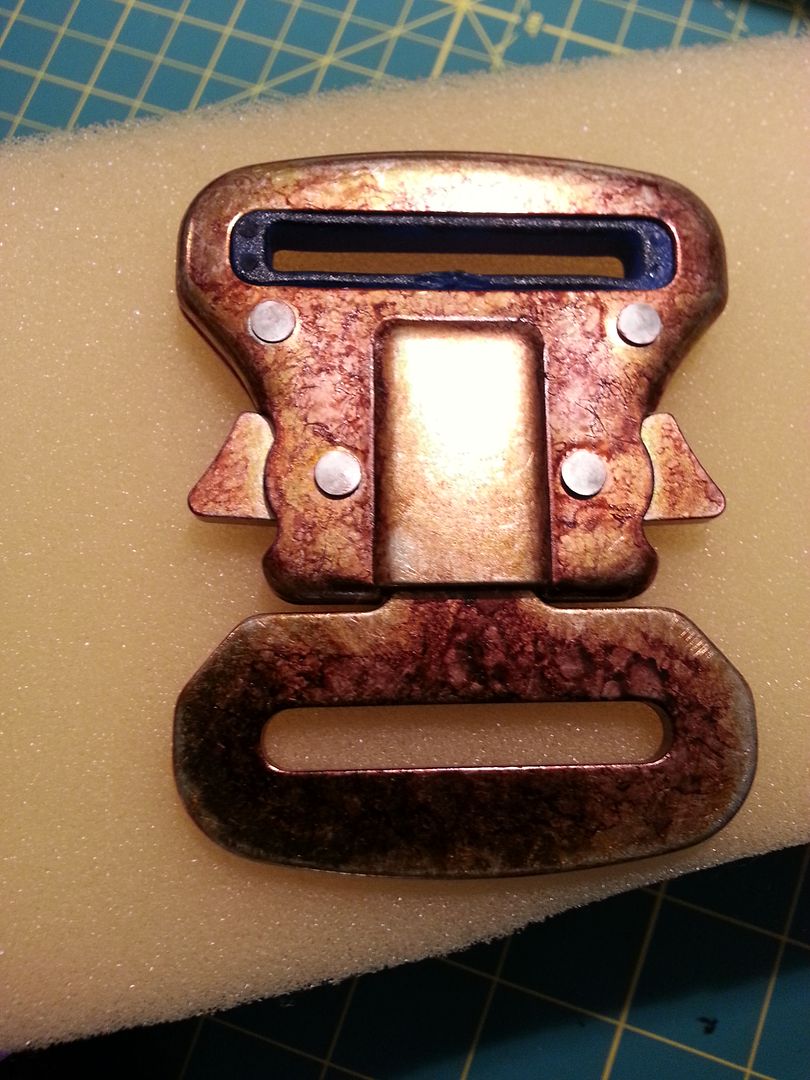
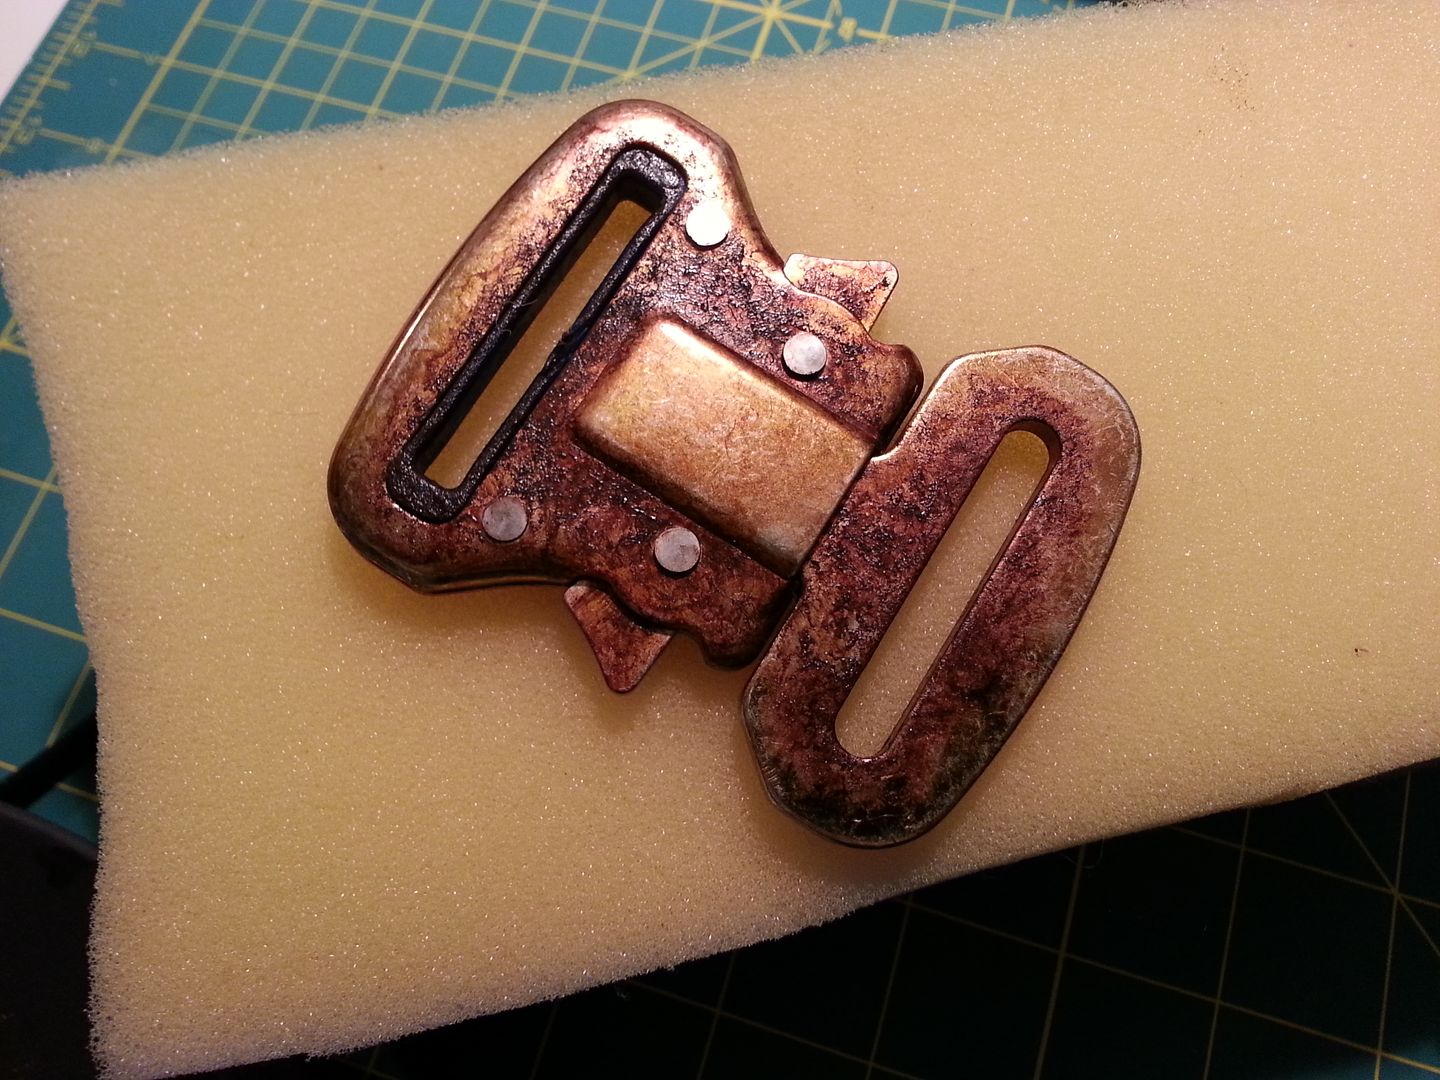
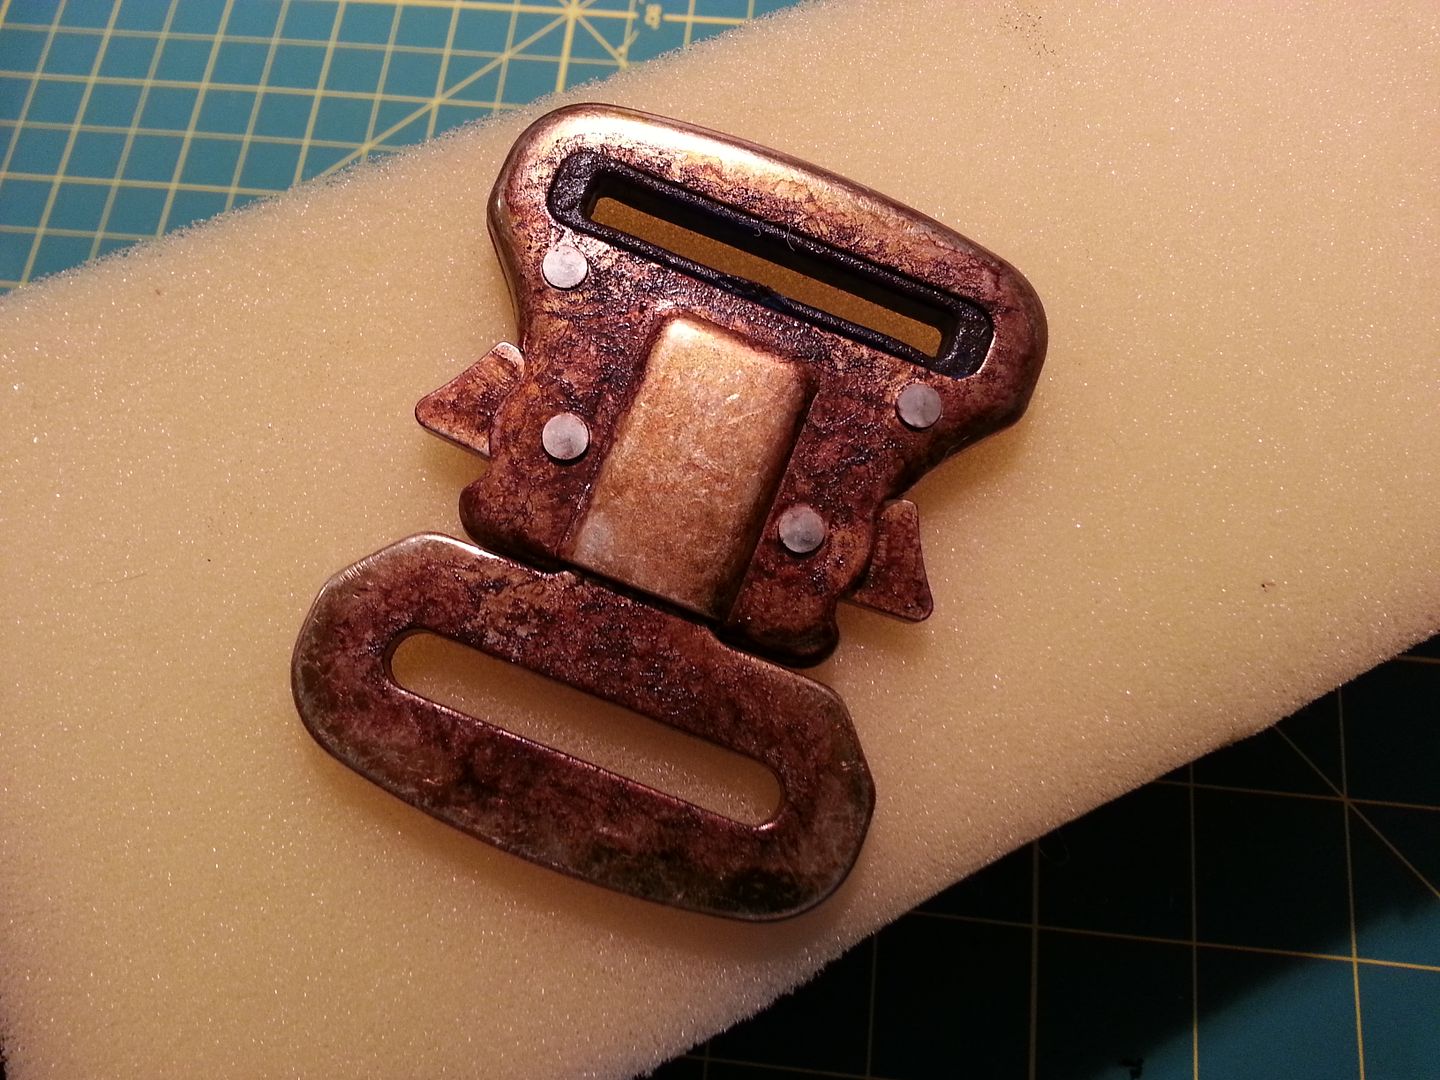
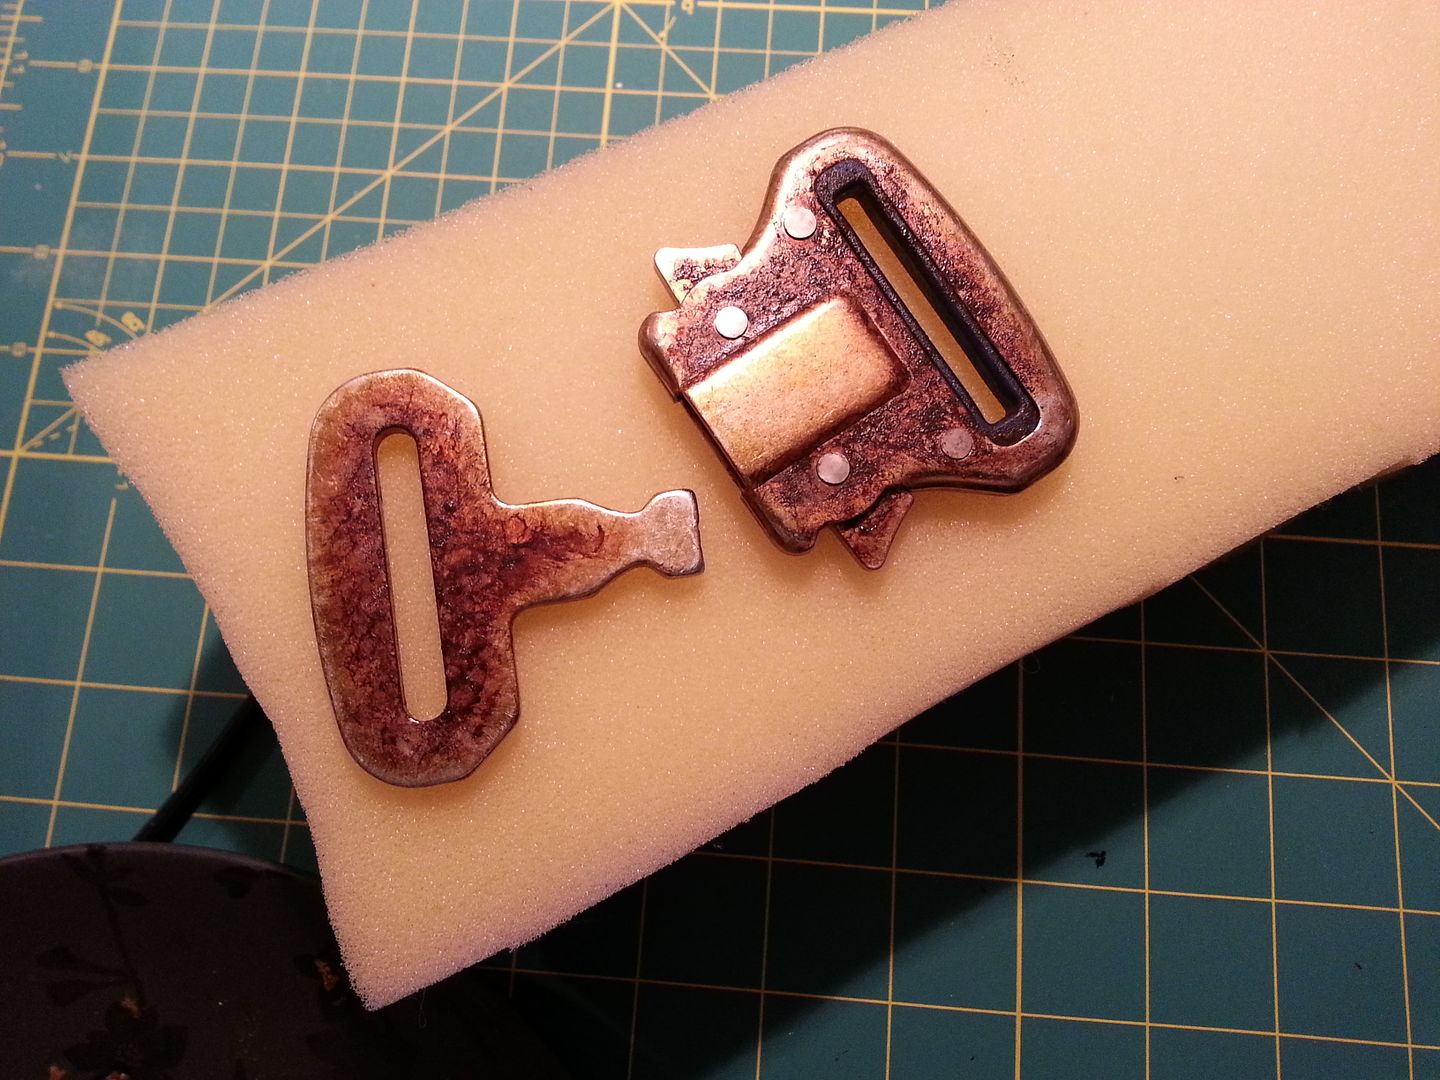
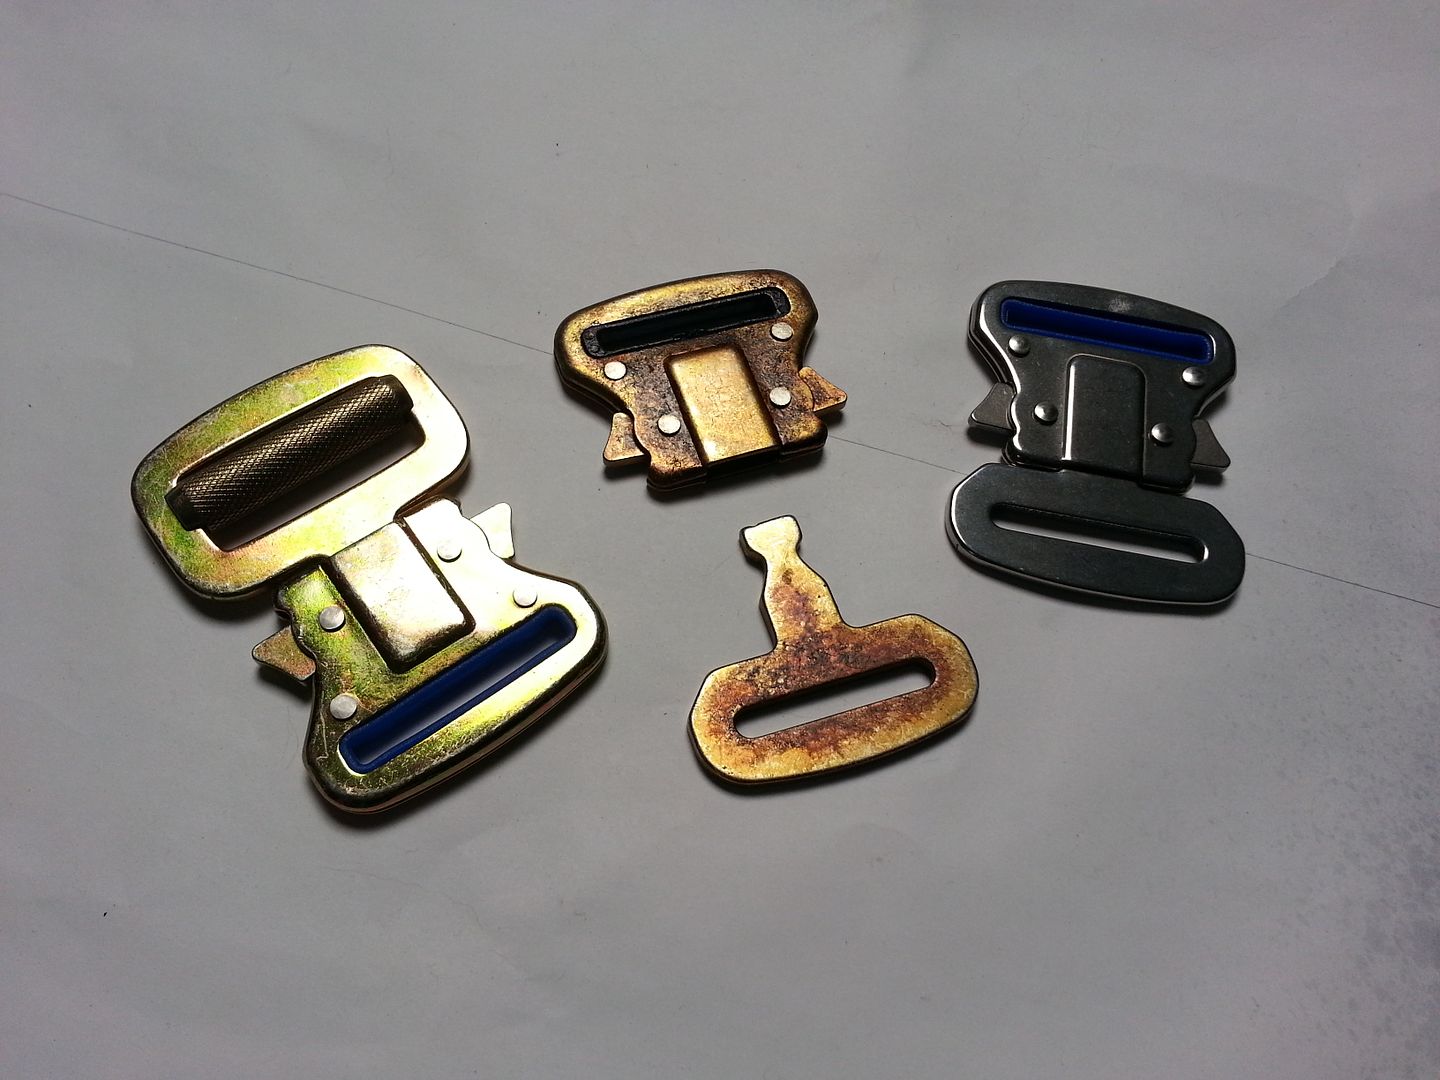
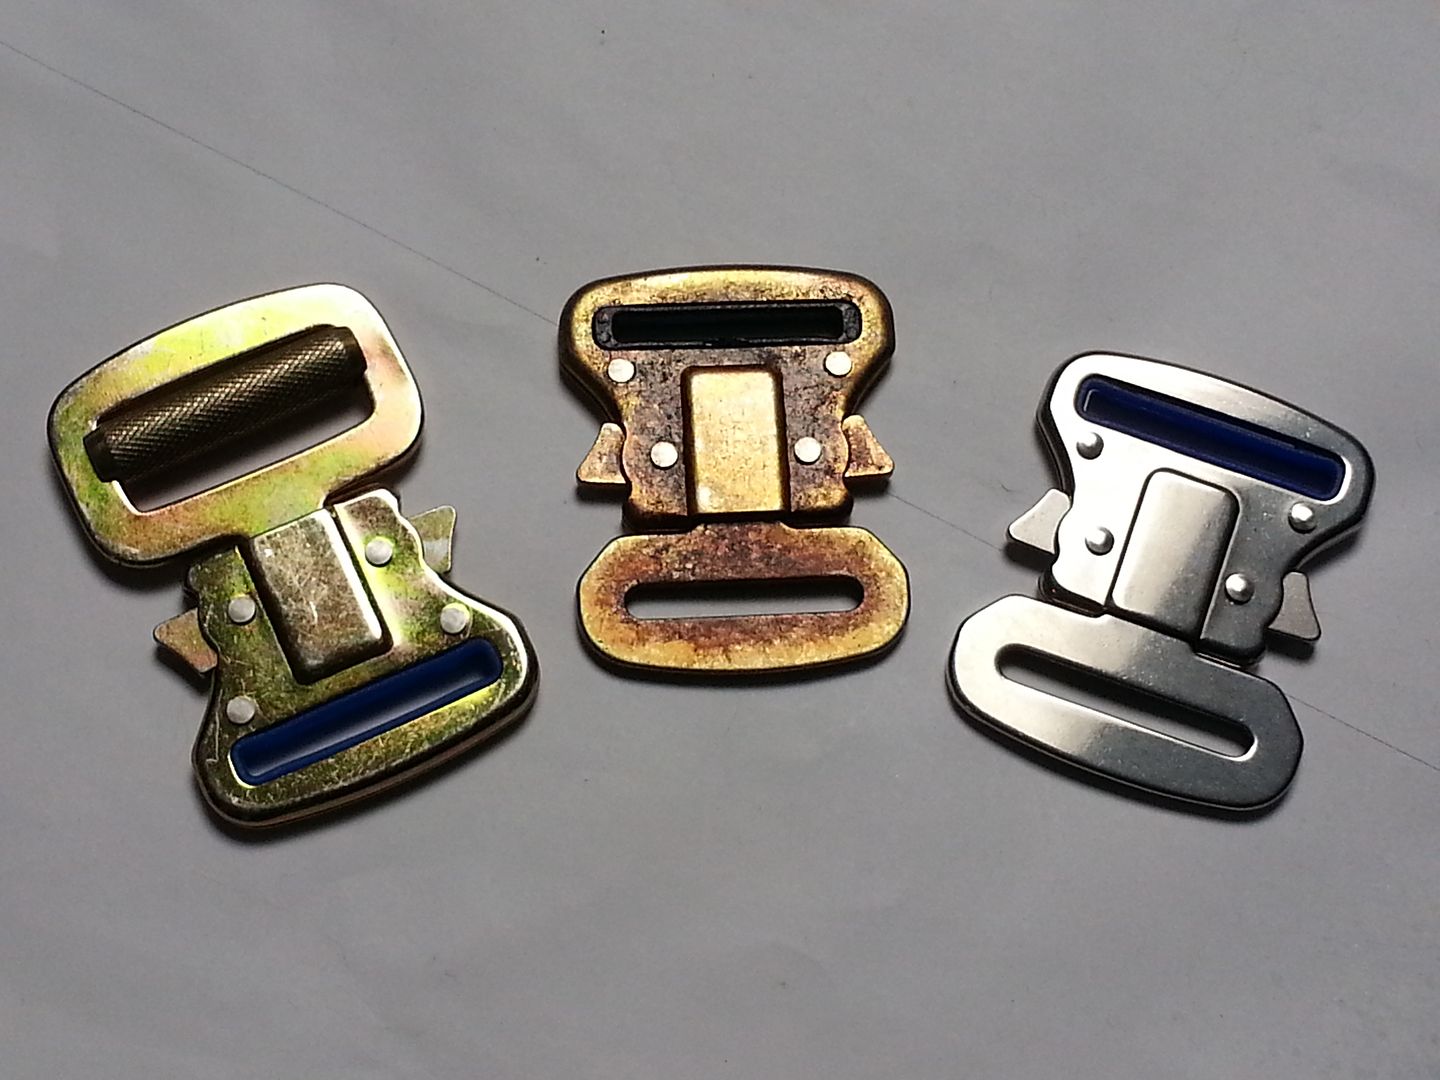
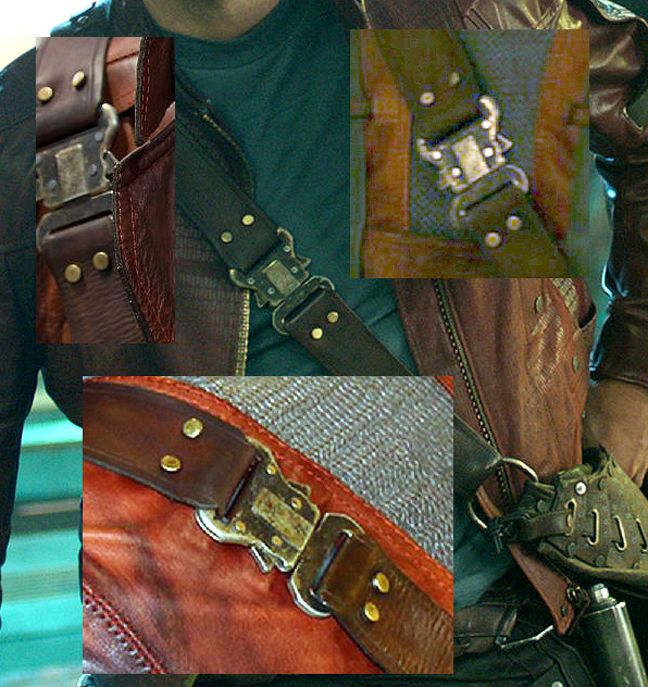
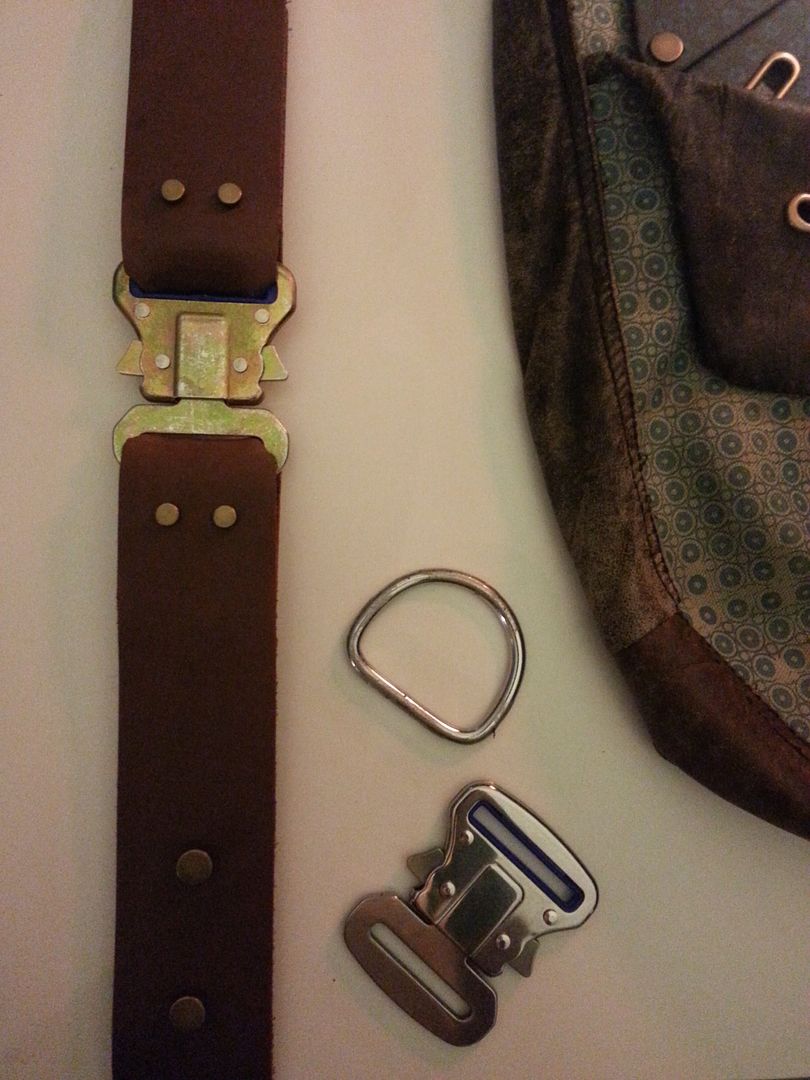
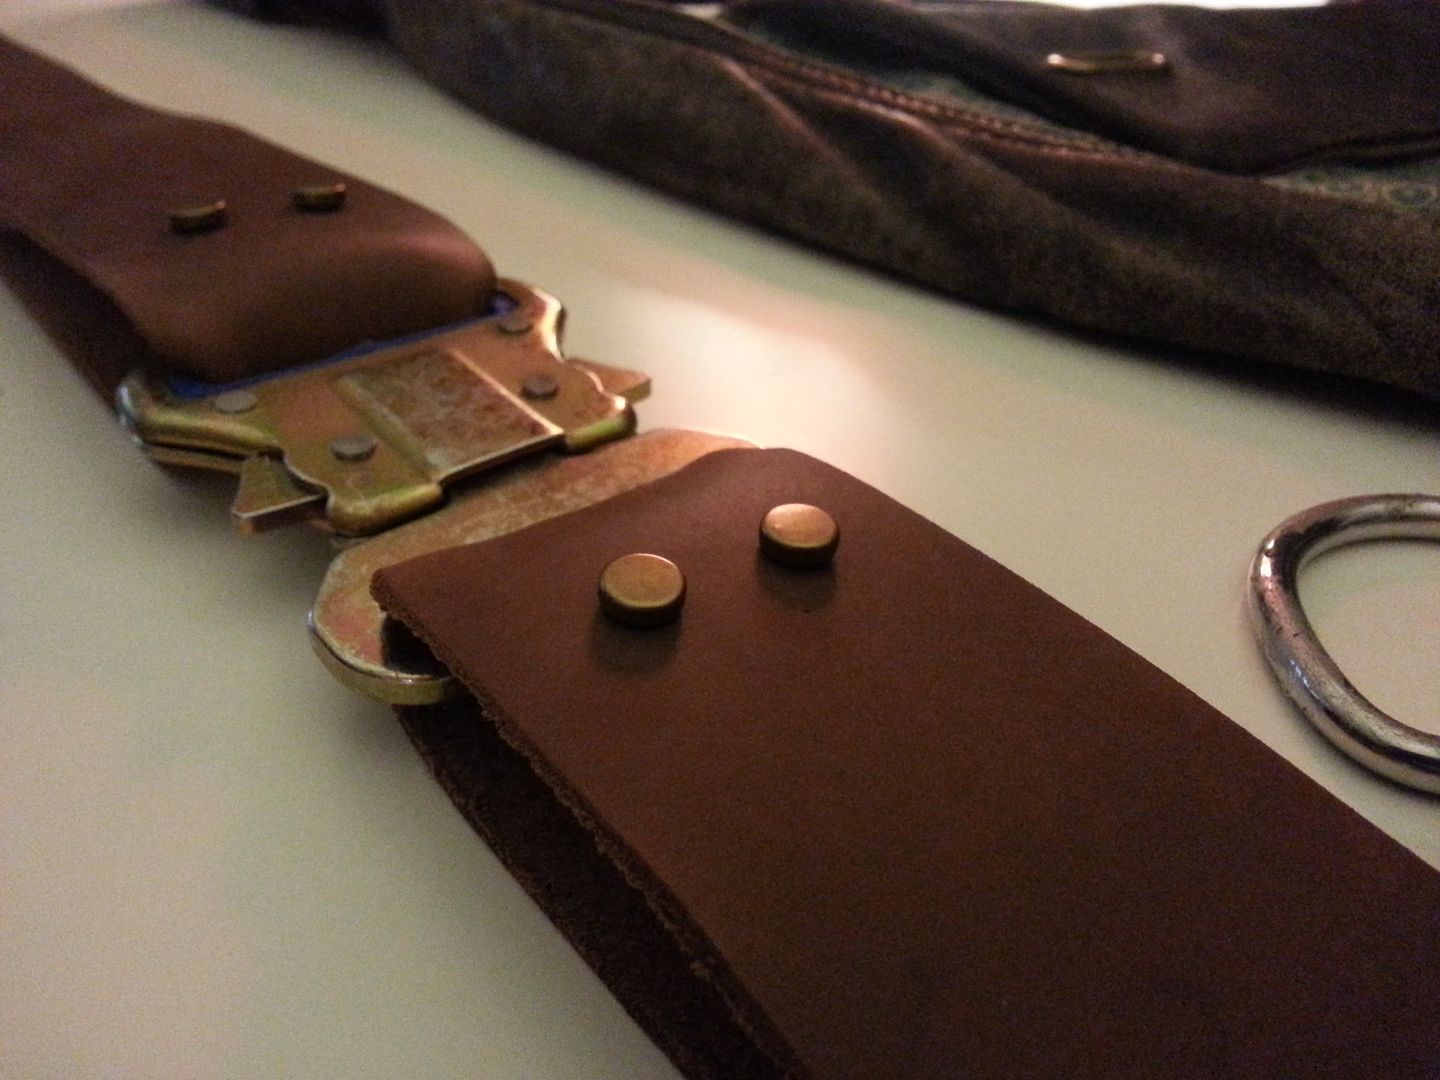
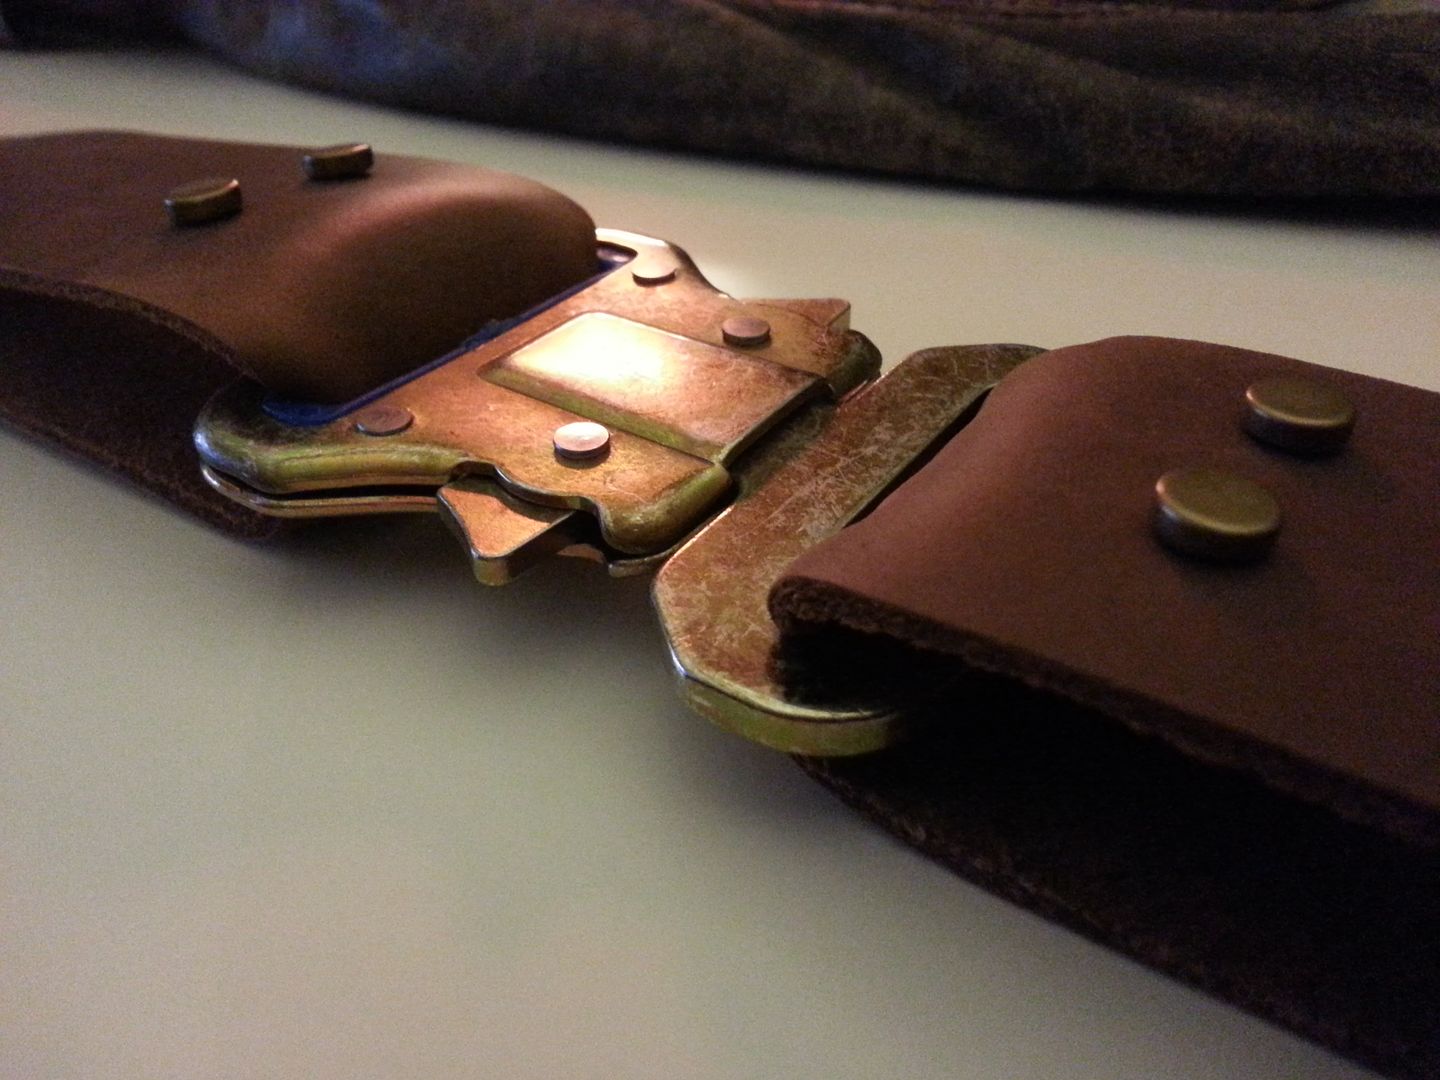
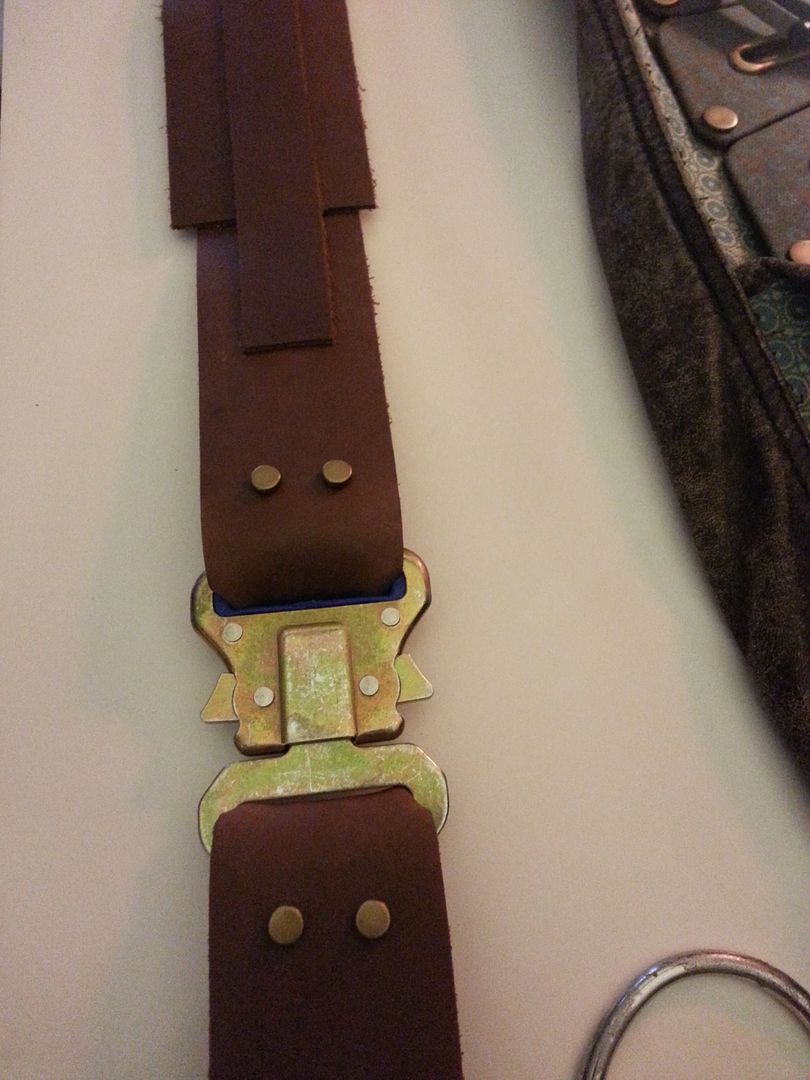
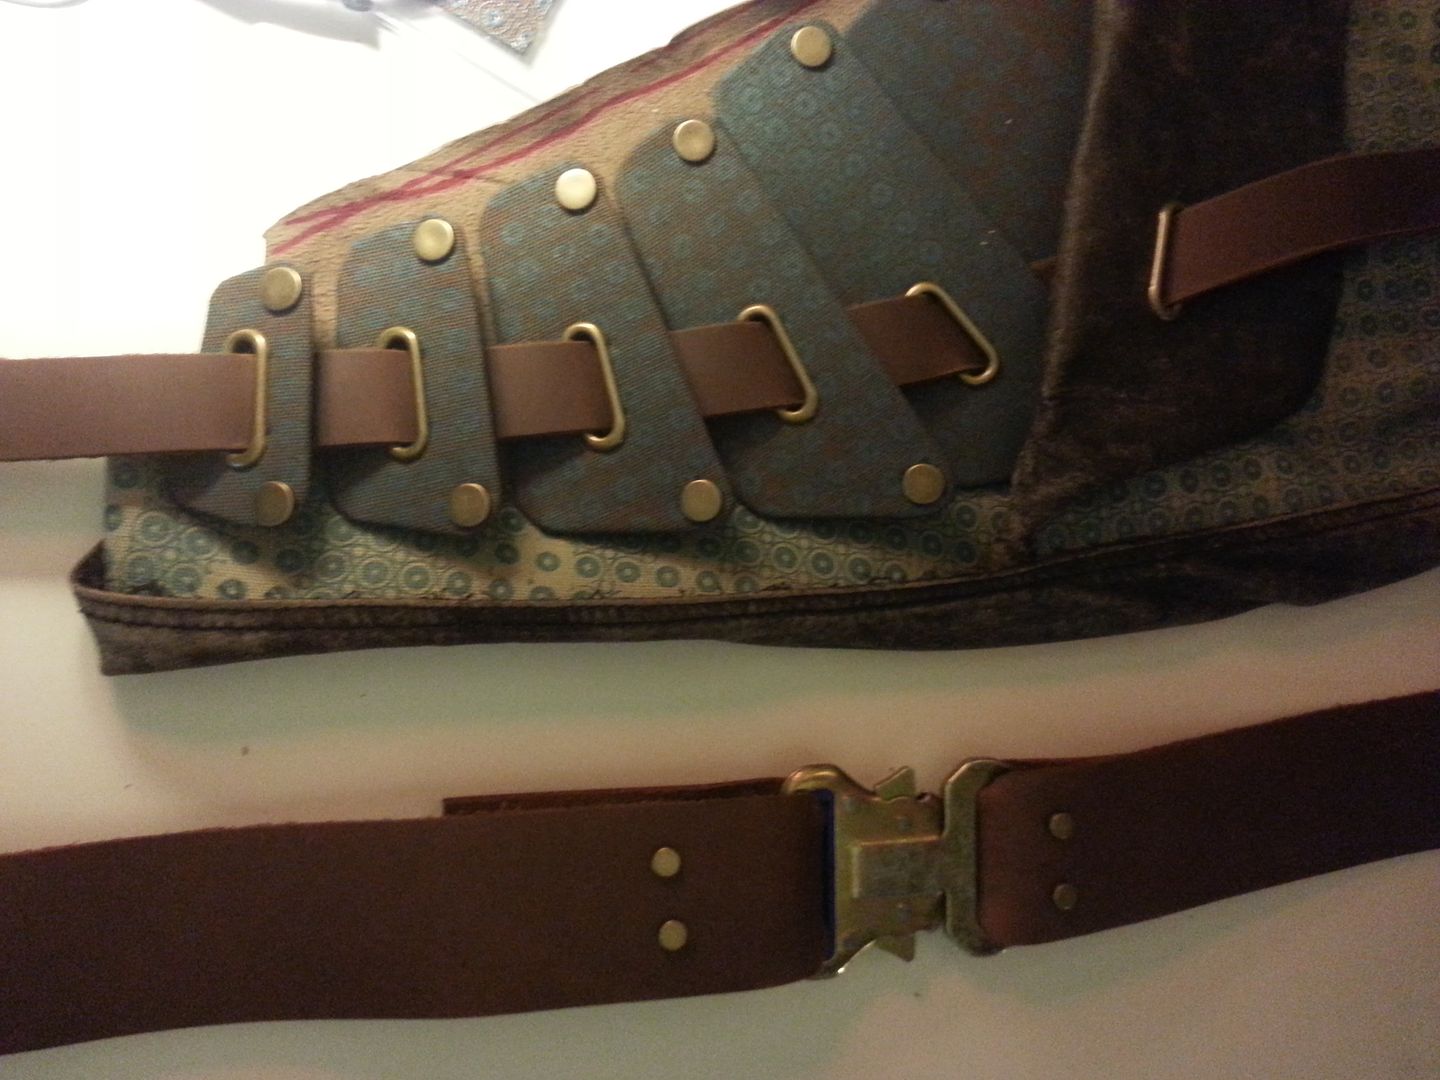
Yeah I had ordered the stainless steel one then decided to order the carbon steel one in 40 mm also had to order 4 as they have a minimum. My stainless steel ones took about 17 days to get. Can't wait to get all the parts in

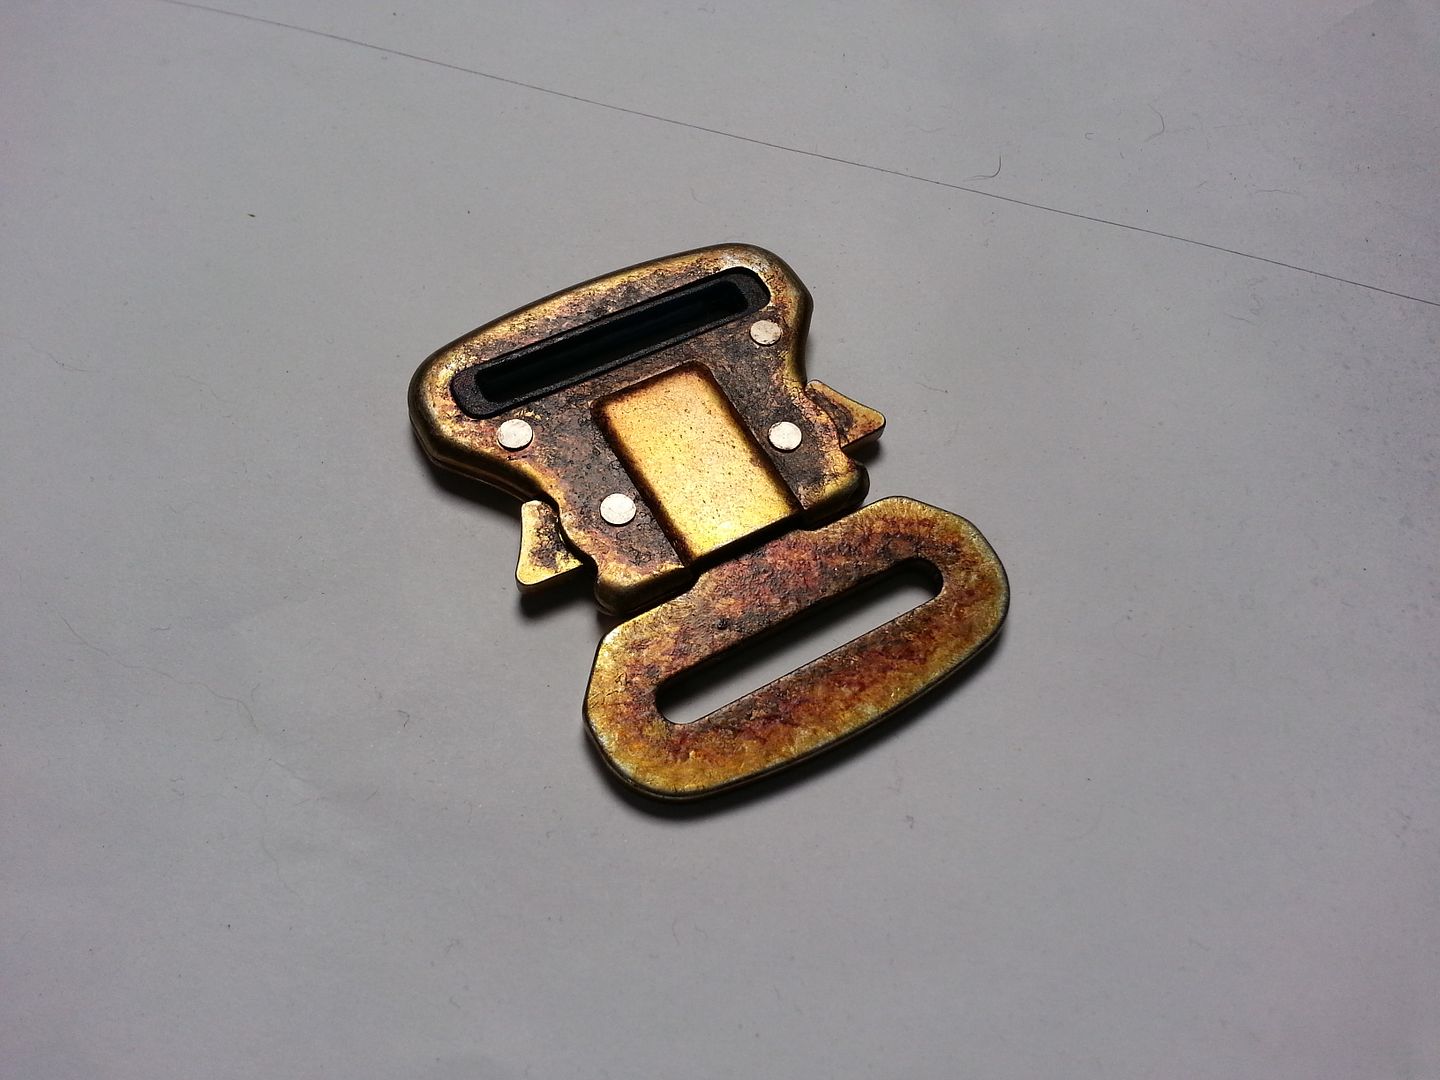
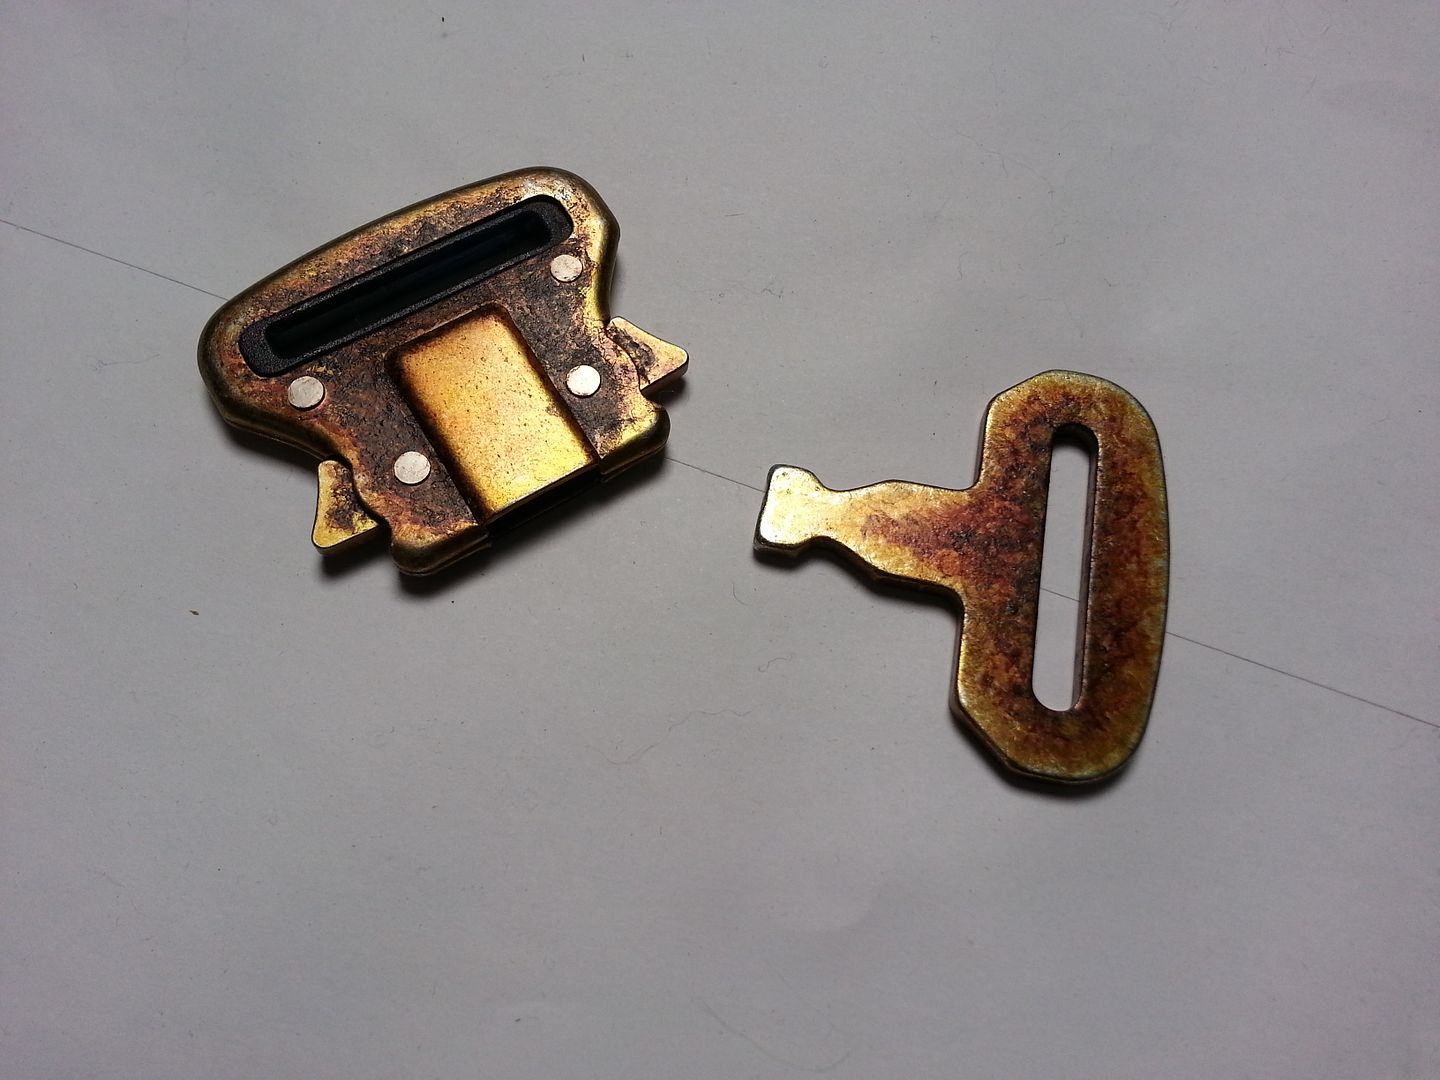
I dropped the whole brass plating thing, since the real one is just the carbon steel 40 mm buckle. I'm just buying a new one. Placed an order for 8 of them for myself and some friends this morning.
 
Last night's progress . . .


I cut some strips from the jacket to test fit where the D rings attach to the bag. I really like the look of this stuff!
20141001_215302.jpg


My 4oz leather straps came in. Judging from the thickness, I'd say these are closer to a 6oz weight and might be just a tad too thick, but I'll make them work.

20141001_220013.jpg


20141001_220056.jpg


These are going to take some serious distressing!

I threaded a couple strips through the buckle and placed some 8mm rivets on top to test size. I'm thinking these are a bit too small What do you think?
20141001_222920.jpg


20141001_223227.jpg


20141001_223309.jpg


I also got some thinner and thicker strips for the rest of the straps:
20141001_223509.jpg


20141001_224345.jpg


The rivets below are looking too small here too. Now I'm convinced 3 different sizes of rivets are used in the construction of this bag. These last two are actually probably snaps and the same size as the ones used for the jacket. Possibly a 14-15mm?

20141001_230112.jpg
 
ordered some of your fabric...and from what i see in the pic above, awesome sauce! the fact that it's not a clean print makes it look 10 times better! more accurate IMO......
 
Last night's progress . . .
I cut some strips from the jacket to test fit where the D rings attach to the bag. I really like the look of this stuff!
My 4oz leather straps came in. Judging from the thickness, I'd say these are closer to a 6oz weight and might be just a tad too thick, but I'll make them work.
These are going to take some serious distressing!
I threaded a couple strips through the buckle and placed some 8mm rivets on top to test size. I'm thinking these are a bit too small What do you think?
I also got some thinner and thicker strips for the rest of the straps
The rivets below are looking too small here too. Now I'm convinced 3 different sizes of rivets are used in the construction of this bag. These last two are actually probably snaps and the same size as the ones used for the jacket. Possibly a 14-15mm?

First off...your bag is coming along GREAT! I love it. My hope is for my bag to even come out close to how yours is looking.

What are the widths of your straps?

I think you may be right that the 8mm may be too small. They are close, but I think maybe 10mm would be perfect.

As far as the 2 rivets on the other end of the bag...they do look to be about the same size as the ones from the jacket...but the ones on the brown section of the bag look to be about the same size as the ones on the jacket as well. However, there definitely is a difference between what you have and what I see in the pictures from the movie. My only thought is that the strap is actually thinner and the rivets are the same size.
 
ordered some of your fabric...and from what i see in the pic above, awesome sauce! the fact that it's not a clean print makes it look 10 times better! more accurate IMO......

Yeah, I plan to do a whole wash on it too. I think the pattern could be even more faded looking. Knock the contrast down a little. I figure I can touch up certain parts by hand as well to fill in any gaps. I'm also going to experiment with some bleach on the darker fabric to knock down the green and bring out some of those oranges.

I also noticed these stripes on the bag where the pattern looks really faded or maybe even missing completely.

bagstripes.jpg


I went with a 2" strap. It's cut all funky varying in widths if you look at some of the screen caps. I also got a 2.5" piece for the shoulder and 1" for the small straps that weave through the oval grommets.
 
Thanks! I thought about sand blasting it. Are you going to take it apart before you sand blast? I feel like the mechanical parts inside are going to grind with sand afterwards if it isn't taken apart. Also, not sure exactly how to put the buckle back together with the rivets after taking it apart.
Nope, I'll either tape up the openings, or just air blast the heck out of the inside afterwards. Or both.
 
Soulinteria, the small rivets are 10 mm. the flat topped things on the dark patches are half inch or 12/13 mm, and the functional snaps on the straps are 5/8" or 16 mm. You're spot on with the 2" strap width.
 
Yeah, I plan to do a whole wash on it too. I think the pattern could be even more faded looking. Knock the contrast down a little. I figure I can touch up certain parts by hand as well to fill in any gaps. I'm also going to experiment with some bleach on the darker fabric to knock down the green and bring out some of those oranges.

I also noticed these stripes on the bag where the pattern looks really faded or maybe even missing completely.

I went with a 2" strap. It's cut all funky varying in widths if you look at some of the screen caps. I also got a 2.5" piece for the shoulder and 1" for the small straps that weave through the oval grommets.

I am attempting this pattern as my first screen printing and am getting the same uneven look. However, I'm getting some really dark and heavy areas too that I don't want. I don't know too much about screen printing...but do you think that light sanding after heat setting the ink would dull it down a little or would that just smear things around?
 
You're spot on with the 2" strap width.

I was thinking 1.75? If the D ring is 2 inches (I don't know if it measures the inside or outside, I was assuming the inside) then the strap is not a full 2".

pEWPFmE.jpg

The magenta rectangle is the piece of strap above. There's definitely a gap between the widths of the strap and the D ring.
 
That bag is seriously AMAZING!! Simply beautiful!!! :thumbsup :thumbsup :thumbsup

So what is the consensus on the finish of the D-rings? Looks like you're using nickel plated, but the screen used look like they're brass to me. And all of the other hardware is brass so it seems odd they would use nickel D-rings and brass everything else if they were going for symmetry.

I was thinking 1.75? If the D ring is 2 inches (I don't know if it measures the inside or outside, I was assuming the inside) then the strap is not a full 2".

Hardware is usually measured by inside diameter.
 
The screen used ones look brass to me. Or brass plated and chipped
c7daH5L.jpg


Also i have 2 extra buckles (1 45mm and 1 40mm stainless steel) if anyone still needs one. Gotta love the site needing a minimum.
 
Last edited:
Yeah, that definitely looks brass to me.

It also looks like the plastic insert on the buckle is visible in that photo. Just looks like it was painted/dyed black.
 
The D rings I got are welded stainless steel. I mainly chose them for their thickness and shape. I figure any hardware I get is going to need additional distressing anyways. After I knock them down they'll look more like the ones in the pic above. I just measured the inside of of these rings and they are 2 1/16". The outer dimension is 2 1/2". They were advertised as 2" rings. The best way to measure the thickness of the strap is to use the buckle for reference rather than the rings since we know the manufacturer and can get exact dimensions from it. I get 2 5/16" wide for the bottom piece without the plastic insert and 1 5/8" for the interior. The strap has a cut-out where it fits into the buckle, so 2" looks right to me.
 
Last edited:
The D rings I got are welded stainless steel. I mainly chose them for their thickness and shape. I figure any hardware I get is going to need additional distressing anyways. After I knock them down they'll look more like the ones in the pic above.

Ah, okay. Just curious! Didn't know if I was missing something :lol

I'm extremely excited to see your bag finished!! :thumbsup
 
Yea, don't scale off of the D-ring, we haven't found the one they used yet. Scale from known measurements. The silk screened pattern is known, you can use that to find the sizes of the 1/2" studs, the 5/8" snaps, and the 1.25" oval eyelets. From there you can branch out and find the 10 mm flat top rivets, and you can use those to determine the 2" strap width. Checked against the 40 mm buckle with a 1.5" hole, there is pretty clearly 1/4" chopped off of each side of the strap to fit it through the buckle, so 2" is confirmed.
 
Yea, don't scale off of the D-ring, we haven't found the one they used yet. Scale from known measurements. The silk screened pattern is known, you can use that to find the sizes of the 1/2" studs, the 5/8" snaps, and the 1.25" oval eyelets. From there you can branch out and find the 10 mm flat top rivets, and you can use those to determine the 2" strap width. Checked against the 40 mm buckle with a 1.5" hole, there is pretty clearly 1/4" chopped off of each side of the strap to fit it through the buckle, so 2" is confirmed.

I feel like I just finished watching a Mythbusters segment :lol :thumbsup

2luxcug.png


Seriously though, I do want to give HUGE thanks to everyone's hard work!!! :thumbsup Threads like these are why I love this place. You guys are all awesome :)
 
So I took to distressing my buckle last night:

Here it is unaltered
20141004_223832.jpg


I decided to go with alcohol inks to simulate the patina. They work great on metal and won't rub off. I started off with the color Butterscotch.
20141004_224932.jpg


Then applied a darker coat of Ginger.
20141004_230116.jpg


Espresso.
20141004_230801.jpg


And finally Mushroom.
20141004_232333.jpg


The great thing about this stuff is that it cuts with Ethanol. So you can blend, rework and remove the ink where needed. You can see above where I wiped off the center portion.

Working the colors together some more. This was about as far as I could go with the alcohol inks.
20141004_232805.jpg


I still wasn't getting the deep contrast I wanted and it was lacking some of that rusty texture, so I tried a new product. It's a home decor antiquing wax by FolkArt.
20141005_000358.jpg


20141005_000409.jpg


20141005_000441.jpg


After letting it dry overnight I buffed it with a paper towel and hit it with an acrylic spray sealer for durability.
20141005_141440.jpg


20141005_141514.jpg


Here it is next to the stock carbon and stainless buckles.
20141005_141607.jpg


20141005_141655.jpg


I'm pretty happy with how it turned out.

The actual buckle for reference:
buckles.jpg
 
That looks really awesome. Do you think there's any chance of getting close to that patina with the stainless steel buckle? Or am I going to be better off ordering the carbon steel one directly from the company?
 
This thread is more than 7 years old.

Your message may be considered spam for the following reasons:

  1. This thread hasn't been active in some time. A new post in this thread might not contribute constructively to this discussion after so long.
If you wish to reply despite these issues, check the box below before replying.
Be aware that malicious compliance may result in more severe penalties.
Back
Top