The food trays in "2001: A Space Odyssey"

... Btw, I fail to see the second hole to put the straw into the box itself.
There is a reason for that: There is no second hole :)
I noticed that, with my tool, I can't make that hole once the box is glued. I would have to make the hole before gluing the pieces - but I didn't. So, currently the straws are going nowhere ... but you can't see that when they sit in the tray.
 
There is a reason for that: There is no second hole :)
I noticed that, with my tool, I can't make that hole once the box is glued. I would have to make the hole before gluing the pieces - but I didn't. So, currently the straws are going nowhere ... but you can't see that when they sit in the tray.
When confronted with that type of challenge (how to pierce a hole in a fairly thick paper/cardboard) I usually trace the circumference and cut an X, respecting the edge of the hole. As soon as you introduce the straw through that X, it will collapse...and voilà: the straw will be snug and will not come out. With the level of accuracy you have already into that build, it would be sad not to respect the original packets ;) (y) (y)
 
After a little break, I made some minor progress. Using the vector file of the old Pan Am logo provided by gnolivos, I printed the logo on slightly thicker paper, and glued it to the tray with Liquitex Gel Medium.
20210509_230443.jpg

On the instructions: I think that most people who will see my tray are no 2001 hardcore fans, so they would be irritated by the gibberish featured on the original prop. And, since I am not creative enough to come up with some meaningful statements to replace that, I decided on not adding the instructions on my tray.
 
Interesting decision. You're right: the "Instructions" were text you'd find at the bottom of Letraset sheets (copyright for different countries mainly). Knowing how all of the text on that movie was carefully research/scripted and applied to different props and set pieces, it's bizarre that this one wasn't as well designed as the other ones.
Did you used my trick to make the second hole in the packets? Looking good, btw. (y)
Thank you!
I agree, given all the other details, this is so not-Kubrick.
And I have not added the second holes yet - but it's on my list (using your suggested method). But finishing the graphics for the packets will anyway take more time. I am currently working on the white tray - and on some HAL-related things (but you will read more about those in another thread in the future).
 
For the white tray (used on the Discovery shuttle before they find the monolith), there are only two views showing details.
w1.jpg
w2.jpg

Both of these are, however, very distorted. In another thread here (which I can't find anymore), a nice member has removed the distortions due to perspective. I used that image to derive the dimensions, based on the assumption that the four inserts are having a width of 4".
WhiteTray-dimensions.jpg

I chose the total height of the tray to be the same as that of my blue tray, which is 1 1/2".
 
Looking good Markus; don't forget, those measurements don't account for the wall thickness of the trays. I discovered that the hard way:( Let's say that you'll use a 2mm wall thickness for each tray, it means that you'll end up with 16mm more when all of those trays are side by side, which is almost 3/4''.
So, the overall length of the tray should be around 21''counting the outside curves of the handles. Eager to see your next update, of course(y)
The walls of my inserts will be notably thicker as I'm building everything from 3/16" (5mm) plywood. But I am taking the wall thickness into account by reducing the inner space of the inserts. The outer width is 4". Actually, it is 3 31/32", so they have a little space to move in the 16" wide opening.
 
Good and, as you probably know, there's a small lip all around the tops of those trays before the main flat part. Little details;)
 
Good and, as you probably know, there's a small lip all around the tops of those trays before the main flat part. Little details;)
Yes - there's a lip! like this one:
20210424_123400.jpg
20210510_221207.jpg

Maybe my lip is a little thicker as compared to the original prop - but that's all I can do with 3/16" plywood.
And here is the assembly of the tray:
20210509_173609.jpg
20210510_205521.jpg


20210510_221024.jpg
20210511_194340.jpg


20210511_231219.jpg
20210511_232947.jpg


It feels like the inserts are maybe a little too deep - but that's the result from making this tray as high as the blue one.
The next steps are sanding, spackling, sanding, spackling, ...
Typically, I am not good at that - because I can not wait to paint my builds. In every new build, I try to do better - but I always fail, again and again.
 
Looking good...my trays are protruding from their main trenches by 0.7mm;)
Sorry, I'm not sure how to understand this statement. You are probably not referring to the lip (which protrudes about 18mm to the front). So, are you referring to the height, the back, or the sides?
 
My small trays are up, in their trench, by 0.7mm all around. So you'll be able to grab their handle easily from the main tray.
 
The next steps are sanding, spackling, sanding, spackling, ...
As one who also can't stand filling and sanding, I commend your use of old-school materials, but are you going to make the blue tumbler from plywood too? And I'd like to see you steam and bend some 1/16inch for the cutlery!
One of these days I'm going to finish one of these too. It was my de-distorted photo you used for your dimensions, 'though I made the mistake of going with 3.75inch instead of 4. But I did notice that the long divider in the middle is only half-height:
vlcsnap-00021_LI.jpg
 
As one who also can't stand filling and sanding, I commend your use of old-school materials, but are you going to make the blue tumbler from plywood too? And I'd like to see you steam and bend some 1/16inch for the cutlery!
One of these days I'm going to finish one of these too. It was my de-distorted photo you used for your dimensions, 'though I made the mistake of going with 3.75inch instead of 4. But I did notice that the long divider in the middle is only half-height:
View attachment 1462964
So, that was your image- thanks a lot!
I download these things as I find them, then I forget from where I got them and can't give credit. But this was certainly very helpful!
And, yes, I noticed that the divider is lower than than the surface of the cup holders (which, again, is lower than the outer rim). In my build, both of these steps are equal to the 3/16" thickness of the wood. So, my divider is 3/8" lower than the outer rim - or approx. 2/3rd of the total inner height of my tray (which is 1 5/16"). Had I seen your image before, I would have made it a little lower.
And there are certain limits of what I try to build from plywood - and the tumbler and cutlery are beyond those... :D
 
macropod80 brought up the tumbler and the cutlery.
Currently, I have no plans on spending excessive amounts of money on those.
For the cutlery, I may never find some cheap replacement that is close to the original.
For the tumbler, I may...
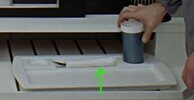
Until then I will try one of these that I found in our kitchen: A blue/white plastic cup or a red/silver tumbler - the latter has roughly the right shape and although the colors are wrong, they look (to me) like they could have been used in the movie.

20210531_135054.jpg
 
For the tumbler, I may...
Until then I will try one of these that I found in our kitchen: A blue/white plastic cup or a red/silver tumbler - the latter has roughly the right shape and although the colors are wrong, they look (to me) like they could have been used in the movie.
A relatively cheap option for the tumbler, sometimes still found in second-hand/thrift shops if not on evilbay, is an old illustrated or souvenir type. The 2001 originals were likely not actually blue plastic but clear, painted on the inside. Clear ones are quite common, with printed advertising imagery (even postcards) sandwiched inside. Sometimes the white liner even pops out, 'though cutting around the outside just under the white rim is not too hard. It worked for me.
 
With a few layers of white paint, the tray finally looks like what it's supposed to be.

IMG_20210531_142537505.jpg

(I apologize for the wrong spoon and tumbler...)
And again, side by side with the blue tray.

IMG_20210531_144957076.jpg


The blue tray is still waiting for the artwork for the white packages (this may take a while...).
But I just had some idea for the white tray, how to create the "mashed potatoe"-like food for the four inserts.
I am currently thinking of using floral foam blocks. But this may also take a while. All this "2001: A Space Odyssey" talk, plus all the ongoing HAL threads have inspired me to build one or two new HALs first...
 

Your message may be considered spam for the following reasons:

If you wish to reply despite these issues, check the box below before replying.
Be aware that malicious compliance may result in more severe penalties.
Back
Top