I'm more than happy to share what I've learned and thank you for your compliments.
You are using an out of date browser. It may not display this or other websites correctly.
You should upgrade or use an alternative browser.
You should upgrade or use an alternative browser.
The Bride of Frankenstein by MOEBIUS - Finished pics page 3
- Thread starter GeneralFROSTY
- Start date
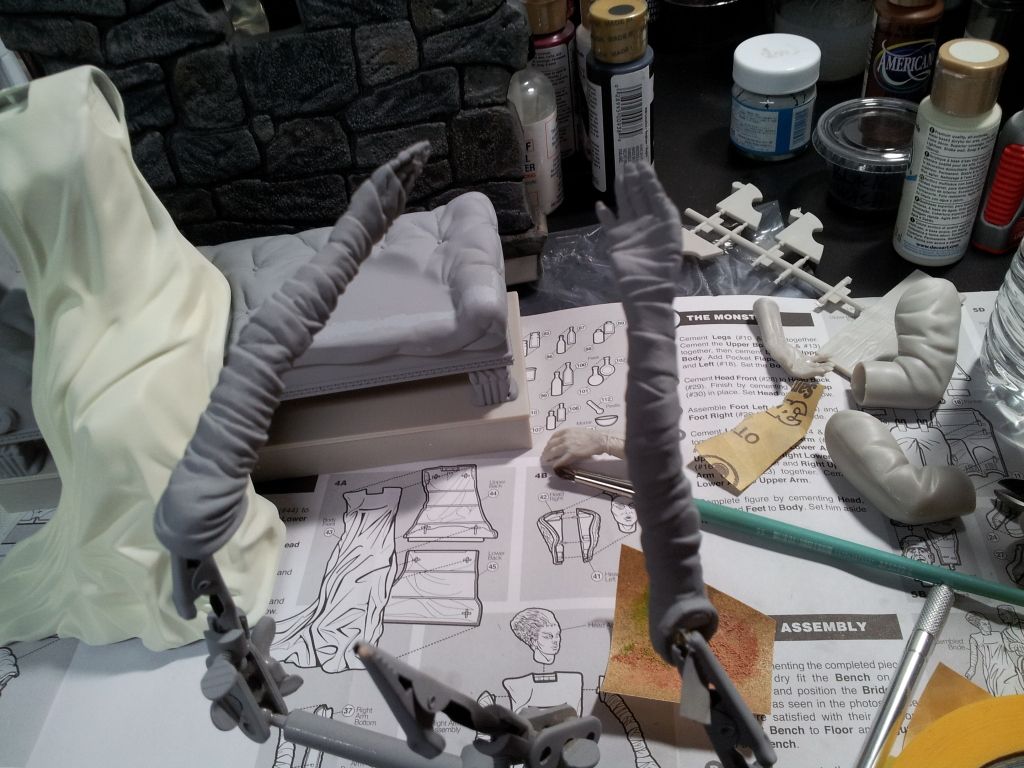
Here we have the Bride's arms.
Starting with the primer coat after seam cleanup:
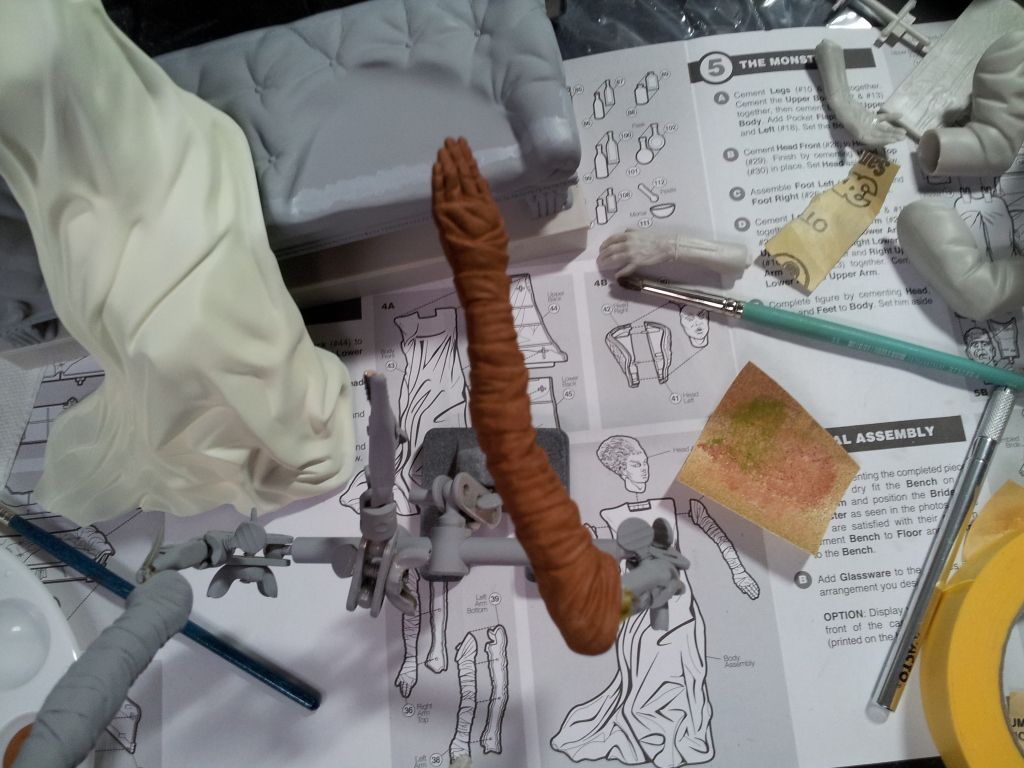
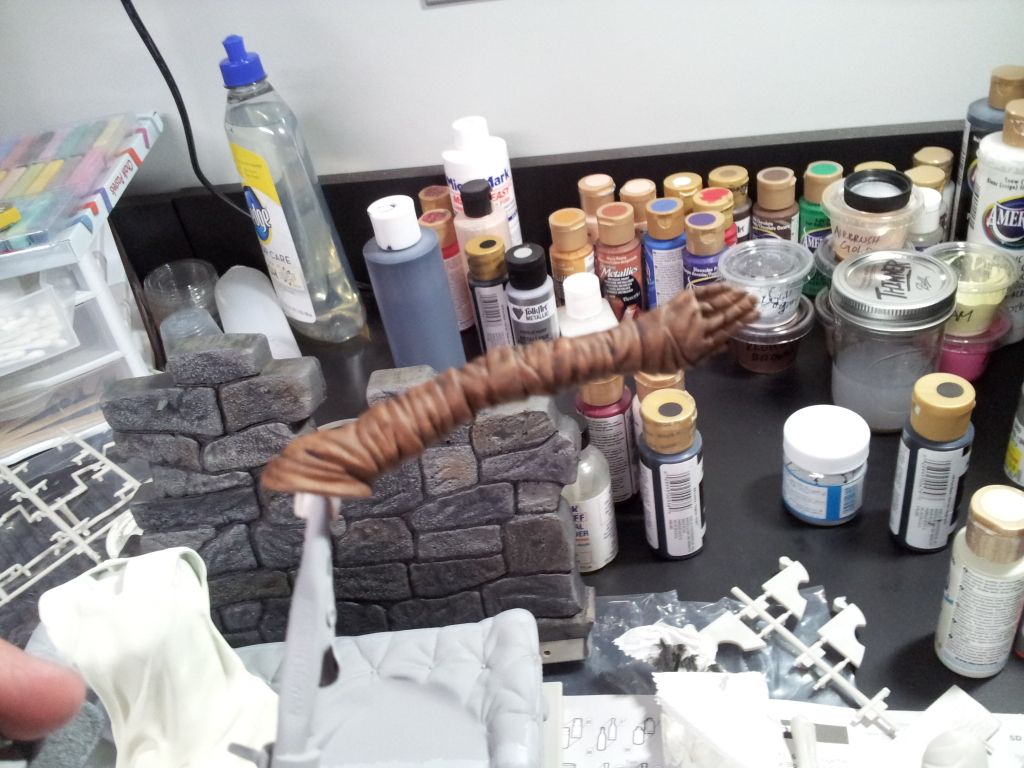
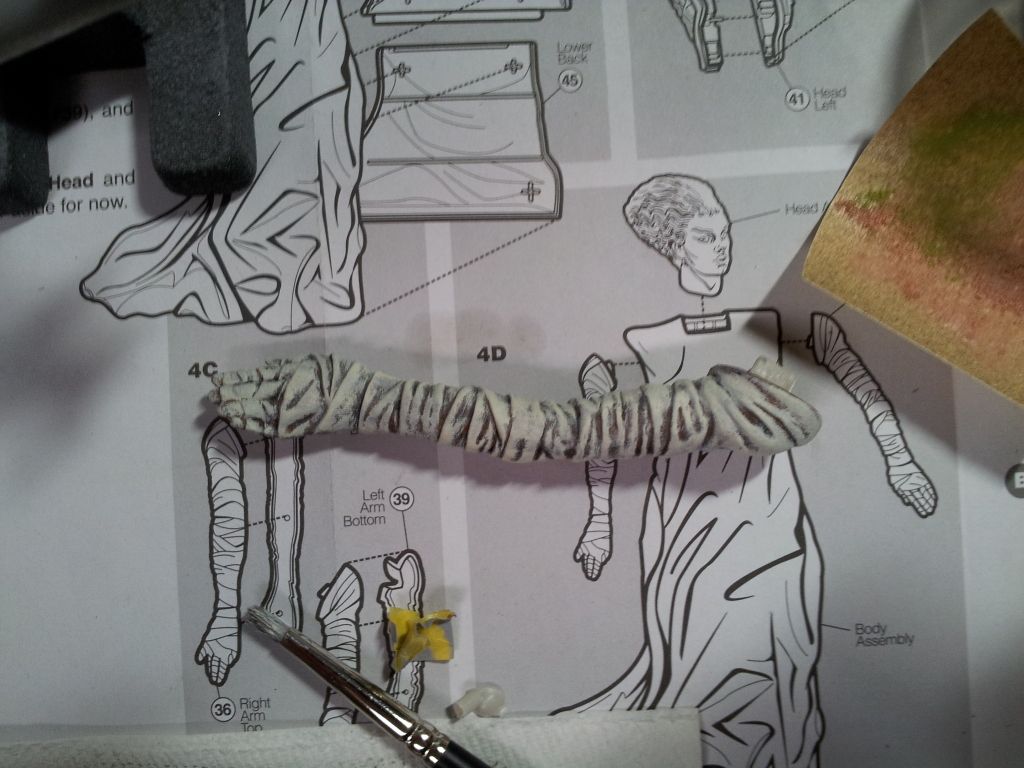
This was another experiment in painting, so I tried out a base coat in brown, then a black wash and finally drybrushed with an off-white color called 'Bleached Sand'
Starting with the primer coat after seam cleanup:
This was another experiment in painting, so I tried out a base coat in brown, then a black wash and finally drybrushed with an off-white color called 'Bleached Sand'
Amish Trooper
Master Member
Re: The Bride of Frankenstein by MOEBIUS - (build thread)
This is looking fantastic!
This is looking fantastic!
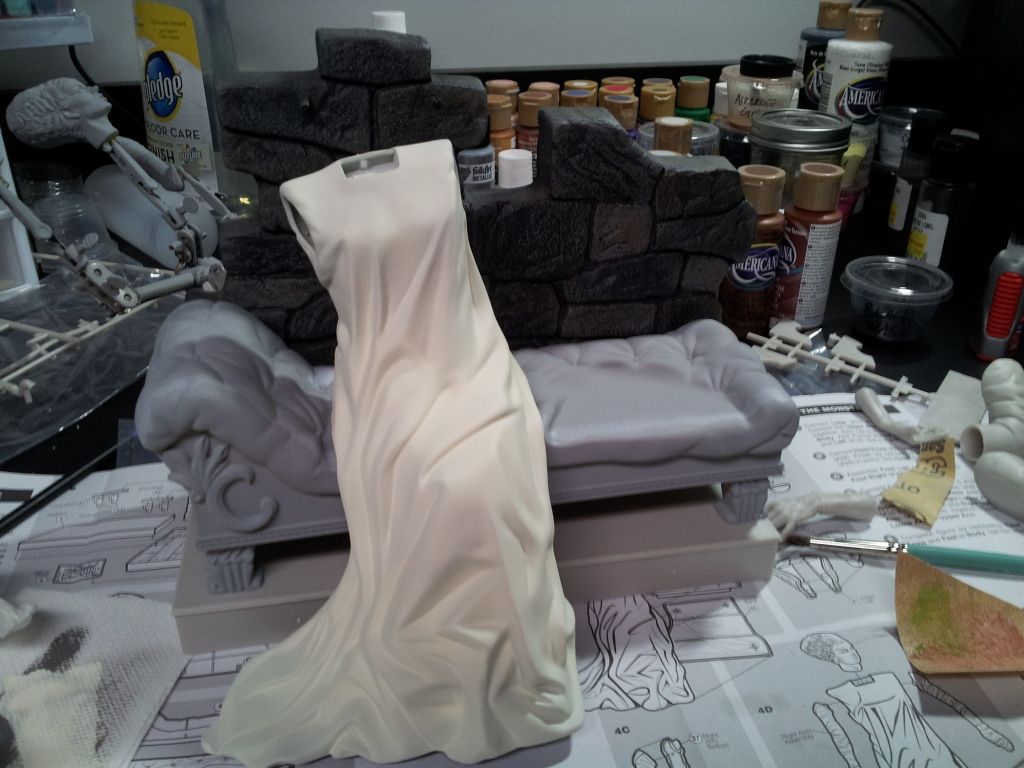
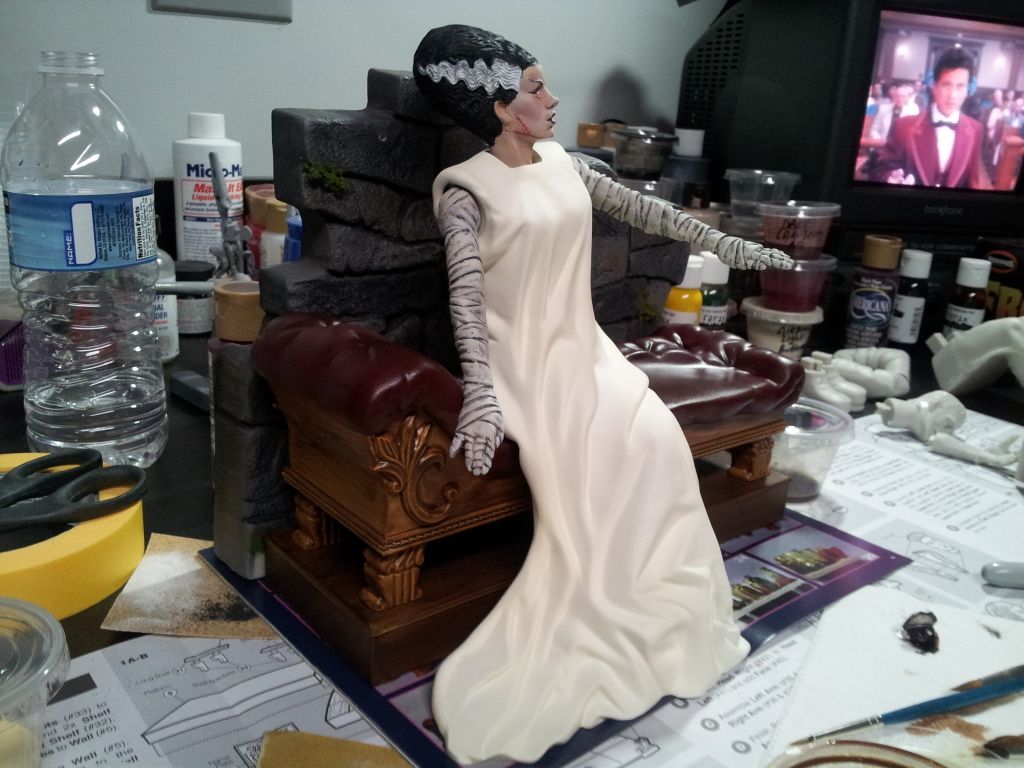
Moving on to the Bride's gown.
This wonderfully sculpted piece didn't need any shading because of how well done the folds are, as another member had mentioned.
As per the tutorial booklet suggestion, I base coated the gown with an ivory shade of white (I used a color called "Light Buttermilk" then airbrushed a thin coat of pure white on the raised areas of the gowns folds to give a very subtle feathered shade effect.
This is one of those things you'd only notice if it were NOT there.
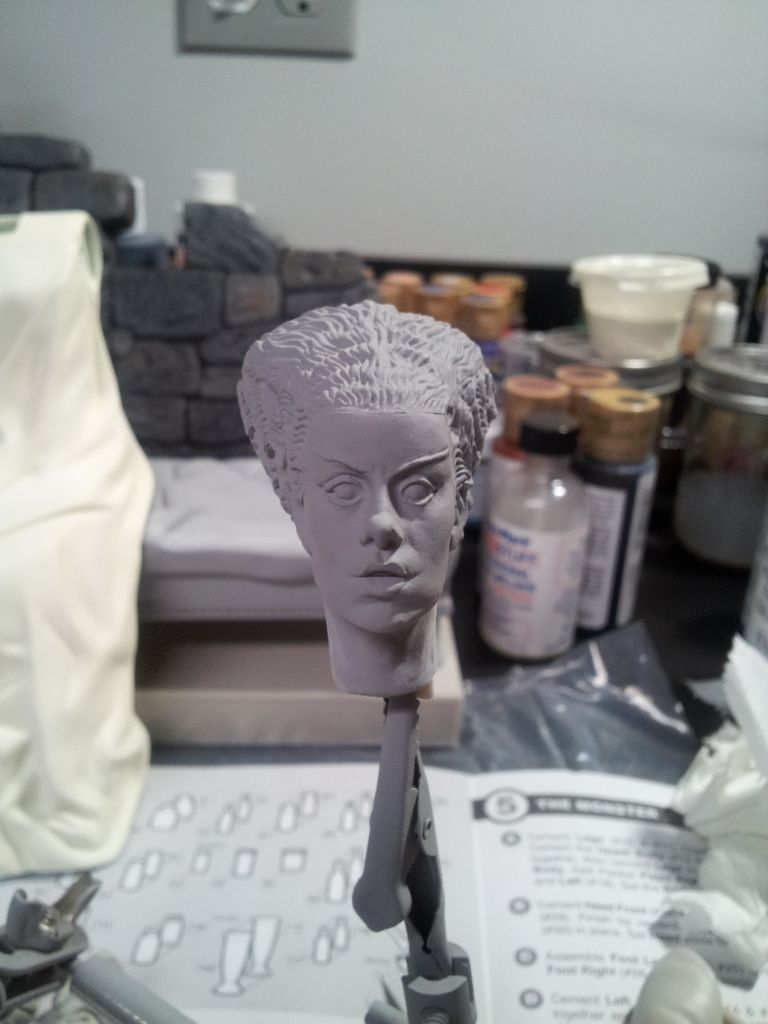
Here I will show you the stages the Bride's head went through.
As mentioned before, I chose to paint her hair a shade of black instead if the more commonly painted brown.
primer:
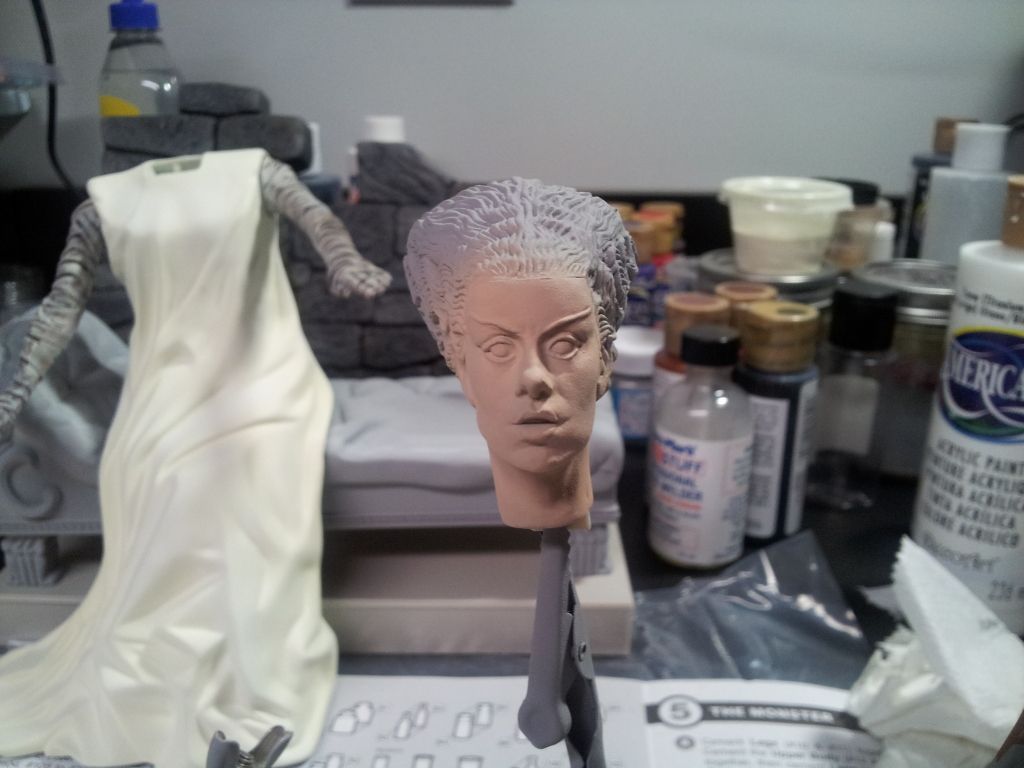
Flesh tone; I put on a few less coats of this than I did with Elvira, and also did not use any satin varnish - this helped keep her looking "dead"
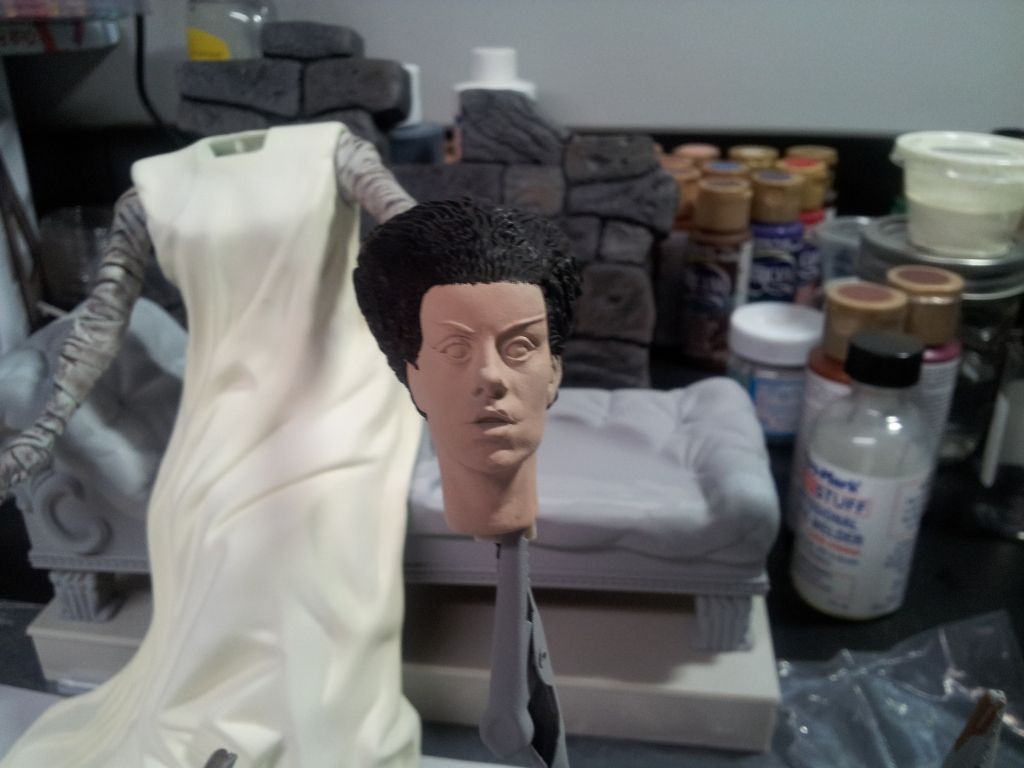
Black painted by brush. I used a color called "Licorice" which was a better tone for this than pure black.
Her hairline looked a little phony when painted, so I used the tiniest brush I have to paint in individual hairs on her hair line:
By itself, the black paint was too plain, so I mixed up a black pearl color and drybrushed - compare to the previouse image and you will see the difference it made.
Her white streak wad based in pure white, then accented with pearl white:
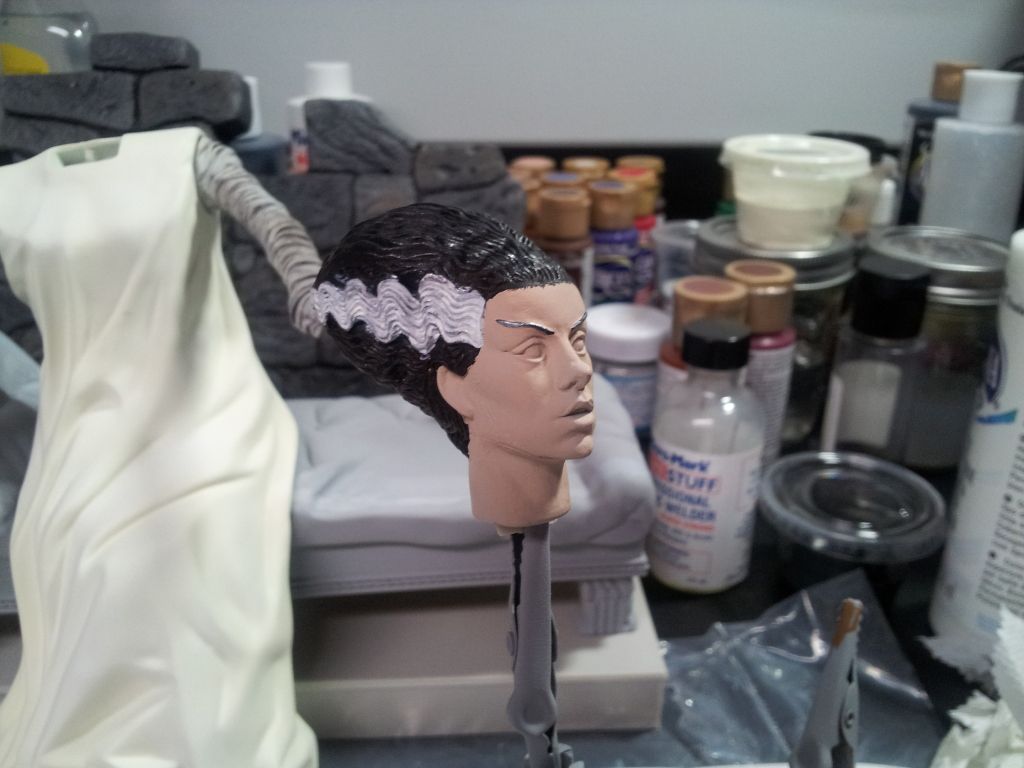
And final details. Skin tones all done with chalks, the rest with washes and paint with a very small detail brush.

As mentioned before, I chose to paint her hair a shade of black instead if the more commonly painted brown.
primer:
Flesh tone; I put on a few less coats of this than I did with Elvira, and also did not use any satin varnish - this helped keep her looking "dead"
Black painted by brush. I used a color called "Licorice" which was a better tone for this than pure black.
Her hairline looked a little phony when painted, so I used the tiniest brush I have to paint in individual hairs on her hair line:
By itself, the black paint was too plain, so I mixed up a black pearl color and drybrushed - compare to the previouse image and you will see the difference it made.
Her white streak wad based in pure white, then accented with pearl white:
And final details. Skin tones all done with chalks, the rest with washes and paint with a very small detail brush.
I recieved my display base upgrade kit today, ordered from Cult TV Man shop.
This is a two-piece upgrade kit and includes a MUCH larger stone wall and a large stone floor.
Here is a comparison of the stock wall with the resin upgrade:
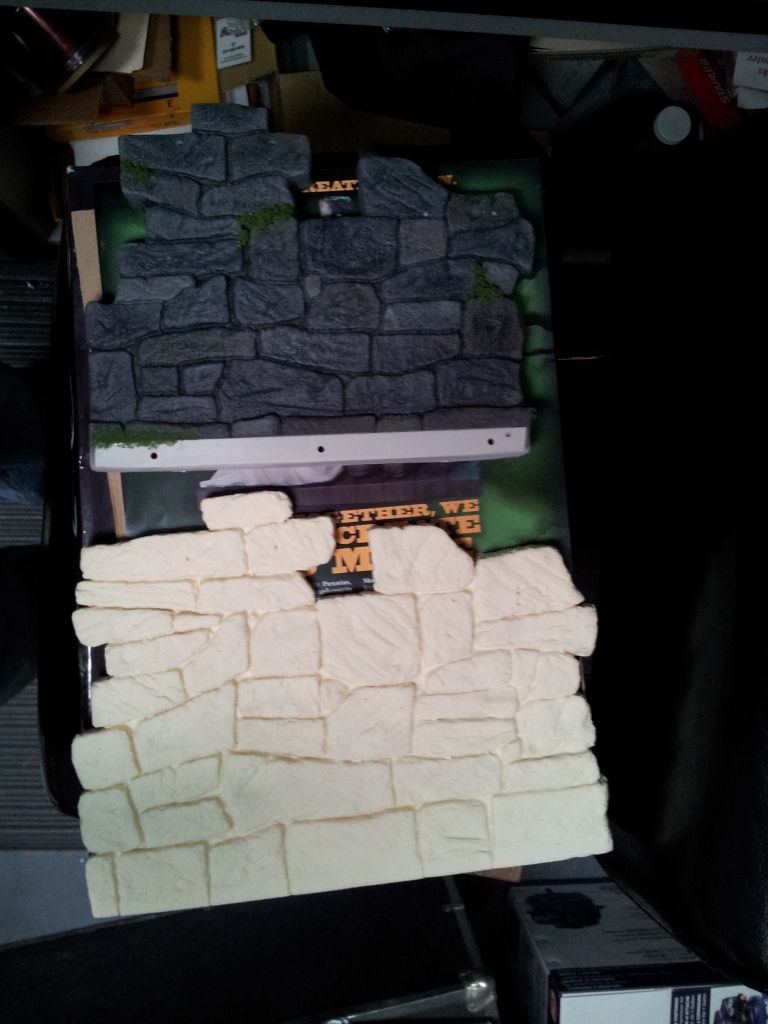
This is a two-piece upgrade kit and includes a MUCH larger stone wall and a large stone floor.
Here is a comparison of the stock wall with the resin upgrade:
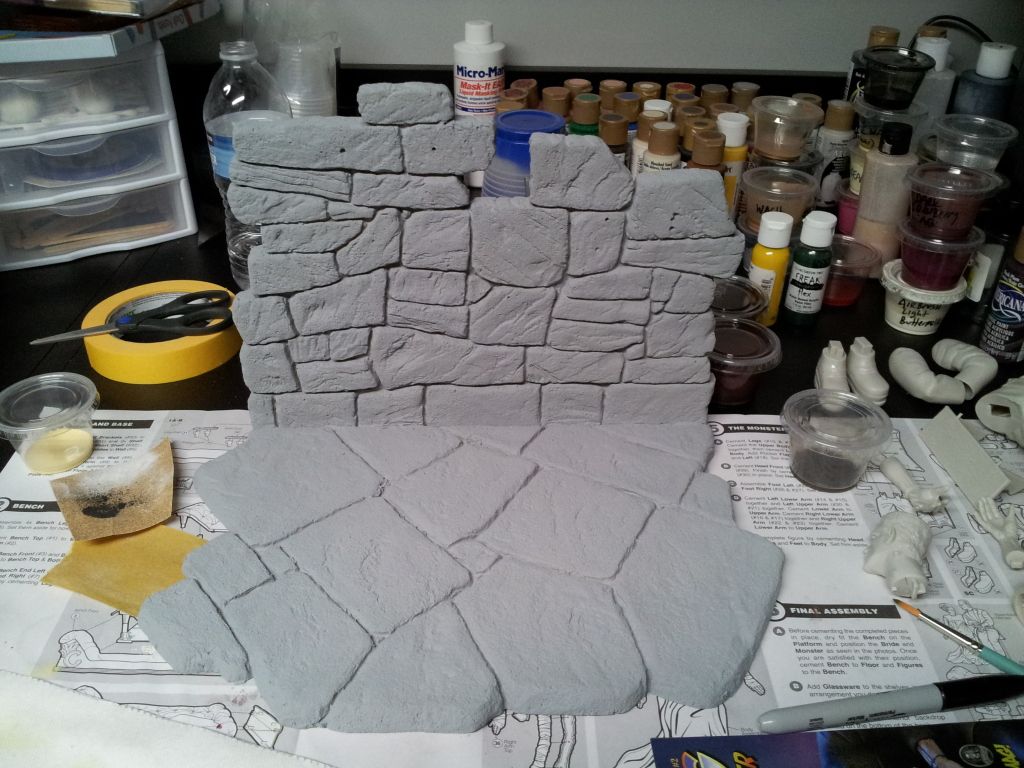
The upgrade base and wall glued together and primered.
I am so happy I got this, it makes such a difference!
I am so happy I got this, it makes such a difference!
To give you an idea of size difference, here you will see the stock base is small enough to fit within the display of the upgrade base:
Here are the shelves (primered) that get mounted on the wall. You can see the new base all painted in the background:

Here are the shelves (primered) that get mounted on the wall. You can see the new base all painted in the background:
Thank you!
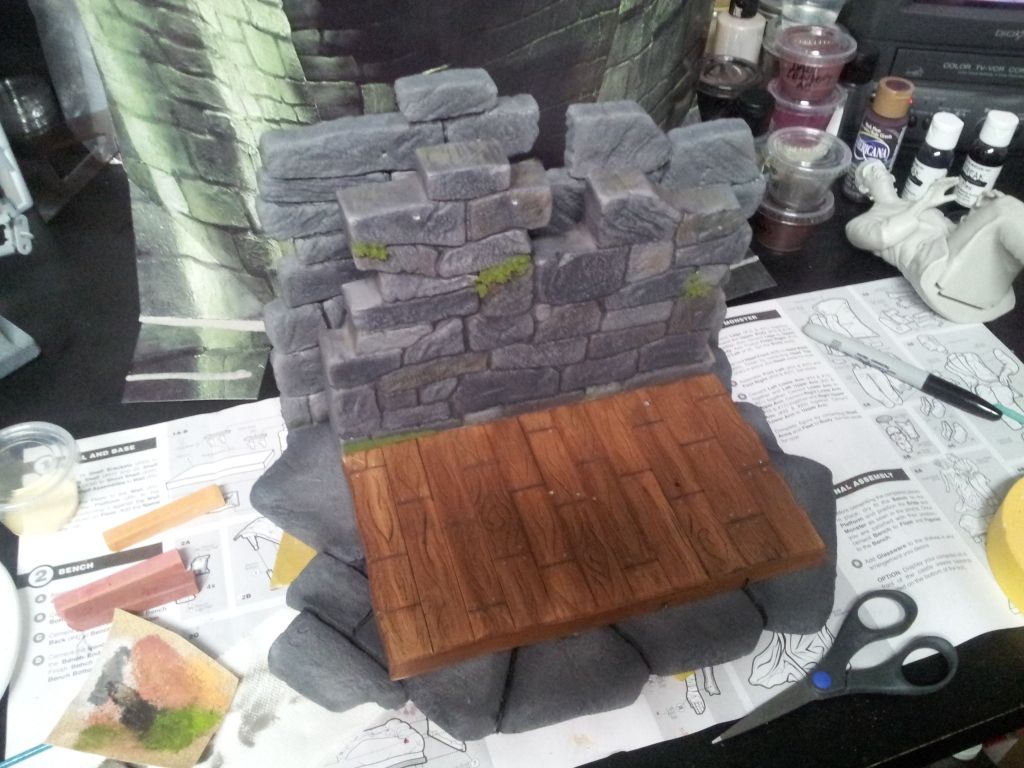
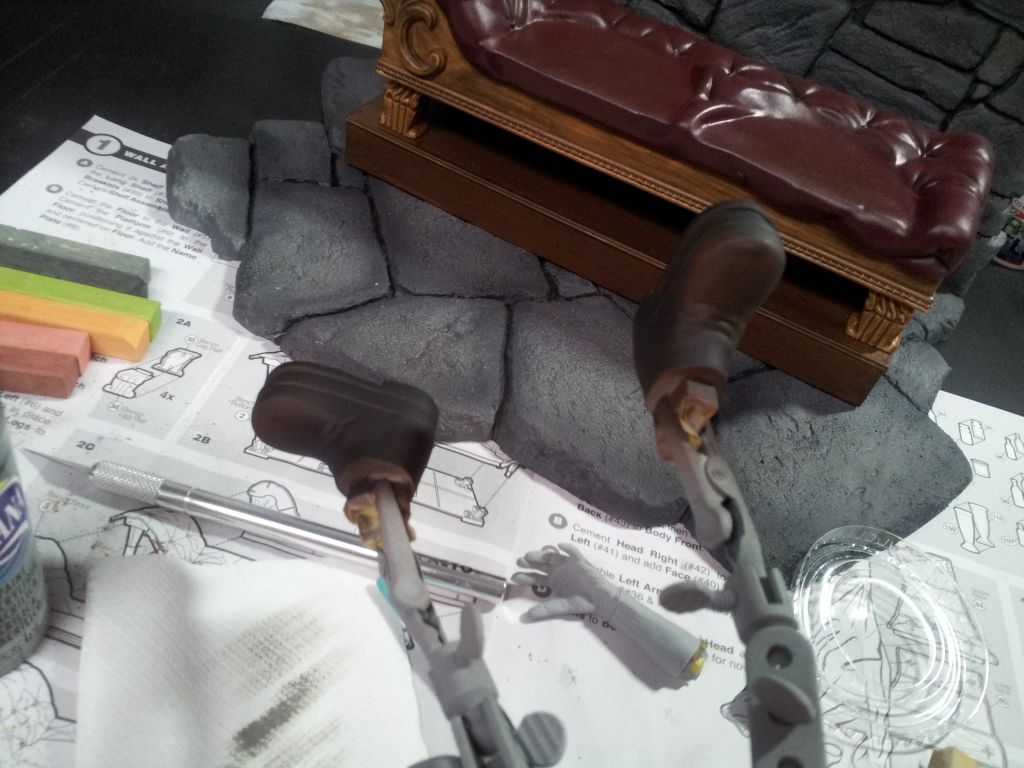
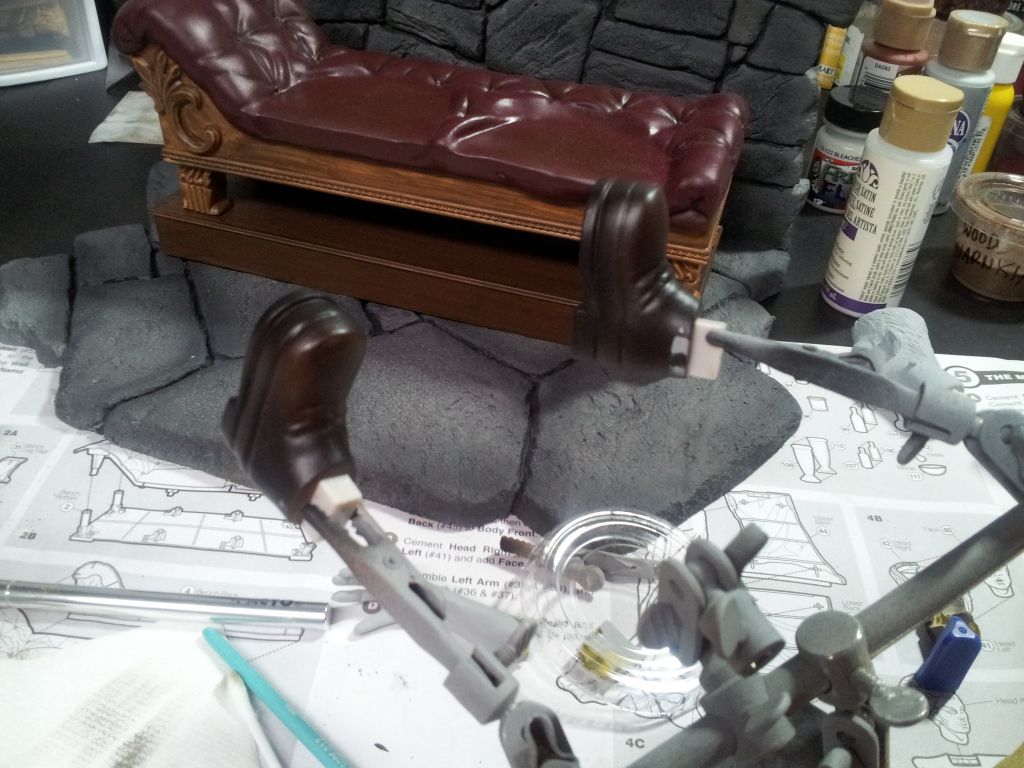
Getting back to the bench...
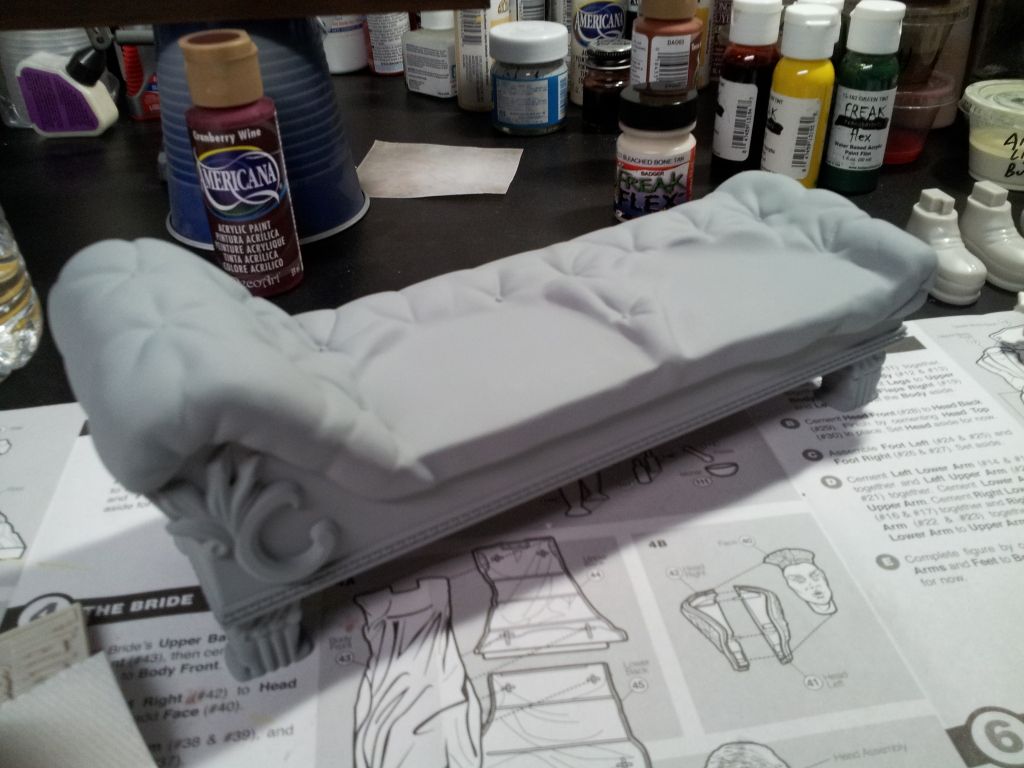
Last time I shared this, I talked about cleaning up the seams.
Shown below, the bench after cleanup and final primer.
Dark Burgundy basecoat:
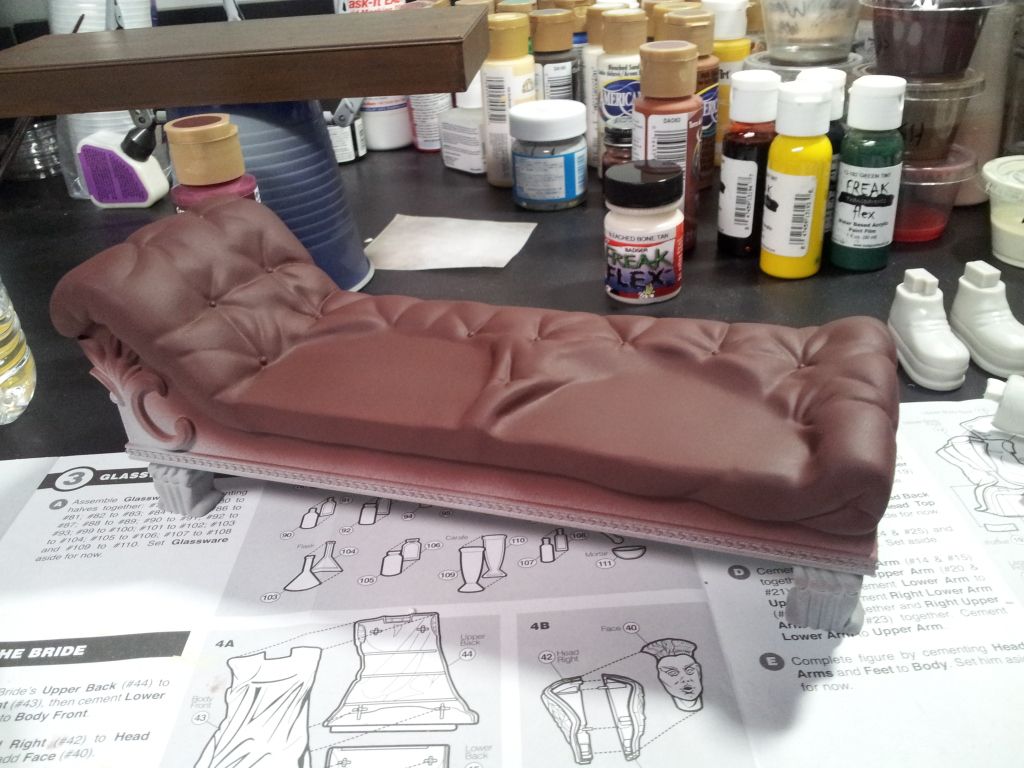
Lighter shade accent topcoat:

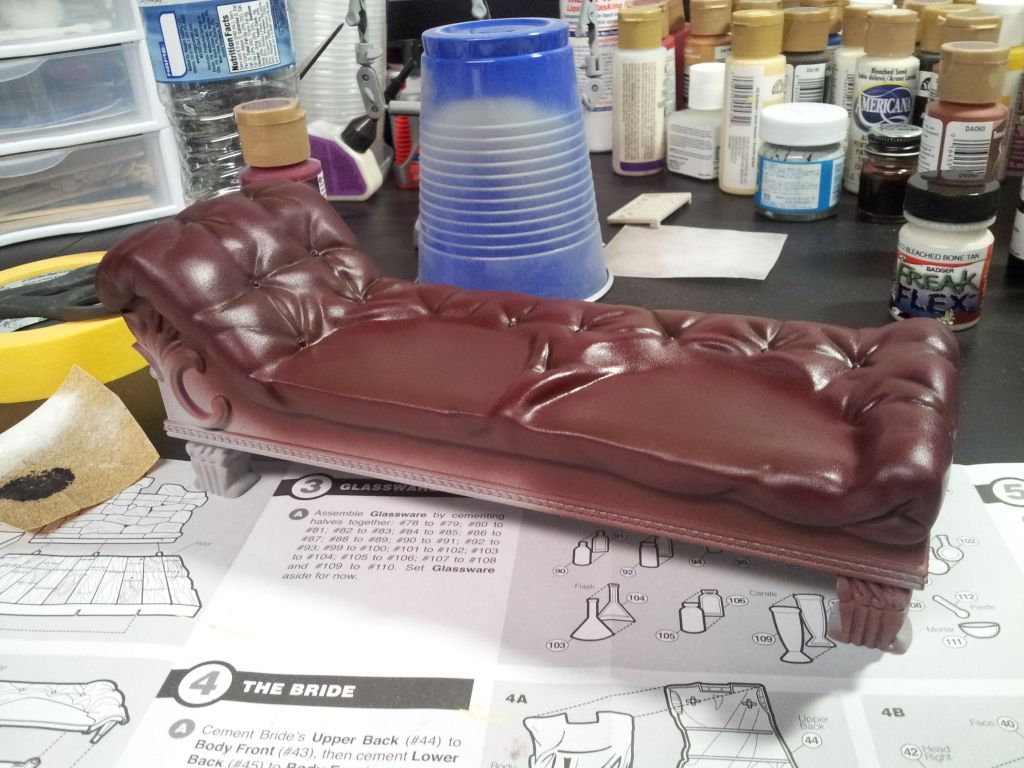
Satin varnish for a leather-like shine:
Shown here, in the process of painting the wood.
I basecoated in pale yellow and used a pencil to draw in the wood grain.
After, I began applying my custom wood stain muxture in layers:
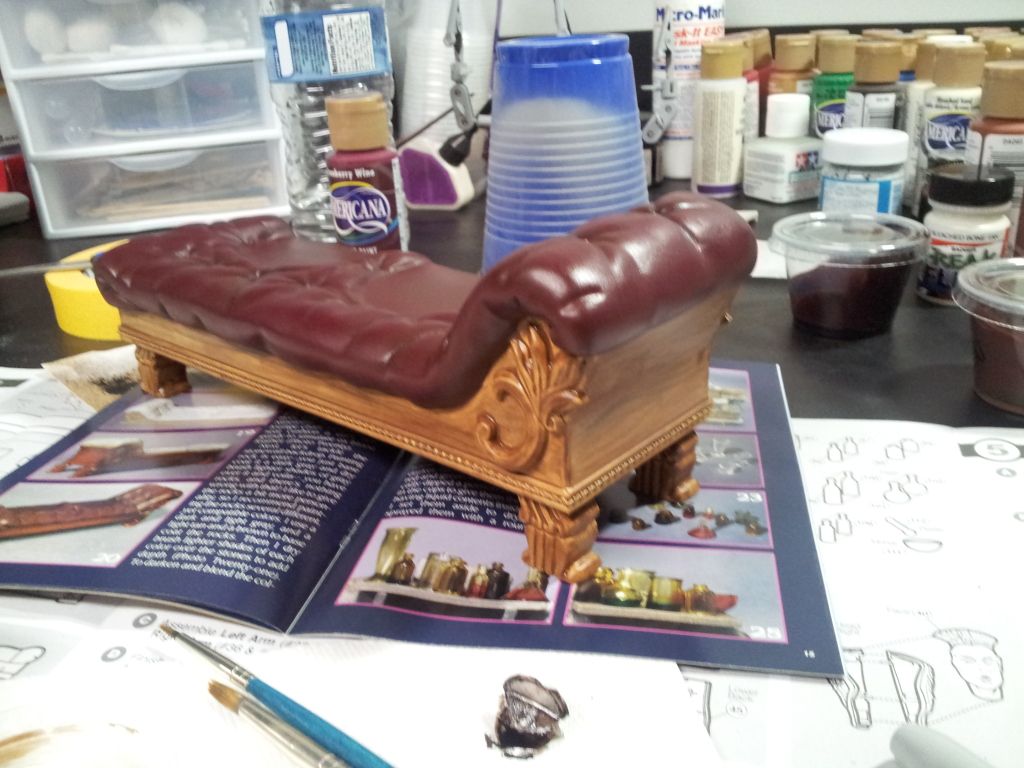
Final, with a dry fit test of the finished Bride...
Getting back to the bench...
Last time I shared this, I talked about cleaning up the seams.
Shown below, the bench after cleanup and final primer.
Dark Burgundy basecoat:
Lighter shade accent topcoat:
Satin varnish for a leather-like shine:
Shown here, in the process of painting the wood.
I basecoated in pale yellow and used a pencil to draw in the wood grain.
After, I began applying my custom wood stain muxture in layers:
Final, with a dry fit test of the finished Bride...
tek2graphics
Sr Member
Re: The Bride of Frankenstein by MOEBIUS - (build thread)
Very nice build! Beautiful paint job on the bench!
Very nice build! Beautiful paint job on the bench!
I appreciate the kind words!
I'm in the process of cleaning up seams on the Monster and will update with pics in a few days.
I'm in the process of cleaning up seams on the Monster and will update with pics in a few days.
Realfiction
New Member
Re: The Bride of Frankenstein by MOEBIUS - (build thread)
Brilliant. Can't wait to see the final product. Love the moss detail.
Brilliant. Can't wait to see the final product. Love the moss detail.
whitehammer
Well-Known Member
Re: The Bride of Frankenstein by MOEBIUS - (build thread)
My jaw is on the floor, the paint job on the bench is a real work of art in it's own right! fantastic stuff!
My jaw is on the floor, the paint job on the bench is a real work of art in it's own right! fantastic stuff!
On to the Monster...
Here are the parts cleaned up and primered:
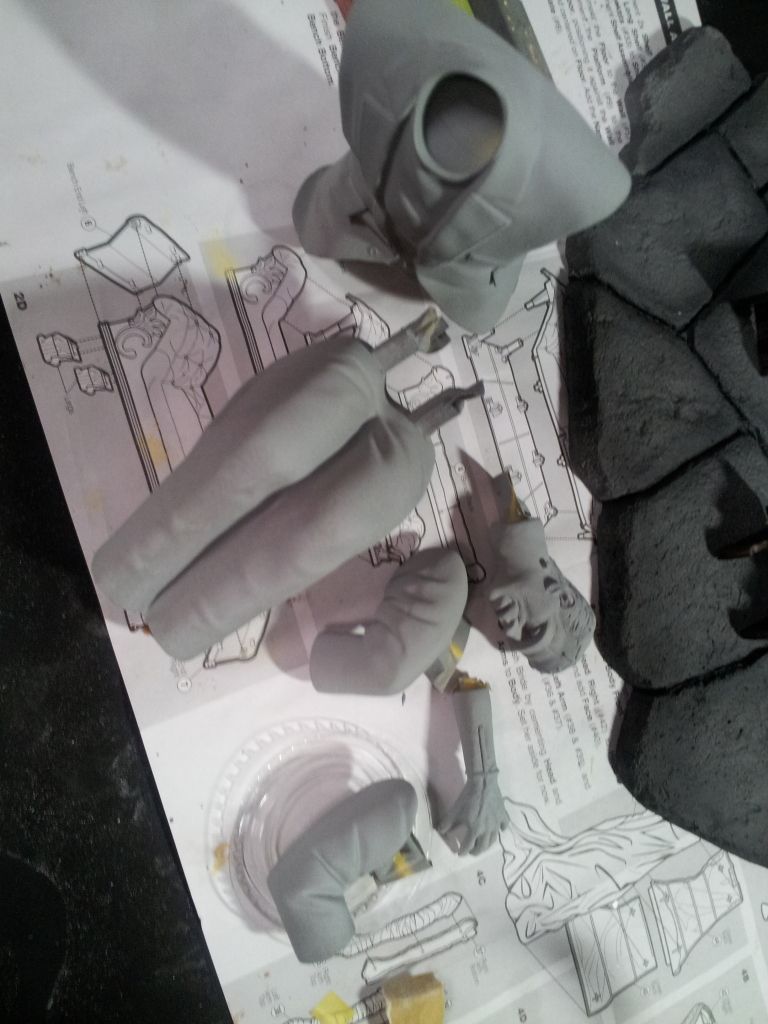
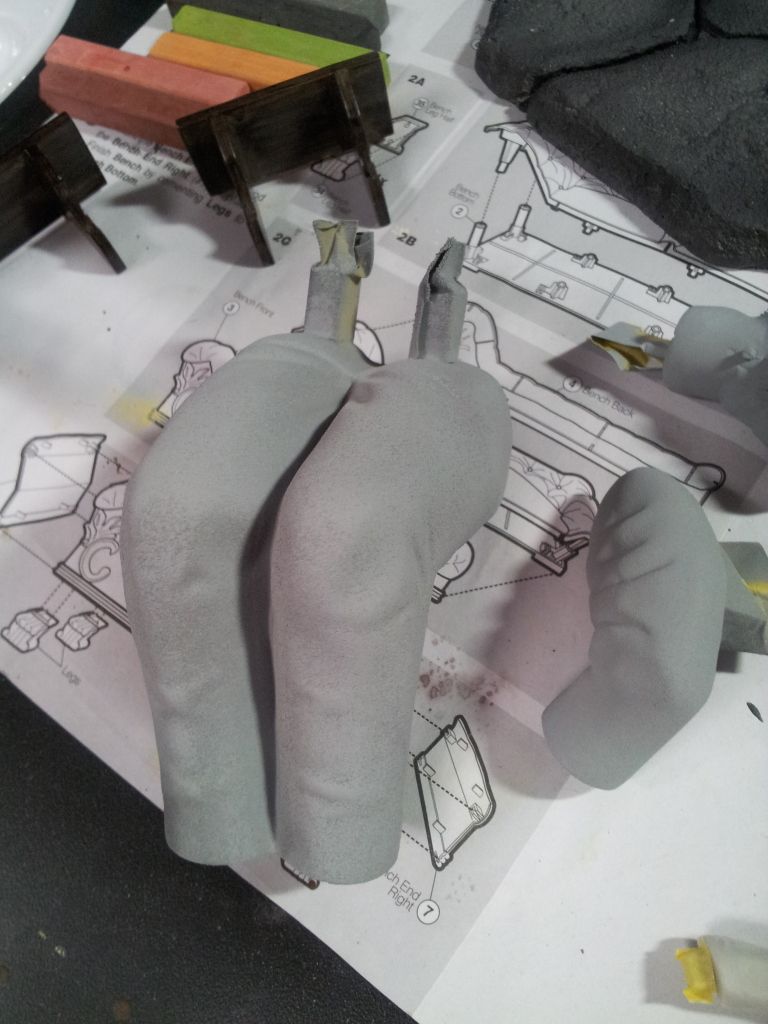
Starting with his boots.
First, basecoated in chocolate brown:
Then, arirbrushed VERY dark brown (nearly black) making sure to feather the spray around the toe area to give the appearance of worn leather:
Finally, a satin topcoat for a leather-like sheen. The topcoat also helps "seperate" the like-color of the main body, since it is predominently black:
Here are the parts cleaned up and primered:
Starting with his boots.
First, basecoated in chocolate brown:
Then, arirbrushed VERY dark brown (nearly black) making sure to feather the spray around the toe area to give the appearance of worn leather:
Finally, a satin topcoat for a leather-like sheen. The topcoat also helps "seperate" the like-color of the main body, since it is predominently black:
Too Much Garlic
Master Member
Re: The Bride of Frankenstein by MOEBIUS - (build thread)
Enjoyable paint work progress. Looking really good.
Enjoyable paint work progress. Looking really good.
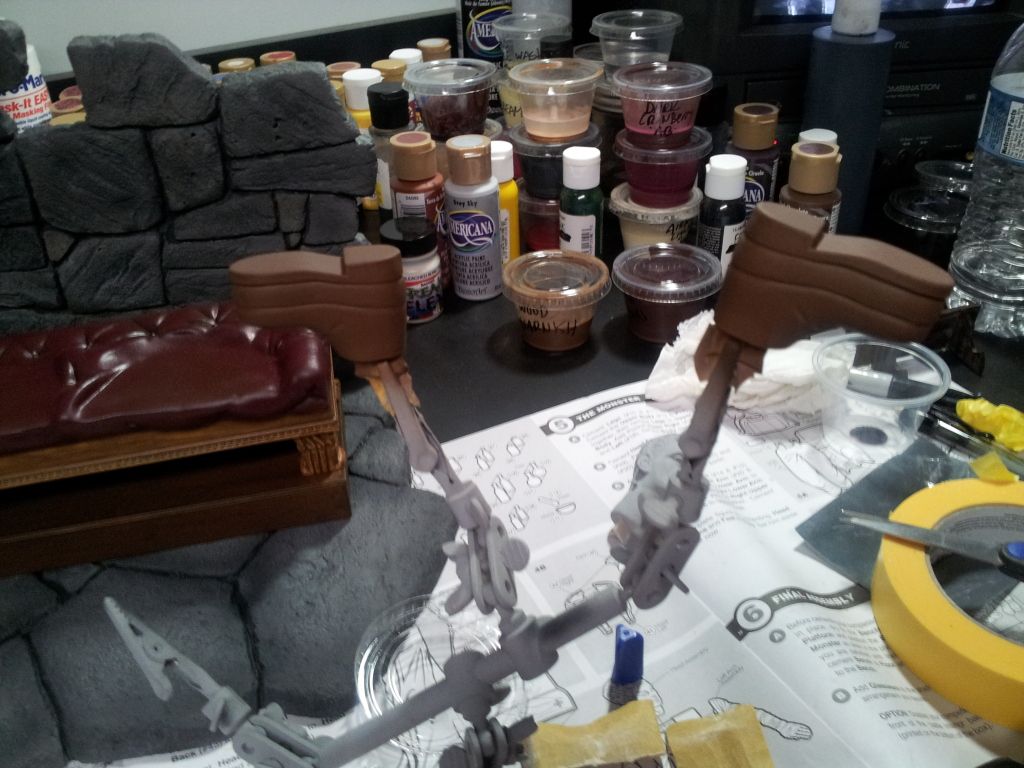
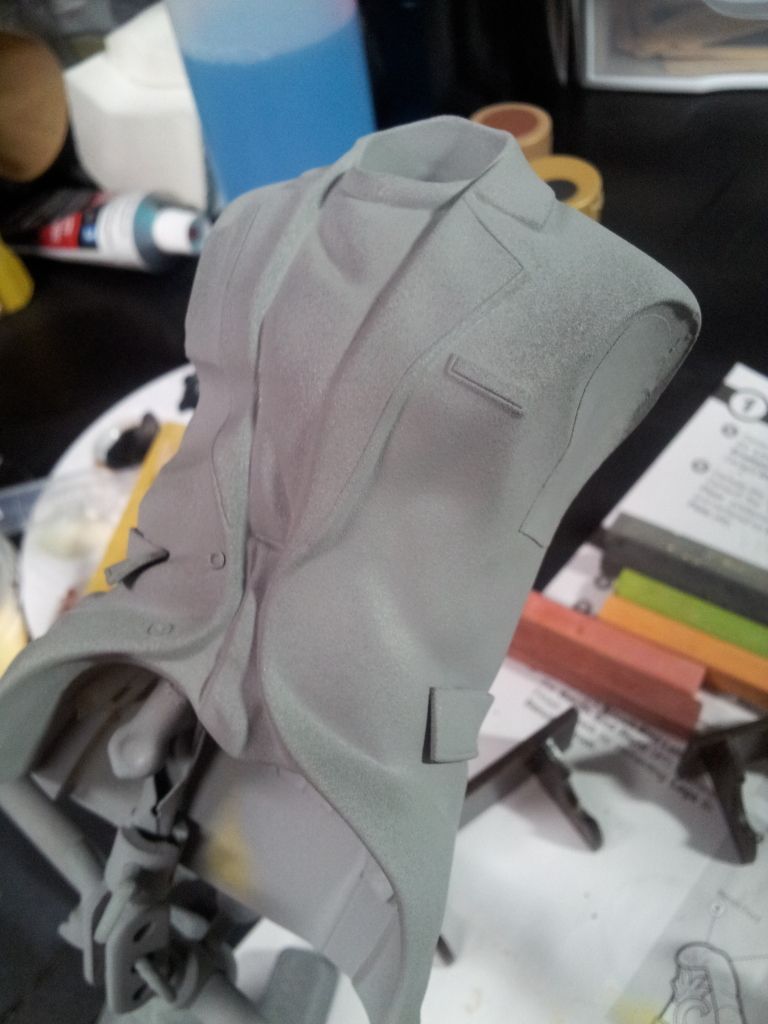
Next, I tackle the body.
I dwelled on this quite a bit before starting.
One thing I wanted to remedy was the complete lack of surface texture on his suit.
I did't want a smooth texture, so I used a little trick I discovered by accident:
After a first coat of primer, I hold the primer can a full arms length away a let out short bursts of mist onto the piece.
What happens here, is the paint particles begin to dry before making contact with the model.
This gives the surface of the model a fine-grain texture that is perfect for sumulating a heavy wool fabric.
The pictures don't illustrate the effect very well, but is indeed prominent in person:
Next, the body is painted using a flat black shade (not pure black) and detail shadows and dirt with both paint and chalks.
Shown here halfway through the process:
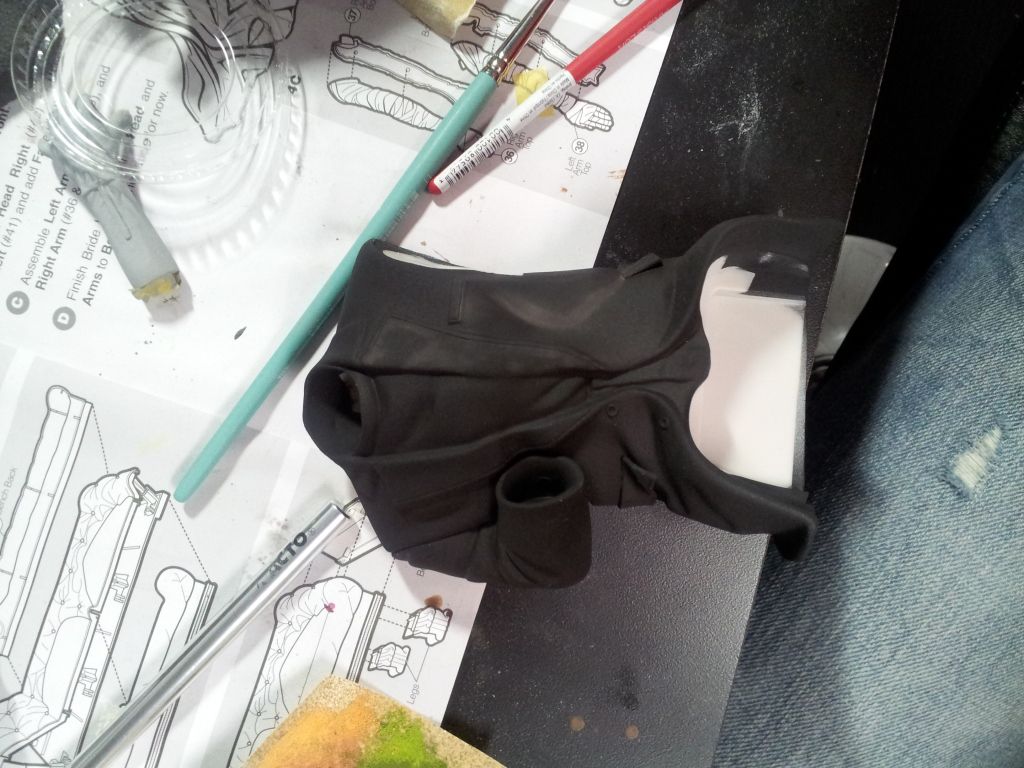
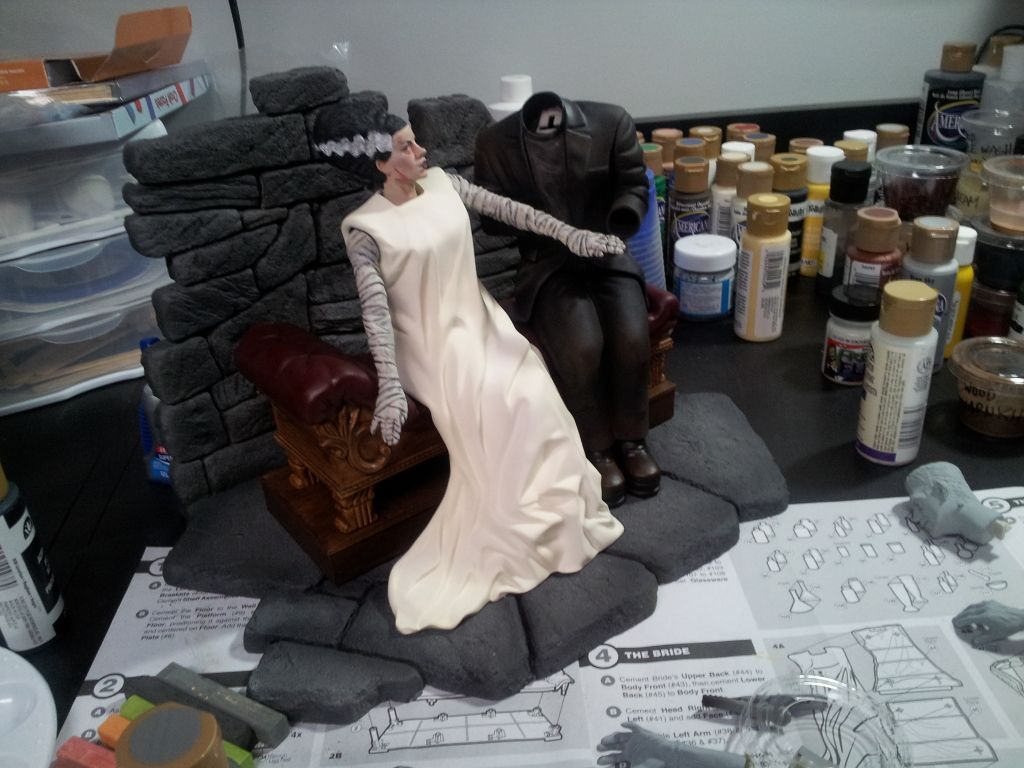
Here is a dry fit to see how his body will look with the rest of the kit.
I made sure to add subtle dirt marks on his knees, elbows and some mud splatter on the cuff of his pant legs.
I don't typically like the look of something that is all black, but in this case, the key to keeping it authentic looking was to use a flat finish with lots of subtle weathering.
Let's face it - this guy aint' going to the drycleaners!
I dwelled on this quite a bit before starting.
One thing I wanted to remedy was the complete lack of surface texture on his suit.
I did't want a smooth texture, so I used a little trick I discovered by accident:
After a first coat of primer, I hold the primer can a full arms length away a let out short bursts of mist onto the piece.
What happens here, is the paint particles begin to dry before making contact with the model.
This gives the surface of the model a fine-grain texture that is perfect for sumulating a heavy wool fabric.
The pictures don't illustrate the effect very well, but is indeed prominent in person:
Next, the body is painted using a flat black shade (not pure black) and detail shadows and dirt with both paint and chalks.
Shown here halfway through the process:
Here is a dry fit to see how his body will look with the rest of the kit.
I made sure to add subtle dirt marks on his knees, elbows and some mud splatter on the cuff of his pant legs.
I don't typically like the look of something that is all black, but in this case, the key to keeping it authentic looking was to use a flat finish with lots of subtle weathering.
Let's face it - this guy aint' going to the drycleaners!
Similar threads
- Replies
- 11
- Views
- 1,247
- Replies
- 2
- Views
- 245