You are using an out of date browser. It may not display this or other websites correctly.
You should upgrade or use an alternative browser.
You should upgrade or use an alternative browser.
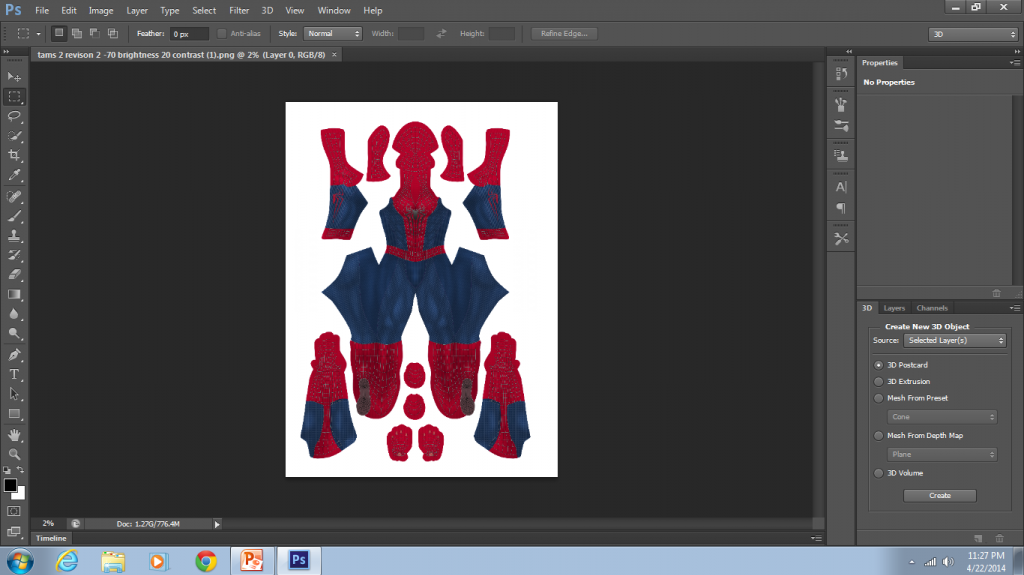
The Amazing Spider-man 2 - 3D Print Files/Pattern - FREE
- Thread starter kenlandrum
- Start date
kenlandrum
Sr Member
how do you get the dimensions of your face to resize the shell??preferably in inches and how would you resize it without change the size of the frame holes???or to change the shell you have to change all parts frames lenses etc...
I would take two rulers or a square and measure from top of head to bottom of chin.

Then in a profile view, resize the face shell accordingly. I guess ultimately if you could get a profile pic of your head and use it as a background ref when resizing, you could make sure everything fits just right.

... and yes, whatever you do to the shell you must do to the lenses & frames.
Last edited:
cha0tic
Active Member
Hi guys,
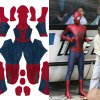
today i've reiceve the sample of kenlandrum pattern, with my modific on spider, brick and color.
what you think?
View attachment 315509
I like it, almost there.
Here's my edit to the pattern side by side with the movie suit, once printed it'll print darker and I feel that'll be close to screen accurate color minus the shine and effect the movie suit has

Sent from my HTC One_M8 using Tapatalk
dungparker
Well-Known Member
You guy should trial black brick color
I like it, almost there.
Here's my edit to the pattern side by side with the movie suit, once printed it'll print darker and I feel that'll be close to screen accurate color minus the shine and effect the movie suit hasView attachment 315510
Sent from my HTC One_M8 using Tapatalk
I love what I'm seeing here. Love everything everyone's adding.
Just one thing, but should the crotch area be a bit bigger? As in, should the parabola shape be much wider and encompass a bigger section?
biccino
Active Member
I like it, almost there.
Here's my edit to the pattern side by side with the movie suit, once printed it'll print darker and I feel that'll be close to screen accurate color minus the shine and effect the movie suit hasView attachment 315510
Sent from my HTC One_M8 using Tapatalk
you have right!! yesterday I saw the movie, and the color is like your! very good! could you give me the color code use in photoshop?
thanks
kenlandrum
Sr Member
hugousmc89
New Member
New to this whole scene and looking for a bit of guidance here guys. I've read through the whole thread and have a basic idea of where to go for the most part (with the exception of the lenses). The issue I'm having is just general lack of knowledge in regards to putting the whole thing together. I'd love some guidance, advice, tips, etc. on the "after everything is printed" portion of making this suit. If I'm in the wrong thread I apologize, but this is the best (and most accurate) suit pattern I've yet to find.
kenlandrum
Sr Member
New to this whole scene and looking for a bit of guidance here guys. I've read through the whole thread and have a basic idea of where to go for the most part (with the exception of the lenses). The issue I'm having is just general lack of knowledge in regards to putting the whole thing together. I'd love some guidance, advice, tips, etc. on the "after everything is printed" portion of making this suit. If I'm in the wrong thread I apologize, but this is the best (and most accurate) suit pattern I've yet to find.
I can tell you how I will approach the lenses and maybe some others here can chime in with other tips...
Once you have downloaded and resized the face shell, frames and lenses... I would print the lenses in whatever material you can get. Smooth the printed parts, automobile spot putty works great for this. Once you have the lenses as smooth as you can get them, cast them in silicone. You can go the expensive route and purchase special molding materials from Smooth-on (which last for several copies) or you can try and make a couple of simple plaster molds. One sided should be fine.

Then get yourself some clear casting resin.

Castin'Craft Clear Polyester Casting Resin - BLICK art materials
Pour your lenses using gravity to get them even and as thin as possible. I would a millimeter thick is fine.
Once cured you need to wet sand and polish...all the while making sure the fit well in the frames.
Find a product like this:

White One way Vision Printable / Paintable Perforat Window Tinting Mesh Film. Fly Eye self adhesive vinyl 1.07x50m Free shipping-in Special Store from Automobiles & Motorcycles on Aliexpress.com
...and back your new lenses with it. Glue them into your frames and---
That's it!
Once again, there are many ways to do these things... this is just how I might go about it.
TheBlur
Member
I can tell you how I will approach the lenses and maybe some others here can chime in with other tips...
Once you have downloaded and resized the face shell, frames and lenses... I would print the lenses in whatever material you can get. Smooth the printed parts, automobile spot putty works great for this. Once you have the lenses as smooth as you can get them, cast them in silicone. You can go the expensive route and purchase special molding materials from Smooth-on (which last for several copies) or you can try and make a couple of simple plaster molds. One sided should be fine.
View attachment 316164
Then get yourself some clear casting resin.
View attachment 316165
Castin'Craft Clear Polyester Casting Resin - BLICK art materials
Pour your lenses using gravity to get them even and as thin as possible. I would a millimeter thick is fine.
Once cured you need to wet sand and polish...all the while making sure the fit well in the frames.
Find a product like this:
View attachment 316166
White One way Vision Printable / Paintable Perforat Window Tinting Mesh Film. Fly Eye self adhesive vinyl 1.07x50m Free shipping-in Special Store from Automobiles & Motorcycles on Aliexpress.com
...and back your new lenses with it. Glue them into your frames and---
That's it!
Once again, there are many ways to do these things... this is just how I might go about it.
I'd mould the frames and actual lense part separately. I tried using clear cast resin once before and from experience is almost impossible to get it optically clear (probably due to inconsistent mm thickness). I'd recommend vaccum forming clear plastic sheeting over the smoothed printed lens part and assembing after.
Sent from my GT-I9100 using Tapatalk
kenlandrum
Sr Member
I'd mould the frames and actual lense part separately. I tried using clear cast resin once before and from experience is almost impossible to get it optically clear (probably due to inconsistent mm thickness). I'd recommend vaccum forming clear plastic sheeting over the smoothed printed lens part and assembing after.
Sent from my GT-I9100 using Tapatalk
Yes the lens and frames separate, for sure... that's what I was saying.... and yes vacuum forming would be pretty darn clear, but the process is more complex. I am assuming (possibly incorrectly) that hugousmc89 is not going to go through that trouble. I have sanded and polished clear resin and it came out pretty clear. Certainly clear enough to see through.
I guess another suggestion would be to purchase the shell, frames and lenses as a set from the junkyard here once someone starts making them available.
TheBlur
Member
Yes the lens and frames separate, for sure... that's what I was saying.... and yes vacuum forming would be pretty darn clear, but the process is more complex. I am assuming (possibly incorrectly) that hugousmc89 is not going to go through that trouble. I have sanded and polished clear resin and it came out pretty clear. Certainly clear enough to see through.
I guess another suggestion would be to purchase the shell, frames and lenses as a set from the junkyard here once someone starts making them available.
Kudos on getting your resin to work
Sent from my GT-I9100 using Tapatalk
cha0tic
Active Member
you have right!! yesterday I saw the movie, and the color is like your! very good! could you give me the color code use in photoshop?
thanks
I can but can't the computer I use for Photoshop Is messed up atm and my other computer takes a while to load the file and Is just crap. in my onedrive I have .png of the file though
Thanks for your opinion makes me more confident to print
Sent from my HTC One_M8 using Tapatalk
Last edited:
spideryeld
New Member
kenlandrum wanted to ask if it was possible to create files for printing 3d spiders front and rear
kenlandrum
Sr Member
kenlandrum wanted to ask if it was possible to create files for printing 3d spiders front and rear
Already on the first page.
https://drive.google.com/file/d/0B_s...it?usp=sharing
Last edited:
Similar threads
- Replies
- 1
- Views
- 1,293
- Replies
- 0
- Views
- 772


