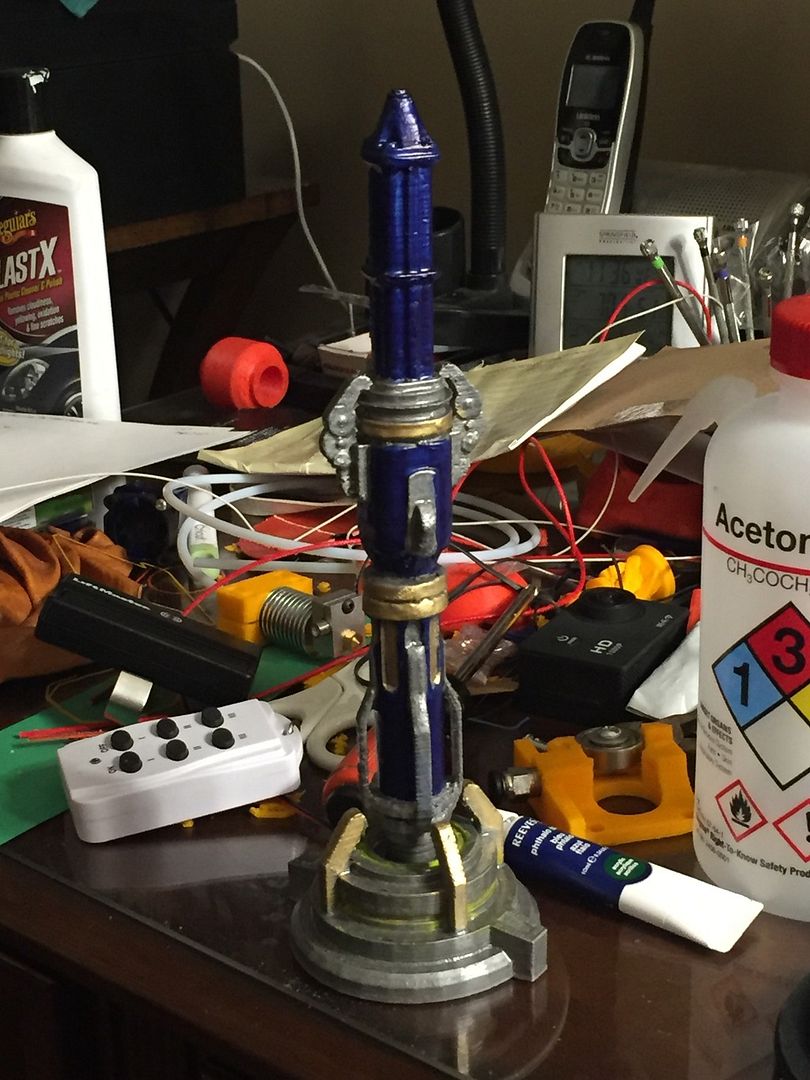
The 12th Doctor's New Sonic Screwdriver

3D printed based off of a design on thingiverse, I rendered the base to match. Not perfect but I will wait to see what rubbertoe and the toy have to offer


Excuse the mess


Sent from my iPhone using Tapatalk
 
Good to see another TARDIS port out there - I see they have that angled block on both sides as I do - but I have yet to see a shot from the show showing the other side...I'm still holding off until I see more.
 
My files don't come close to yours, I wish I had your rendering skills. But I just play part time. Old Physician by trade


Sent from my iPhone using Tapatalk
 
My files don't come close to yours, I wish I had your rendering skills. But I just play part time. Old Physician by trade


Sent from my iPhone using Tapatalk

Oh, you made the stand? Right on. I saw that you got the Sonic on Thingverse and assumed the same of the port stand. Don't suppose you've spotted a frame with the other side of the port in view that shows whether or not that angled extrusion at the base is on the other side or not, eh? It's bugging me that I don't know :confused

Also, that sonic is solid, I assume? Great for a stunt prop! I wish I had my own printer so I could print thicker walls but cost is a huge factor and the only way to cut back on material is thinning things out.
 
The port stand you see on thingiverse is the one I created, I haven't seen a frame wich shows the other side, and if we dont see it in the Christmas special then it's all up to conjecture as I am sure the port will disappear from the console. I don't have a great 3D printer but my little davinci makes it nice and cheap to knock static props out for display. I actually got it when I was pricing what people wanted for finished dark eyes sonics before I found the rpf. My davinci only cost about 500 bucks on sale. It is getting ready to go under the knife though so I can improve my hot end and get a little better resolution and speed


Sent from my iPhone using Tapatalk

Nice. I'm still holding off on getting into the home 3d printing game until there's something a little more advanced and affordable. I've been spoiled by the design freedom that comes with SLS and find it hard to design for extruded processes. Still, it would be fun to mess around with any number of the FDM home printers out there.
 
Oh, you made the stand? Right on. I saw that you got the Sonic on Thingverse and assumed the same of the port stand. Don't suppose you've spotted a frame with the other side of the port in view that shows whether or not that angled extrusion at the base is on the other side or not, eh? It's bugging me that I don't know :confused.

The angled extrusion is on both sides. Here's a poor look at the other side but you can tell that its there:

tardis.jpg
 
The angled extrusion is on both sides. Here's a poor look at the other side but you can tell that its there:

View attachment 567337

Awesome! Thanks for sharing that, it was driving me nuts. I went through all the TARDIS scenes in the last episode with a fine tooth comb but for some odd reason it didn't occur to me to go through previous episodes at all. It also looks like one of those 4 brass angled pieces is further out than the others. Maybe it's nothing or maybe they're supposed to open and close. No matter, I got the answer I was looking for, thanks again!
 
Awesome! Thanks for sharing that, it was driving me nuts. I went through all the TARDIS scenes in the last episode with a fine tooth comb but for some odd reason it didn't occur to me to go through previous episodes at all. It also looks like one of those 4 brass angled pieces is further out than the others. Maybe it's nothing or maybe they're supposed to open and close. No matter, I got the answer I was looking for, thanks again!

No problem, always happy to help.

Off topic fun fact:
I found out that it hasn't always been on the console, I believe it first appeared in Matt Smiths last episode here
tardis2.jpg

But before that it was a completely different piece:
tardiscontrol-3.jpg

And on the google map view of the TARDIS it shows what the piece was during the 50th anniversary episode:
tardis3.jpg
tardis4.jpg
 
Damn dude, that looks amazing! Are you willing to share some techniques for how you got the 3d printed parts so smooth and metallic looking? I've struggled so much with recreating a genuine metal look with 3d printed parts.
 
Love the look of the new design, hoping somebody does a run of them. All the rendering so far look great!
 
Love the look of the new design, hoping somebody does a run of them. All the rendering so far look great!

Working on it! Just about finished the CAD model, another member has a light package in the works nearly done - and once they do, I can finish up the model to accommodate their electronics. They should be available sometime mid to late January!
 
Are you willing to share some techniques for how you got the 3d printed parts so smooth and metallic looking?

Step 1: Sand the hell out of it (I printed in PLA, so vapor smoothing was out, and the parts were so tight I didn't want to make them thicker with XTC 3D). On most parts, I did numerous passes, using successively finer grits (150, 220, 320, 600, 800, 1000, 1500, and 2000). For the latch parts, since they were printed flat, I basically just sanded their edges.

Step 2: Airbrush with Alclad II paints. These give the most metal-looking finishes I've seen (their chrome paint is a mouth-watering thing of beauty).

Step 2a: Prime. I used Alclad's Grey Primer and Microfiller (since it was printed in white, and the next step would be black, I used grey so I could see when I got full coverage for both this step and the next one). This was my first time using Alclad's primer, rather than a spray can; I was hoping it would fill in the striations that I hadn't managed to sand out, but I guess they weren't "micro" enough. For best results, go over it with 4000-grit micromesh after it's dry, but I didn't have any and was too impatient to order some and wait for it to arrive.

Step 2b: Lay down Gloss Black base. This is utterly essential for their chrome paint, but it also really helps give their other shiny metals that extra depth. Try not to touch the painted surfaces at all (it'll pick up fingerprints like mad).

Step 2c: For the parts which would eventually be painted blue, I put Bright Silver Candy Base on over the gloss black. As I discovered, this needs to be done in VERY light passes; if it goes on too thickly, it'll craze as it dries, and just doesn't look good at all.

Step 2d: Put on the final color. I used Aircraft Aluminum, Polished Brass, and Candy Electric Blue.

Let each step dry for at least an hour before moving on to the next one (I paint a plastic spoon along with the model, so I can test dryness without touching the actual thing).

Alclad also makes a gloss clear coat, but I've never used it. If I planned on handling the model a lot, I'd probably give it a try.
 
Back
Top