Temple of Doom Tri-Motor 2.0

i always like the weathering to be on the lighter side, i think what you have done so far with the pastels has really made it pop!
 
More weathering. I flipped a coin and am weathering it as the full sized Trimotor. I'll do the next one as the ILM model version.
 

Attachments

  • DSC04616.JPG
    DSC04616.JPG
    90.8 KB · Views: 150
  • DSC04617.JPG
    DSC04617.JPG
    123.8 KB · Views: 145
  • DSC04618.JPG
    DSC04618.JPG
    107.9 KB · Views: 132
  • DSC04619.JPG
    DSC04619.JPG
    489.7 KB · Views: 142
  • DSC04623.JPG
    DSC04623.JPG
    117.4 KB · Views: 144
  • DSC04620.JPG
    DSC04620.JPG
    125.7 KB · Views: 147
  • DSC04621.JPG
    DSC04621.JPG
    96.4 KB · Views: 137
  • DSC04622.JPG
    DSC04622.JPG
    104.5 KB · Views: 140
  • DSC04624.JPG
    DSC04624.JPG
    86.5 KB · Views: 127
  • DSC04625.JPG
    DSC04625.JPG
    107.9 KB · Views: 132
I built one of these years ago. I based mine off of the ILM version because I had a very good photo of it. I like what you've done there, I see no reason to build 2. The difference would be just the blue wing cowlings, pretty much.
 
Added the curtains for the windows...
 

Attachments

  • DSC04630.JPG
    DSC04630.JPG
    134.2 KB · Views: 132
  • DSC04636.JPG
    DSC04636.JPG
    463.3 KB · Views: 146
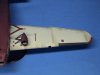
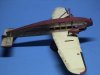
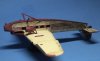
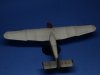
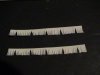
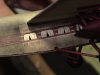
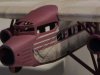
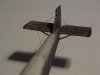
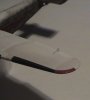
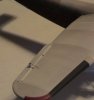
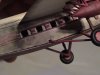
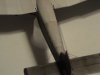
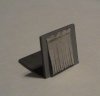
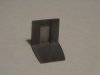
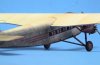
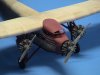
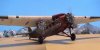
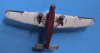
Got the wire rigging and control cables installed. (That was tedious!) I also redid the curtains in the windows so that they were weathered and open a little more. I think it looks better than my first attempt. I added the cockpit door/curtain to the cockpit that I've started scratch building. I found some paper that has a 'thread weave' texture, and I used that for the curtains. It may be off scale for the model, but it looks pretty cool when weathered. I'll probably just add chairs to the cockpit, since the rest really won't be visible.
 

Attachments

  • DSC04650.JPG
    DSC04650.JPG
    159.1 KB · Views: 139
  • DSC04649.JPG
    DSC04649.JPG
    120.9 KB · Views: 136
  • DSC04652.JPG
    DSC04652.JPG
    72.1 KB · Views: 121
  • DSC04653.JPG
    DSC04653.JPG
    80.1 KB · Views: 137
  • DSC04654.JPG
    DSC04654.JPG
    83.5 KB · Views: 121
  • DSC04655.JPG
    DSC04655.JPG
    154.9 KB · Views: 137
  • DSC04656.JPG
    DSC04656.JPG
    125.9 KB · Views: 141
  • DSC04657.JPG
    DSC04657.JPG
    78.6 KB · Views: 140
  • DSC04659.JPG
    DSC04659.JPG
    116.2 KB · Views: 150
Last edited:
Aaaaand Lao Che Air Freight 2.0 is finished...installed the new radial engines, took some pics, and then had a little fun with the camera putting it in some action shots!
 

Attachments

  • DSC04676.JPG
    DSC04676.JPG
    164 KB · Views: 149
  • DSC04709.JPG
    DSC04709.JPG
    154.2 KB · Views: 163
  • DSC04678.JPG
    DSC04678.JPG
    186.3 KB · Views: 162
  • DSC04712.JPG
    DSC04712.JPG
    162.3 KB · Views: 162
  • DSC04713.JPG
    DSC04713.JPG
    149.4 KB · Views: 143
  • DSC04714.JPG
    DSC04714.JPG
    188.6 KB · Views: 153
  • DSC04716.JPG
    DSC04716.JPG
    167.9 KB · Views: 146
  • DSC04717.JPG
    DSC04717.JPG
    135.5 KB · Views: 151
  • Dawn over the Himalayas.JPG
    Dawn over the Himalayas.JPG
    84.1 KB · Views: 165
  • Morning over the Himalayas.JPG
    Morning over the Himalayas.JPG
    122.5 KB · Views: 154
  • Morning over the Himalayas 2.JPG
    Morning over the Himalayas 2.JPG
    134.4 KB · Views: 148
  • Morning at Chunking.jpg
    Morning at Chunking.jpg
    92.7 KB · Views: 166
  • DSC04673.JPG
    DSC04673.JPG
    156.5 KB · Views: 160
Back
Top