Bizarro Lois
Sr Member
Ok, most of the research I've done on this has been with the help of a Brikette collector forum. They've been very sweet and enthusiastic in helping me find answers about the doll Talky Tina was made from, as well as doll restoration and parts knowledge that has come in handy along the way. As of last night, I was ready to go buy another old doll in order to give my Talky Tina the ability to move. Yet while watching Twilight Zone clips, I came across a dilemma. I've cut and pasted this from a message I sent to one of my Brikette friends, to see if anyone here can offer any help.
>>I'm pretty sure Tina had a string in her back, but it might have been just for show. The other thing I'm wondering about, is if the string was not functional, how did they get her started without winding the key onscreen? My husband just brought up a valid point: Is it possible that Tina's motion was done by hand? If there was some kind of rig inside her, and a dial or switch under her dress, it could have been connected to move her arms and head in sync with one another. It might not have taken up quite so much room inside her, and maybe they would have just glued the original torso together. I don't have the episode on DVD, so I'm pretty much left to the mercy of YouTube. I couldn't find the complete episode, but from the portions I was able to watch, I couldn't find any scenes where she was in motion and not being held by an actor or sitting on a table. An actor(or a puppeteer, when she was just sitting) could have been operating Tina under the cover of her dress. I also haven't, as of yet, been able to find a shot where whoever is holding her has both hands visible. So the movement by hand is starting to sound plausible, don't you think?<<
So, does anyone have any feedback to offer? I haven't been able to find much about how Talky Tina was made. I'm torn between how cool it would look to just wind her up and let her move, and what sounds like a very plausible way to accomplish her movement. It might have even been less difficult to do the movement by hand. And if someone out there thinks that way is correct, any ideas how to do it?
**I moved all the build photos to the start of this thread, because I've read that it makes it easier for people following it to find the most recent updates. Comments and discussion have been left as-is.**
Here's a link to my Reference folder on Photobucket, so you can see what photos I have so far, Reference pictures by delirium_dizzy - Photobucket and here are pics of my doll that will be used for this project:
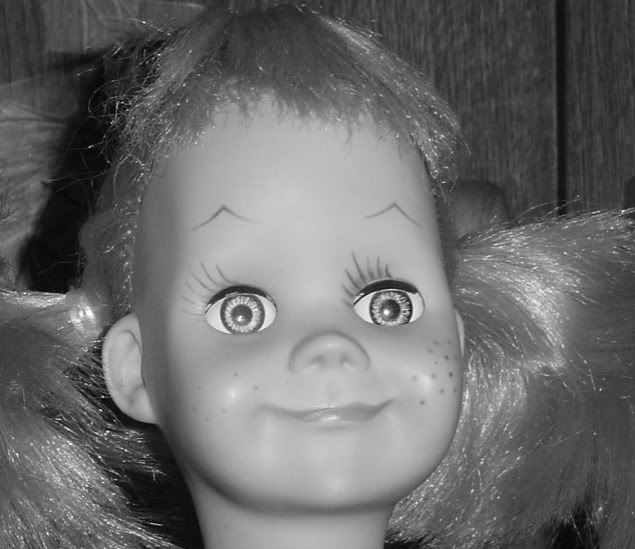
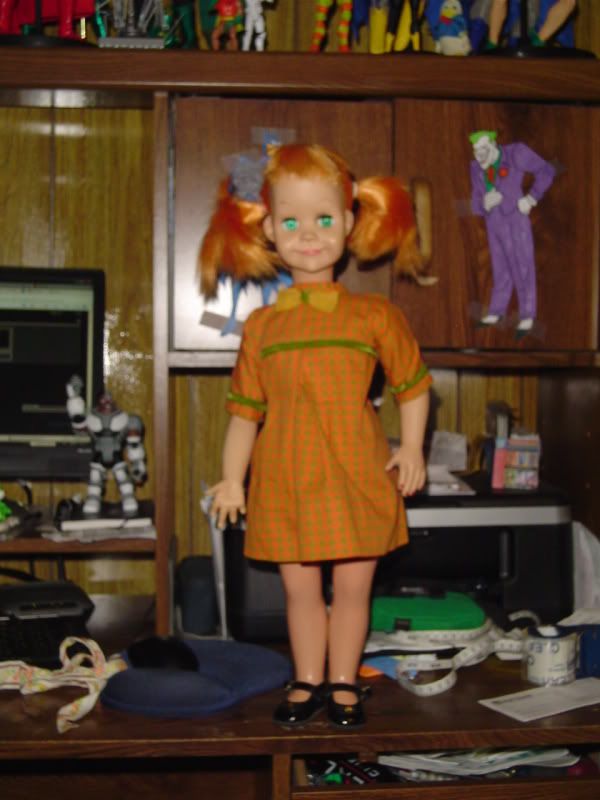
Here's the fabric I picked out. The color is wrong, and much darker than the screenshots. But the plaid pattern is so close that I got it anyway.
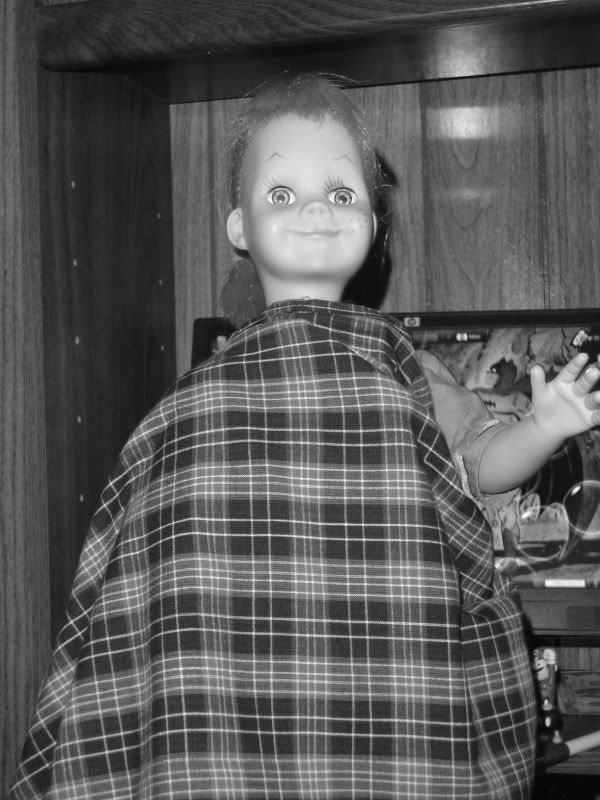
Here it is in color. If I ever find the same thing in a lighter, more feminine color, I'll probably make a new dress. But for now, I think this works pretty well.
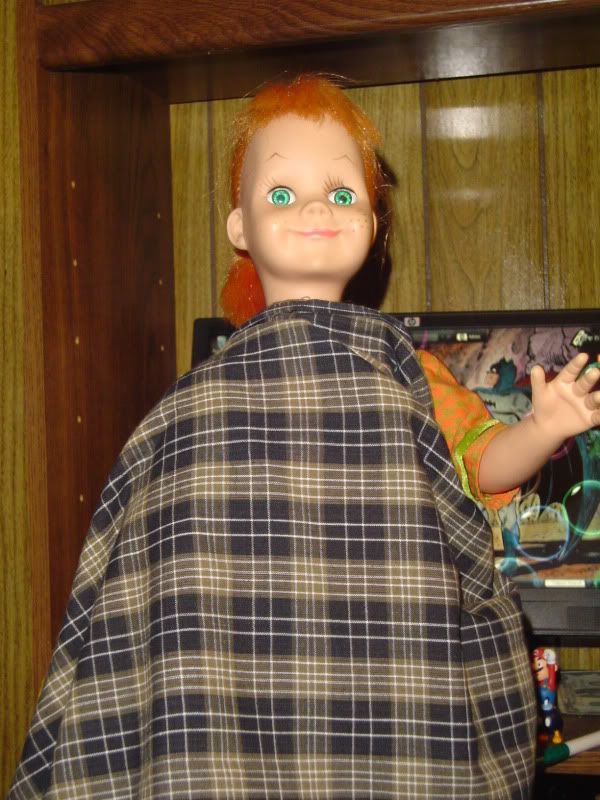
Disassembling the Walking Doll
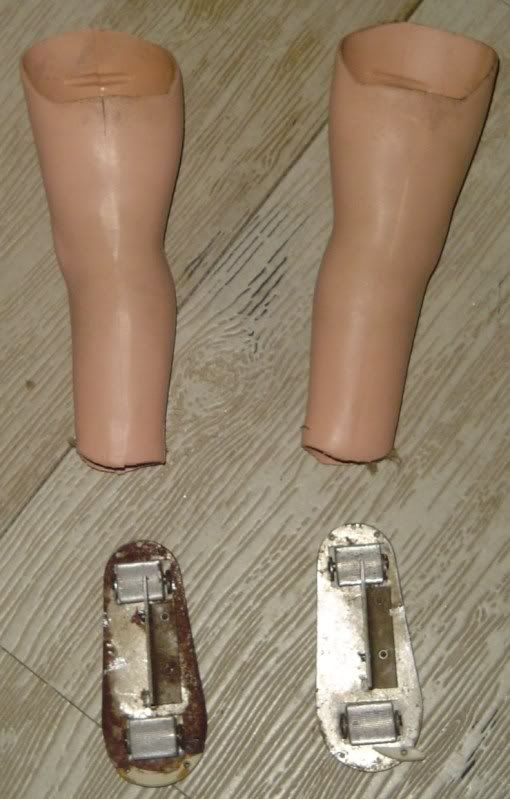
First, you remove the screws holding the back and front plastic torso pieces. Save the screws, because you'll be reattaching these pieces later on. Then, the doll's plastic shoes have to be removed. There are metal "feet" underneath, attached by small pins. I dremeled these off, removed the feet, and slid the plastic legs off the doll.
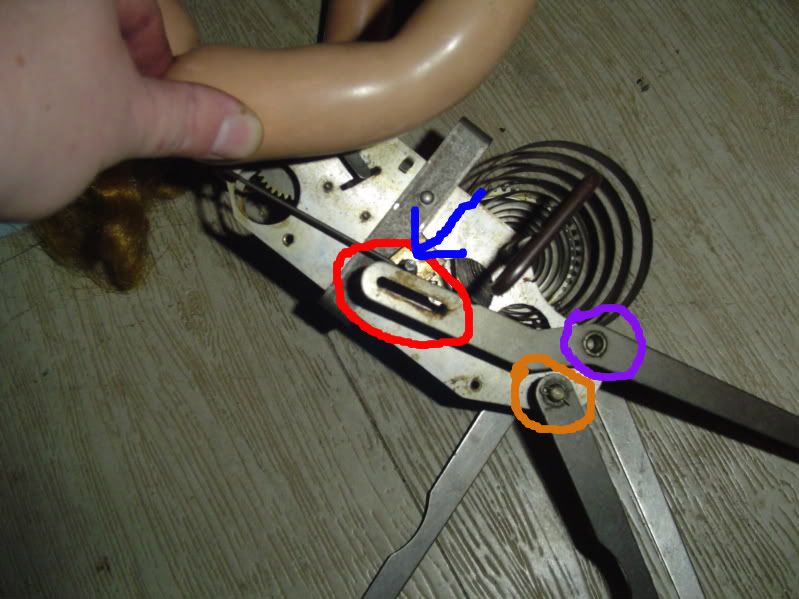
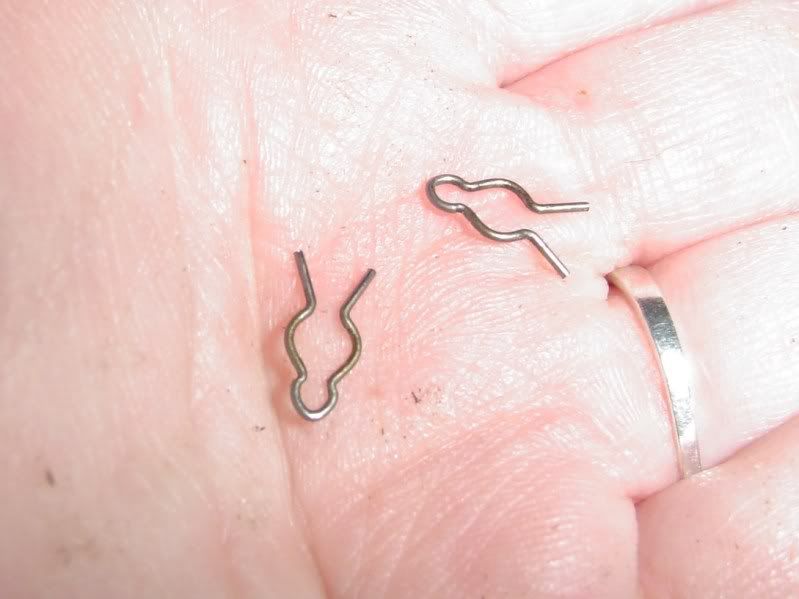
The metal leg pieces on each side have to be disengaged from the parts that make the body move. In the picture, you'll be able to see the slot, marked by a red circle. Pull it off the moving piece, marked by a blue arrow. The picture is what it should look like when this is done. Do this to both sides. In this picture, you'll also see a piece circled in purple. This piece is the only other part holding the metal leg on. There are small "clamps" on the ends - I've included a photo of these as well. Remove them, and the metal legs will slide right off. You can also remove the rod that the leg pieces were connected too. The orange circles show where the second leg pieces are attached.
This is what you should have by now:
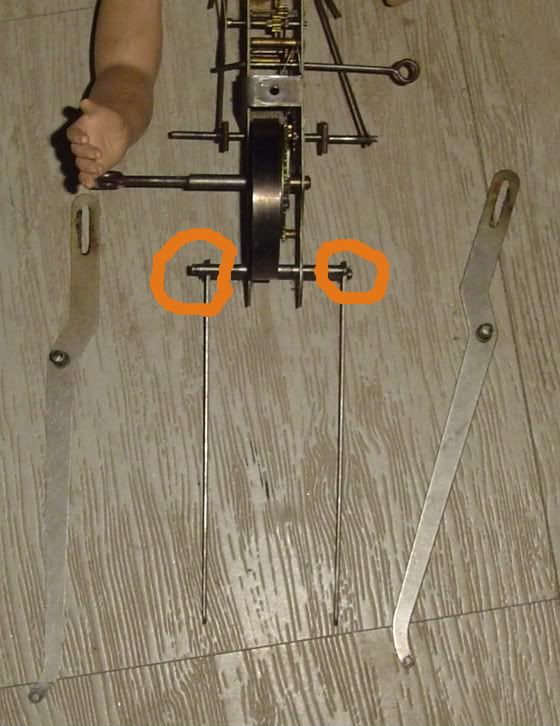
Remove the second leg piece the same way - by pulling off the little clamps and sliding the piece off. Leave this rod in place, as this will be where the Brikette legs will be attached. This is what it will look like - I'm leaving the clamps on the end of the rod until I'm ready to attach the Brikette legs, so it doesn't get lost.
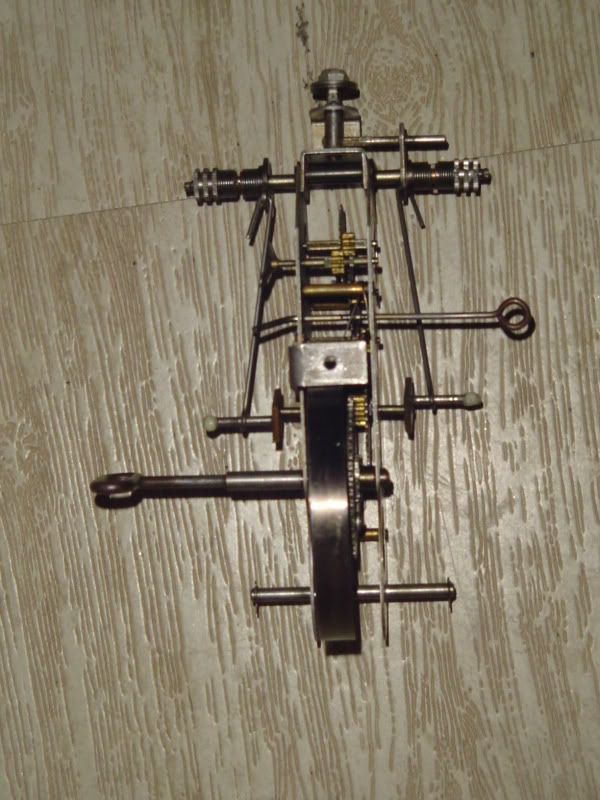
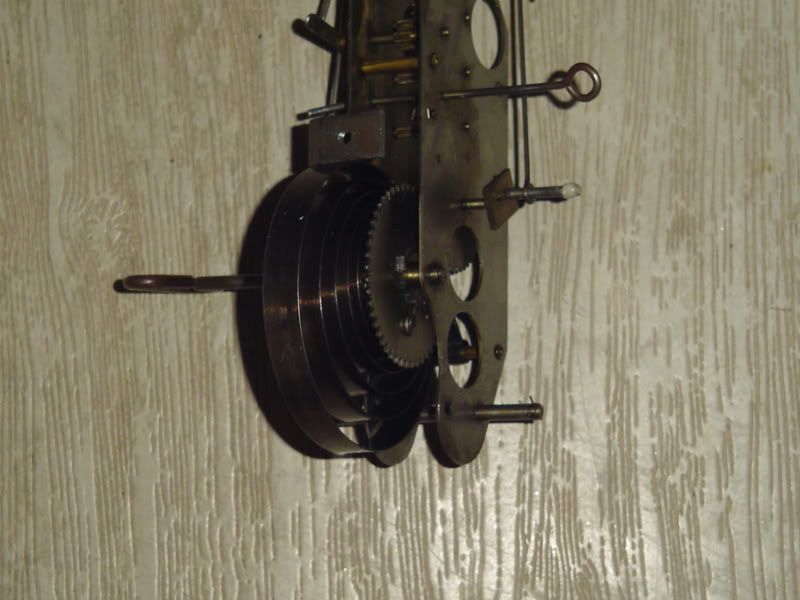
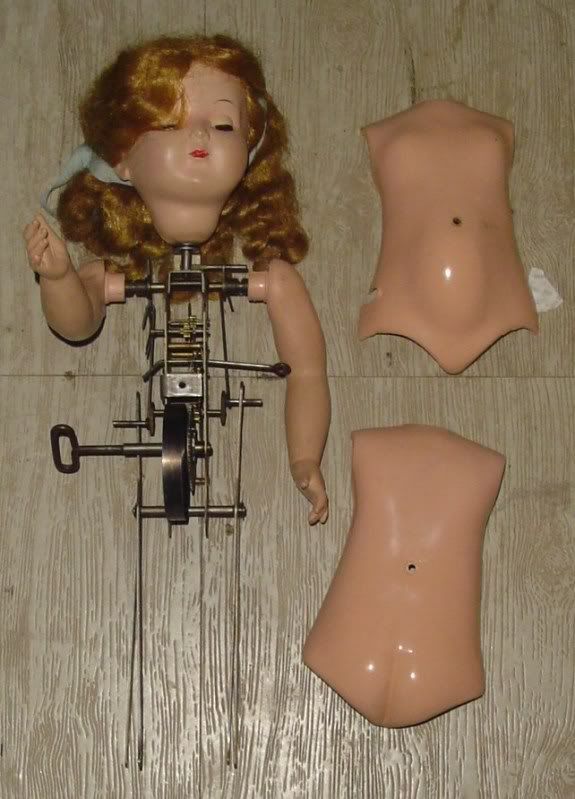
Next, you'll have to remove the arms and head. I wasn't able to just pull them off, so I carefully dremeled the plastic until it fell off. Note: If the walking doll you are using still has hair, I would cut as much of it off as possible, because it tends to get wound around the dremel bit.
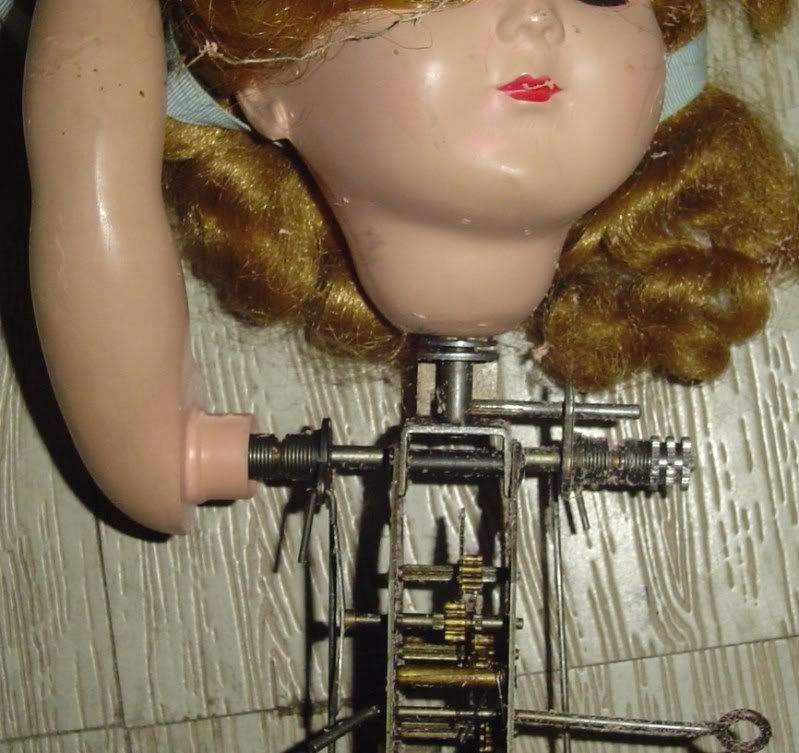
I started to cut the doll's head around the chin line, and found a bolt of some kind holding the head on. Once I find my pliers, I will try and loosen it to remove the remaining plastic. So this is what I currently have on my work desk:
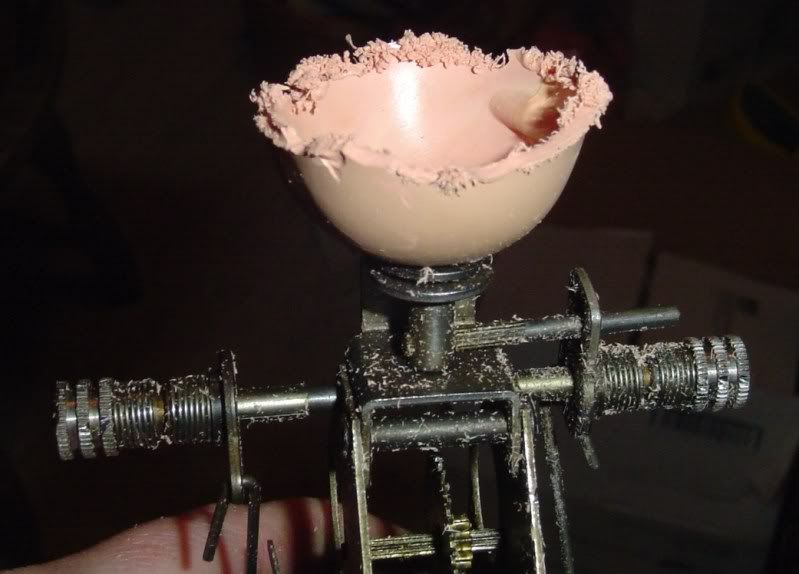
I recommend cleaning the stray bits of plastic with compressed air, so nothing gets stuck in the gears or springs. It's pretty amazing to watch the naked gears move, simply by winding a key that tightens a spring in the doll's belly. I'll probably spray some WD40 inside to keep everything working.
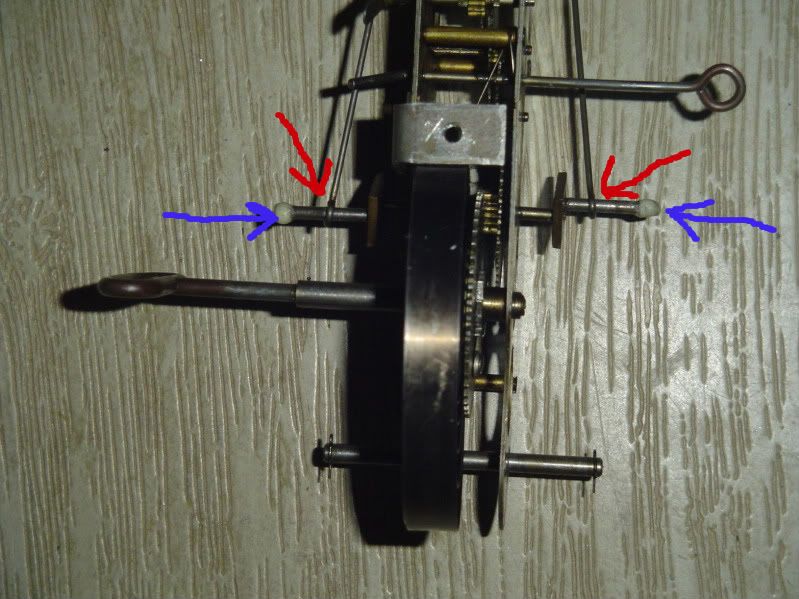
I was having some trouble with a specific moving piece(marked with a red arrow) sliding off its post when I operated the walking mechanism, so I wrapped a little wire around the end of the bar(marked with a blue arrow) and used a little Gorilla glue to secure it. If you buy a Wanda doll with legs that work, but arms and a head that don't, this could easily be your problem.
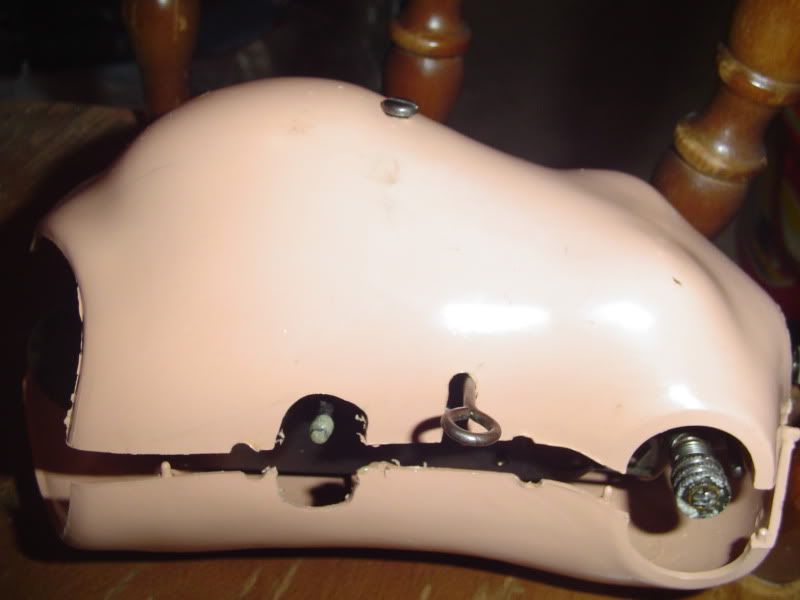
I don't know if the body of the walking doll I bought has warped plastic or what, but at times, some of the moving parts were getting stuck where the torso pieces meet. They've never lined up correctly. I dremeled out little circles in the plastic where the parts were rubbing. I marked them with a Sharpie in the photos so you can see what I mean. This is just another idea for a fix if you try this and have difficulty with the moving parts.
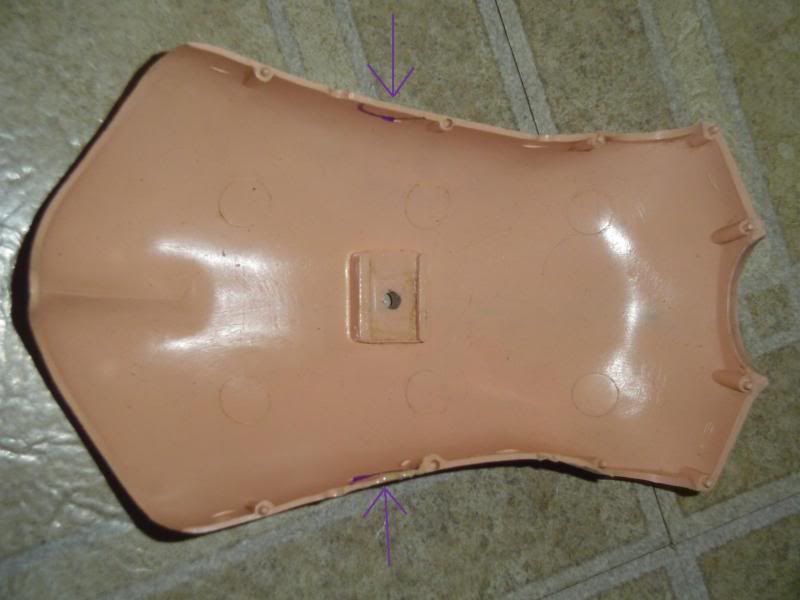
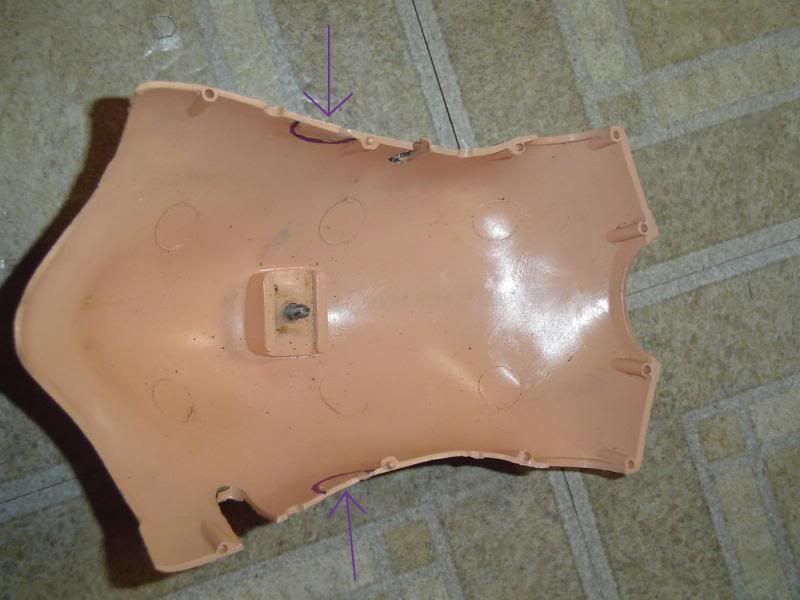
This is the reassembled torso, with the pieces cut out. I sanded them smooth later on.
I also attached the legs to the walking mechanism. I drilled a hole in each leg and gorilla glued one to the bar that I'd been saving. After it dried, I put the bar back through the bottom of the mechanism, where it had been originally. I glued the other leg to the remaining end of the bar.
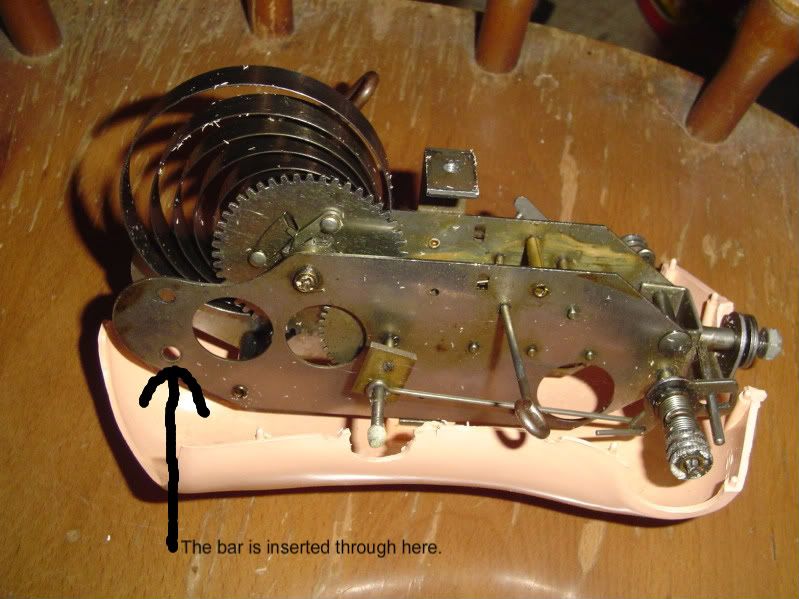
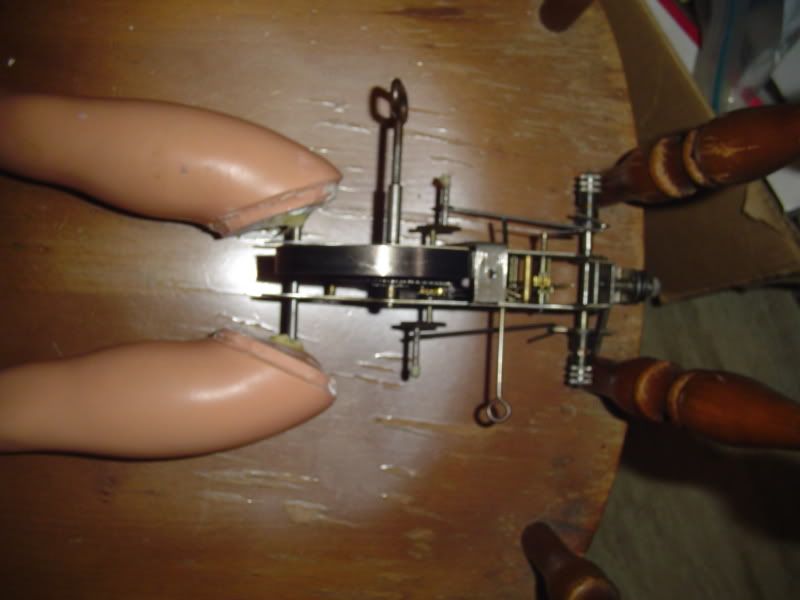
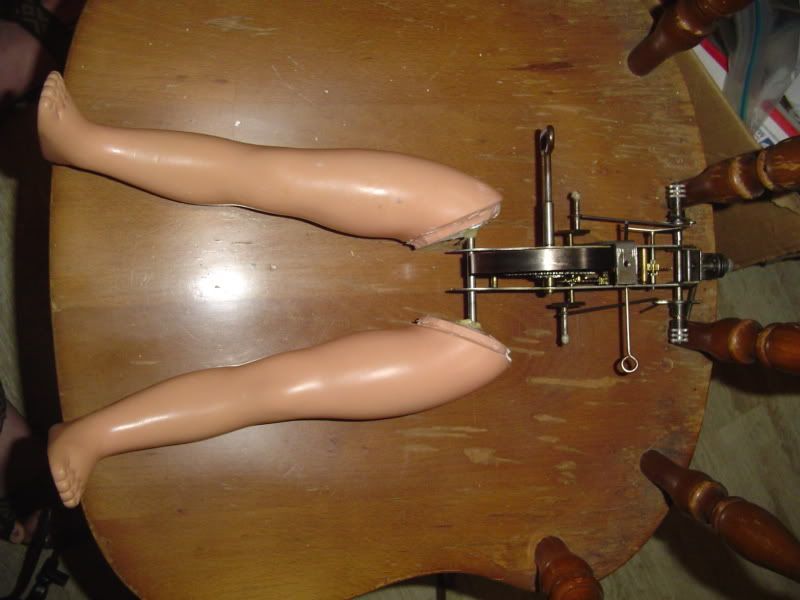
Later on, I plan to reattach the torso and get some work done on the arms.
Here's what the torso looks like with the legs. I heavily dremeled and sanded the openings where the legs meet the body, and they still don't match up. But I was able to alter it that the body can sit and stand. I will definitely need to display Tina on a doll stand though, as the mechanism makes the torso very top-heavy.
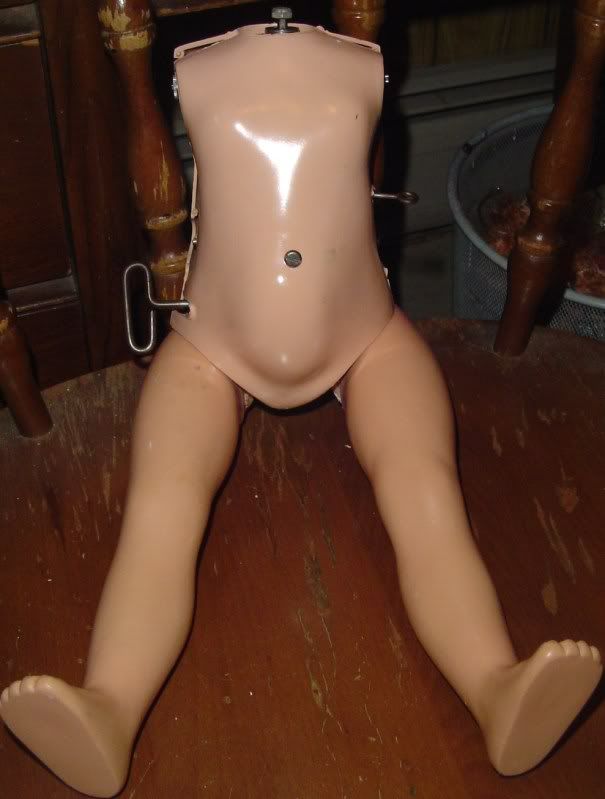


I had bought panties, but they don't fit very well, between the windup key in the side and the way the legs hang. I'll have to make something a little more like bloomers. The socks worked out at least.

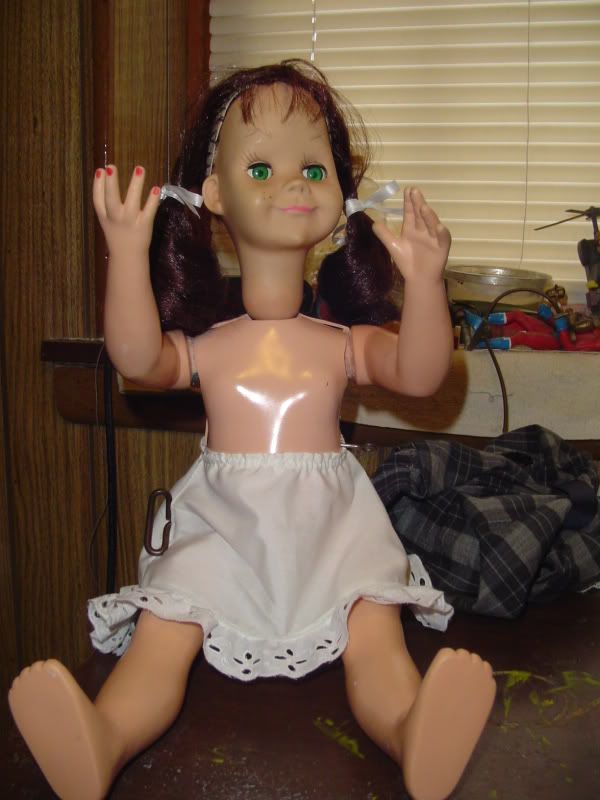
Ok, after a lot of trouble getting the arms to stay attached without stopping the mechanical parts, Talky Tina is moving. I didn't attach the head yet, because there is still some work to be done on the wig, but that will happen before too long. I made a video of her arms moving with my digital camera, but it's sideways. I haven't had this computer very long and don't know what(if any) video editor is on here. My old one had Windows Movie Maker, so I'm hoping to find a program similar to that. Unfortunately, Windows Media Player automatically opened the file, and I think that also affected how it posted to Photobucket. The last time I uploaded video there, it allowed me to edit, but won't now. So if anyone knows how I might be able to fix this, please let me know. Anyway, here are some pics of Tina with arms:


Ok, I've got the video working through Photobucket. Just click on it and it should open in a new window.
Making the Wig
I started out with some stretchy mesh fabric that I found at WalMart.
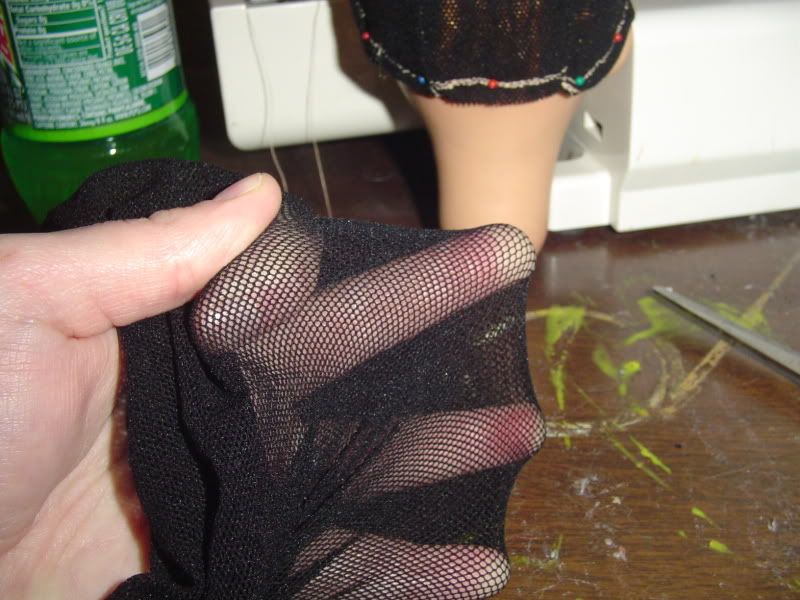
It's hard to explain exactly how I put the cap together, because it was all trial and error. Basically, I measured the length from the hairline in the front to the one in the back. It came to about 6". Using the wig I originally tried to use as a model, the cap was made of three pieces sewn together to make a curved piece. Using double layers of fabric, I cut a rectangle 6" by 3", then two more about the same size. The second two, I trimmed the corners off to make ovals. I lined up the edges of the ovals with the sides of the rectangle, one on either side, and stitched them together. This caused the finished piece to be round and fit the doll's head better. At first, it was still too big, so I kept making the hems larger until I got the fit I wanted, then trimmed the excess.
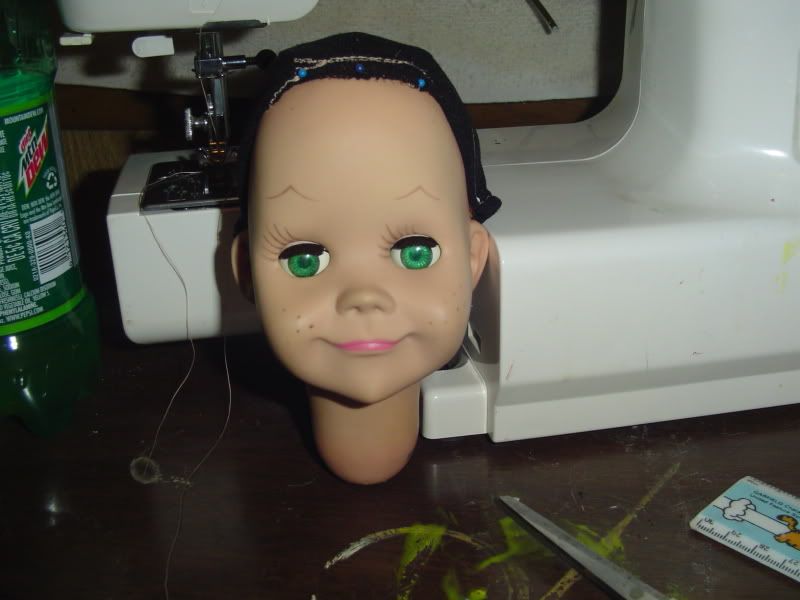
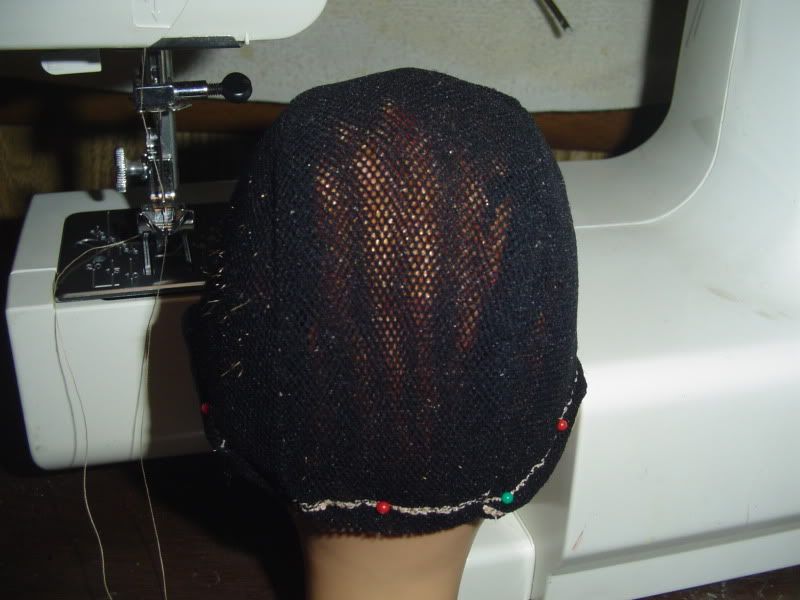
Then I used 1/2" tan elastic(it was called ballet elastic at the fabric store) and used it to edge the wig cap. It starts at the right edge of where the bangs will fall, along the hairline, around the back, and ends at what will be the left side of the bangs.
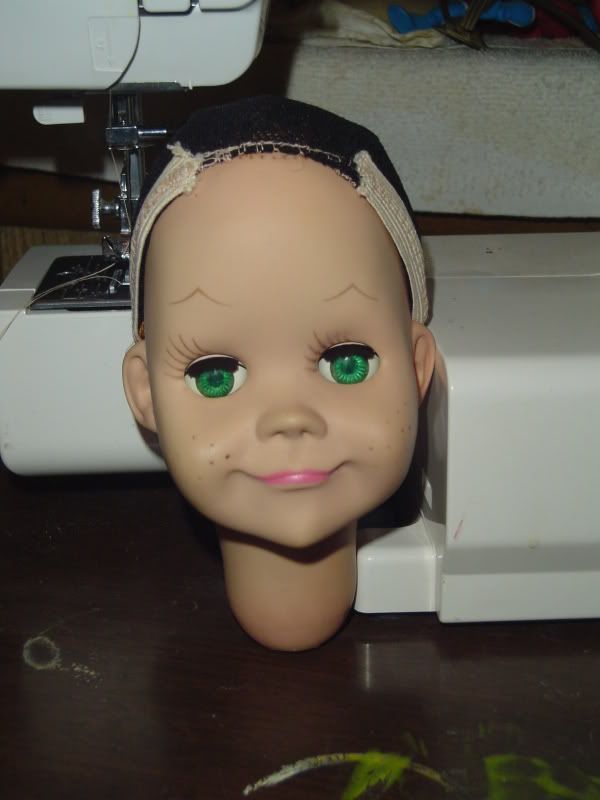
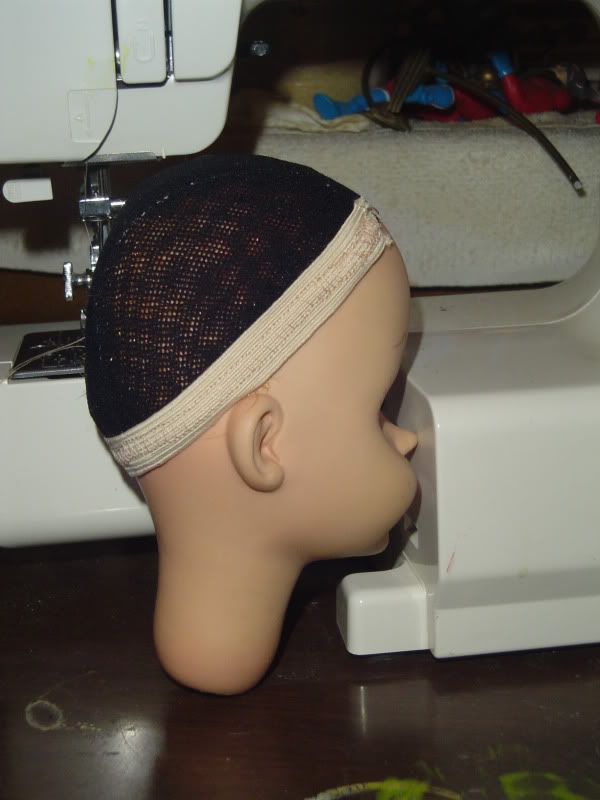
Adding Hair - The section that makes up the bangs just hangs out over the front edge and was sewn as close to the edge as I could get it. The first parted layer is just sewn down the middle. I had trouble getting it to lay right at the edge, right behind the bangs, so I hand-sewed a few little bunches of hair to get that started. Then comes the real pain in the butt - taking about a half-inch to an inch section of hair, finding the middle, and laying it across where the part goes. Then I hold it in place while machine-stitching across it. I have that done about halfway back, and will keep repeating this step until I have one thin layer completely covering the wig cap. The top layer will be rooted by hand to make a nicer part. I'm also hand-sewing a few small bunches around the edge of the cap for better coverage on the hairline. I was hoping to do more, but the light bulb burned out in the craft room the last time I went back in to work.
So here's what the head looks like at the moment:
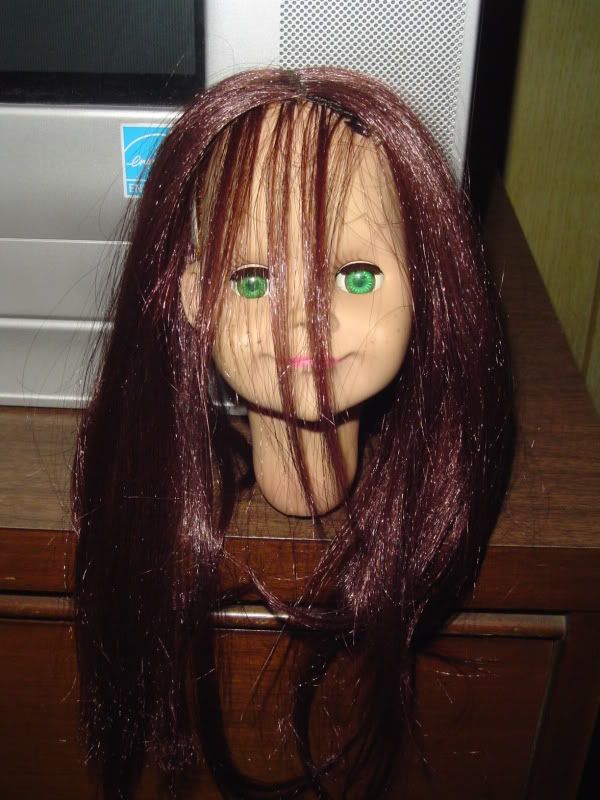
The Finished Wig
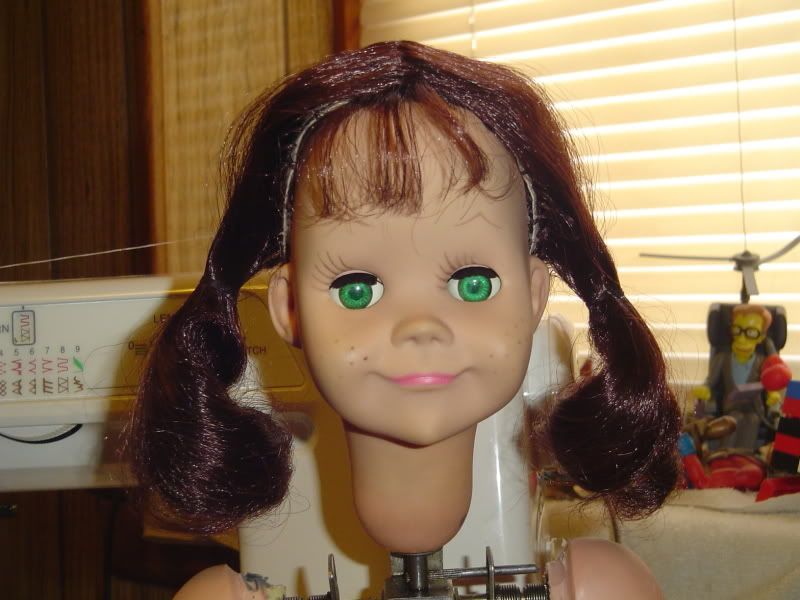
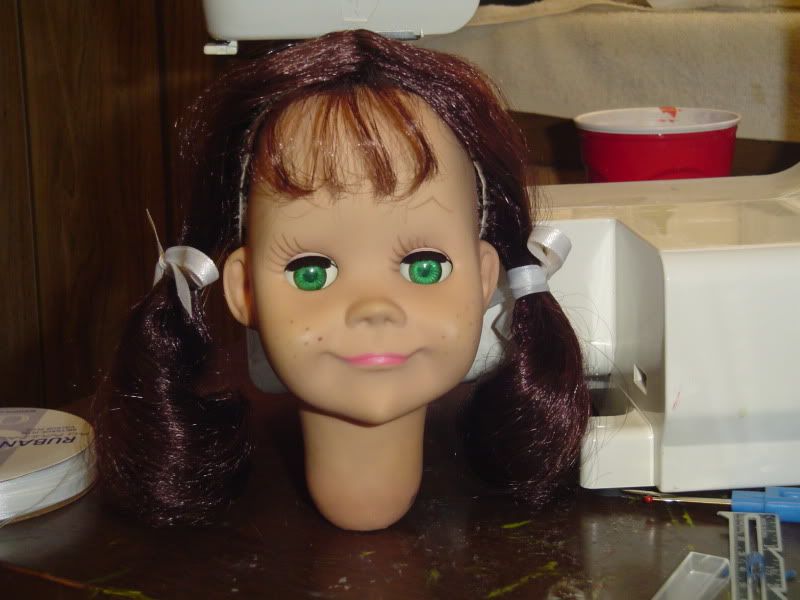
I just put the head on top of the mechanism. There's a little bolt or screw that turns the head back and forth. As soon as the glue dries, I can put the torso pieces back on and start fitting it with a dress, slip, and panties.
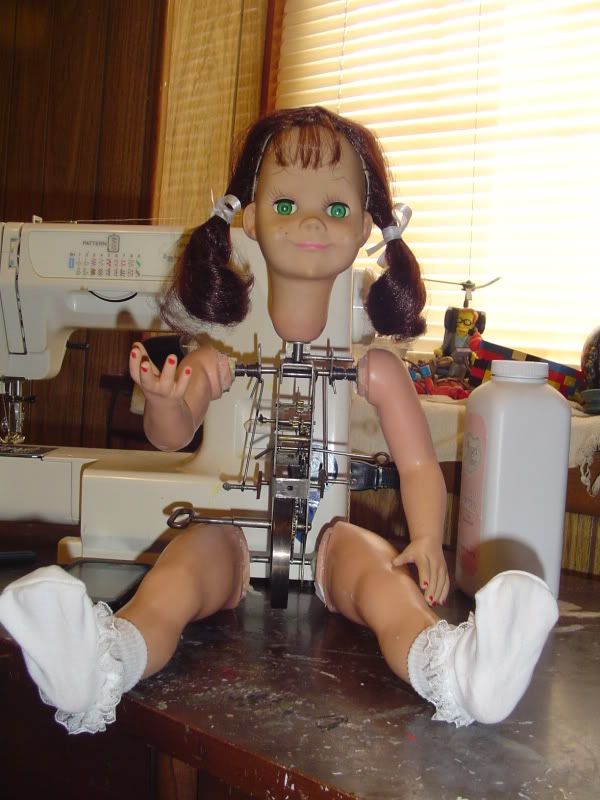
Video of the assembled doll moving:
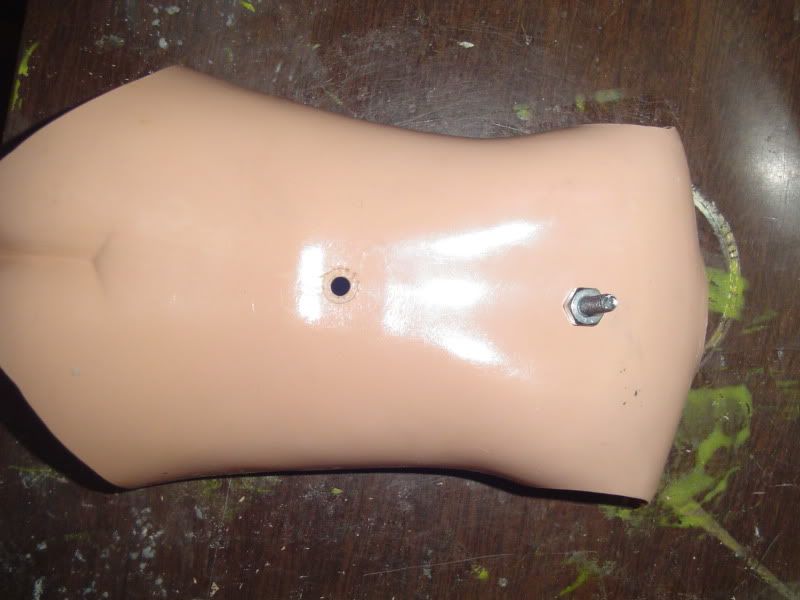
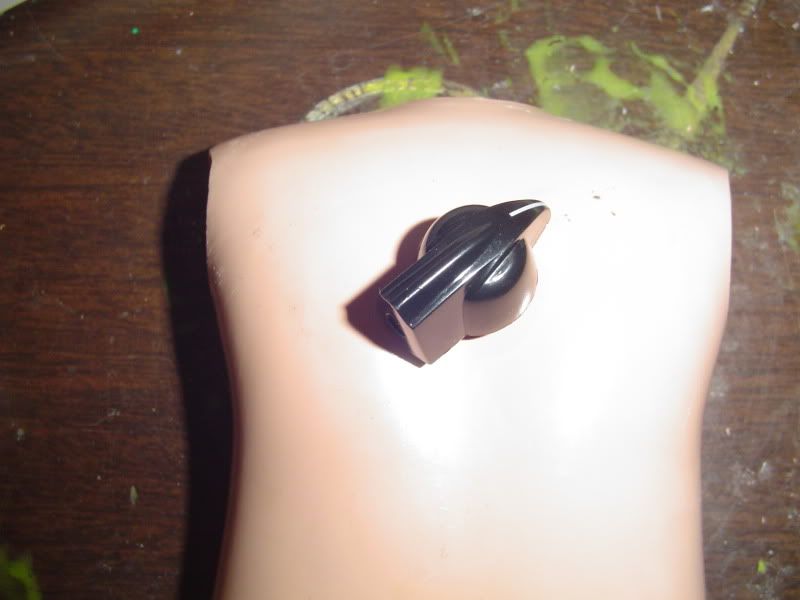
For the volume knob, I drilled a hole in the back and put a screw through it from the inside out, to make a post. The chickenhead knob has a tiny screw(eyeglass repair size) that you can tighten, so I slipped the knob over the post and tightened the tiny screw to keep the knob in place.
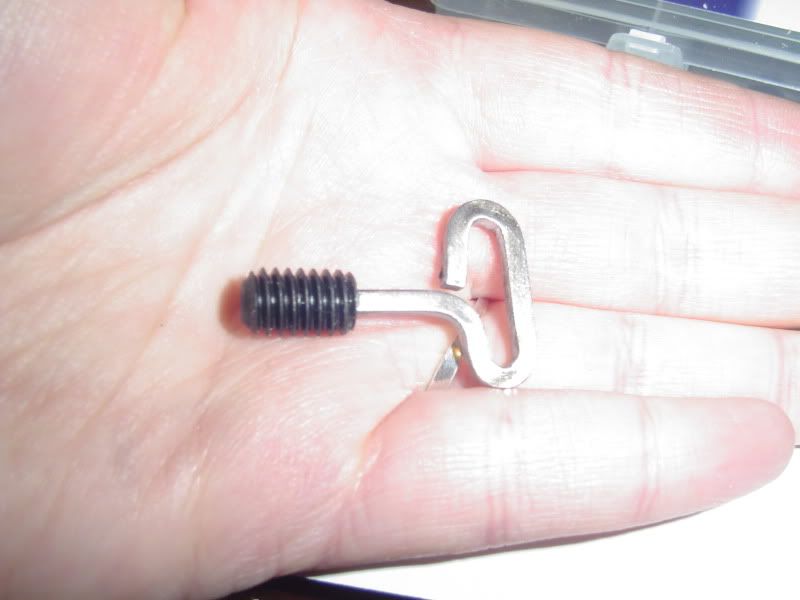
I also wanted to put a key in the back, even if it wasn't functional. Instead of just drilling, I still wanted it to turn. I used a set screw and used epoxy to glue the end of the windup key inside. Then I drilled another hole big enough for the set screw and stuck it in.

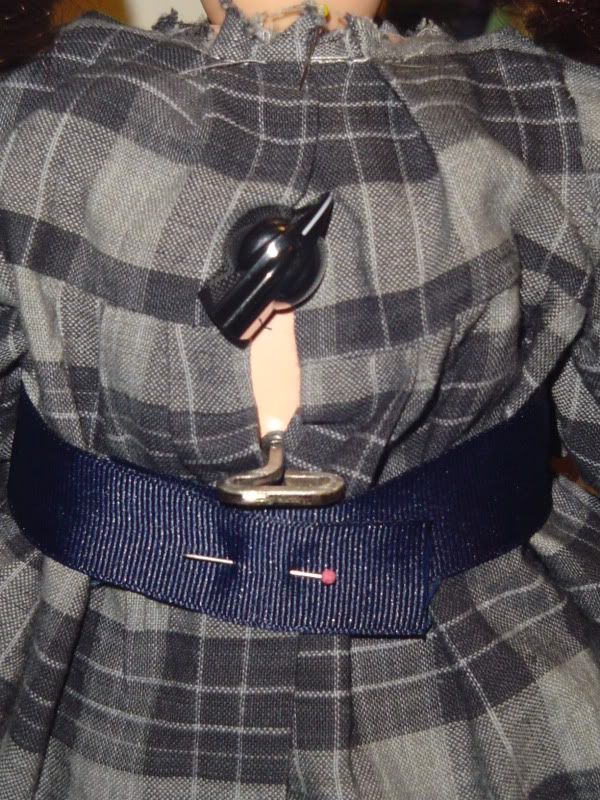
I'm still working on the dress, but I'm having some trouble getting the collar to fit right. The ribbon belt is pinned in place, but here's what the dress looks like so far:

I can't remember if I posted this elsewhere in the thread or not, but I wanted to add that the fabric in the pictures above looks different from when I first started this project, because I lightened it. I used about a half a packet of RIT dye remover, just to make it a little lighter, and was actually very happy with how the fabric turned out. Still not a perfect match, but I like it.
I made a slip with lace on the bottom, because it looks like Tina's wearing one in the scenes where she ends up on the floor.
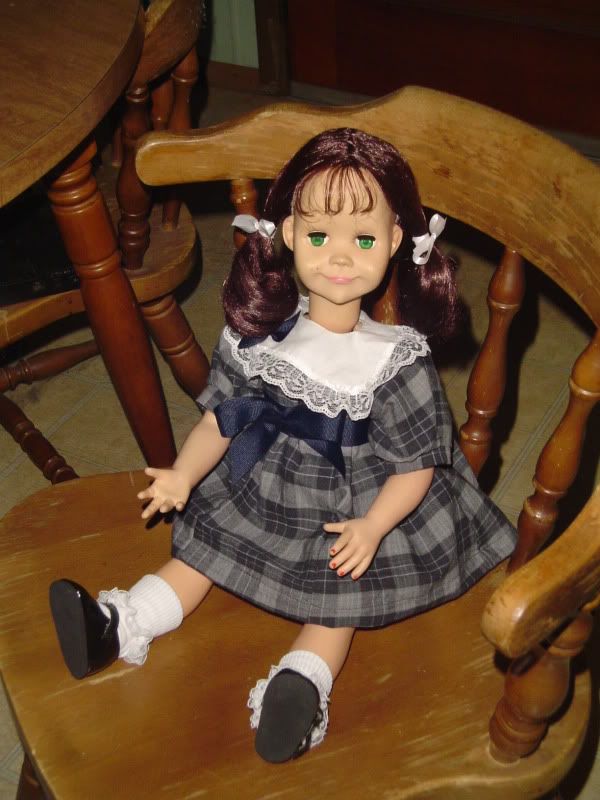
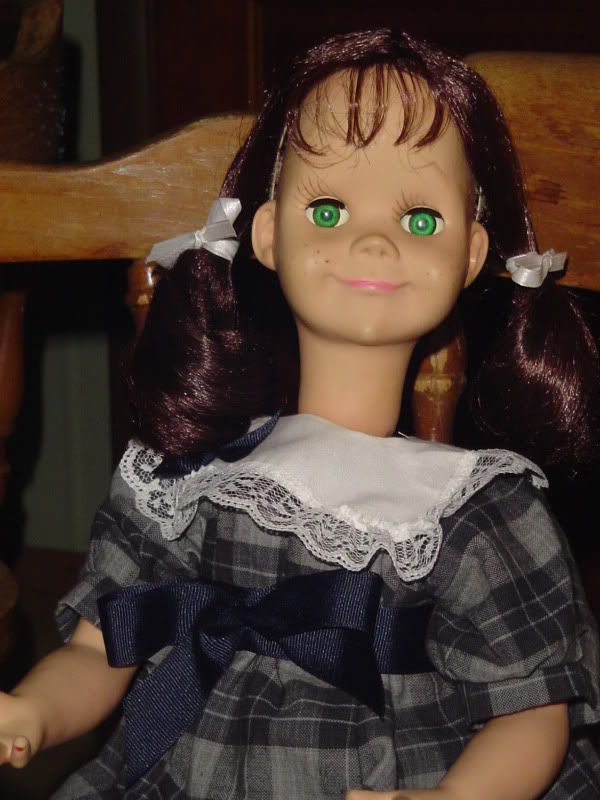
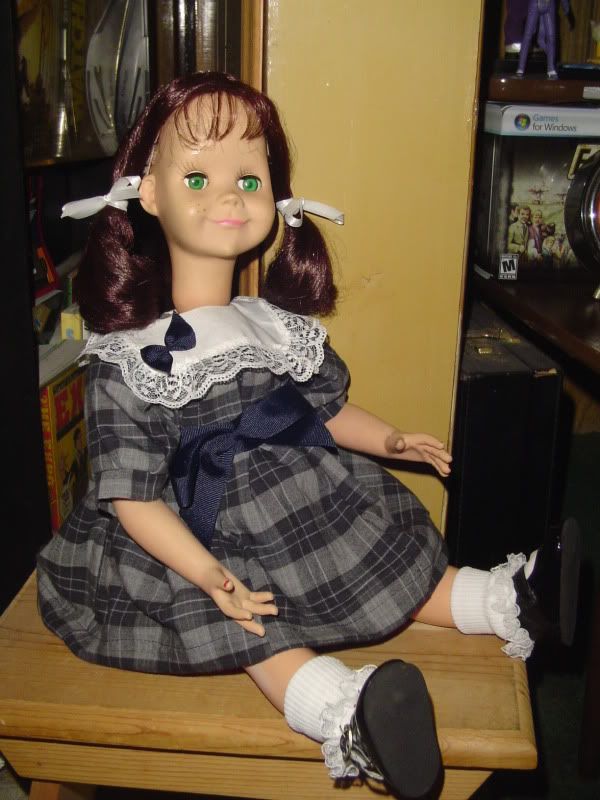
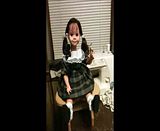
The complete doll. I will be taking more pics when I get a chance. But for now, here are the ones I have:
She's ALIVE! (video of the complete doll moving)
>>I'm pretty sure Tina had a string in her back, but it might have been just for show. The other thing I'm wondering about, is if the string was not functional, how did they get her started without winding the key onscreen? My husband just brought up a valid point: Is it possible that Tina's motion was done by hand? If there was some kind of rig inside her, and a dial or switch under her dress, it could have been connected to move her arms and head in sync with one another. It might not have taken up quite so much room inside her, and maybe they would have just glued the original torso together. I don't have the episode on DVD, so I'm pretty much left to the mercy of YouTube. I couldn't find the complete episode, but from the portions I was able to watch, I couldn't find any scenes where she was in motion and not being held by an actor or sitting on a table. An actor(or a puppeteer, when she was just sitting) could have been operating Tina under the cover of her dress. I also haven't, as of yet, been able to find a shot where whoever is holding her has both hands visible. So the movement by hand is starting to sound plausible, don't you think?<<
So, does anyone have any feedback to offer? I haven't been able to find much about how Talky Tina was made. I'm torn between how cool it would look to just wind her up and let her move, and what sounds like a very plausible way to accomplish her movement. It might have even been less difficult to do the movement by hand. And if someone out there thinks that way is correct, any ideas how to do it?
**I moved all the build photos to the start of this thread, because I've read that it makes it easier for people following it to find the most recent updates. Comments and discussion have been left as-is.**
Here's a link to my Reference folder on Photobucket, so you can see what photos I have so far, Reference pictures by delirium_dizzy - Photobucket and here are pics of my doll that will be used for this project:


Here's the fabric I picked out. The color is wrong, and much darker than the screenshots. But the plaid pattern is so close that I got it anyway.

Here it is in color. If I ever find the same thing in a lighter, more feminine color, I'll probably make a new dress. But for now, I think this works pretty well.

Disassembling the Walking Doll
First, you remove the screws holding the back and front plastic torso pieces. Save the screws, because you'll be reattaching these pieces later on. Then, the doll's plastic shoes have to be removed. There are metal "feet" underneath, attached by small pins. I dremeled these off, removed the feet, and slid the plastic legs off the doll.


The metal leg pieces on each side have to be disengaged from the parts that make the body move. In the picture, you'll be able to see the slot, marked by a red circle. Pull it off the moving piece, marked by a blue arrow. The picture is what it should look like when this is done. Do this to both sides. In this picture, you'll also see a piece circled in purple. This piece is the only other part holding the metal leg on. There are small "clamps" on the ends - I've included a photo of these as well. Remove them, and the metal legs will slide right off. You can also remove the rod that the leg pieces were connected too. The orange circles show where the second leg pieces are attached.


This is what you should have by now:

Remove the second leg piece the same way - by pulling off the little clamps and sliding the piece off. Leave this rod in place, as this will be where the Brikette legs will be attached. This is what it will look like - I'm leaving the clamps on the end of the rod until I'm ready to attach the Brikette legs, so it doesn't get lost.


Next, you'll have to remove the arms and head. I wasn't able to just pull them off, so I carefully dremeled the plastic until it fell off. Note: If the walking doll you are using still has hair, I would cut as much of it off as possible, because it tends to get wound around the dremel bit.

I started to cut the doll's head around the chin line, and found a bolt of some kind holding the head on. Once I find my pliers, I will try and loosen it to remove the remaining plastic. So this is what I currently have on my work desk:

I recommend cleaning the stray bits of plastic with compressed air, so nothing gets stuck in the gears or springs. It's pretty amazing to watch the naked gears move, simply by winding a key that tightens a spring in the doll's belly. I'll probably spray some WD40 inside to keep everything working.
I was having some trouble with a specific moving piece(marked with a red arrow) sliding off its post when I operated the walking mechanism, so I wrapped a little wire around the end of the bar(marked with a blue arrow) and used a little Gorilla glue to secure it. If you buy a Wanda doll with legs that work, but arms and a head that don't, this could easily be your problem.

I don't know if the body of the walking doll I bought has warped plastic or what, but at times, some of the moving parts were getting stuck where the torso pieces meet. They've never lined up correctly. I dremeled out little circles in the plastic where the parts were rubbing. I marked them with a Sharpie in the photos so you can see what I mean. This is just another idea for a fix if you try this and have difficulty with the moving parts.


This is the reassembled torso, with the pieces cut out. I sanded them smooth later on.

I also attached the legs to the walking mechanism. I drilled a hole in each leg and gorilla glued one to the bar that I'd been saving. After it dried, I put the bar back through the bottom of the mechanism, where it had been originally. I glued the other leg to the remaining end of the bar.


Later on, I plan to reattach the torso and get some work done on the arms.
Here's what the torso looks like with the legs. I heavily dremeled and sanded the openings where the legs meet the body, and they still don't match up. But I was able to alter it that the body can sit and stand. I will definitely need to display Tina on a doll stand though, as the mechanism makes the torso very top-heavy.


I had bought panties, but they don't fit very well, between the windup key in the side and the way the legs hang. I'll have to make something a little more like bloomers. The socks worked out at least.

Ok, after a lot of trouble getting the arms to stay attached without stopping the mechanical parts, Talky Tina is moving. I didn't attach the head yet, because there is still some work to be done on the wig, but that will happen before too long. I made a video of her arms moving with my digital camera, but it's sideways. I haven't had this computer very long and don't know what(if any) video editor is on here. My old one had Windows Movie Maker, so I'm hoping to find a program similar to that. Unfortunately, Windows Media Player automatically opened the file, and I think that also affected how it posted to Photobucket. The last time I uploaded video there, it allowed me to edit, but won't now. So if anyone knows how I might be able to fix this, please let me know. Anyway, here are some pics of Tina with arms:


Ok, I've got the video working through Photobucket. Just click on it and it should open in a new window.

Making the Wig
I started out with some stretchy mesh fabric that I found at WalMart.

It's hard to explain exactly how I put the cap together, because it was all trial and error. Basically, I measured the length from the hairline in the front to the one in the back. It came to about 6". Using the wig I originally tried to use as a model, the cap was made of three pieces sewn together to make a curved piece. Using double layers of fabric, I cut a rectangle 6" by 3", then two more about the same size. The second two, I trimmed the corners off to make ovals. I lined up the edges of the ovals with the sides of the rectangle, one on either side, and stitched them together. This caused the finished piece to be round and fit the doll's head better. At first, it was still too big, so I kept making the hems larger until I got the fit I wanted, then trimmed the excess.


Then I used 1/2" tan elastic(it was called ballet elastic at the fabric store) and used it to edge the wig cap. It starts at the right edge of where the bangs will fall, along the hairline, around the back, and ends at what will be the left side of the bangs.


Adding Hair - The section that makes up the bangs just hangs out over the front edge and was sewn as close to the edge as I could get it. The first parted layer is just sewn down the middle. I had trouble getting it to lay right at the edge, right behind the bangs, so I hand-sewed a few little bunches of hair to get that started. Then comes the real pain in the butt - taking about a half-inch to an inch section of hair, finding the middle, and laying it across where the part goes. Then I hold it in place while machine-stitching across it. I have that done about halfway back, and will keep repeating this step until I have one thin layer completely covering the wig cap. The top layer will be rooted by hand to make a nicer part. I'm also hand-sewing a few small bunches around the edge of the cap for better coverage on the hairline. I was hoping to do more, but the light bulb burned out in the craft room the last time I went back in to work.
So here's what the head looks like at the moment:

The Finished Wig


I just put the head on top of the mechanism. There's a little bolt or screw that turns the head back and forth. As soon as the glue dries, I can put the torso pieces back on and start fitting it with a dress, slip, and panties.

Video of the assembled doll moving:

For the volume knob, I drilled a hole in the back and put a screw through it from the inside out, to make a post. The chickenhead knob has a tiny screw(eyeglass repair size) that you can tighten, so I slipped the knob over the post and tightened the tiny screw to keep the knob in place.


I also wanted to put a key in the back, even if it wasn't functional. Instead of just drilling, I still wanted it to turn. I used a set screw and used epoxy to glue the end of the windup key inside. Then I drilled another hole big enough for the set screw and stuck it in.


I'm still working on the dress, but I'm having some trouble getting the collar to fit right. The ribbon belt is pinned in place, but here's what the dress looks like so far:


I can't remember if I posted this elsewhere in the thread or not, but I wanted to add that the fabric in the pictures above looks different from when I first started this project, because I lightened it. I used about a half a packet of RIT dye remover, just to make it a little lighter, and was actually very happy with how the fabric turned out. Still not a perfect match, but I like it.
I made a slip with lace on the bottom, because it looks like Tina's wearing one in the scenes where she ends up on the floor.

The complete doll. I will be taking more pics when I get a chance. But for now, here are the ones I have:


She's ALIVE! (video of the complete doll moving)

Last edited:


