T800 project

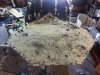
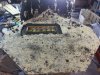
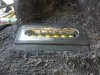
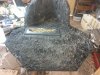
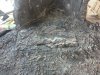
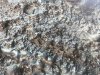
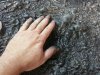
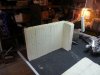
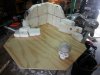
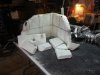
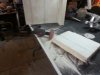
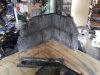
The constant patching and sanding has been getting to me a bit, so I have desided to take a short break for all the clean up and do some work on the base/stand, it's early days yet, but I've got something special in mind for this, so watch this space on this one, mostly carving foam and cutting the basic shape for the top of the base at this stage
 

Attachments

  • 2014-03-28 14.00.58.jpg
    2014-03-28 14.00.58.jpg
    256.6 KB · Views: 190
  • 2014-03-29 15.26.07.jpg
    2014-03-29 15.26.07.jpg
    320.8 KB · Views: 174
  • 2014-03-29 15.25.40.jpg
    2014-03-29 15.25.40.jpg
    351.7 KB · Views: 190
  • 2014-03-29 14.17.56.jpg
    2014-03-29 14.17.56.jpg
    236.9 KB · Views: 197
  • 2014-03-28 15.05.41.jpg
    2014-03-28 15.05.41.jpg
    2 MB · Views: 185
  • 2014-03-28 14.05.16.jpg
    2014-03-28 14.05.16.jpg
    1.8 MB · Views: 189
  • 2014-03-29 15.26.50-2.jpg
    2014-03-29 15.26.50-2.jpg
    309 KB · Views: 181
Last edited:
Still all a bit experimental, but I'm hoping to use a setup of 3 or 4 ultrasonic misters

That would have been my second guess. :) Just be mindful that they put out *water*, so you probably won't want them running for hours on end.

Love how this is coming together!
 
I'm going to set it up with a timer and a auto cut off, if it all works the way I want it to it will have several settings
 
Now that I have convinced myself that the idear is going to work, I spent most of yesterday afternoon biuld a light box and wiring it up, I"m waiting some ultrasonic mister units to arive, there only cheepy ones off Ebay but hopefuly they will be good enough to get the effect I'm after.
 

Attachments

  • 2014-04-04 16.47.43 (Copy).jpg
    2014-04-04 16.47.43 (Copy).jpg
    305.1 KB · Views: 278
  • 2014-04-04 17.39.19 (Copy).jpg
    2014-04-04 17.39.19 (Copy).jpg
    163.5 KB · Views: 183
  • 2014-04-04 17.39.28 (Copy).jpg
    2014-04-04 17.39.28 (Copy).jpg
    147.9 KB · Views: 158
  • 2014-04-04 17.32.48 (Copy).jpg
    2014-04-04 17.32.48 (Copy).jpg
    227.1 KB · Views: 177
Did a bit of texturing on the base today, still a lot to add, the idea for this layer, is melted bubbled asphalt
 

Attachments

  • 2014-04-07 12.39.30 (Copy).jpg
    2014-04-07 12.39.30 (Copy).jpg
    375 KB · Views: 162
  • 2014-04-07 12.45.38 (Copy).jpg
    2014-04-07 12.45.38 (Copy).jpg
    413.4 KB · Views: 184
  • 2014-04-07 13.06.26 (Copy).jpg
    2014-04-07 13.06.26 (Copy).jpg
    348.2 KB · Views: 186
  • 2014-04-07 13.06.32 (Copy).jpg
    2014-04-07 13.06.32 (Copy).jpg
    314.6 KB · Views: 182
  • 2014-04-07 13.06.48 (Copy).jpg
    2014-04-07 13.06.48 (Copy).jpg
    395 KB · Views: 187
  • 2014-04-07 13.07.16 (Copy).jpg
    2014-04-07 13.07.16 (Copy).jpg
    279.9 KB · Views: 183
  • 2014-04-07 13.07.20 (Copy).jpg
    2014-04-07 13.07.20 (Copy).jpg
    153.5 KB · Views: 240
  • 2014-04-07 13.58.51 (Copy).jpg
    2014-04-07 13.58.51 (Copy).jpg
    378.6 KB · Views: 186
  • 2014-04-07 13.59.12 (Copy).jpg
    2014-04-07 13.59.12 (Copy).jpg
    342.4 KB · Views: 180
Bit more of an update on the base, I'm still waiting on the final bits I need to finish the fire effect, so I thought I'd do the skulls and some decorative/fake rebar still a way to go but I'm pretty happy with the look of it so far.
Rebar and Skulls - YouTube
 
Alright! Looks like the paint on method for the silicone is working well too. The skull castings look pretty great. Nice work.
 
Not gonna lie...the way you worked that pipe into the arm shape was pretty friggin' awesome. Careful with the smoke/fumes though buddy. The fumes created by burning PVC are crazy bad for you.
 
Oh My God - awesome! You can also use plumbers glue to shape PVC too. Just paint it on then ignite it.
 
Back
Top