Jaz-
You crazy f*ckin' Aussie this build is amazing!
Just spent the last 3 hours (while at work) tuning out the world, reading though this build, and watching almost every single one of your videos. The metalwork is absolutely amazing. Really, really, cool stuff and I learned a TON! Thanks for documenting the whole process and keeping people up to date and informed on this thread. A true wealth of information in here and an asset to TheRPF. Also, I hope the Achilles is healing up nicely and not giving you any more problems. That sounded like no fun.
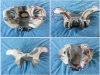
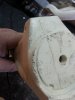
I have ZERO experience with metalwork so I learned a lot while reading this. However, what I do have a lot of experience in is Silicone molds. Now, I'm unsure as to what type of silcone (tin cure or platinum cure) and Shore value of silicone you are using but after watching the YouTube video of your skull mold it looks like you are going to use a cubic crap ton of silicone to mold up the whole T800. Also, without a vacuum degassing chamber I fear that your going to have quite a few air bubbles to deal with...which is less than ideal, especially with something you are investing this much time into. Have you thought about using a silicone thinner and "painting" on a detail coat and then using a thickener after that to lay up the rest? You could save some money in silicone by having thinner walls around your mold and then laying up a mother mold of plaster bandages or fiberglass. Also, thinner silicone walls will make pulling pieces out of the mold a lot easier (won't need your son and his mate
")
) and could allow you to have smaller seams and seam lines...as you can put the seam lines in odd places and then stretch the mold off of the casting.
Once again, this build is amazing. Can't wait to see more progress!