T-47 Snowspeeder 1:1 full scale prop build

Sunday, April 12, 2015 - Day 9:

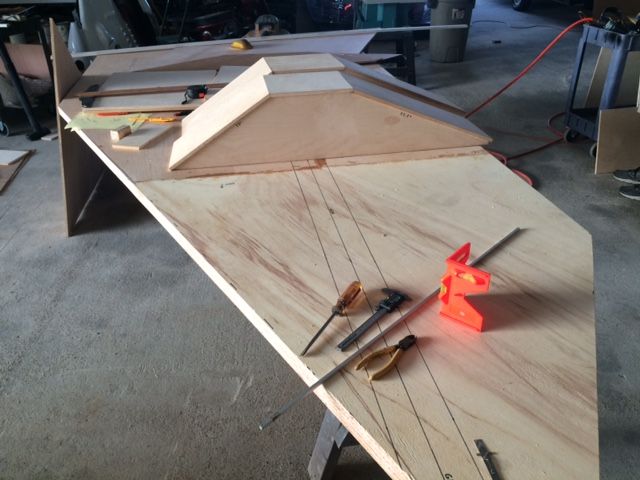
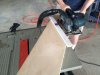
After church and before Sunday night dinner with the family, we were able to put in 3 hours to transfer the patterns to 12mm fine grain plywood. We stacked and fastened 4 rough cut panels together and commenced to sawing the top and bottom parallel edges on the table saw. We tried using the angel slide rail, but the 4 panels weight caused too much friction and made us afraid we'd get an uneven cut if we forced it. So we went with our proven method of sawing by hand with a set fence guide. All 4 side panels of the front pair of gun support boxes are now perfect mirror images of each other.


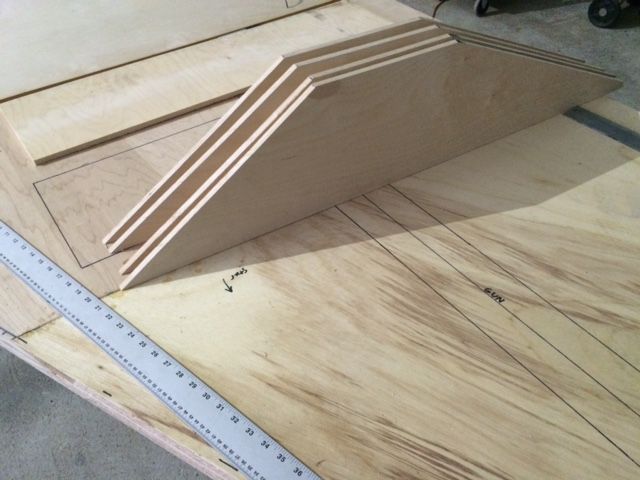
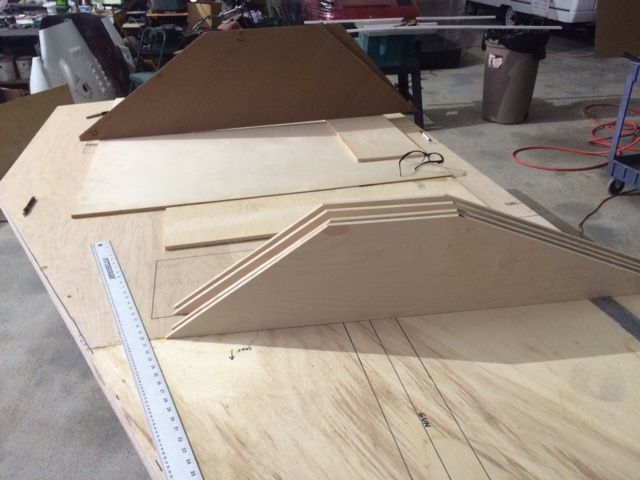
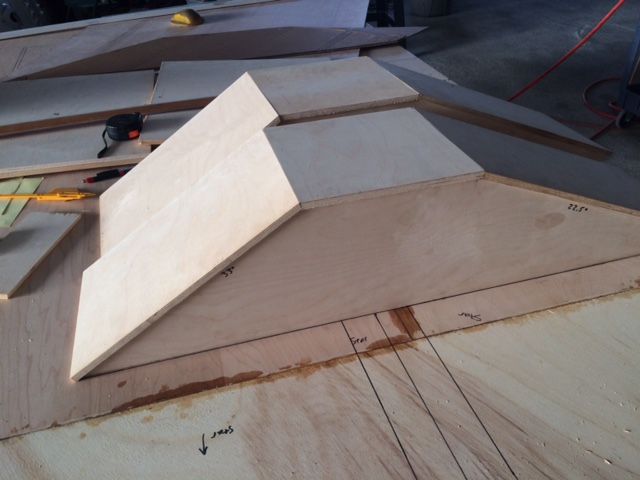
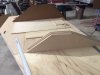
On the table saw, we cut the top 3 flat panels for each box with miter cuts for the adjoining joints. Multiple stacking rough cut panels and sawing a single time to guarantee exact copies. Tightbond III wood glue and airgun nails are holding it all together sturdily while the glue dries. We will epoxy fillet and fiberglass all of the interior joints with 4" wide 45 degree axis tape, after we have built all 4 boxes. Right now each gun-box weighs a hefty 11 pounds. These wings are well on their way to their estimated target weight of 200 pounds each. We are really creating a monster that I know we are going to regret moving around this summer. This speeder will be built like a tank and just about bullet proof. I'm seriously considering my original idea of putting a hovercraft skirt on the bottom to inflate when moving the ship around once completed.


Attachments

  • T47 36.JPG
    T47 36.JPG
    110.1 KB · Views: 169
  • T47 37.JPG
    T47 37.JPG
    107 KB · Views: 174
  • T47 38.JPG
    T47 38.JPG
    101.8 KB · Views: 174
Last edited:
Help. Why are my pictures disappearing? When I post the message they are there, but then disappear after a few minutes. Any thoughts guys? I'll try using photobucket tomorrow and see if that helps. Right now I am uploading them directly to the RPF editor using INSERT IMAGE when writing my pages. i am having to load the pictures twice to get them to stick.

SOLVED IT.
 
Last edited:
I spent way too much time this afternoon watching the live YouTube feed of Celebration VII. I have a bunch more pictures and updates from the last few days, but I'm still fighting with this picture storage and display problem.
 
Last edited:
Monday, April 13. I think I've figured out how to link photobucket images.
T47%2042_zpsdfnsd7kj.jpg%7Ec200


We spent most of the day dragging our 18' trailer through the side streets of downtown Fort Worth, avoiding construction and traffic jams. I'd purchased 300 square feet of 2024 aluminum. 15 feet long by 5 feet wide. .100" thick. Each sheet only weighs about 115 pounds, put each was like wrestling a bear to unload it off the trailer and into position against the front wall. This will be water jet cut into the individual armor plate pieces that will fully cover all of the wood substructure that we have been building. From the outside the speeder will be all aluminum plated. The wings will each weigh well over 200 pounds, of which 85 pounds will be the armor plate.


We had just enough daylight and strength to rough cut 4 panels and then precision saw the 4 stack bundle for the vertical front and back walls of the rear engine boxes. We'll cut the 6 top 26" wide panels tomorrow.


Last edited:
Wednesday, April 15. Day 12 since start of construction.

Building the rear engine boxes. 12mm, 5 layer cabinet grade plywood. Mitered joints. Tightbond III wood glue on all the joints and 18 gauge nail gun.


front temporary view just to see how the front profile looks.


Stand in PVC pipe for the test gun barrel.

 
Last edited:
Is anyone enjoying this thread? Should I keep posting? Right now it's still in the early frame wood stages, so I know it's not overly exciting. Stay with me guys, I promise it will start looking like a T-47 Snowspeeder soon.

If anyone is in the North DFW area and wants to help work on it, just let me know. We are across the highway from Texas Motor Speedway.

Kenny
 
Is anyone enjoying this thread? Should I keep posting? Right now it's still in the early frame wood stages, so I know it's not overly exciting. Stay with me guys, I promise it will start looking like a T-47 Snowspeeder soon.

Heck, yeah! I love seeing the WIP as you move forward with the project. Keep up the good work.
 
Next time you want to clad , try a product called ACM (aluminium composite material) its used in the sign industry and is very cheap, it also come in colours.
Imagine a aluminium sandwich , 2 very thin sheets of aluminium with a plastic filling.
just a thought.;)
 
Loving the progress. Starting to take shape. Keep going. And yes photobucket or similar is usually best for hosting images.
 
Every project has a beginning & it's nice to see a project start there rather than halfway through when no imagination is needed to know what the finish thing will look like. Keep going with the updates. I'll look forwards to the conclusion of the build.
 
SofaKing, I figured this was just your type of mess. I've learned from watching you, not to fear wood filler. I keep having to remind myself that gaps in the joints can be filled later with GOOP. :)
 
SofaKing, I figured this was just your type of mess. I've learned from watching you, not to fear wood filler. I keep having to remind myself that gaps in the joints can be filled later with GOOP. :)

EXACTLY! There are no imperfections when you have LOTS of filler and LOTS of patience. :)

Since this will see lots of travel and more than usual wear and tear, my advice would be to use the "exterior" grade filler. For simple fills the interior is fine.
 
Thursday, April 16.

Finished the pair of engine and gun boxes.


Reinforcing the interior joints with two layers 8oz glass cloth strips cut 4" wide on a diagonal 45 degree ply bias. That means each plywood joint is covered with a "X" pattern of glass fibers bonding across the joint. Before laying down the 4" wide strips, we wet paint on straight epoxy to allow it to soak into the thirsty wood grain. We then immediately follow that with resin mixed with micro glass balloon powder, mixed to a white colored, peanut butter like consistency. The putty mixture is then spread into the 90 degree edges and smoothed with a gloved finger to form a rough 1/4" radius fillet in the joint. Fiberglass cloth does not like to make sharp edges, and the load path of glass fiber responds much better to transition edges that have a smooth outside radius edge or interior fillet edge. While the first layer of resin and putty are still wet, we thickly brush on epoxy resin 2" wide on each side of the joint and lay the cloth into this wet epoxy. We push the glass down into the resin with the brush and in places add a little more epoxy where there is a dry spot that the glass did not soak through the resin applied underneath it. This "stippling" method is the best way to confirm that the cloth is fully resin rich and no air pockets are trapped under the cloth. When mixing resin we calculate a 50/50 ratio of glass cloth to resin, by weight. Meaning that if we have 5 oz of cut cloth that we plan to use, then we mix up 5 oz of resin to soak into the cloth.

 
Last edited:
Saturday April 18, 2015.

We've fiberglass cloth reinforced all of the wood joints in all 4 boxes.


The wet resin and cloth stays in position better if not forced to cling to a vertical or negative surface. We tilt each box over on one side at a time so that the glass is never at vertical position while still wet. After about an hour of curing time, we can flip the box onto the other edge and continue working.


The black lines are sharpy pen marks that were drawn on the dry glass cloth when we measured and cut the cloth. The ink has no effect on the fiberglass's final strength. The solid lines at the edges were our cut lines. The dashed lines are center lines that help when aligning the 4" wide strips to know where the middle line is. As soon as the cloth soaks up some resin it becomes translucent. And until the resin kicks off (begins to harden), the wet glass is quite slippery and can be slid into place.

 
Sunday April 19. Day 16 of build.

The sun was out bright and clear for the first time in a few weeks, so we took the opportunity to solar heat the fiberglass resin work from yesterday. Epoxy curing is temperature sensitive. Much below 65 degrees and it really never hardens. It just stays mushy until the temperature rises above 70's. Putting the boxes out in the sun for a few hours did a nice job of really hardening the resin. Thermal scanner on the wood recorded a temperature of 118 degrees. More than sufficient to set the chemistry.


While the parts cooked in our free solar oven, I spent a little time milling out a few sample parts for some of the gun barrel detail parts. Using one inch thick clear acrylic blocks, I'll end mill the detail work into the decorative piece, and then decide to cast a mold of it for resin reproduction or to scan it and have it milled on the 3 axis CNC bot.

 
Last edited:
Monday April 20: 30 days till Houston Comicpalooza. So far we have been working on the speeder about 15 days now. Most evenings we are able to put in 3 to 4 hours. It's mentally exhausting, since there are no blueprints or plans to follow. We are just making it up as we go along. Solving one problem and design decision after another and just keep moving forward. The design is all in my head and is coming together nicely, but until you start cutting and shaping parts, the small details begin to stack up. Surprising how mentally tired at the end of the day this is making me.

The 4" diameter 6061 alloy aluminum tubes were delivered. Each 12 feet long. 1/8" wall thickness. Each tube weighs 16 pounds. At 12 feet long, it will allow the gun barrel to be securely anchored at the rear through the front bulkhead of the rear engine box, and run forward through both vertical walls of the front gun box and extend more than two feet past the nose tip of the wing. The gun barrel will extend seven feet unsupported, 1-1/2 inches above the wing armor plates. The two joysticks that will be the cockpit controls arrived. Also we picked up a Bazooka 6" 100 watt powered subwoofer to power the engine sounds.


Now that the barrels are secured, we can begin building the many changing diameter gun sections that make up the gun cannon body on the wing.

 
Last edited:
Back
Top