Stormtrooper start to finish

It is hard to get into the suit by yourself,but it can be done.I used elastic everywhere on my armour.It is necesary if you want to wear it as like you say,the snaps just pop off as soon as you put any pressure on them.I found that putting the biceps and forearms on last is best,as it's them that restrict or should I say pinch the most.

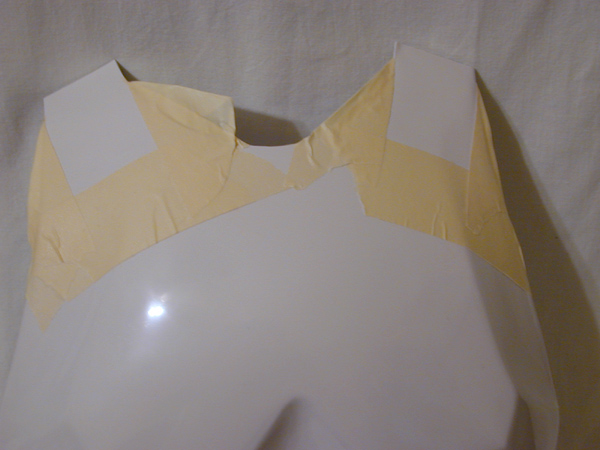
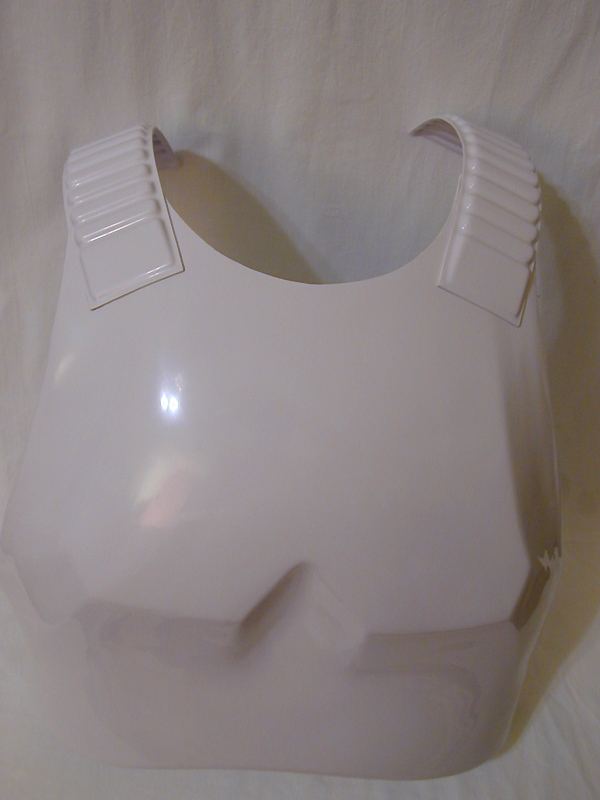
The shoulder straps shouldn't be a problem.Test fit them first and draw a faint pencil line to get them where you wanted them.The hero suit's had them with like 5 of the ribs (plus the big 'starter')on the chest,so you could do the same.The movie suit's were all over the place.Just remember to only glue the chest and leave them free to hang at the back,but with the 'keeper'.Try elastic or cotton and see which is best.
 
Cool. Thanks for the info. I think I counted 12 small ribs on Luke's straps. The GF has more and it also has the big 'starters' on both ends. Looks like there might be a larger gap between my back and chest pieces than on the movie, so I'll just have to play it by ear. I got the belt back this morning and it looks like it'll work. I used a bra extender (don't laugh) that has 4 or 5 metal hooks on it. Thank goodness I have access to someone with a sewing machine. Now, there won't be any guesswork with velcro.

Next, I will cut the belt into two pieces and bolt each half onto the ab plate under the abs belt.

Any thoughts on the holster? The straps look to be a reddish color leather and are riveted onto the back of the belt. I have a black leather holster with leather loops, but I don't want to loop it onto the belt. I aged it some with some sandpaper and now it has a nice satin finish.
 
Here are the shoulder bell/bicep assemblies:

shoulderbells.jpg


Here is a picture of the belt. I had the hooks set in some so that it could be adjusted if need be. The thermal detonator will cover the seam:

belt01.jpg


belt02.jpg


Here are my TK-409 neckseal and nomex gloves:

neck.jpg


Here is the back and front still joined together. There are two attachment points on each side with snaps. The crotch has velcro in front and a snap in back. The two hanging straps are elastic ones that velcro to the back plate to keep it held in place:

body.jpg
 
Last edited:
good work man. glad to see this project is coming along, and that you're taking your time to make it come out real nice
 
Thanks guys. BTW, Imagecave sucks. They have a monthly bandwidth limit. Beotches. I should have more pics soon...
 
Thanks oldken. Target's coming up... :lol

Got a package in the mail today. Segs for that TK click and the actual colors used for painting TK's. I'm going to use the paints to paint the buttons on the ab plate. They are Humbrol AD Gray #5 and Midnite Blue #15. Now to figure out how to paint a perfect circle. :) I'll probably hammer the segs to my Caboots. Big thanks to ANH Trooper for getting these to me!

segspaint.jpg


Finally got up the courage to attach the shoulder bridges. I basically wore the armor and figured out the best placement for the bridges by holding them up against the armor. Good placement for me was with three small ridges (plus the big starter) on the chestplate.

BTW, the large squares on the other sides were cut off. This leaves 13 small ridges. Luke had 12, so I may chop another off later on. I also heated them up and flattened them some because they had way too much curvature to them.

I put two layers of masking tape around the bridges onto the chestplate. This serves two purposes. One, it gives me a guide for perfect placement and two, it prevents any excess glue from oozing out onto the chestplate. I must say now looking back, I should have masked all seams with tape before gluing. The seams would have been much cleaner.

Here is a pic of chestplate before gluing:

chestmask.jpg


I sanded the bridges and the areas on the chestplate inside the tape borders. I then applied a thin layer of glue to both the chestplate and the bridge and clamped it down with four clamps around the edges. Five minutes later, I repeated the process for the other bridge.

Once gluing was complete, I removed the mask and carefully cut away any excess glue with a razorblade. The glue should just peel right off because it will never make contact with the chestplate due to the mask.

Finished chestplate:

chestfinished.jpg


Two more hurdles left; painting and attaching the ab button plates and attaching the belt/dropboxes.
 
Last edited:
Looking good there matey. Glad to see you got yourself some Segs. Good choice :thumbsup

Cheers, Gord.
 
Originally posted by KevVader@Oct 12 2005, 09:32 PM
Damn....that blaster is nice...too pretty to weather...


Be a devil weather it you know you want to :lol

Things are looking great Clutch this is a great thread. Once you have finished I hope this thread can be archived for future reference for all TKs.

Keep up the great work I can't wait to see it finished (bet you can't wait either :D).


Cheers Chris.

P.S. nice touch getting segs for Clutch ANH trooper little things like that sum up the good things in this community :) .
 
I wish I would have found this thread sooner. I just finished my TE suit. I had another one built by TE himself so putting this one together was a no brainer......kinda. I'll chime in a little. Plan on reshaping the left bicep period. I am 6 foot and 200lbs and thank god I have skinny thighs because there is no wiggle room there.
 
The thighs can be a pain, literally. I also had problems with them hitting the crotch area of the ab plate, so I had to cut that area back some on the sides.

Which reminds me. If you ever use a cutting wheel on a dremel tool (I have a metal one) please use extreme caution. One slip and you could end up with a nasty cut. Goggles are also a must. Wear them because hot plastic will fly up in your face.

I finally finished the ab buttons. I went about it this way: I masked off each sticker with latex mold builder and painted them. Because I peeled the stickers off the small strip, I had to paint each button one at a time by sticking a sticker on, masking around it, peeling the sticker off, and painting.

Picture of buttons masked off. The first gray button has been painted:

moldbuilder.jpg


To attach the button panels, I clamped each one to the ab plate and masked around them with two layers of masking tape. I then roughened up the surfaces to be joined with sandpaper and glued them with weld builder.

Position the piece where you want it, clamp it down, and mask:

abbuttoninstall1.jpg


Remove panel and sand adjoining surfaces:

abbuttoninstall2.jpg


Finished ab plate:

abbuttoninstall3.jpg
 
Last edited:
They came out great. Nice job. :thumbsup

And I feel your guy's pain about the tight thighs. I'm 6'2" and 180 with fairly thin legs but I had to separate the glued backs of my TE thighs and put velcro there because they were just slightly too tight.

-Todd
 
WOW...

this is still one of my fav threads here...
keep your GREAT work up... :thumbsup

AWESOME DUDE.
 
Thanks everybody. I am starting to see the finish line.

I noticed that the forearm pieces like to slide up and down my forearms, so I put weatherstrip in them:

foam.jpg


foamarm.jpg


The foam really grabs the fabric of the gloves.

For the handguards, I velcroed in a band of of elastic that will go around my palms and I glued in 'scunci' bands via strips of styrene. These will go around my wrists:
Firm and tight. :lol

scunci.jpg


handguards.jpg
 
Last edited:
Back
Top