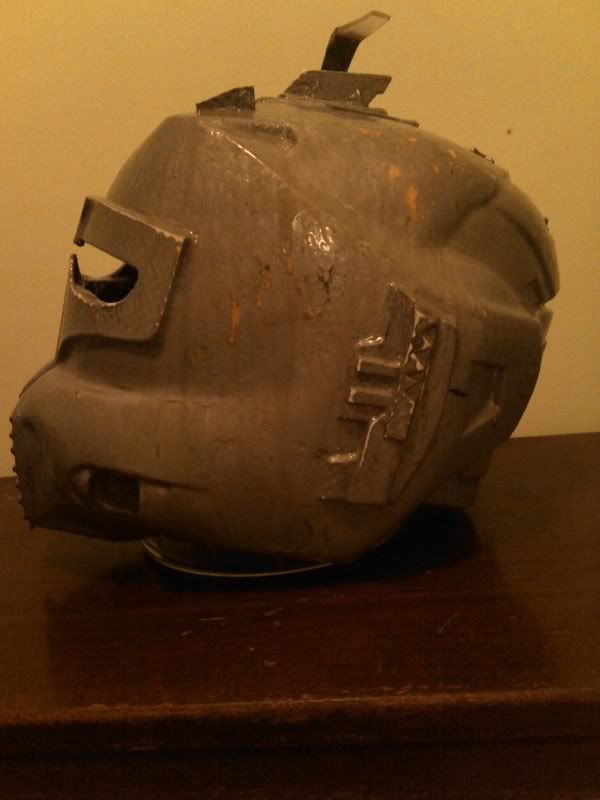
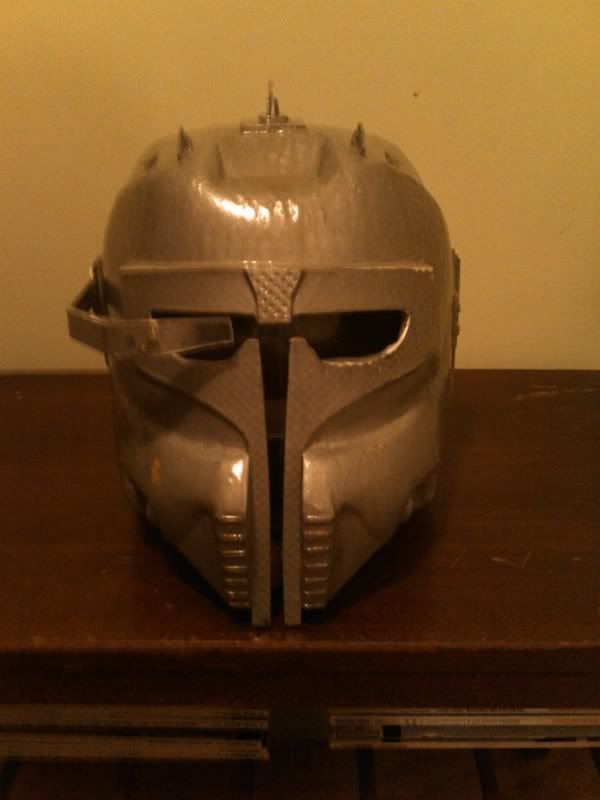
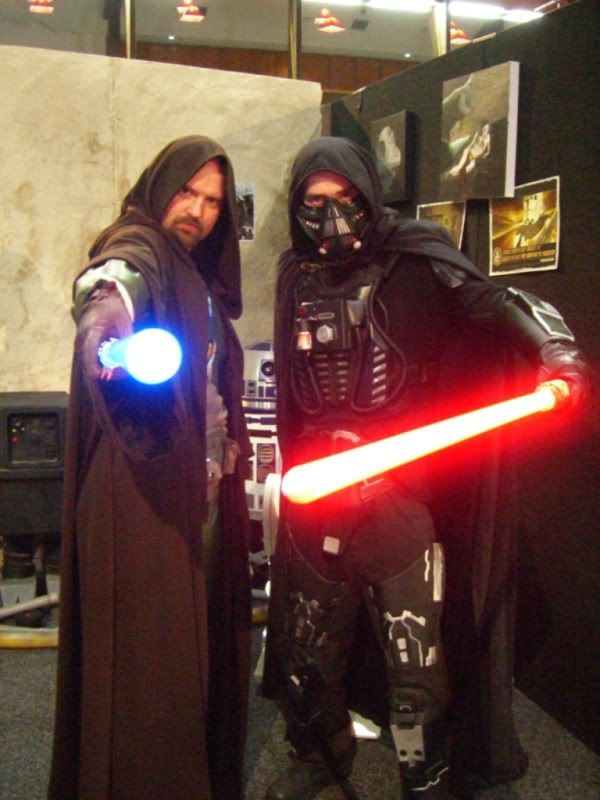
Re: hand made custom sabers,swtor sith warrior armor and more.
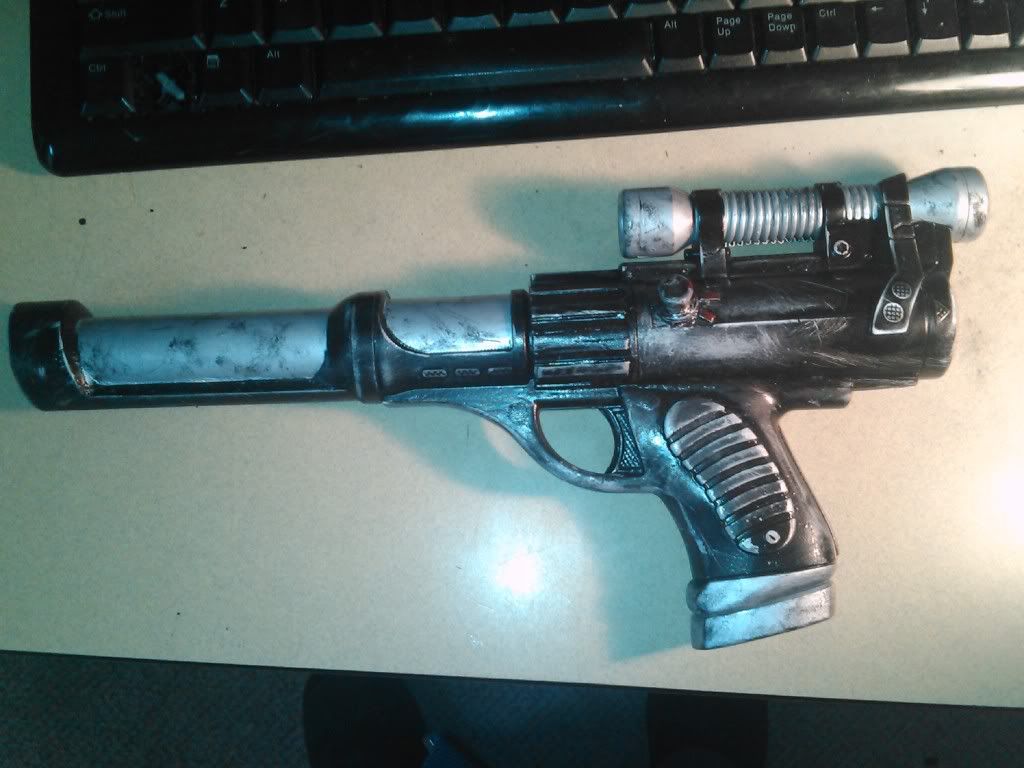
Hey guys thought id share the hasbro E-11 I have repaired, upgraded,kitted out and painted over the last two weeks.
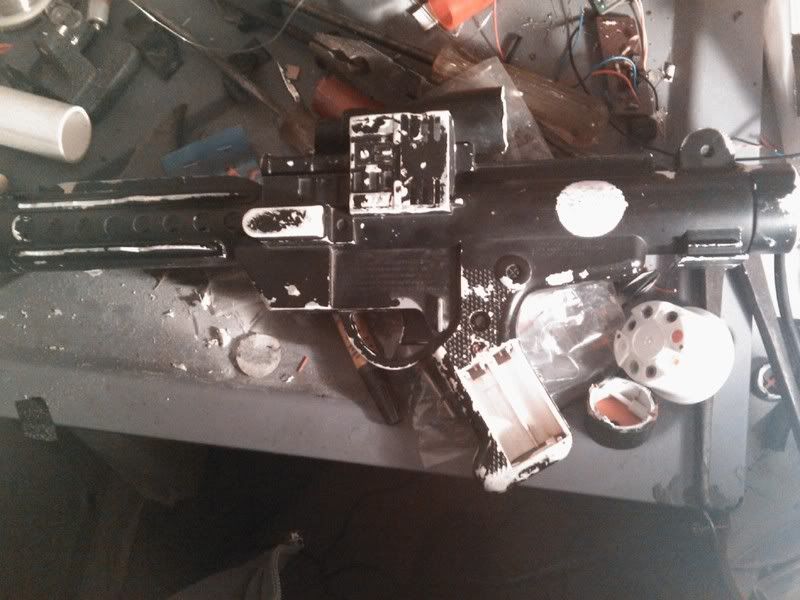
This is a 95 hasbro E-11 that I found in the long grass out the back of my brothers house. my nephews had been given it as an already broken and not going hand me down from some family friends kids. it had been outside its entire life,had broken and missing fins,no battery pack cover,every single square edge was worn round,scope was broken and the sound card didnt go at all.
as you can see here:
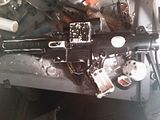
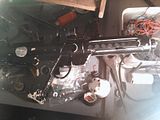
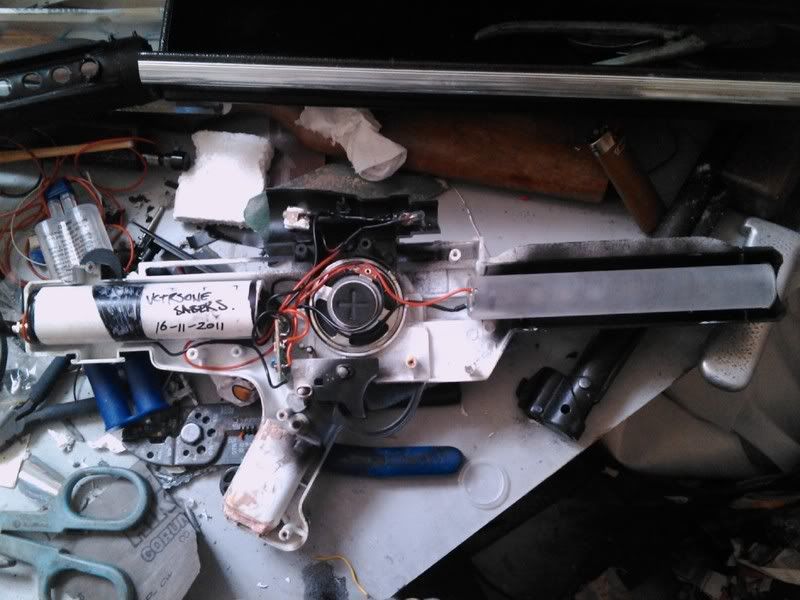
So I opened her up rewired the board,replaced the speaker and then gave her some juice..and to my surprise she fired straight up!
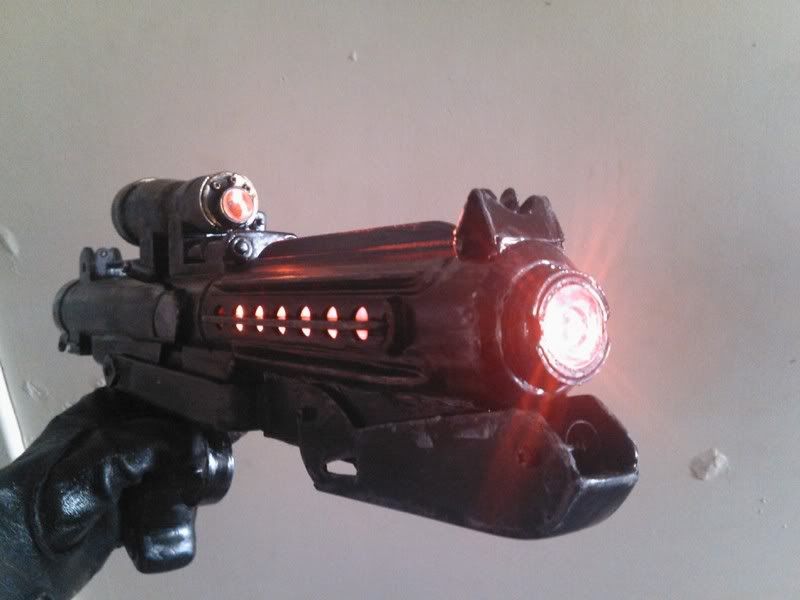
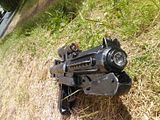
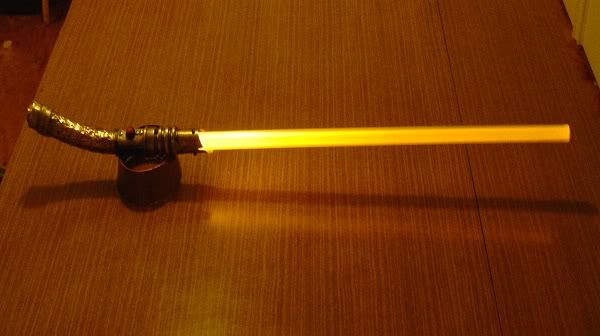
I then got to work building the rest of the circuit which includes a 4x AA 4.8v in-blaster rechargable battery pack (built into the pvc pipe) with a 2.1mm recharge port located in the end cap, a new .25w speaker which i glued the old rubber too, 2x 3mm red leds in the scope and one Lux I 1w red led in a lightsaber style set up for the core.
heres the internal pics:

after I had completed the internals I started on the repair..which was a lot of epoxy resin and bogging..so I didnt really take any progress pics for a while. I repaired and replaced the fins, bogged out the battery box on the handle and I redid all the corners so they were all straight again. last on the repair list was the trigger which i had to make two new support rods for and I cut it onto a better shape before reinstalling. (every part of this blaster was broken)
Then it was time for the custom stuff...I found an awesome reference pic site that features the "bapty" e11 screen used prop.
http://www.originalprop.com/blog/movie-guns/star-wars-episode-iv-a-new-hope/
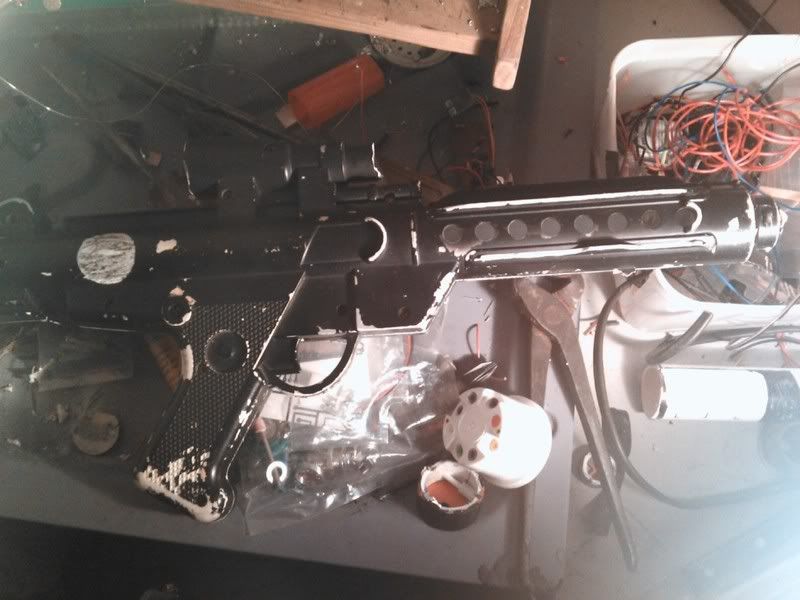
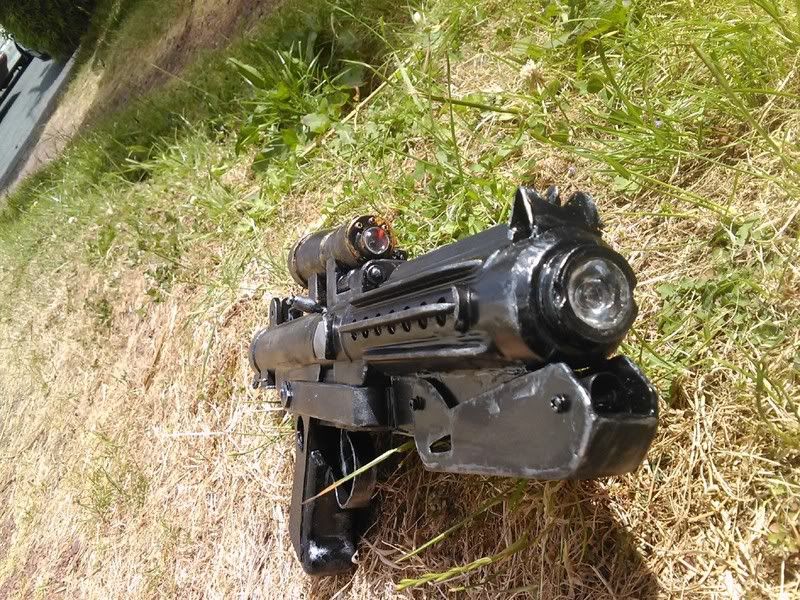
so to start off I added two new fins to the central vents (no t tracks as I wanted you to still see the lighting id made for it).
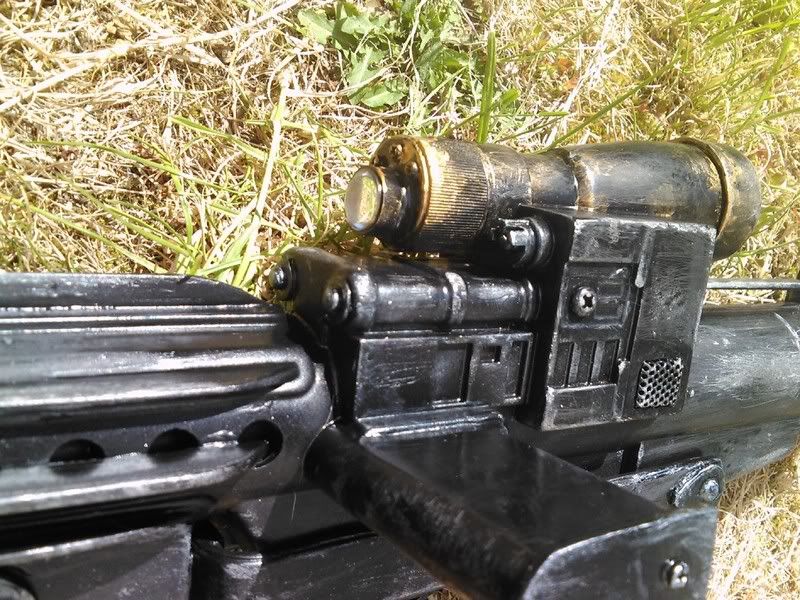
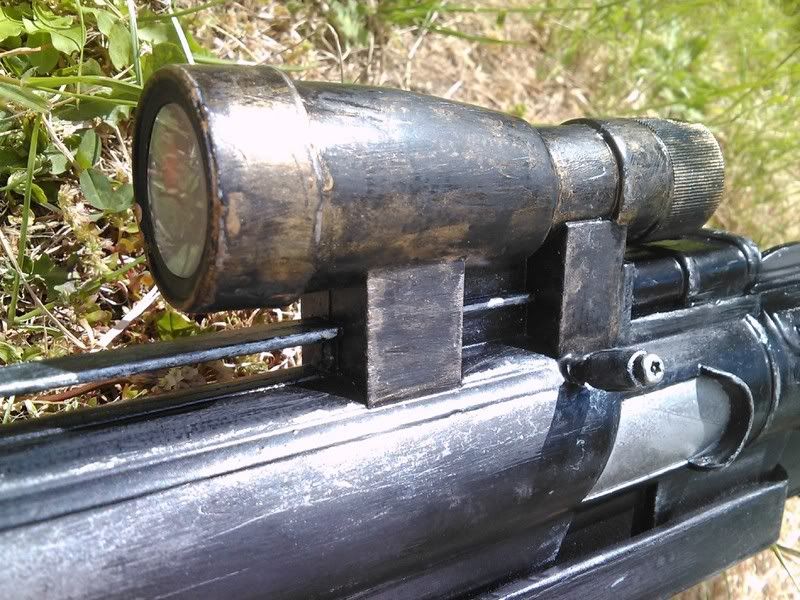
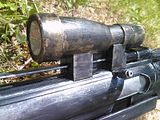
I built a custom front for my scope with a shampoo bottle head and a 7* colimator led lens, I cut the middle of the rear scope cap out found a bottle cap with a circle and x style reticle in it and glued some mylar film to the front so that when the scope was off the screen goes silver and blank but when lit its red and you can see the reticle.
I then marked and cut out to new grips from an old cordless drill box (they have a nice grip texture and its a nice soft plastic).
next up I marked out and cut up an old fridge icebox for my folding stock parts..I used pics of a real e11 scratch build to help draw out the plans. when the stock was assembled it actually worked but being plastic was a little flimsy so I glued the stock to the barrel. then I added the little fins on the end cap,cut some fridge magnet words up for the s and two o's which i made a 500 from to look like the real counter.
I had already bogged out the badly damaged top speaker grill so i decided to chop out the lower and replace it with real speaker grill..which was great it now has the same amount of opening as it had with top and bottom vents.
I found a couple small washers and screws and used them for the front of the range finder thingy thats molded into the gun. I also replaced all fake screws with real ones of the appropriate size and cut out the scope rail.
for the sights I cut out some plastic and melted a lighter refill nozzle for the front and added the little middle part to the rear sight. (not screen accurate as bapty is but bapty is a solid rear sight)
the clip was a small cardboard box I get my premium lightsaber speakers in mated with a pvc tube I cut in half..after trying to build a box and clip set up it looked like crap so I decided I would use the hasbro design and extend it, as well as giving it a better clip ejection button.
I also cut up my solder reel and melted to half circles into its sides for the emitter and then mounted a 5*colimator lens into it.
next I melted a hole and glued in the cocking lever i made.
last but not least I added the little middle sight part to the rear scope.
then it was onto its chrome under coating of which it got 3 coats I then gave it 4 coats of satin black and started attacking it with the sand paper while looking over the "bapty" hellishly beaten props....I decided to go with the really worn look...after Id scratched and worn some black paint away I took a small bit of foam with some silver on it and used it to highlight the harder to scratch areas...next up I got out the gold arclic and mixed it with a little black for a bross type color and added detailing to the scope...I even wrote "telescope m40" around the cap but I made it hardly visable and sanded it off mostly..you can still read bits tho like in the real props.
I ended up deciding i didnt like the trigger guard so i chopped it off and I used knead it epoxy putty to make a new trigger and then replaced the guard with one off a stuffed slug gun , I got my hammer and beat the metal guard into a new shape to fit. I used some 2 part epoxy to glue the trigger guard on.
Ok sorry for the huge story but it was a huge build! All finished now so heres the updated pics!

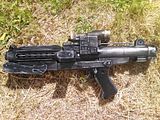
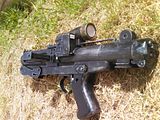


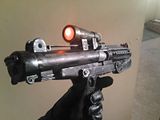
I went a bit over board with the weathering but in the end it has quite a battle worn look to it which i like.


")