PhuketAussie
Active Member
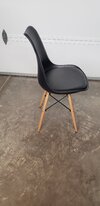
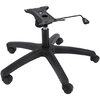
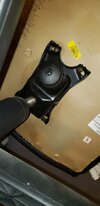
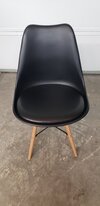
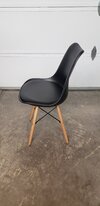
Hi there. Late last year I purchased a pair of Chinese made chairs with buckets that closely resemble the chairs used in 1960's Star Trek. They measure out a little smaller, but that's okay with me. My intention is to remount them on office chair bases (they came with four wood legs and a wire frame) so that they can be used practically in a modern situation, but still have them look from the seat up just like the original chairs. I've collected some resources online, but couldn't find much in the way of helpful measurements, so I reached out to Gerald Gurian (Star Trek Prop, Costume & Auction Authority) for help and he has been so kind with his time to measure out his replica chair and send me loads of photos with those measurements.
Originals had the top lip cut off and stiffened with plywood, I believe, though more recent replicas use MDF. I'm taking a very different route, I'm building up the seat back using EVA foam. I've successfully built a D-1 Droid (Rise of Skywalker) out of EVA foam using plans from James at Rebel Base Build (JC3D - The Rebel Base Build is creating Something From A Galaxy Far Far Away | Patreon), so I'm confident that EVA will work well for this project. I've also obtained self-adhesive vinyl that looks the part.
I've started by pencilling in the shape of the lower back rest, and using waste strips of EVA foam leftover from my workshop floor I'm framing up the lower rear sections. I'm going to have to wait for my wife to come home with a new pot of contact glue this afternoon before I can do much more!