You are using an out of date browser. It may not display this or other websites correctly.
You should upgrade or use an alternative browser.
You should upgrade or use an alternative browser.
Space Academy Planetoid build in 1/2 studio scale
- Thread starter Joseph C. Brown
- Start date
-
- Tags
- filmation space+academy
Joseph C. Brown
Sr Member
Joseph C. Brown
Sr Member
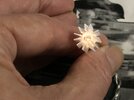
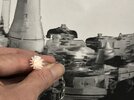
Publiusr, I really don't know what went into the Star Command Defense Drones; given the late-Seventies, they literally could be anything from pure scratchbuild, to converted salad dressing bottles, to modified chair leg attachments. There was a fair amount of vacuform materials used in the interior full size sets of Space Academy (the interior corridor section, the Bridge/Command Deck and the Seeker and Starfire interiors) but whether the model makers had any access to that is yet another thing that I do not know.
Here are some salad dressing bottles that potentially could have served as vacuform bucks; Girards redesigned their classic bottle in 2019, but the prior design was in use from the 1960's - 2010's.
Here are some salad dressing bottles that potentially could have served as vacuform bucks; Girards redesigned their classic bottle in 2019, but the prior design was in use from the 1960's - 2010's.
Attachments
-
 1934 mywifesvariant.jpg50.4 KB · Views: 193
 -
 1970s classic Girards.jpg84.5 KB · Views: 183
 -
 2019 Girards-Salad-Dressing-Bottle.jpg355.6 KB · Views: 206
 -
 2019-03-13 20_39_37-Windows Media Player.jpg672.5 KB · Views: 191
 -
 2019-03-13 20_41_19-Windows Media Player.jpg635.6 KB · Views: 197
 -
 SC Drones07a.jpg185.8 KB · Views: 185
 -
 SC Defense Drone 0002 ed.jpg64.9 KB · Views: 177
 -
 2019-03-13 19_43_18-Windows Media Player.jpg243.5 KB · Views: 183
Joseph C. Brown
Sr Member
Thanks! I've always wanted models of the ships and Star Command since the show aired; 42+ years later, I realized if I wants 'em, I gotta build 'em!Wow...this takes me back to Saturday mornings as a kid!!
Really liking the progress you have on this!

Joseph C. Brown
Sr Member
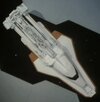
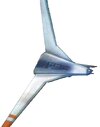
I ran across this illustration the other day, and instantly thought "Awesome!"I don't remember any nozzles or nacelles. All spindizzy I suppose.
Attachments

Joseph C. Brown
Sr Member
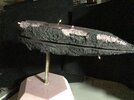
I love Berton's DVD, bought it when it was released. This is some of the additional footage that he has been putting up on YouTube. At 4:33 in the video is a behind the scenes pic from Jason of Star Command, showing Drago's Dragonship - and I'd never seen that pic before! Thank you!
Joseph C. Brown
Sr Member
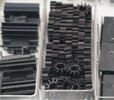
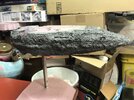
Thank you! Many of the sub-assemblies are complete, or nearly so. The main issues right now are the LEDs ( eight needed) and the big honking seam joining the top and bottom foam sections.
Then, final painting of the planetoid, and placement of all the sub-assemblies, a few pics, and toss it into the truck to go to Wonderfest!
Then, final painting of the planetoid, and placement of all the sub-assemblies, a few pics, and toss it into the truck to go to Wonderfest!
Joseph C. Brown
Sr Member
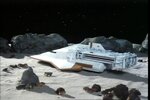
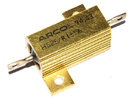
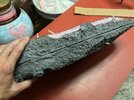
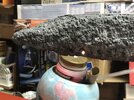
I've been getting a fair amount done, just haven't had any time on the web for posting. The planetoid has 8 lights with heat sinks, research by some others (Patrick King Hill & I & Satazius) have nailed down many of the donor ID's of many parts; some others are of unknown post May-1977 leftover parts. The heat sinks, however, sure look to be some form of the Aavid and the Arcol types used in A New Hope. Since I am half-studio-scaling this model, some scratchbuilding was needed
Attachments

Joseph C. Brown
Sr Member
Joseph C. Brown
Sr Member
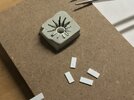
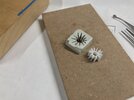
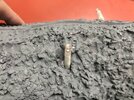
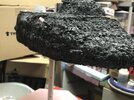
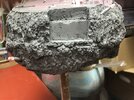
Major goal accomplished; lights and battery pack inside with the upper and lower halves sealed together. I have a plan to deal with that monster seam, and, I remembered to paper-tape wrap the bases of the LED's so that they can get painted to match the planetoid.
Attachments

Joseph C. Brown
Sr Member
If you don't mind me asking, David ___?____ (I mean, great sentiment!) Perhaps you can share the whole name at some point?If I could take years off my life, and give them to David so he could still create—I’d do so without question.
Joseph C. Brown
Sr Member
Joseph C. Brown
Sr Member
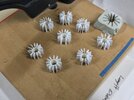
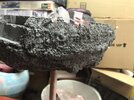
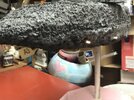
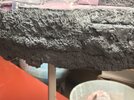
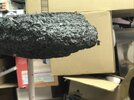
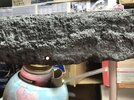
And, the seam filling is done. Perfect?
No.
But, adequate for my purposes - and next up, some dry-brushing of other grays/greys and some light shades of brown, then onto the ventral structures. Those were always pretty obscured, so... some liberties just might get taken.
No.
But, adequate for my purposes - and next up, some dry-brushing of other grays/greys and some light shades of brown, then onto the ventral structures. Those were always pretty obscured, so... some liberties just might get taken.
Attachments
Similar threads
- Replies
- 14
- Views
- 1,639
- Replies
- 1
- Views
- 223