Joseph C. Brown
Sr Member
Space Academy Planetoid build in 1/2 studio scale, the build files!
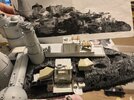
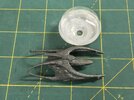
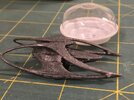
I actually saw many of the Saturday morning TV episodes when they aired, in the Fall season of 1977. Jason of Star Command followed along in 1978 and '79, and the shows were in re-runs for a long time on Saturday morning TV, well into the 1980's. From a sci-fi modeler perspective, the spacecraft modeling was outstanding, given the low budget and time constraints. Lou Scheimer's book said that he could only afford to hire part the MCA-57 team, and made it plain in a video interview that he had minimal budget to work with. My best guess is that they (Jonathan Erland, Lorne Peterson, and Paul Huston(sp?) )used a fair number of leftover parts from their Star Wars model kit boxes. What I am doing is making screencaps from the DVD set, printing out sections at the scale I am building, and trying match near-equivalent small scale parts to that.
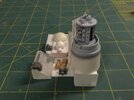
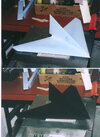
The actual filming effects miniature was 4 feet long (48 inches or 1.336m). The planetoid miniature that I am building here is 22 inches long, approximately half studio scale. That means scratch building virtually the whole thing; very few off-the-shelf items will be compatible without modifications. This meant using lots of ‘found’ parts to be kit-bashed and tweaked into shape.
Why that size? I deeply admire and respect the modelers who tackle the 4-foot and larger builds, but, my home just has no room for that… and moving to a larger house just to have space for the models is something that my awesome wife (huge sci-fi fan herself!) just says: “No”.
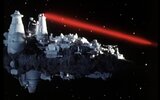
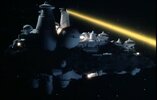
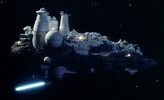
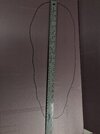
Some quickie math, since I am simply a happier modeler when I have an inkling of the scale I am working with. Based on screen captures of the televised program from DVD's and the hard work of the gentlemen E. James Small and Patrick King Hill, the width of a Seeker was determined to be 18 feet.
Using that to determine the maximum width of the hanger bay, I get a width of 126 feet. Using the best available side view of the Academy planetoid showing the length of the Academy and the hangers, I arrive at an approximate overall length of 20,800 feet. My build is 22 inches long, giving me a scale of 1/11093. Roughly, that is.
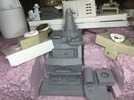
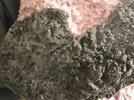
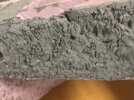
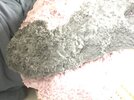
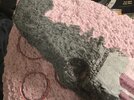
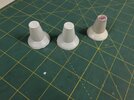
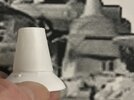
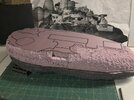
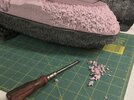
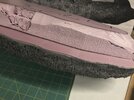
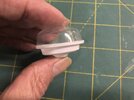
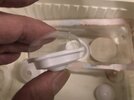
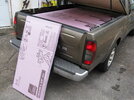
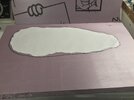
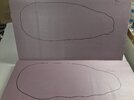
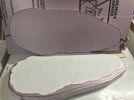
Have determined the length and size of my build, I got started by getting a new sheet XPS foam (Extruded Polystyrene foam). Its very light weight, easy to form and sculpt, and can be attached in layers with a variety of adhesives. The surface can be textured with sanding, and with a number of sculpting tools. I am a fan of working with foam; and while foam has it's own unique challenges, it is inexpensive and easy to work. I had determined the overall size and shape of the planetoid, and using a band saw, quickly cut out a top and bottom blank. I used a ceramic kitchen knife for rough shaping as it does not bind up (well, not as much) in the foam the way most other metal blades will - thanks to Robb Merrill for that tip!
*the show itself refers to the "planetoid" and almost never used the word asteroid.
(more as time and schedule allows)
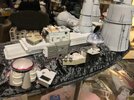
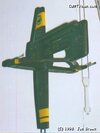
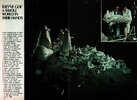
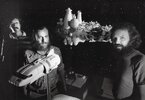
Pics are from: the Oct 29 1977 TV Guide, a PR pic from Filmation via Pamelyn Ferdin's FB page, screencaps from the DVD set, and my creaky I-phone7.
I actually saw many of the Saturday morning TV episodes when they aired, in the Fall season of 1977. Jason of Star Command followed along in 1978 and '79, and the shows were in re-runs for a long time on Saturday morning TV, well into the 1980's. From a sci-fi modeler perspective, the spacecraft modeling was outstanding, given the low budget and time constraints. Lou Scheimer's book said that he could only afford to hire part the MCA-57 team, and made it plain in a video interview that he had minimal budget to work with. My best guess is that they (Jonathan Erland, Lorne Peterson, and Paul Huston(sp?) )used a fair number of leftover parts from their Star Wars model kit boxes. What I am doing is making screencaps from the DVD set, printing out sections at the scale I am building, and trying match near-equivalent small scale parts to that.
The actual filming effects miniature was 4 feet long (48 inches or 1.336m). The planetoid miniature that I am building here is 22 inches long, approximately half studio scale. That means scratch building virtually the whole thing; very few off-the-shelf items will be compatible without modifications. This meant using lots of ‘found’ parts to be kit-bashed and tweaked into shape.
Why that size? I deeply admire and respect the modelers who tackle the 4-foot and larger builds, but, my home just has no room for that… and moving to a larger house just to have space for the models is something that my awesome wife (huge sci-fi fan herself!) just says: “No”.
Some quickie math, since I am simply a happier modeler when I have an inkling of the scale I am working with. Based on screen captures of the televised program from DVD's and the hard work of the gentlemen E. James Small and Patrick King Hill, the width of a Seeker was determined to be 18 feet.
Using that to determine the maximum width of the hanger bay, I get a width of 126 feet. Using the best available side view of the Academy planetoid showing the length of the Academy and the hangers, I arrive at an approximate overall length of 20,800 feet. My build is 22 inches long, giving me a scale of 1/11093. Roughly, that is.
Have determined the length and size of my build, I got started by getting a new sheet XPS foam (Extruded Polystyrene foam). Its very light weight, easy to form and sculpt, and can be attached in layers with a variety of adhesives. The surface can be textured with sanding, and with a number of sculpting tools. I am a fan of working with foam; and while foam has it's own unique challenges, it is inexpensive and easy to work. I had determined the overall size and shape of the planetoid, and using a band saw, quickly cut out a top and bottom blank. I used a ceramic kitchen knife for rough shaping as it does not bind up (well, not as much) in the foam the way most other metal blades will - thanks to Robb Merrill for that tip!
*the show itself refers to the "planetoid" and almost never used the word asteroid.
(more as time and schedule allows)
Pics are from: the Oct 29 1977 TV Guide, a PR pic from Filmation via Pamelyn Ferdin's FB page, screencaps from the DVD set, and my creaky I-phone7.
Attachments
-
 x OCT 29 1977 Issue OF TV Guide 13.jpg6.3 MB · Views: 418
 -
 1977 2021 Pamelyn Ferdin files pic 001.jpg247.2 KB · Views: 408
 -
 IMG_0007.JPG3.5 MB · Views: 333
 -
 IMG_3421.JPG1.7 MB · Views: 281
 -
 IMG_3427.JPG1.6 MB · Views: 256
 -
 IMG_3429.JPG1.5 MB · Views: 274
 -
 IMG_3433.JPG1.6 MB · Views: 265
 -
 IMG_3506.JPG2.4 MB · Views: 285
 -
 IMG_3512.JPG793.2 KB · Views: 395