arborealkey
Active Member
Good evening everyone !
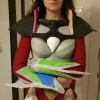
EDIT: COMPLETE (Started on October 4th, finished on November 12th)
(pictures by Lescargotgraphe)
EDIT#2 (july 19th 2017): version 2 is coming
Glass bow thread: https://www.therpf.com/showthread.php?t=279361


ABOUT THE BUILD
I recently decided to build the Glass armor from Skyrim (see the picture below). I'm doing a carved version of the actual armor (I was inspired by some texture mods...).
I'm building this entirely out of EVA foam, with a thickness of 5mm. The grey foam has a density of 100kg/m3 and the black one is 45kg/m3. I shape my foam with a hot gun, assemble the parts with hot glue, sand the edges with a Dremel tool and carve them with a woodburning tool (I don't know the exact name in English, sorry...).
I use black gesso as a primer and paint with acrylics.
Here's my reference picture:

The skirt
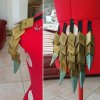
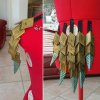
I'm still a bit new to armored cosplays (well, not that new, but...), so I decided to start with something easy: the "scaled skirt thing" (if you know what I'm talking about...). I cut a bunch of little foam pieces. It took forever. I sanded them. It took even longer. Now I have to carve them (see you in ten years). I'm not going to glue them together since I want to achieve a sort of "articulated" look, so they will be attached with some sort of strings.
Here's a picture of some of my scales (a bunch was missing back then), just cut, before sanding them.

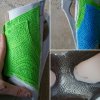
The arms
I made my pattern using the "wrap yourself in tape" method. The green and blue parts are craft foam (for details). I close them with a zipper (this is so NOT game-accurate, though extremely practical).
Carving in progress
It's just random lines since I'm terrible at drawing.
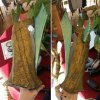
The legs
I used the same method as before. Those ones are also closed with a zipper.

Carving in progress

Paint job in progress (far from complete). I used black gesso as a primer. I usually coat my pieces with wood glue, as it gives a nice smooth texture...I could no do it that time since it tends to clog the details I spent so much time carving... Then I rubbed gold acrylic paint (it's number 350 from Pebeo if anyone is interested). The black gesso isn't only my primer, it's also my undercoat (soooo black).
Since they aren't carved, I primed the glass parts with wood glue, before painting them gold like the rest of the armor. Then, I used various iridescent acrylics (the glass parts are literally impossible to look at under the sun...so shiny). The color of the glass parts changes depending on the light and the angle you look at them.
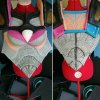
The breastplate
Same as before, I taped myself... The boobs were made on a plastic sphere since I'm totally flat-chested (that's why I like wearing armor...I can choose the size of my breasts...).
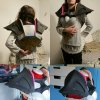
Carved
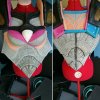
Paint job in progress

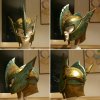
The helmet
Only the beginning for the moment...

The pauldrons
No pattern for those, I just drew a random shape and it kinda worked...
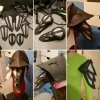
After carving
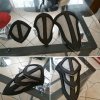
Paint job in progress (not complete)

It looked blue in the kitchen...it looks green outside

I'll update as I make progress ! I will also add more detailed information about the construction, since I just threw a bunch of pictures here without proper explanations for the moment...
EDIT: COMPLETE (Started on October 4th, finished on November 12th)
(pictures by Lescargotgraphe)
EDIT#2 (july 19th 2017): version 2 is coming
Glass bow thread: https://www.therpf.com/showthread.php?t=279361


ABOUT THE BUILD
I recently decided to build the Glass armor from Skyrim (see the picture below). I'm doing a carved version of the actual armor (I was inspired by some texture mods...).
I'm building this entirely out of EVA foam, with a thickness of 5mm. The grey foam has a density of 100kg/m3 and the black one is 45kg/m3. I shape my foam with a hot gun, assemble the parts with hot glue, sand the edges with a Dremel tool and carve them with a woodburning tool (I don't know the exact name in English, sorry...).
I use black gesso as a primer and paint with acrylics.
Here's my reference picture:
The skirt
I'm still a bit new to armored cosplays (well, not that new, but...), so I decided to start with something easy: the "scaled skirt thing" (if you know what I'm talking about...). I cut a bunch of little foam pieces. It took forever. I sanded them. It took even longer. Now I have to carve them (see you in ten years). I'm not going to glue them together since I want to achieve a sort of "articulated" look, so they will be attached with some sort of strings.
Here's a picture of some of my scales (a bunch was missing back then), just cut, before sanding them.


The arms
I made my pattern using the "wrap yourself in tape" method. The green and blue parts are craft foam (for details). I close them with a zipper (this is so NOT game-accurate, though extremely practical).

Carving in progress
It's just random lines since I'm terrible at drawing.

The legs
I used the same method as before. Those ones are also closed with a zipper.

Carving in progress

Paint job in progress (far from complete). I used black gesso as a primer. I usually coat my pieces with wood glue, as it gives a nice smooth texture...I could no do it that time since it tends to clog the details I spent so much time carving... Then I rubbed gold acrylic paint (it's number 350 from Pebeo if anyone is interested). The black gesso isn't only my primer, it's also my undercoat (soooo black).
Since they aren't carved, I primed the glass parts with wood glue, before painting them gold like the rest of the armor. Then, I used various iridescent acrylics (the glass parts are literally impossible to look at under the sun...so shiny). The color of the glass parts changes depending on the light and the angle you look at them.

The breastplate
Same as before, I taped myself... The boobs were made on a plastic sphere since I'm totally flat-chested (that's why I like wearing armor...I can choose the size of my breasts...).

Carved

Paint job in progress

The helmet
Only the beginning for the moment...

The pauldrons
No pattern for those, I just drew a random shape and it kinda worked...

After carving

Paint job in progress (not complete)

It looked blue in the kitchen...it looks green outside

I'll update as I make progress ! I will also add more detailed information about the construction, since I just threw a bunch of pictures here without proper explanations for the moment...
Last edited:


