Simulating "gun grip" texture

BornKilr

Sr Member
RPF PREMIUM MEMBER
I did several searches for this and didn't find anything. I am currently making a P08 Luger and an M7 bayonet for costume props. Both of these, as well as a lot of weapons, have a diamond cut texture on the grips. Is there a way to simulate this so that it looks OK? Not looking for screen accuracy obviously, just a close approximation. Keep in mind, I don't have access to milling equipment, just hand and desktop power tools.
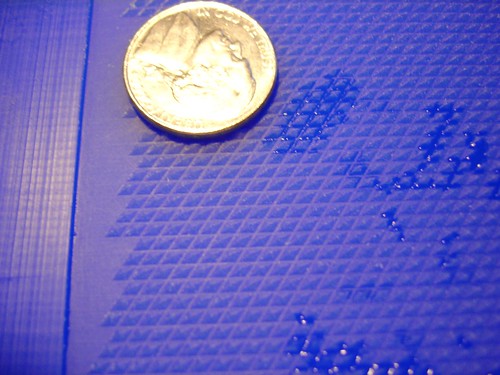
I was able to get close on a flat surface with a triangle file, scoring the plastic in a diamond shaped. Problem is, both of these have curved top surfaces, so I couldn't get that to work. I was thinking maybe painting thru a screen mesh with lighter color, but haven't tried it yet. I figured maybe someone here had tried this before and could help.

Thanks
 
It's called "checkering" and there are hand tools sets you can purchase to do it yourself.

Lots of companies make the tools you need to do it. Here is one:

J&R Engineering

And a vid:
YouTube - ‪Gunstock Checkering‬‏

I'm on a Mac so I got no warnings, but thanx for the heads up.
Well, That would definitely be the way to go, but 50$+ is more than I can spend since these are for a few one time use props that may not even get unholster/sheathed.
Thanks for the info though.

There is a tutorial here on how to apply a carbon fiber paint effect to an old PC mouse, the same technique could possibly be transposed for your grips. Have a look and see what you think:
Maximum PC | Mod Men Episode#2: The Mod Men PC Build Begins!

Like a few of the guys in the comments said, there was no video there.
 
Depending on what material this is being applied to, I had used window screen to finish up this project.

http://www.therpf.com/f9/siver-age-comic-book-villian-gun-103195/

I had simply added a layer of glue on the grips, let it dry and applied another coat of glue over the texture. After all that dried, applied paint over the the model and texture to seal it down.

Damn, that looks great. Did you use metal window screen or the vinyl kind?
 
I'm on a Mac so I got no warnings, but thanx for the heads up.
Well, That would definitely be the way to go, but 50$+ is more than I can spend since these are for a few one time use props that may not even get unholster/sheathed.
Thanks for the info though.


Like a few of the guys in the comments said, there was no video there.

Oh yeah, just figured you'd like to see what the tools look like is all.:thumbsup
 
Oh yeah, just figured you'd like to see what the tools look like is all.:thumbsup

Yeh, I appreciate that. And its amazing how simple some tools turn out to be to create various things. That solves the problem I had on my file drifting out of line. It could probably be done with a simple jig. Have to look into that.
 
I milled a diamond cut pattern for Morganthirteen's first Rexim.
390652050_362552d37a.jpg


I believe he cast it in thin rubber and then used it to make his checkered pattern.
 
anyone got any ideas on a good way to simulate the other style of gun grip, the more sandpapery grips on something like a p228?


like this
1287725580.jpg
 
I milled a diamond cut pattern for Morganthirteen's first Rexim.
390652050_362552d37a.jpg


I believe he cast it in thin rubber and then used it to make his checkered pattern.
That what the actual grip looks like! Perfect. But short of milling, guess I'm gonna have to settle on something else though.

anyone got any ideas on a good way to simulate the other style of gun grip, the more sandpapery grips on something like a p228?


like this
1287725580.jpg

I would think on that, since it is a random pattern, it could be done the same way as adding skin texture and pores to a face sculpt. Roll out thin clay and then press the texture in using texture stamps or a stiff brush, then cast it and use that to mold the pieces in resin or rubber.
 
This might sound really strange, but you might want to look into this product too since it's so relatively easy to do:

31e1PfxSoWL._SL500_AA300_.jpg


Amazon.com: Tub Grip!: Home & Garden

It's called Tub Grip - fairly sturdy once it sets - just have to make sure to keep it well away from any water while it cures. Texture wise, it's almost spot on to what you're going for (sandpapery). I have some of this in my bathtub and it's a marvelous product!

-C
 
I used plastic screen for grips once, but I held it down with tape and bondoed over it. Then let it start to set and carefully removed the screen and had the proper inset pattern. Looked good.

The more modern pattern looks like 'crackle' paint. It's used on cars quite a bit.
 
You mentioned screen mesh. I wonder if you could lay the mesh on the grip and tape it in place at a 45 degree angle, so you get somewhat of a diamond pattern rather than squares. The use filler primer to build up the thickness and pull off the mesh when it dries. The mesh would basically be a mask. If you used mesh like for screen doors you can cut a piece big enough for overlap and since it's actually woven, you could tweak it by pulling it on opposite directions to get more of a diamond shape and less of a square. It's harder to explain it than it would be to show it to you, so I hope this is making sense.
 
You can definitely get the pattern via paint using the screen technique. That way has been used to paint numerous items over the years but practice on a test bunny first.

For the random "rubberized" finish it can be done with paint but I prefer to just spray some rubber bumper finish or undercoat onto the surface then hit it with something that has the same pattern such as vinyl or even a fine dish rag. Once dried, the high spots can be knocked down, paint, done.

With painting the plastic/bakelite pattern, you can get the black on black or any color on color effect by simply spraying the grip with a semi flat finish the go back over it with a plastic bag that has the right amount of paint on it. I just spray flat or matte out of the rattle can and onto the plastic baggie then sort of pad it on the surface with the bag a little bundled up. The fresh paint does two things, it adds the color while blending and removing some of the first layer of paint, wait, thats three things. Consider one a freebie then.
 
This thread is more than 12 years old.

Your message may be considered spam for the following reasons:

  1. This thread hasn't been active in some time. A new post in this thread might not contribute constructively to this discussion after so long.
If you wish to reply despite these issues, check the box below before replying.
Be aware that malicious compliance may result in more severe penalties.
Back
Top