Volguus
New Member
Back in 2007 I bought a Rubies Supreme Vader just to have a Vader costume. I promised myself at that time that it would be little more than a springboard for me to upgrade or replace it to 501st standards, a piece at a time as time and funds permitted. Well, only 4 years later, my first real effort takes shape!
I prefer to be a builder rather than a buyer. Contrary to conventional wisdom, that's not necessarily always the less expensive route, but I just like keeping my skills alive, if not challenged. In this case, challenge was ample, but mostly in finding proper materials and resources in my current residence of Romania. Thus, I thought you might enjoy a photodocumentary of my recent scratchbuild ROTJ Vader chestbox.

It starts with a saw. The round sides of the Chestbox are reportedly best replicated with a strip of quarter-oval moulding that is 1/2" on one side and 1" on the other. I had to assemble the equivalent from two different strips.
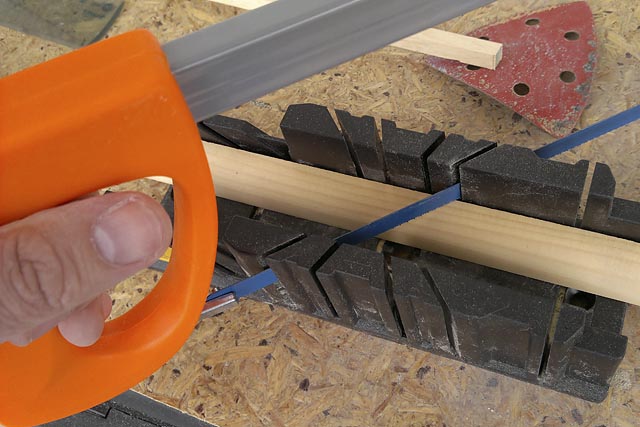
Electric compound miter saw? On my budget?!??
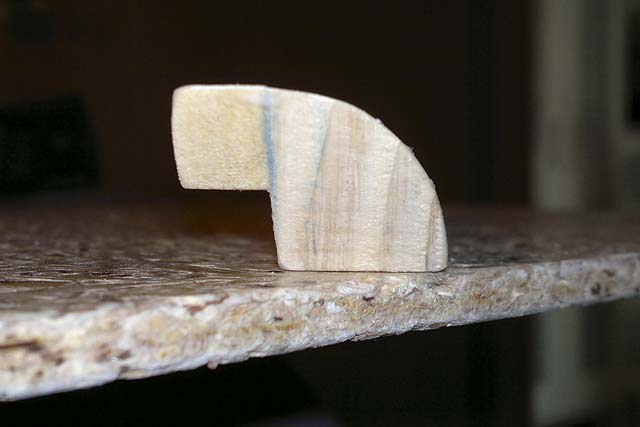
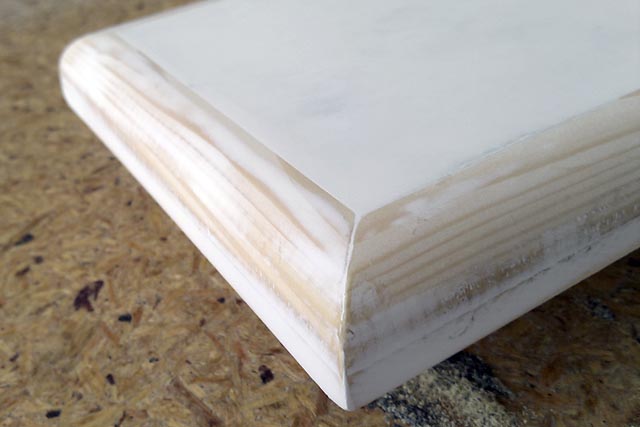
The desired profile of the side pieces.
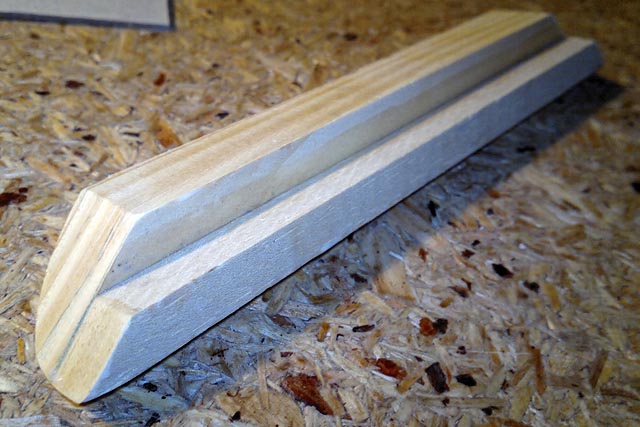
The best method for assembly is to end each piece in a 45-degree angle.
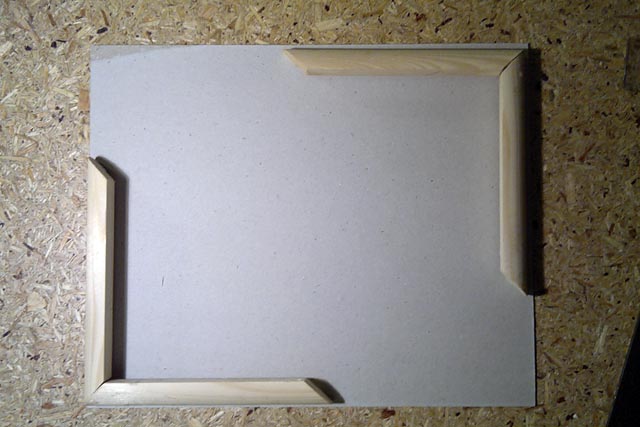
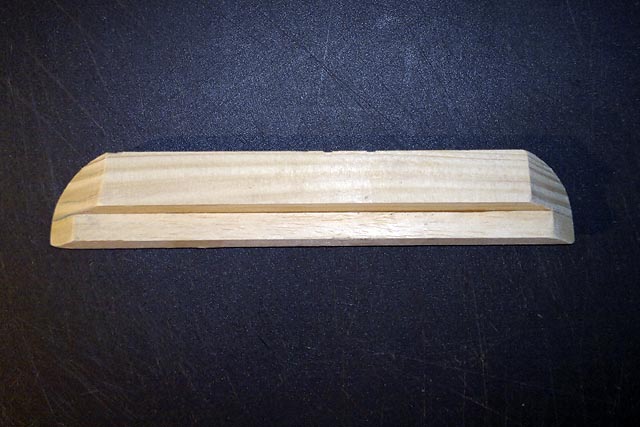
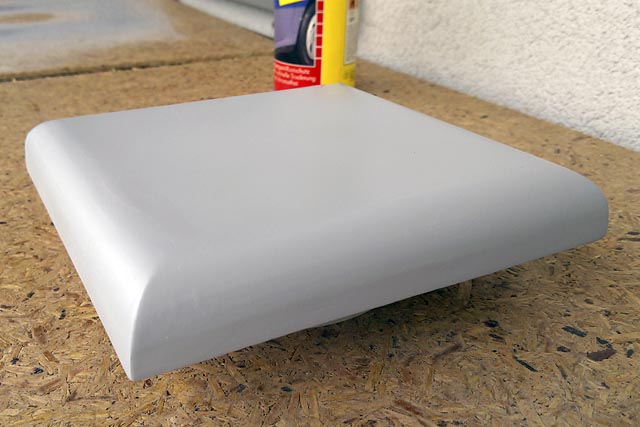
All 4 pieces glued together.

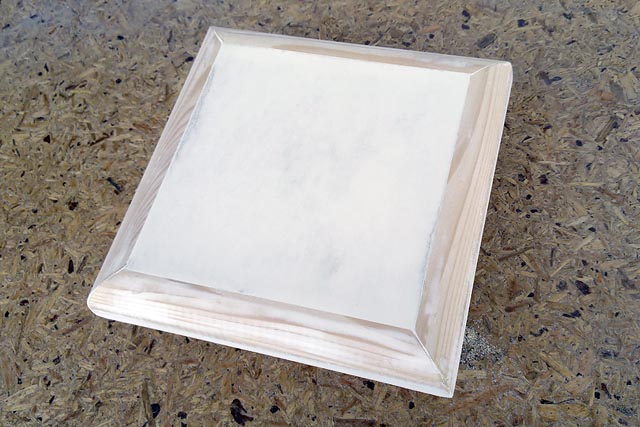
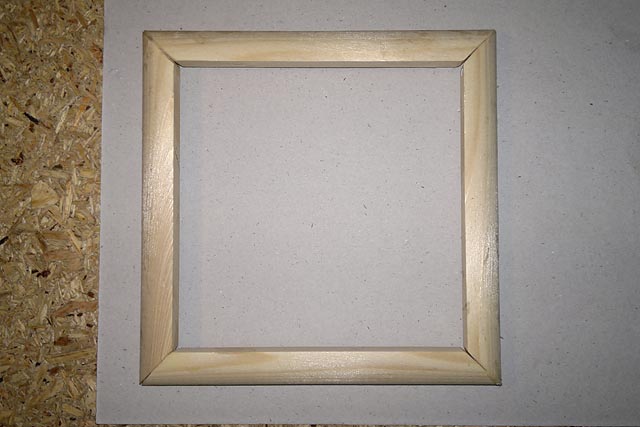
A simple wood square fits in the middle, with a coating of wallboard compound to even out any textures and defects, then sanded smooth.
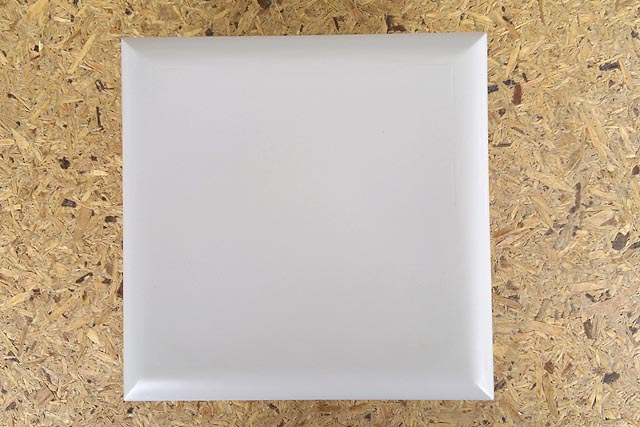
A coating of spray primer to seal the deal!
GREEBLIES
I've personally snapped photos of Vader costumes on exhibit at Celebration IV, Celebration Europe, and Planet Hollywood Las Vegas, and have a good idea what it means to be (and not be!) an accurate ROTJ Vader chestbox.
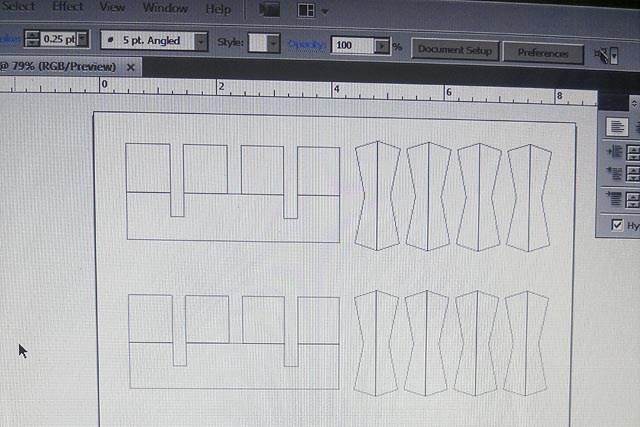
So, if I use Illustrator to create a template for cutout, can I say my parts are made by CAD?")
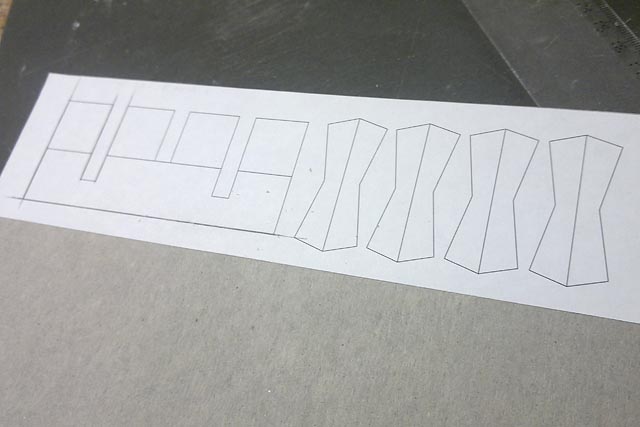
Print on adhesive label, stick it onto cardboard, grab the X-Acto and...
Voila! A pile of ready-to-glue pieces, just waiting for one of my good sneezes.
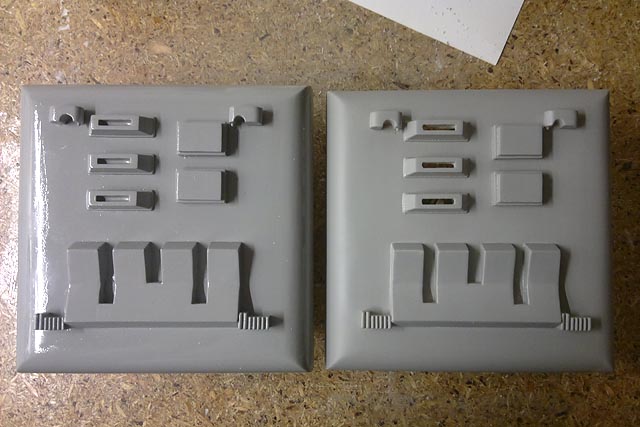
Mercifully skipping the gluing, wallboard compounding, sanding and priming, here is the finished switchplate assembly.
The next few greeblies came about by making cubes of auto-body filler and carving them down. Poor-man's Renshape, I guess.
Do the parts of the Chestbox have cool fan-made names like Ghostbusters Proton Packs do? I can only say these things go on the tops of the round rods on either side of the front. EDIT: In hindsight I will make these a tad bigger overall for future iterations of the Box.
These go on the bottoms of the rods. I've seen many boxes create these greeblies as symmetrical mirror images of each other, and with the taller ends facing outward as often as inward. My photo research puts them both in "L" configuration, as non-aesthetic as that may be.
These are small metal things that fit between switches on the switchplate as well as between the red and blue squares on the upper right of the box. Mine are mostly strip styrene, which, in Romania is: a strip cut from a styrene plumbing access panel cover.
You may know that these small metal things each have a section that is raised to a point as if "pinched" with your fingers. To make those, I pressed two round-handled metal files into a strip of "knead and repair" 2-part epoxy putty...
...and sliced it up like Oscar Mayer Bologna.

And that brings us to our finished Small Metal Things.

Here are the Red and Blue Boxes I spoke of. I refuse to call them lights because of the small fact that THEY DON'T LIGHT! Show me any scene in the Original Trilogy where they do. Lighting them was a fan-made idea that caught on in the costuming realm, to such an extent that it is now confused for canon. Anyway, these are simply cardboard, nothing special. But they were the last bits I needed to scratchbuild.
The Coin Slots (Hmm, I guess there ARE a few parts names after all) and the Rods, I would cheat a little and modify the ones from the Rubies chestbox. That involved molding and casting copies of the originals.
MOLDING
It is, at long last, finally possible to find RTV silicone and casting resin in Romania.
It's simply imported from Germany and, for whatever reason, sold by weight not volume. This prevents a quick comparison with the US prices I know, which temporarily masks just how insanely expensive it is. But I estimate the standard generic RTV to run almost $3.00 per ounce, or about 3 times the OOMOO I used and loved Stateside. Needless to say, I use this stuff VERY sparingly for molding tiny greeblies and other detail-intensive or repeat-need molds. For the bigger stuff, I needed an alternative.
Internet to the rescue! Searching a few other gripes about silicone prices led to a hobby forum that listed a home-made alternative, which ultimately led me to ...wait for it... a 1950 issue of "Popular Mechanics"!
Download the article as a PDF
In summary, before there was RTV silicone, polysulfide, latex (well, maybe not before latex) molding could be done with simple gelatine. PopSci updates the recipe by using glycerine instead of water so it doesn't dry or shrink. As luck would have it, gelatine and glycerine are cheap and plentiful, once you know where to look!
I whipped up a stash to have on hand, "smelting" it into bricks thanks to some Ikea tupperware. And to answer some wags out there, no it isn't flavored! It's raw, "Knox"-style gelatine, which smells strongly of a dog's rawhide chew toy when cooking. Ew.
Back to the box. Test fit of all the components. Looks good!
All the bits meant to be molded at once are glued onto the base box, then sealed with spray lacquer. Into a mold box it goes, and...
Pour on the gel! It works by melting, so don't use hot glue to put anything together, ESPECIALLY the mold box (ask me how I know)! The hot liquid gel will re-melt the hot glue and... (shudder).
And the original pops right out! I don't know if the gel is as release-friendly as RTV. I doubt it. But so far it's let go of every smooth surface it's been up against.
FINISHING
You guys of all people will appreciate the crunch time that is the last few days before Halloween. All my time had to go to finishing this project, leaving none to document it. As it is, I was lucky to remember to take the photos I did during the home stretch. And let's dive right in...
A resin detail coat slushed into the gelatine mold. No mold release, I live in the fast lane. The green "X" is a guideline I used to measure and cut fiberglass for the next step.
The next step... wait for it: Fiberglass (did you guess?)! The particular matting I had was thinner and more flexible than I expected, and I should have done two passes. Didn't realize it until I demolded it, so I just firmed it up with another resin slush coat instead.
The original next to my first pull.
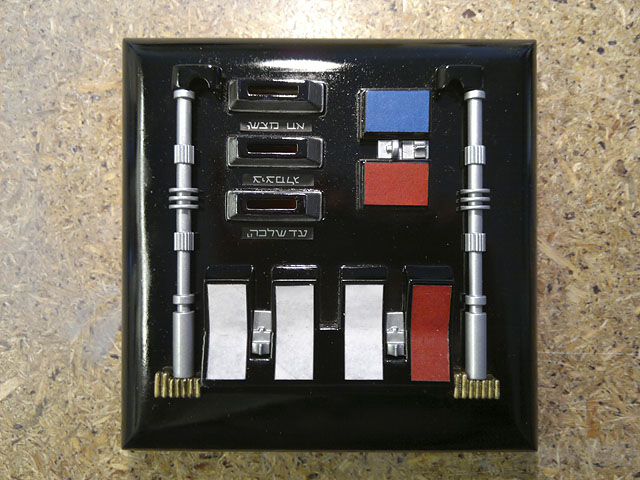
A quick layer of gloss black with computer-printed stickers placeholding for the colored bits. Just to give an overall idea if this actually might work or not.
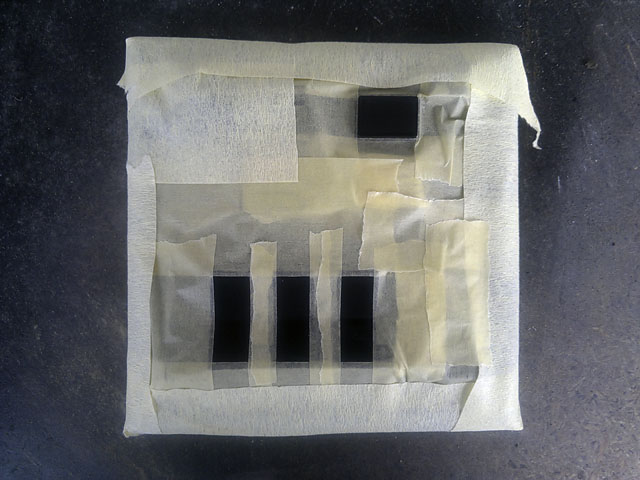
Masking for the final detail painting.
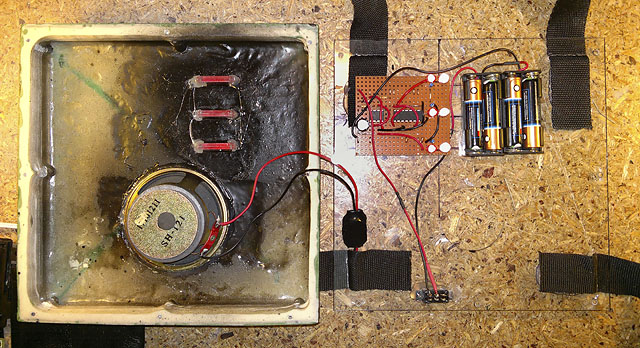
You've got guts, boy! Let's see what color they are! Actually all that went into the box are the lights and the speaker. I wanted to keep the box empty as possible to function well as a speaker cabinet. The lights I wired up myself using the recipe for a "3-Bit Binary Counter" easily Googled. I'm embarrassed to say I wound up having to ape the breadboard diagram onto the perfboard in order to save my sanity trying to create a layout. But it fired up on the first try! The lenses for the coinslots are squares of acrylic the front edges of which I rounded and polished into cylindrical submission.
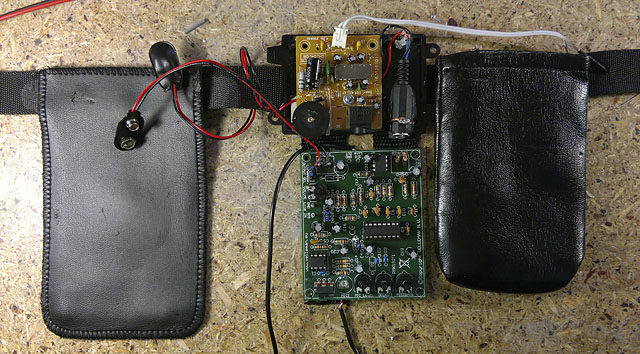
And here's the rest of the artillery, mounted on the chestbox strap to be hidden under the Jedi cloak. From left to right: a pouch for holding 8 AA batteries, a 2W amplifier (upper circuit board) and a digital echo (lower board) for the microphone in the helmet. Next to the upper board you may see the second headphone jack I installed, which takes a patch cord from my Nokia N8, playing a looped MP3 of Vader breathing. The N8 goes into the second pouch on the right.
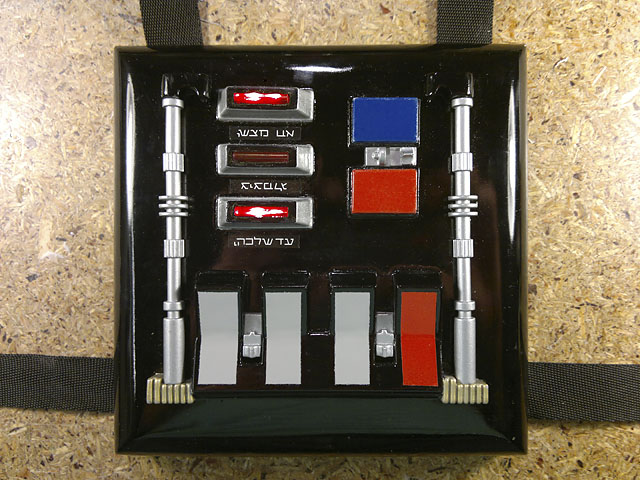
Aaaaaand the money shot! This is not only the box finished, it's actually after an evening's workout at a party with the Romanian Star Wars Fan Club. So there are lots of fingerprints and a few scuffs already, but IMHO that only brings it closer to looking like the screen-used item!
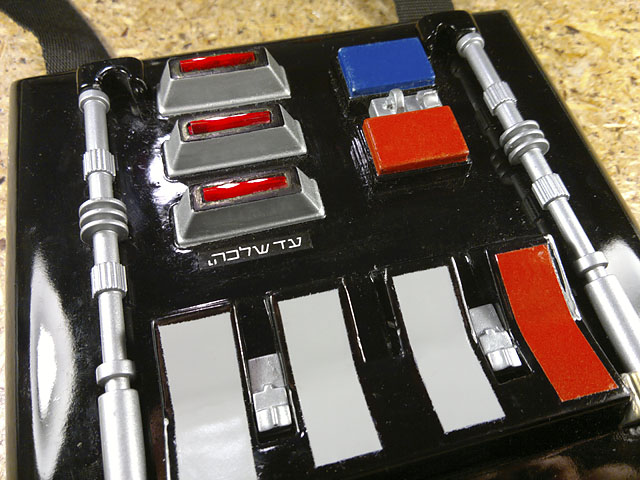
Even at this close range you can't see where I cut holes for the speaker. I trimmed away the two facing vertical sides of the two center switches. Trust me, it was more than enough for room-filling sound with an unexpectedly significant amount of bass. The Nokia churned out over 2 hours of breathing without losing a single tick off the battery meter. All in all, a surprising success! Thanks for reading!
- Ken -
I prefer to be a builder rather than a buyer. Contrary to conventional wisdom, that's not necessarily always the less expensive route, but I just like keeping my skills alive, if not challenged. In this case, challenge was ample, but mostly in finding proper materials and resources in my current residence of Romania. Thus, I thought you might enjoy a photodocumentary of my recent scratchbuild ROTJ Vader chestbox.
It starts with a saw. The round sides of the Chestbox are reportedly best replicated with a strip of quarter-oval moulding that is 1/2" on one side and 1" on the other. I had to assemble the equivalent from two different strips.
Electric compound miter saw? On my budget?!??
The desired profile of the side pieces.
The best method for assembly is to end each piece in a 45-degree angle.
All 4 pieces glued together.
A simple wood square fits in the middle, with a coating of wallboard compound to even out any textures and defects, then sanded smooth.
A coating of spray primer to seal the deal!
GREEBLIES
I've personally snapped photos of Vader costumes on exhibit at Celebration IV, Celebration Europe, and Planet Hollywood Las Vegas, and have a good idea what it means to be (and not be!) an accurate ROTJ Vader chestbox.
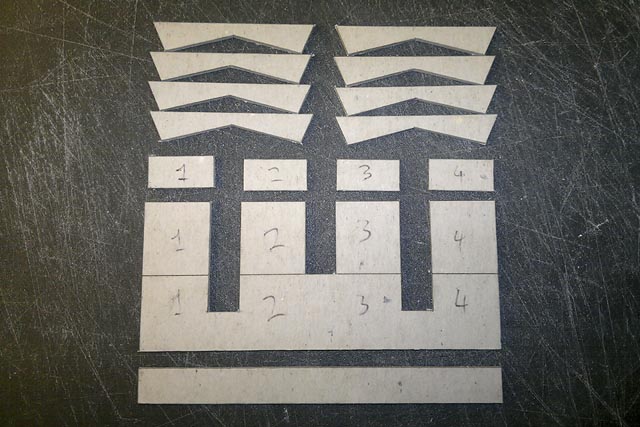
So, if I use Illustrator to create a template for cutout, can I say my parts are made by CAD?
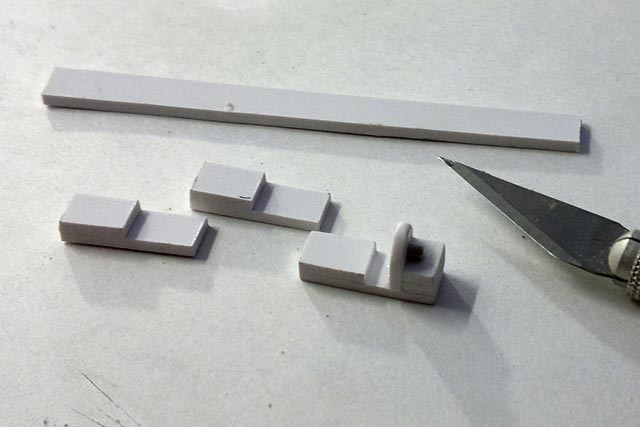
Print on adhesive label, stick it onto cardboard, grab the X-Acto and...
Voila! A pile of ready-to-glue pieces, just waiting for one of my good sneezes.
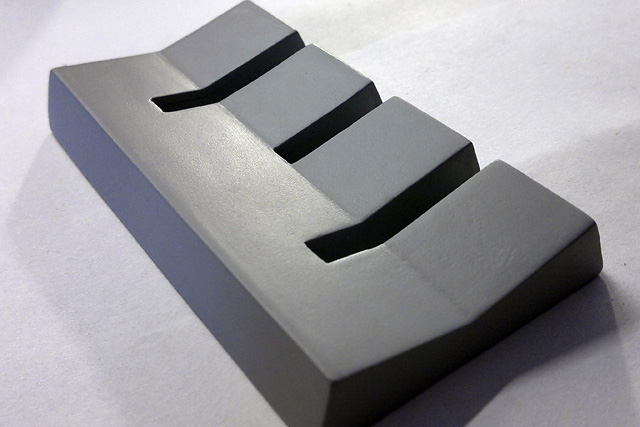
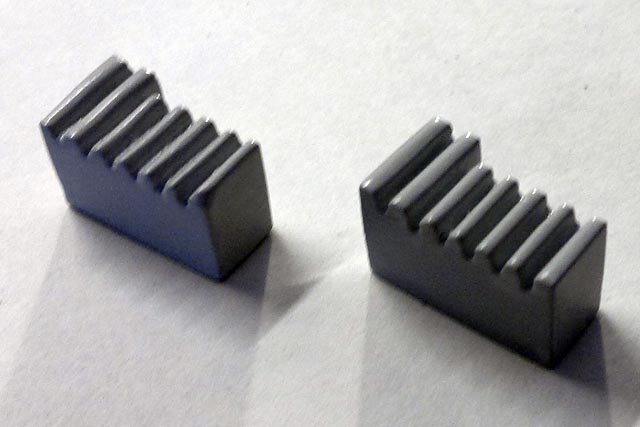
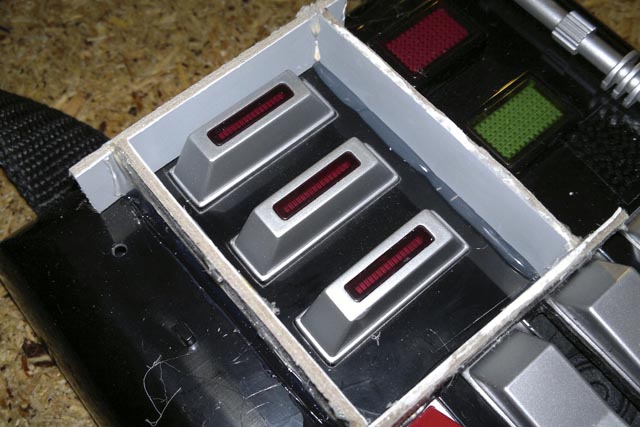
Mercifully skipping the gluing, wallboard compounding, sanding and priming, here is the finished switchplate assembly.
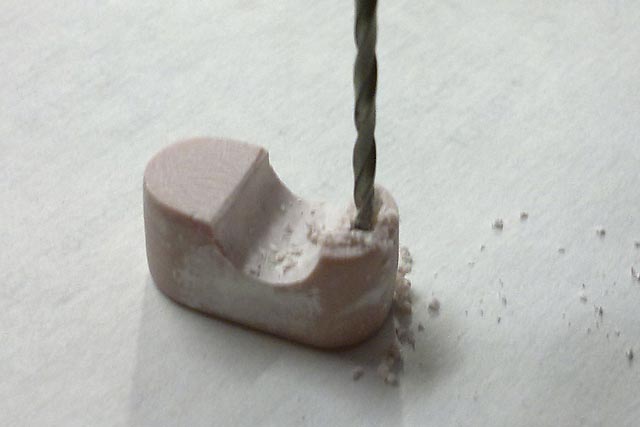
The next few greeblies came about by making cubes of auto-body filler and carving them down. Poor-man's Renshape, I guess.
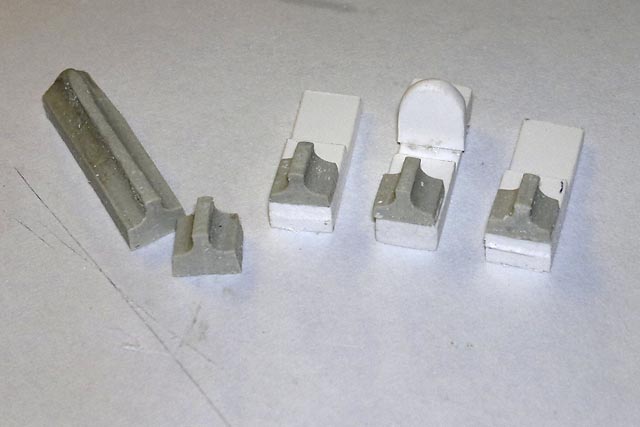
Do the parts of the Chestbox have cool fan-made names like Ghostbusters Proton Packs do? I can only say these things go on the tops of the round rods on either side of the front. EDIT: In hindsight I will make these a tad bigger overall for future iterations of the Box.
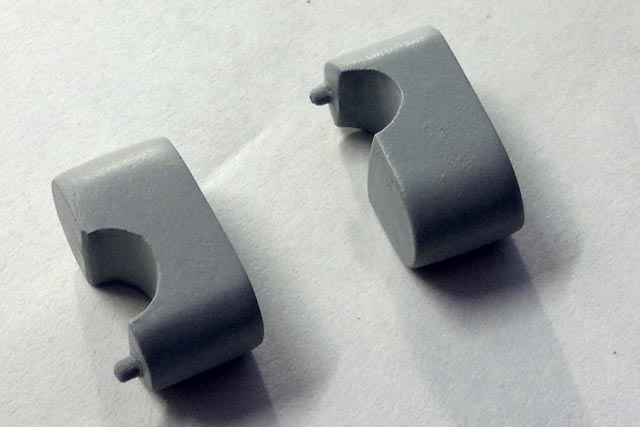
These go on the bottoms of the rods. I've seen many boxes create these greeblies as symmetrical mirror images of each other, and with the taller ends facing outward as often as inward. My photo research puts them both in "L" configuration, as non-aesthetic as that may be.
These are small metal things that fit between switches on the switchplate as well as between the red and blue squares on the upper right of the box. Mine are mostly strip styrene, which, in Romania is: a strip cut from a styrene plumbing access panel cover.
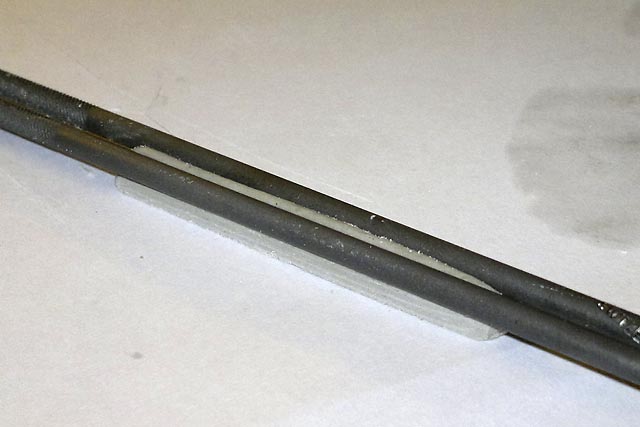
You may know that these small metal things each have a section that is raised to a point as if "pinched" with your fingers. To make those, I pressed two round-handled metal files into a strip of "knead and repair" 2-part epoxy putty...
...and sliced it up like Oscar Mayer Bologna.
And that brings us to our finished Small Metal Things.
Here are the Red and Blue Boxes I spoke of. I refuse to call them lights because of the small fact that THEY DON'T LIGHT! Show me any scene in the Original Trilogy where they do. Lighting them was a fan-made idea that caught on in the costuming realm, to such an extent that it is now confused for canon. Anyway, these are simply cardboard, nothing special. But they were the last bits I needed to scratchbuild.
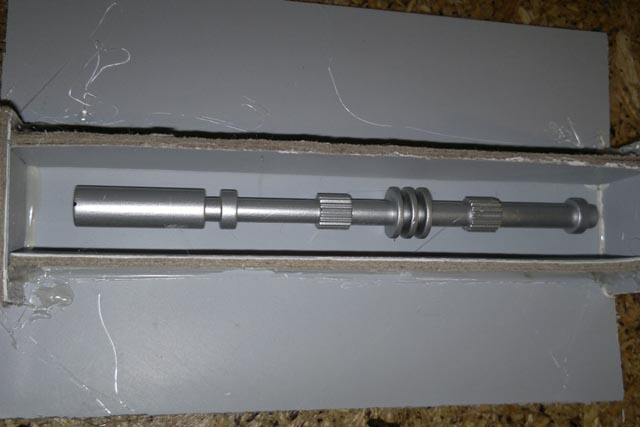
The Coin Slots (Hmm, I guess there ARE a few parts names after all) and the Rods, I would cheat a little and modify the ones from the Rubies chestbox. That involved molding and casting copies of the originals.
MOLDING
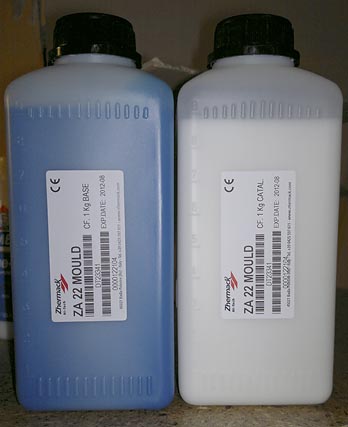
It is, at long last, finally possible to find RTV silicone and casting resin in Romania.
It's simply imported from Germany and, for whatever reason, sold by weight not volume. This prevents a quick comparison with the US prices I know, which temporarily masks just how insanely expensive it is. But I estimate the standard generic RTV to run almost $3.00 per ounce, or about 3 times the OOMOO I used and loved Stateside. Needless to say, I use this stuff VERY sparingly for molding tiny greeblies and other detail-intensive or repeat-need molds. For the bigger stuff, I needed an alternative.
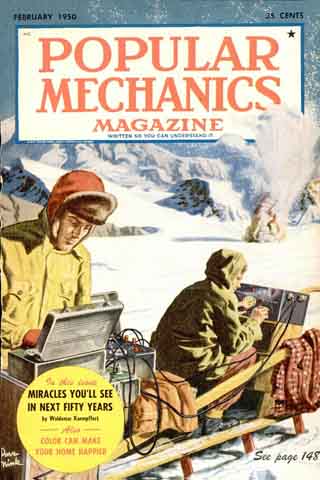
Internet to the rescue! Searching a few other gripes about silicone prices led to a hobby forum that listed a home-made alternative, which ultimately led me to ...wait for it... a 1950 issue of "Popular Mechanics"!
Download the article as a PDF
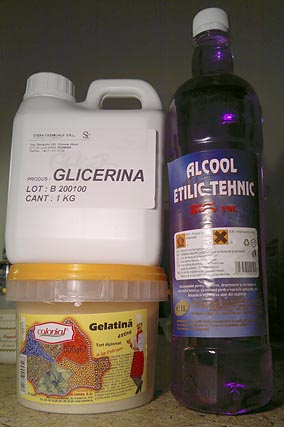
In summary, before there was RTV silicone, polysulfide, latex (well, maybe not before latex) molding could be done with simple gelatine. PopSci updates the recipe by using glycerine instead of water so it doesn't dry or shrink. As luck would have it, gelatine and glycerine are cheap and plentiful, once you know where to look!
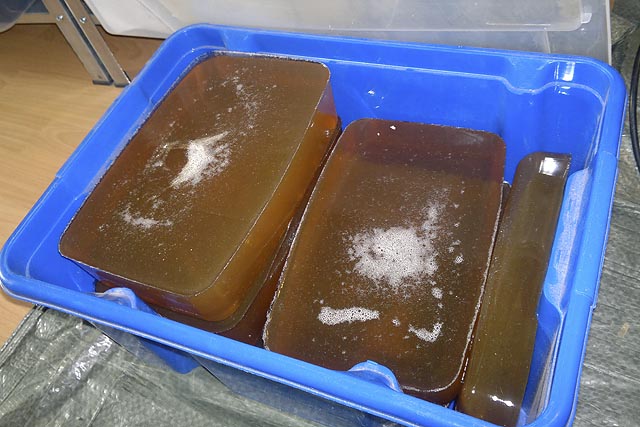
I whipped up a stash to have on hand, "smelting" it into bricks thanks to some Ikea tupperware. And to answer some wags out there, no it isn't flavored! It's raw, "Knox"-style gelatine, which smells strongly of a dog's rawhide chew toy when cooking. Ew.
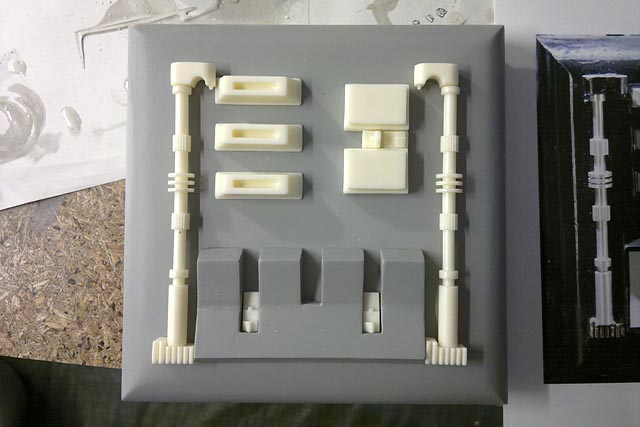
Back to the box. Test fit of all the components. Looks good!
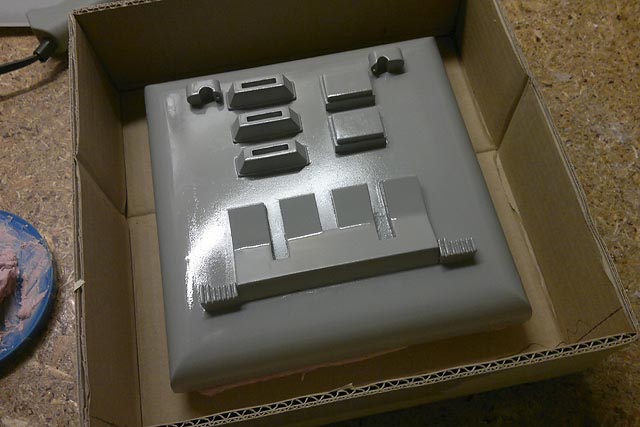
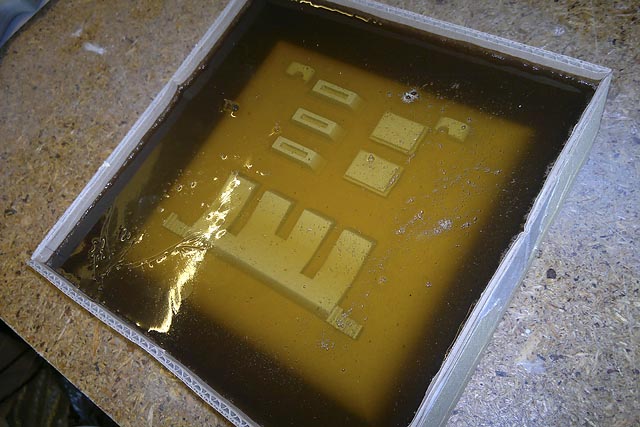
All the bits meant to be molded at once are glued onto the base box, then sealed with spray lacquer. Into a mold box it goes, and...
Pour on the gel! It works by melting, so don't use hot glue to put anything together, ESPECIALLY the mold box (ask me how I know)! The hot liquid gel will re-melt the hot glue and... (shudder).
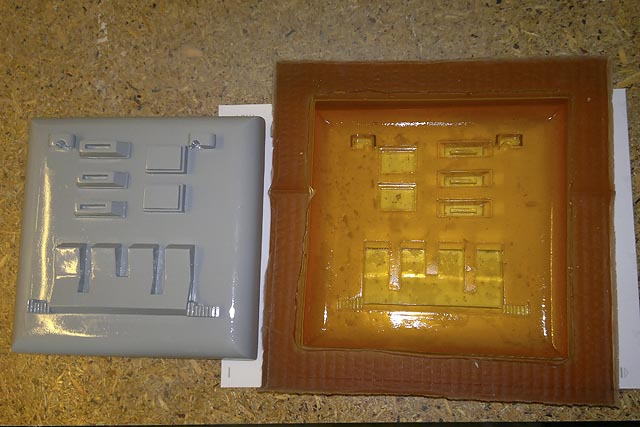
And the original pops right out! I don't know if the gel is as release-friendly as RTV. I doubt it. But so far it's let go of every smooth surface it's been up against.
FINISHING
You guys of all people will appreciate the crunch time that is the last few days before Halloween. All my time had to go to finishing this project, leaving none to document it. As it is, I was lucky to remember to take the photos I did during the home stretch. And let's dive right in...
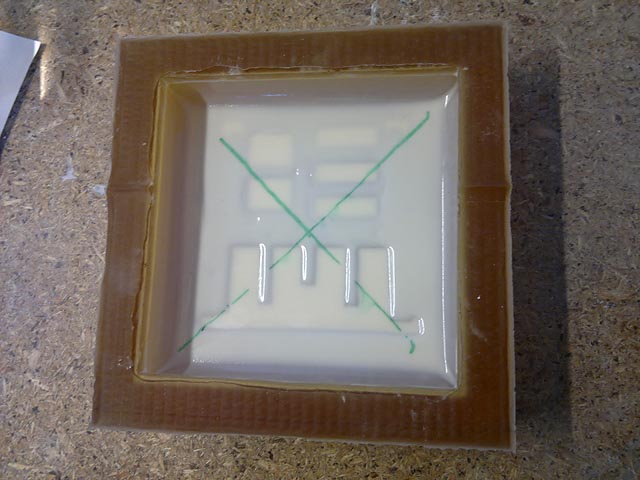
A resin detail coat slushed into the gelatine mold. No mold release, I live in the fast lane. The green "X" is a guideline I used to measure and cut fiberglass for the next step.
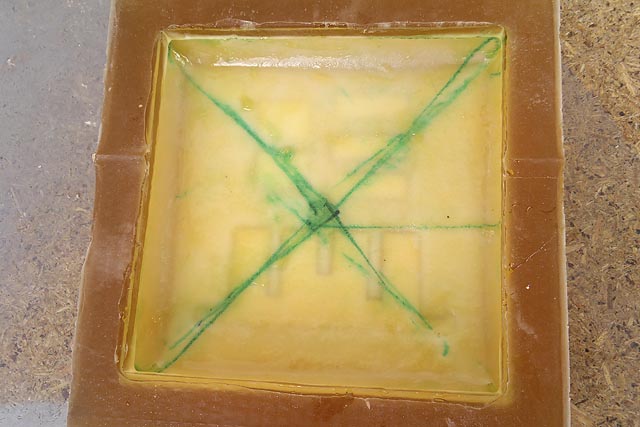
The next step... wait for it: Fiberglass (did you guess?)! The particular matting I had was thinner and more flexible than I expected, and I should have done two passes. Didn't realize it until I demolded it, so I just firmed it up with another resin slush coat instead.
The original next to my first pull.
A quick layer of gloss black with computer-printed stickers placeholding for the colored bits. Just to give an overall idea if this actually might work or not.
Masking for the final detail painting.
You've got guts, boy! Let's see what color they are! Actually all that went into the box are the lights and the speaker. I wanted to keep the box empty as possible to function well as a speaker cabinet. The lights I wired up myself using the recipe for a "3-Bit Binary Counter" easily Googled. I'm embarrassed to say I wound up having to ape the breadboard diagram onto the perfboard in order to save my sanity trying to create a layout. But it fired up on the first try! The lenses for the coinslots are squares of acrylic the front edges of which I rounded and polished into cylindrical submission.
And here's the rest of the artillery, mounted on the chestbox strap to be hidden under the Jedi cloak. From left to right: a pouch for holding 8 AA batteries, a 2W amplifier (upper circuit board) and a digital echo (lower board) for the microphone in the helmet. Next to the upper board you may see the second headphone jack I installed, which takes a patch cord from my Nokia N8, playing a looped MP3 of Vader breathing. The N8 goes into the second pouch on the right.
Aaaaaand the money shot! This is not only the box finished, it's actually after an evening's workout at a party with the Romanian Star Wars Fan Club. So there are lots of fingerprints and a few scuffs already, but IMHO that only brings it closer to looking like the screen-used item!
Even at this close range you can't see where I cut holes for the speaker. I trimmed away the two facing vertical sides of the two center switches. Trust me, it was more than enough for room-filling sound with an unexpectedly significant amount of bass. The Nokia churned out over 2 hours of breathing without losing a single tick off the battery meter. All in all, a surprising success! Thanks for reading!
- Ken -