You are using an out of date browser. It may not display this or other websites correctly.
You should upgrade or use an alternative browser.
You should upgrade or use an alternative browser.
Scrap-built spaceship
- Thread starter Wouldchop
- Start date
postmanpat
Sr Member
Fantastic imagination. The spaceship looks great!!! Once you put the primer on it, it really brought it to life.
Wouldchop
Active Member
Scrap-built spaceship, the crate
Wauw, i didnt expect so much appreciation.
Thanks y'all, its very motivating!
The built is split up in a few parts to keep things manageable. The building order is becoming an issue, as i've only foreseen the final mounting..
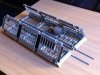
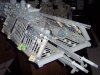
First i focus on the collapsible crate. Its reinforced by a tube, because its floppy vinyl. I like the shape and worn down look. Not ideal to work with but it can make a nice mandible like structure, at the front of the ship.

The bashed parts fit nicely when the sides are folded. Pieces of fresnelsheet for small led armatures.
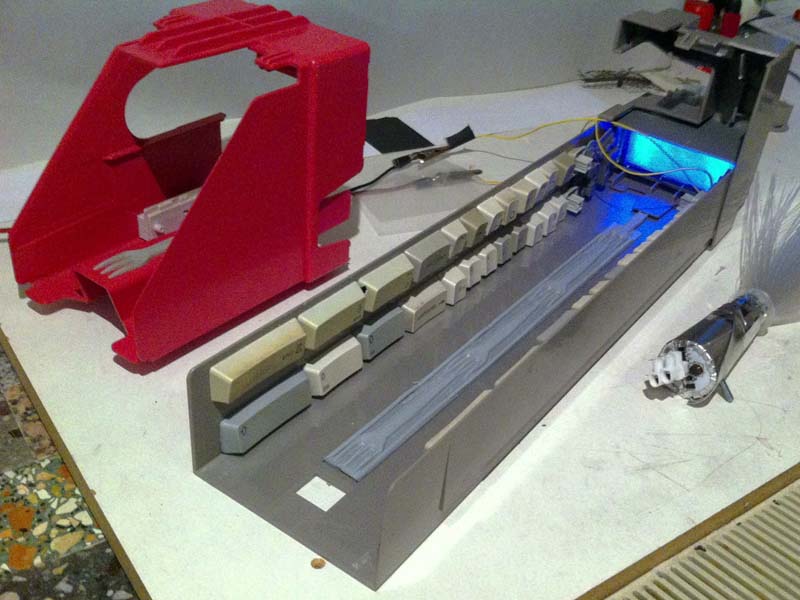
I like the gap to be open over the whole length so the wiring had to be split up.

The smallest armatures i've made yet.

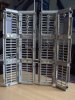
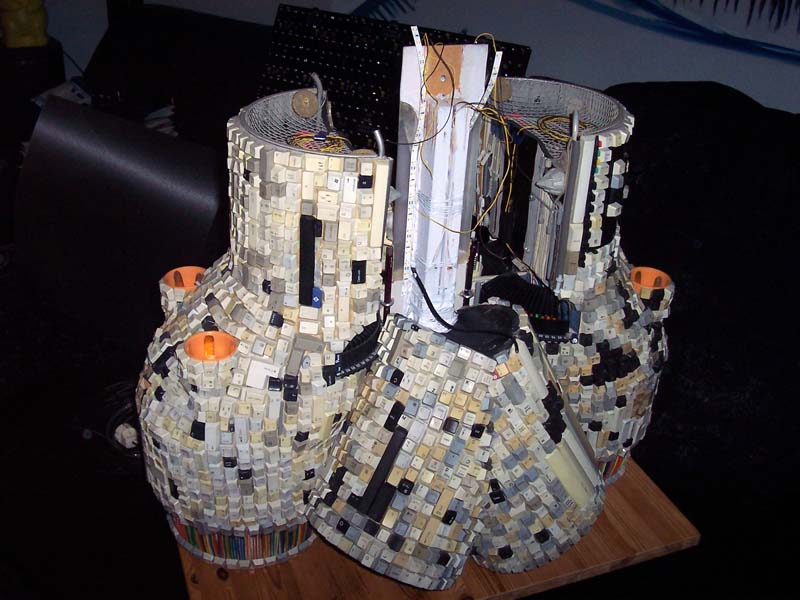
The diskettes make great finely detailed scrap. I searched and found heaps of black diskettes around. But i wanted beige/grey, and after a good search i now have 31 MBs worth of beige diskette-scrap:thumbsup.
This is turning into quite an abstract thing now. Not really sure what i'm building. Just trying to make it look interesting and consistent in scale.

When everything is mostly symmetrical, i like to add one asymmetric feature.
This bottlecap has nice scribing along the side. I scratched out some more, making it translucent when lit.

Party inside, ..

...business on the outside.

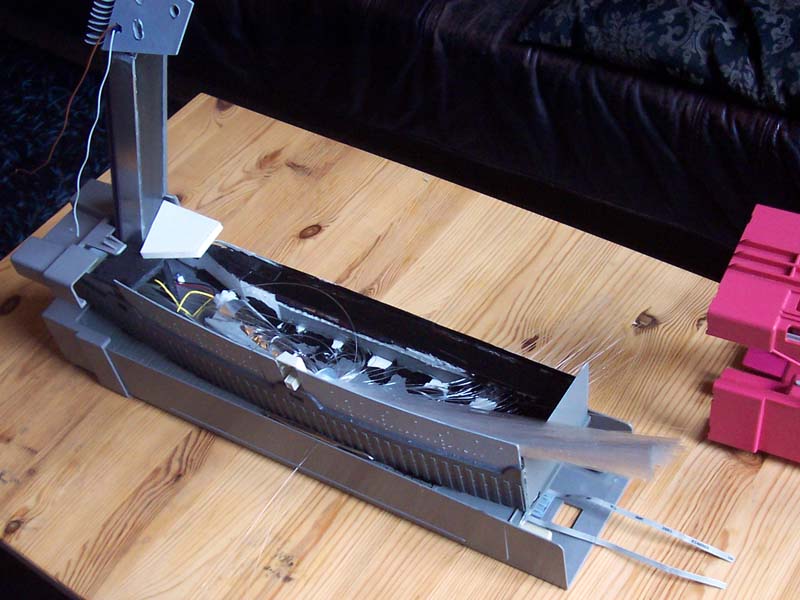
Its about ready for mounting, on to the next part.
The cardridge will be up now.

Wauw, i didnt expect so much appreciation.
Thanks y'all, its very motivating!
The built is split up in a few parts to keep things manageable. The building order is becoming an issue, as i've only foreseen the final mounting..
First i focus on the collapsible crate. Its reinforced by a tube, because its floppy vinyl. I like the shape and worn down look. Not ideal to work with but it can make a nice mandible like structure, at the front of the ship.
The bashed parts fit nicely when the sides are folded. Pieces of fresnelsheet for small led armatures.
I like the gap to be open over the whole length so the wiring had to be split up.
The smallest armatures i've made yet.
The diskettes make great finely detailed scrap. I searched and found heaps of black diskettes around. But i wanted beige/grey, and after a good search i now have 31 MBs worth of beige diskette-scrap:thumbsup.
This is turning into quite an abstract thing now. Not really sure what i'm building. Just trying to make it look interesting and consistent in scale.
When everything is mostly symmetrical, i like to add one asymmetric feature.
This bottlecap has nice scribing along the side. I scratched out some more, making it translucent when lit.
Party inside, ..
...business on the outside.
Its about ready for mounting, on to the next part.
The cardridge will be up now.
Attachments

Last edited:
Master Tej
Active Member
Just keep along! This hasn't lost any awesomeness!
- Master Tej -
- Master Tej -
Wouldchop
Active Member
Scrap-built spaceship, the cartridge
Thank you Master Tej, i will!
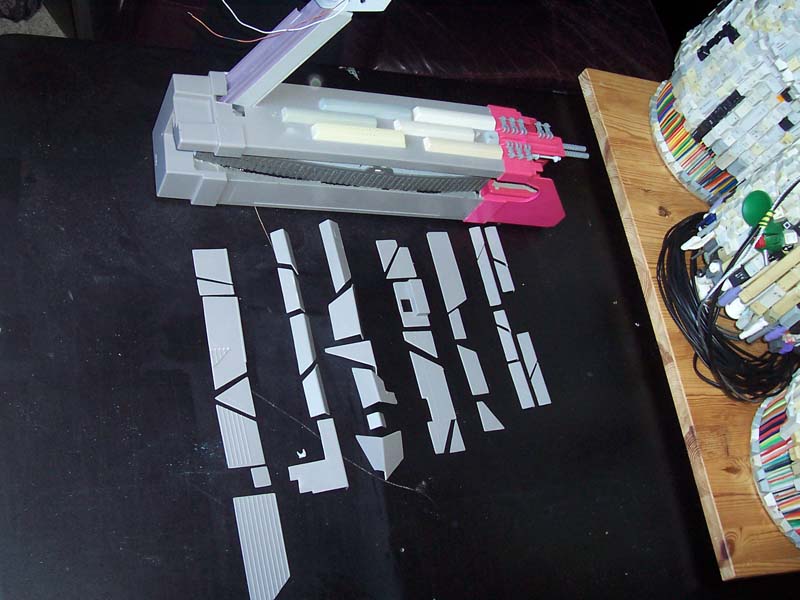
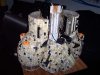
To continue building weird parts, i started on the cartridge. Without the context of the rest its kinda abstract, but again just trying to keep it consistent.
Its a disposable colour cartridge i saved from the bin. I like to turn it into a asymmetric "claw" like feature.
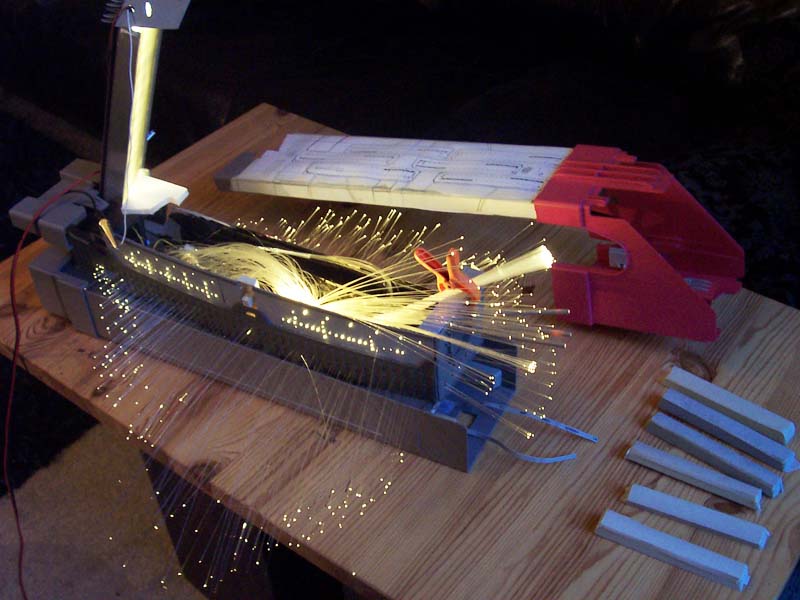
First some wires and leds in the backend. Its the backwall of the inside-view, lit through fresnelsheets and a blue filter.

Testing the light. I'd like a gloomy lit view inside. There's a transparant sheet on the floor to make it more shiny.
Another fibre tree is waiting.
Some more detailing and preparing the closing of the "bay".

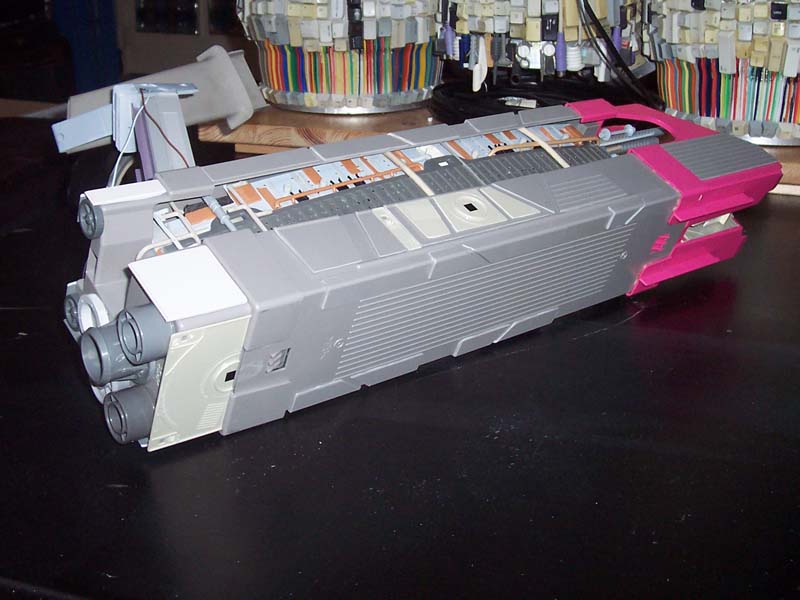
The buid-up panels come from a scanner bed. It will make a curved wall. Could be funny, so i went for it.
The inside is painted black with a brush. Against lightleaks and it sticks the fibres.
And i fitted a ledstrip in the arm.
Explosion!
I had to plan what to do on top, to count out the fibres and close this thing.
Here it is, more or less the way it will be connected to the ship; with the mounting plate horizontal.
Mirrored to the otherside is a smaller arm. I plan to build a similar part, but smaller, so it will have disproportionate claws like a shrimp.
I figured its a good idea to have a little animism in my spaceshipdesign.")
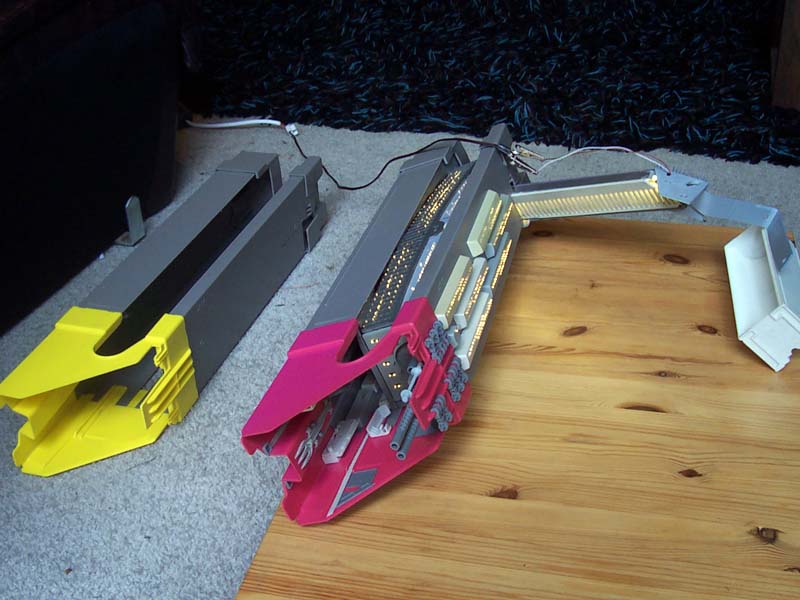
I have a "spare" cartridge. Maybe i use that to make panelling.
I hope it all turns out the way i'm imagining it..
Just keep along! This hasn't lost any awesomeness!
- Master Tej -
Thank you Master Tej, i will!
To continue building weird parts, i started on the cartridge. Without the context of the rest its kinda abstract, but again just trying to keep it consistent.
Its a disposable colour cartridge i saved from the bin. I like to turn it into a asymmetric "claw" like feature.
First some wires and leds in the backend. Its the backwall of the inside-view, lit through fresnelsheets and a blue filter.
Testing the light. I'd like a gloomy lit view inside. There's a transparant sheet on the floor to make it more shiny.
Another fibre tree is waiting.
Some more detailing and preparing the closing of the "bay".
The buid-up panels come from a scanner bed. It will make a curved wall. Could be funny, so i went for it.
The inside is painted black with a brush. Against lightleaks and it sticks the fibres.
And i fitted a ledstrip in the arm.
Explosion!
I had to plan what to do on top, to count out the fibres and close this thing.
Here it is, more or less the way it will be connected to the ship; with the mounting plate horizontal.
Mirrored to the otherside is a smaller arm. I plan to build a similar part, but smaller, so it will have disproportionate claws like a shrimp.
I figured its a good idea to have a little animism in my spaceshipdesign.
I have a "spare" cartridge. Maybe i use that to make panelling.
I hope it all turns out the way i'm imagining it..
Attachments


Last edited:
Dragontomb
Well-Known Member
Awesome build, especially since it is an orginal creation.
Wouldchop
Active Member
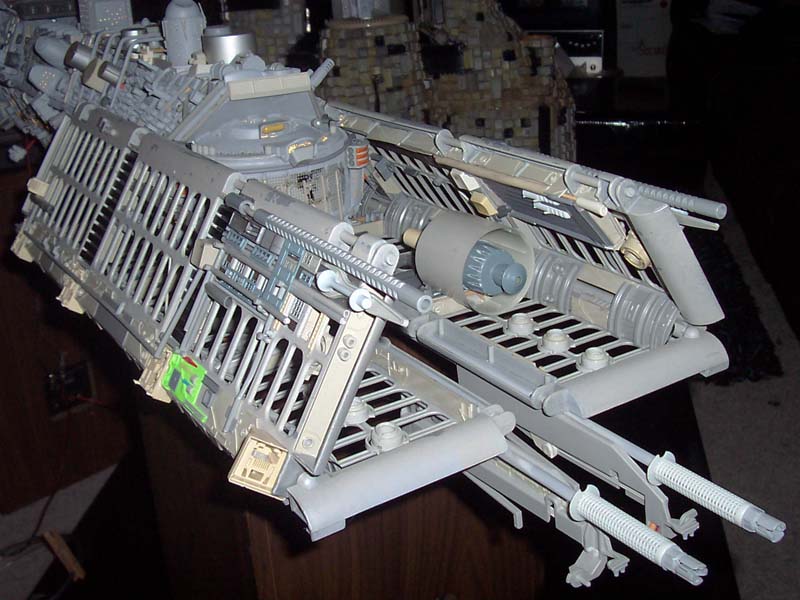
Scrap-built spaceship, frontend
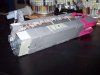
This weekend i was able to spend some time and actually assemble parts.
Its cool, things are nearing the final stages and i get an idea of the final look.
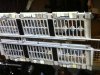
Time to connect the crate to the rack. I prepared it all to be perfectly aligned and solid. On the underside there's nuts and i'm glueing the sides.
First i used the "wrong" glue where the ridge meets the round side. Tore it quickly to reveal the contact area; prepared that and glued with 2components glue.

A bit tricky; a cantilever out of floppy vinyl. But it seems to work out.
Good cos its gonna have to bear some more scrap.
Giving the underside some teeth.
Nice fit of the printertray-sides-scrap on the antenna thingies.
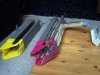
Knolling my scrappies for the side.
Almost there. Just for fun i trew a bit of fluor in there.
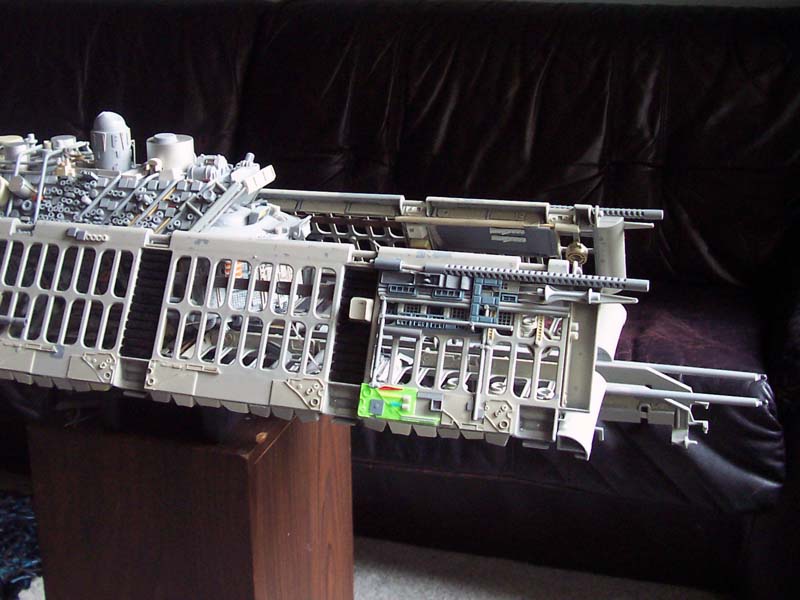
I dont know what to do yet with the antennas. I'm on the lookout for a tube or a plug or whatever, to put over the led.
I'm taking my time, but its coming together.
:cool
This weekend i was able to spend some time and actually assemble parts.
Its cool, things are nearing the final stages and i get an idea of the final look.
Time to connect the crate to the rack. I prepared it all to be perfectly aligned and solid. On the underside there's nuts and i'm glueing the sides.
First i used the "wrong" glue where the ridge meets the round side. Tore it quickly to reveal the contact area; prepared that and glued with 2components glue.
A bit tricky; a cantilever out of floppy vinyl. But it seems to work out.
Good cos its gonna have to bear some more scrap.
Giving the underside some teeth.
Nice fit of the printertray-sides-scrap on the antenna thingies.
Knolling my scrappies for the side.
Almost there. Just for fun i trew a bit of fluor in there.
I dont know what to do yet with the antennas. I'm on the lookout for a tube or a plug or whatever, to put over the led.
I'm taking my time, but its coming together.
:cool
Attachments


falloffalot
New Member
Dude, that is a beast :eek
Great use of every day tat
Great use of every day tat
NextGenMaker
Member
I didn't like this thing at first, but it is really growing on me. Nice work.
This is coming along very nicely.
Good work!
"Use the fork, Luke!"
Cheers
Eddie
ARGH... you beat me to it!
AMAZING! This is such a bizarre build - meant with the highest respect and honors!
Wouldchop
Active Member
ARGH... you beat me to it!
AMAZING! This is such a bizarre build - meant with the highest respect and honors!
:lol
Yeah i'm learning the ways of the fork. Just hope it doesn't penetrate me. ta dum tsshh
Wouldchop
Active Member
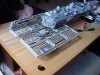
Scrap-built spaceship, rounding up the parts
I thought, whenever designing a spaceship and halfway through the model looks like a giant spacegun, one is on the right track.

Actually i would like a picture in the fashion of themodelshopman in his inspiring threat, http://www.therpf.com/f10/studio-scale-tantive-iv-73694/ but not quite there yet.
Time to round up all the parts and do a last bit of work on em, before the grand unification.
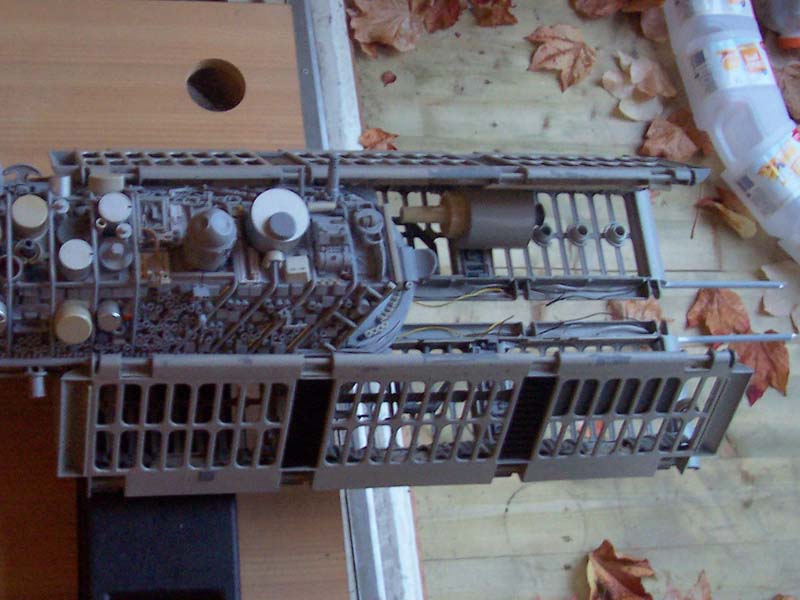
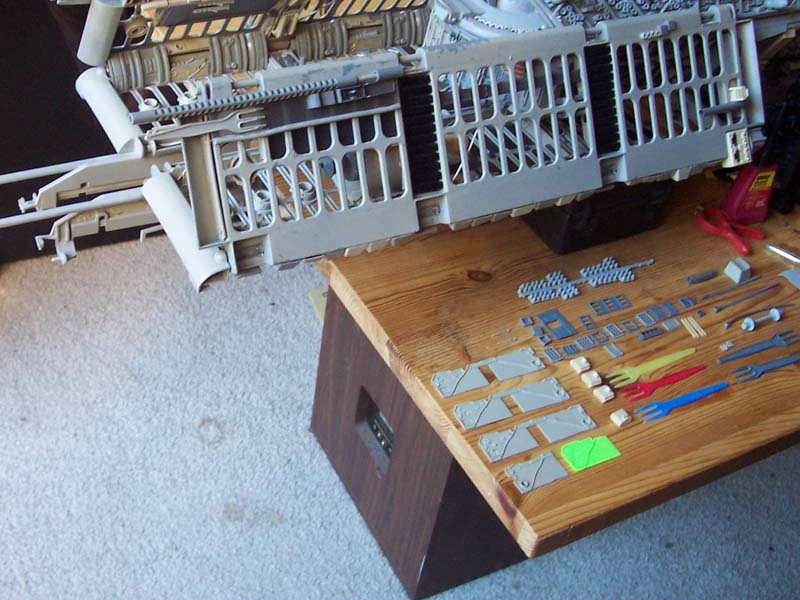
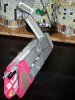
First some stuff i found to dress up the front some more.
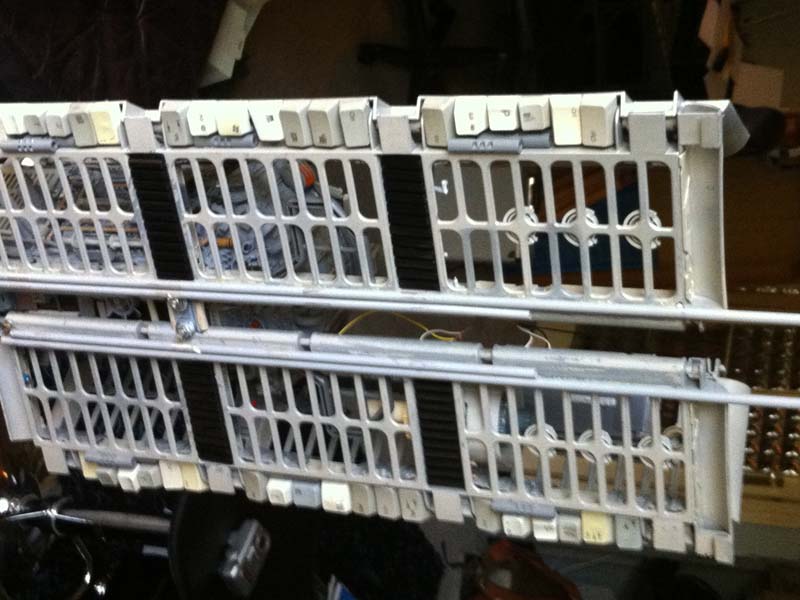
Then from way back, the engine array.
I used some transparant sheet and white paint to house the 7 Watts of ledd strip. It should distribute the light evenly.
All ready for connecting as far as it goes.
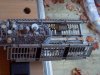
Next the arm(s). I cut up the sparecartridge, so i can have panels around the corner, and made a nice puzzle of it.
Backend. Sorry for the flash.
The idea is evenly panelled areas and a more busy techy area.
Otherside.

The thing dangling will be a disproportionate opposite arm. Dustbuster-utensil
I can only fix it when all is hanging, to adjust for the sag and align it. Thats for later.
First thing now is connecting the big parts, probably not in this year..
But i'm sure i'll have liftoff in 2014!
Best wishes to everyone!
I thought, whenever designing a spaceship and halfway through the model looks like a giant spacegun, one is on the right track.
Actually i would like a picture in the fashion of themodelshopman in his inspiring threat, http://www.therpf.com/f10/studio-scale-tantive-iv-73694/ but not quite there yet.
Time to round up all the parts and do a last bit of work on em, before the grand unification.
First some stuff i found to dress up the front some more.
Then from way back, the engine array.
I used some transparant sheet and white paint to house the 7 Watts of ledd strip. It should distribute the light evenly.
All ready for connecting as far as it goes.
Next the arm(s). I cut up the sparecartridge, so i can have panels around the corner, and made a nice puzzle of it.
Backend. Sorry for the flash.
The idea is evenly panelled areas and a more busy techy area.
Otherside.
The thing dangling will be a disproportionate opposite arm. Dustbuster-utensil
I can only fix it when all is hanging, to adjust for the sag and align it. Thats for later.
First thing now is connecting the big parts, probably not in this year..
But i'm sure i'll have liftoff in 2014!
Best wishes to everyone!
Attachments


Master Tej
Active Member
Ah, there's the engines! This thing is just so awesome, I can't wait to see it finished!
- Master Tej -
- Master Tej -
Love this kind of stuff! Subscribed!
Wouldchop
Active Member
Liftoff!
Hi again,
After a period of slow progress i finally got back to building.
It took me a while to rearrange my workspace and figure out a way to rig the cables.
I wasnt looking forward to it, but it worked out and now i can go on and finish the ship as a whole.
I went for two hand winches. Elektric would have been nice but w€ll..
this ll do the job.

Elegant and totally inconspicuous..

At last i can assemble it all.
connecting the fuselage to the engine. glued.

Landing bay bolted to the fuselage. aligning it later.
All ready for liftoff!

There she flies!
Through the cramped reaches of my workspace.

Quite a big moment really.
Its huge and just fits here to work on it.
Not the time for beauty-shots.

Lifted off her "feet" and never to stand again.
Only non atmospheric flight from now on.

Now i can tend to the joint and cover it with my cool panels.
Its all prepped and thought-out but a bit hard to reach.

back at it.
Hi again,
After a period of slow progress i finally got back to building.
It took me a while to rearrange my workspace and figure out a way to rig the cables.
I wasnt looking forward to it, but it worked out and now i can go on and finish the ship as a whole.
I went for two hand winches. Elektric would have been nice but w€ll..
this ll do the job.
Elegant and totally inconspicuous..
At last i can assemble it all.
connecting the fuselage to the engine. glued.
Landing bay bolted to the fuselage. aligning it later.
All ready for liftoff!
There she flies!
Through the cramped reaches of my workspace.
Quite a big moment really.
Its huge and just fits here to work on it.
Not the time for beauty-shots.
Lifted off her "feet" and never to stand again.
Only non atmospheric flight from now on.
Now i can tend to the joint and cover it with my cool panels.
Its all prepped and thought-out but a bit hard to reach.
back at it.
Last edited:
Simply awesome. Glad to see you're back to it.
metal wood
Well-Known Member
Simply awesome. Glad to see you're back to it.
fully agreed! happy to see this back!
Similar threads
- Replies
- 47
- Views
- 2,161