Satele Shan Lightsaber

rogue9607

Active Member
I've lurked on the board here for a while as I worked on a couple of projects and finally have one nearly-complete that I wanted to share.

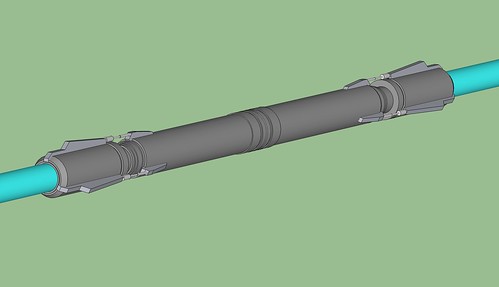
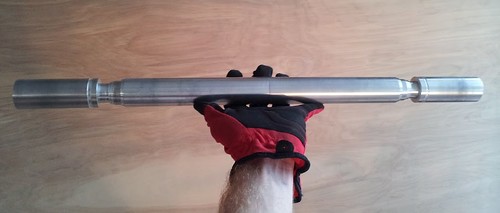
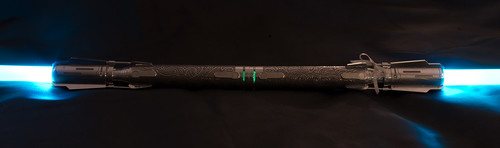
Late last year when SW:TOR launched, my wife saw Satele Shan's lightsaber in the Hope trailer and immediately said "I want her saber, but with a Tiffany Blue blade!" Having never built a saber before, or worked with metal, I initially brushed it off as something crazy I'd never be able to do. However, like many things that sound crazy at first, it planted a seed and soon I found myself researching what went into building a saber. To my amazement, I found myself thinking I could actually do it!

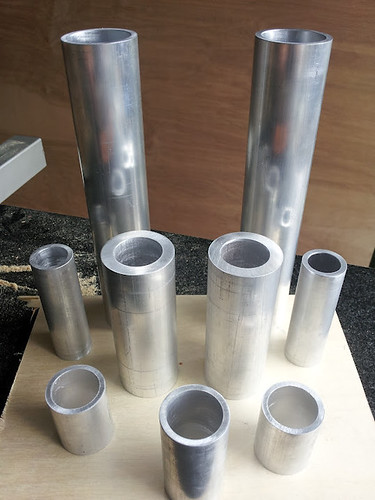
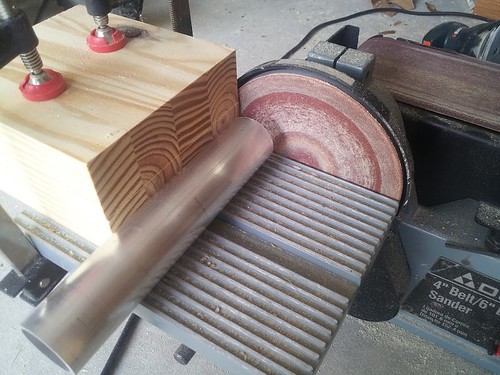
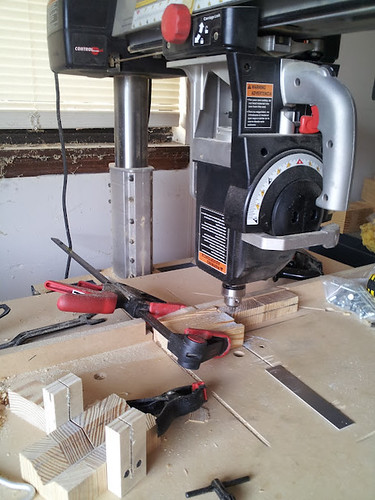
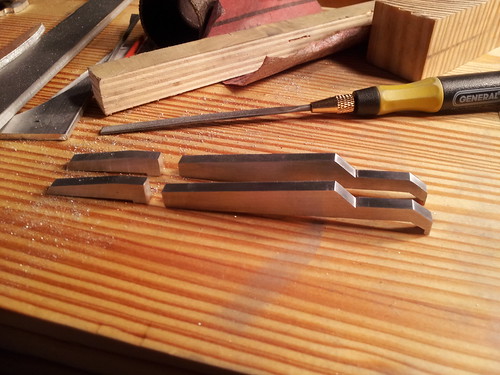
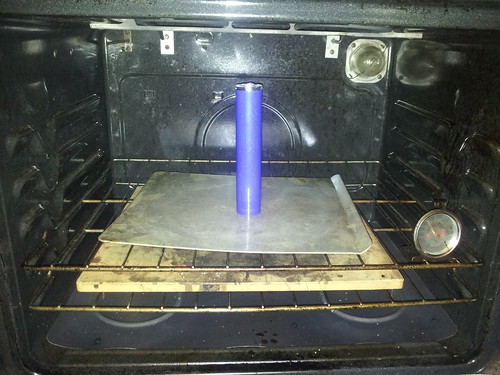
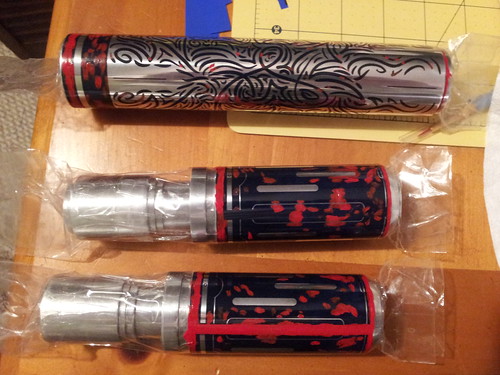
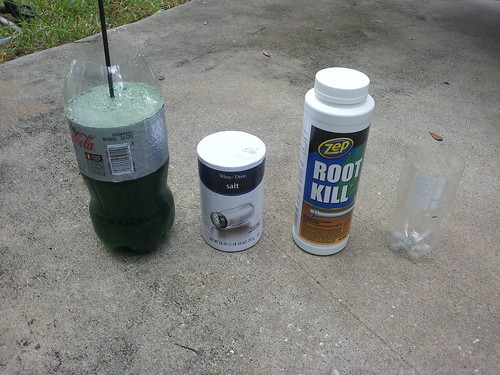
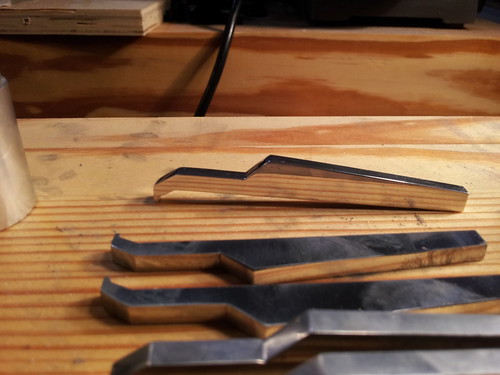
I started with an order of aluminum tubing and sheet aluminum, and after many challenging hours, I managed to assemble a nearly-final product five hours before Celebration VI began. (a deadline I'd been telling myself I would make after having the project slip past my wife's birthday)

My wife has named this saber "Holly" (after "Holly Golightly" from "Breakfast at Tiffany's"). So, I'm proud to present... Holly!


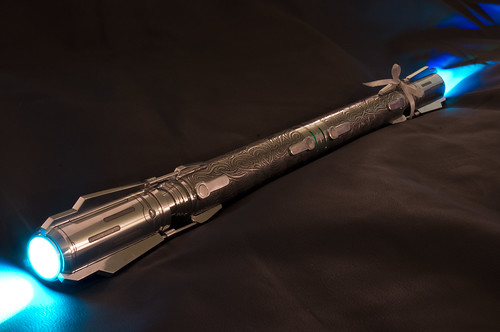
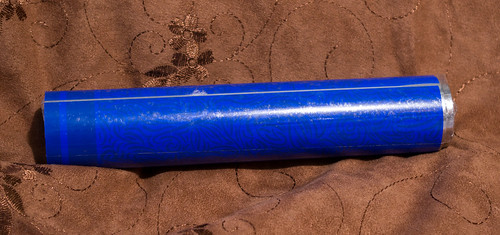
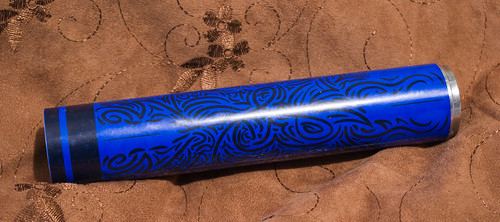
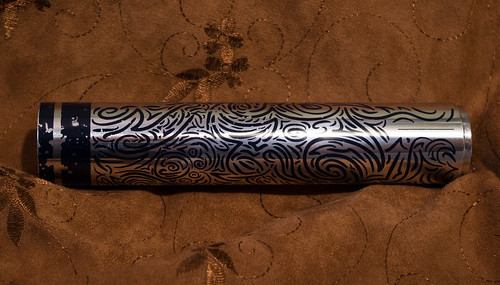
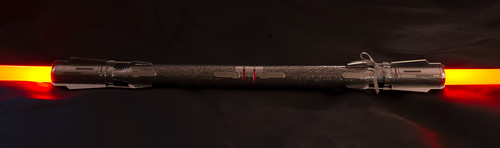
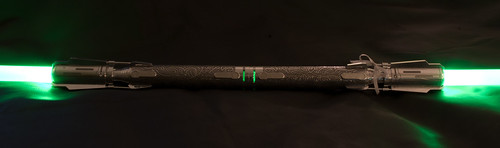
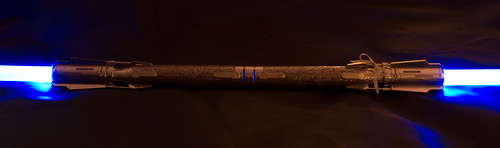
Some of the color options: Tiffany Blue, Red, Green, and Blue


Thanks for looking!
 
Last edited:
Thank you both!

If it's the same Abby, we saw her at CVI and were in awe of her Satele costume. Got a fun shot of her with this saber. :D
 
this is so cool. nice build!
got any production-pictures?

I have quite a few pictures from the process. I'll try to cover it all without going too far overboard...

First, I needed to get a good reference shot to design from, so I broke the Hope trailer into frame-by-frame screenshots. This one was the best I could find and used it as the base for my Sketchup model.


I started with a 2D view to visualize how the different pieces fit together and eventually made a 3D version.


I never got a shot of the materials as the came out of the box, but this was just after I got things cut to rough length.


I should mention that I don't really have any metal-working tools, just woodworking tools. So, I got creative with a lot of my setups/jigs. This was my jig for cutting the tubes to length.


I used a disc sander and a guide block to generally square up/finish the cuts.


Since I lack both a lathe and a mill, I put the radial arm saw to use. I do not recommend this setup, but it ultimately worked. I used a dremel bit along with a series of very thin shims so that I could make *very* small passes.


Eventually I had the grooves all done and dry fit things together to see the general proportion.


The angles on the end were also done on the RAS with lots of small passes.


I rough cut the fin pieces on the band saw and then finished them up with a lot of time filing and sanding.


For the switch bodies, I first cut blocks to the right length/width and then hollowed out the back so they'd sit on the hilt. After that I cut away as much as I could on the bandsaw before finishing them with the belt sander, files, dremel, and grinder.


For the acid etching, I did a ton of testing with different mixtures, resists, etc. This was the results of the last test.


For the resist, I ended up drawing the patterns for the hilt and emitter in illustrator and then printed them out on PNP Blue transfer sheets.


I wrapped each piece with the PNP Blue sheets as tightly as I could and secured with clear packing tape.


It was then time to bake the piece for 15 minutes at 325 degrees.


This is what the piece looked like after baking. The sections of toner get much darker when they transfer to the aluminum.


Removing the transfer sheets shows a decent, but far from perfect transfer.


To fill in the missing sections, I used some Testors model enamel. I also taped off the ends so that acid could not get inside the tubes. I painted the seams between tape and aluminum so the acid would not leak through (something that had been a problem in testing).


This was my etching setup. Water, root kill, salt, and another bottle used as a measuring cup. After etching, I removed the toner/paint resist with acetone.


For the switch buttons, I needed 3/8" discs. I made a scrap piece of aluminum look like swiss cheese and used that as a mask for a spray paint resist.


I went back to the acid to etch around the discs to give myself something to cut/grind/file to.


After some fine tuning, I got everything to sit flush.


I used a series of polishing wheels on a bench grinder (my only power tool purchase for this project) to clean up the pieces before assembly.


I don't have a good writeup for the electronics portion yet, but mostly because that part had some issues and is likely only temporary until I can gather the parts to completely rework it.
 
Last edited:
Pretty darned impressive build here.
Look so crisp clean and amazing and that with limited resources.
 
After seeing and handling this saber in person I have to say the work and attention to detail on this piece is amazing- I'm definitely interested in owning one ;)
 
As am I, that is absolutely gorgeous work. The saber didn't stand out to me in the teaser trailer but I doubt I'll ever forget it now. Great job :)
 
Dude! That is Awesome! :cheers

I Beg of you,
dog32.gif
please go into more detail with the acid etching.:) I have been wanting to do a few of the sabers from The Old Republic and that sort of skill just rockets them to the next level. :thumbsup

Avolow.
 
Looks amazing and I love that you used woodworking tools to do it as that's all we have around here too.
 
Great etching tutorial, I'm going to have to give that a shot here pretty soon. Wonderful build, looks great. I wish all my first efforts turned out so cleanly.
 
Thanks everyone!

I'm actually contemplating making a couple more of these (along with a couple other TOR sabers that I'd like - Orgus Din's saber and the Consular's Birthright Saberstaff) if I can swing a couple of the tools. But first, I need to finish this one which entails a complete electronics gut, which brings me to the sound comment...

I had a sound solution working when this was wired up on a breadboard, but the sound unit I was using was incredibly finicky and really fell below my expectations. When I got it wired up Wednesday night, it freaked out and in the interest of having an assembled saber for CVI, I temporarily dropped sound. I think the CF v6.10 that just released can handle my requirements and will likely use that when I redo the electronics.

A bit more detail on the etching: I first designed the patterns for the emitter and hilt pieces in Illustrator, making anything that should not be etched black. I printed these designs on to "Press-n-Peel Blue" transfer sheets (that are normally used to make DIY circuit boards) with a laser printer. The instructions say to iron the transfer sheets onto the target surface, but an iron was useless for me when working on an aluminum tube. The contact area was incredibly small, and the tube was very efficient at dissipating the heat.

The general idea is that the heat from the iron melts the toner which then bonds to the aluminum. I figured that baking the piece should produce similar results, so I wrapped the transfer sheet as tightly as I could and put it in a 325 degree oven for 15 minutes. The instructions suggested a temperature range for the iron and 325 was the high end, so I used that. The 15 minutes was a guess. I expected the first piece to come out poorly and I'd need to clean it off with acetone and start again adjusting temp/time, but thankfully it actually came out pretty well. When the piece came out of the oven I rolled it for a minute on a flat cutting board for some added pressure (I did a later test without the rolling and didn't notice a significant difference) and then ran water through the tube to cool the whole thing off before peeling the transfer sheet back.

The results were far from perfect, so I needed to touch up the resist. I used a model enamel from Testor and packing tape to seal off the ends of the tubes and create a handle to raise/lower the piece with. The toner tended to have frequent pin holes in solid areas, so those needed to be covered with paint/tape. I tried quite a few different products to make these touch ups (permanent marker, paint pens, spray paint, art markers, etc) but the paint/tape combo seemed to be the best combination of easy application and durability in the acid bath. I did paint the seam between tape and toner since I'd had some issues with leaks during test.

Once everything was touched up and taped off, I prepared the acid bath. (Oh, I did realize that the hilt pieces would float when taped off, so I added some extra tubing inside to add some weight) My final mixture was 7 cups of fluid after adding 1 1/8 cups salt and 1 1/8 cups root killer (copper sulfate) to the water. I just used a chopped up 2L soda bottle, but any glass/plastic container should do. For both hilt pieces, I put the pieces in the acid for a total of 2 minutes (actual time in acid), checking every 30 seconds to make sure the toner wasn't deteriorating. I left the emitters in for 2:45 each since the acid seemed to get significantly weaker. In retrospect, I should've added chemicals to refresh the acid (which I haven't taken the time to refine yet), or just make a fresh batch.

After the acid bath, I rinsed each piece with water then used acetone to remove the toner/paint. Then I lightly buffed each piece and cleaned again with acetone.

Just a couple of disclaimers on this... I'm sure the fumes from this are not healthy, so I'd suggest a well ventilated area. Also, this needs to be disposed of properly and absolutely do not pour it down the drain or put it in contact with any metal that you don't want etched. Finally, I suggest testing on scraps until comfortable with the process before subjecting a piece of hard work to a bath in acid. :)

I'm sure I left stuff out of that... so feel free to ask any questions.
 
Last edited:
Back
Top