Rulebreakers Revell 1/48 Tie Fighter "88" series

Rulebreaker

Active Member
Hello,

i bought this Revell "1/65" Outland Tie Fighter. It was/is on sale on amazon for only 15 Bucks
For 15 Bucks its a great kit, and i can live with the wrong details here and there.
1.jpg

1 Scale Discussion
this is a comparison i found online, i modified it and added more information to it
Tie Size.jpg

so there are three main series
The "108", the "88" and the "75" series, but the pilot is always the same size, regardless of the "series believs"
In my observation the "108" series is correct, because the pilot has a good look trough the viewport. In "75" it looks straight into the fuselage, so no chances to see anything, where the "88" series offers a view trough the upper part of the viewport(wich opens the discussion about turning the viewport)
cockpit comparison.png
not to scale, but u should get the idea, i tried making pictures but i cant get em sharp enough to lets you see something
the "108" also gives the pilot the chance to look up in the mirror, to see whats behind him on the screen
rear view.jpg
I think 1 shows the rear faceing camera, 2 is the chaf dispenser, 3 is the flare dispencer and 4 looks like a ircm

I think scaleing around the viewport is good, but can get improved when taking the pilot too. On the most "planes" it doesnt mather much if its "108" or "88" but on the tie bomber, the pilot cant sit straight
* Finemolds made a beautifuler cockpit compared to the usual vanila thing, but the pilot looks too big - or the "plane" is to small
* Bandai tried to put the pilot lower, reminds me about the/this millenium falcon shot
millenium falcon.jpg
* AMT tried to make the pilot sit lower in a lovely beach chair where you can put your legs in the air and relax
* Revel doesnt even care, they put a 1/40 Pilot in, who is directly looking into the fuselage
i found a rebel pilot in 1/48 on thingy, i made a couple of "view checks" - looks great, but i also ordered a Hasegawa Ground crew in 1/48

2 Unboxing
2.jpg3.jpg4.jpg5.jpg6.jpg7.jpg8.jpg
some sprues are doubled
a whole Tie Fighter was/is included and some retrofit parts for the new Outland Tie Fighter
a small comparison with the AMT Tie Intercepter from "75" series
9.jpg
AMTs 1/32 is from the "108" series, but i could not find a shop in europe(not england) that has it in stock, or is willing to ship to my country

3 Build
10.jpg11.jpg12.jpg13.jpg14.jpg15.jpg16.jpg17.jpg
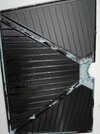
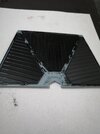
I built and painted it like the instructions says, nothing special, i liked the mold color, so i was only painting the solar panels black, and the cockpit and vieport dark grey/gray.
I tried masking off the wings with tape, but the results were terrible, no mather how good you tape it off, there will always be some clean up needed afterwards.
after painting, the outer wing goes only hardly on, because of the added color on the pins, so either mask the pins of or drill the holes a little wider

4 Retrofit coming soon
need to make pictures first
 
Rulebreaker, please clarify what you mean by your numerical label series, ie '108', '88' and '75'. It appears you are using them to designate how the various kits size out to your arbitrary 'scale' (as in 10.8, 8.8 and 7.8 meters), a scale which I believe you have based on a 1.8 m tall 'pilot' figure. I like your midline at a 70 inch (5'10") tall pilot, although, I'd want to assign shorter individuals as TIE pilots, say 5'8" which is more normal average size for modern males (but is that relevant in the Star Wars universe?) (Now we see the issue with using the human figure for specific measurements or scaling unless we designate the scale height of the reference figures being used... which you did.)

It is an interesting analysis, regardless of end findings and likely as valid as any other. I do find the variously labeled Revell TIE kits, lately set at "1/65" -which if you look at the included pilot figure, it is more of 1/32 scale - are good value! The AMT label of '1/32' as its scale for the new kit is a misnomer given I believe it is actually in fact 3/4 the size of the actual Studio models, which have been set (again, arbitrarily by ILM or is it Disney...?) to 1/24, which caused AMT to label their kit at 1/32. In my personal scale analysis, I accepted the size of the provided figures and so hold the Revell TIE as 1/32 scale. However, if I hold the Fine Molds large TIE as 1/48 scale, then the Revell TIE scales as 1/40 scale, based on comparison of the 'wing' heights. If the Fine Molds TIE is accepted as 1/48 scale, then the TIE 'wing' height is 24.5 ft (7.4675 m) and the AMT kit would be significantly bigger than 1/32 scale. If the 'wing' height values I've found are correct, namely ILM TIE is 17.6875 in. tall and the new AMT kit is 13.5" tall, then we have a situation where:
1) If the ILM TIE is 1/24 scale, then the AMT kit at 75% that size would be 1/32 scale.
or
2) If the AMT kit scales out at 1/21.78 scale based on a 24.5 ft "full height", then the ILM models are more like 1/16 scale.

In the end, things are going to be arbitrary with regards to scale since there is no 'real world' dimension that we can measure on the models to determine the actual scale. Fine Molds produced a very nice and screen accurate TIE kit that they labeled as '1/48' scale, which has an identically sized cockpit viewport as the old AMT kit, though strangely, the cockpit ball diameter is 4% larger than the AMT kit, the same difference as the 'wing'. So the Fine Molds and old AMT kits are within 4% of each other.

When I 'mock up' a cockpit space based on these models, I find that there would be approximately 6.5 ft of height above the pilot's seat within the cockpit. This seems to match well with the movie sets where the "pilot" seems to be close enough to the ceiling to touch it with his hands, he also appears to be standing and not sitting in a chair. If there were a seat, then it would be very simple to stand on it (or use an extensionable ladder on the back of the seat) to exit through the top hatch, which is the assumed point of entry/exit. Logically, I would expect a single pilot 'fighter' craft to have a smaller cockpit volume for many reasons such as structural strength, controls access, better energy management and so on. For a 'space fighter', there is the additional constraints brought on by the environment, namely operating in a vacuum.

Position of the viewport relative to the pilot can be considered to be non-critical given the fact that the view out is blocked so much by the 'wings', necessitating use of a 'virtual display' of the external aspect. If the external view was completely virtual via helmet displays, then the pilot could 'see' past the fighter's structures using external sensors, allowing for a complete 360 degree view if desired. The viewport is likely only to serve as a reference and for use if the primary viewing systems were to fail. (And so it can go if we jump down that 'rabbit hole'...!)

IMHO, the Revell kit is a very good depiction & a good value, being accurately proportioned and with well done detail, as you've seen. And it isn't that hard to find and so doesn't come dear. Does it have the wonderful & subtle depiction of the Koolshade on the 'wings' that the new AMT kit has? No. But it does have a good representation and is accurately shaped, assembles pretty easily so has little fault to it. I suspect you will enjoy it very much and have a nice display model once completed.

Kind regards, Robert
 

Attachments

  • screenshot-2022-10-12-at-15-15-35.jpg
    screenshot-2022-10-12-at-15-15-35.jpg
    45.2 KB · Views: 133
  • maxresdefault.jpg
    maxresdefault.jpg
    37.4 KB · Views: 123
Last edited:
If we go by the Andor scene, I'm pretty convinced the Revell TIE's 1/72 scale, to be honest, and I'm assuming the Outlander has the same proportions. The Revell TIE pilot can be chopped up, the limbs shortened, and reassembled to a nice size. The pilot figure's excellent imho.

1715453386420.png


1715453495624.png
 
Jimmy B, what is the kit number please? Revell has so many different kits out there... zonks!
;^)
R/ Robert

It doesn't matter. I thought the Outland TIE was the same scale as the wrongly described 1:110 standard TIE. I just compared the wing heights of Rulebreaker's Outland sprue shots, and my Revell (TIE) wing height, and the Outland TIE's larger. Ignore my post Rulebreaker. I dunno what goes on in Revell's heads sometimes (or mine), and Rulebreaker's TIE's cooler because it's bigger and now I'm jealous.
 
rbeach84 is meant that the 10,8m is simplified to the "108 series".
in my observation, the ILM Ties are 1/24 as "usual"(except a and b-wing, and probably some more), so i agree with your "1"

JimmyB
The Outland Tie Wings are higher/taller and wider/longer then the mormal Tie, i dont know if it is suposed to be like this, or if it is a Revell "idea"
Fighter vs Outland.jpg
And the Outland parts are not compatible with the regular Tie, only the cockpit interior parts and viewport carry over, thats probalby why, they "added" the standart Tie, because they didn't want to make a new mold

Outland Parts
i also experimented with the outland parts
Outland guns.jpgOutland rear.jpgOutland Top.jpgscratch.jpg
* so i was testing my brush paint "skills"
* i tried to wash the mold directly, but didn't work well, the paint didnt stick
* i also tried doin pencil lines with a pencil
* i engraved the missing lines behind the dark grey/gray parts
* since the "guns" are thicker than those of the regular Tie Fighter, i tried to drill em open, the right one was to thin, the tool broke, but the left one looks good, but i think cutting the "cross" with a knife would be to much
* i cut the reactor hole out, so it looks "better"

4 Retrofit
I didn't like, that one half of the wings was "perfect" and the other half included the solar panels.
So i decided, since its only 15 bucks, i get another package, so i have two perfect wings, per side.
then i can paint the solar panels and i put them in without masking or anykind of trouble or worries.

Mini Review Hasegawa 1/48 Deck crew set
Hase 0.jpgHase 1.jpgHase 2.jpg
Each figure is available 3 times, so you actualy have 30 figures. So u can trade arms, heads and so on
I also added the AMT Tie Pilot 1/48 "75", AMT Vader 1/48 "108", Revell "1/65" "88" (measured its actually 1/40) and the Thingy in 1/48
Hase 3.jpg
P0a.jpgP0b.jpg
also compareing the Pilots to each others and their chairs, i took the "88" fuselage, because all fit there
thingy 1/48 pilot
P1a.jpgP1b.jpg
amt 1/48 ("75") pilot
P2a.jpgP2b.jpg
revell "1/65"(actualy 1/40) pilot
P3a.jpgP3b.jpg
amt 1/48 ("108") pilot(vader)
P4a.jpgP4b.jpg

Inner Wing Modifikation
From the fixed wing, the solar areas get cut out
18.jpg19.jpg
the wings mounting points need be be 0,25mm lowered, because the distance between the wingstars is 2,5mm, but the solar panels are only 2mm t
IMG_20240417_122020.jpgIMG_20240417_122709.jpgIMG_20240417_122845.jpgIMG_20240417_122911.jpg
i bought some 1,6mm styrene rods, they get cut down to 3mm and insterted into each hole, then the wings can be mounted together
the inner wing need some details removal to accept the wingbox, and the "hole" needs to be widened to accept the wingbox moutning tube
also the inner wing needs some material removal where it is in contact with the wingbox(wingbox is the thing that conects the wing with the fuselage("ball"))
Pr1.jpgPr2.jpgPr3.jpgPr4.jpg

a first dry fit
IMG_20240507_204720.jpgIMG_20240507_204600.jpgIMG_20240507_204609.jpgIMG_20240507_204658.jpgIMG_20240507_205351.jpgT Stripe.jpg
Black or black or black?
i tried revell 6, 7, 8 acrylic colors and apliying them with a pencil on an outland wing first
6, 7, 8 from left to right
IMG_20240509_235821.jpg

6 goes on easily, drys fast and the details can still be seen
IMG_20240509_235836.jpg
7 is bad, it doesnt stick to the part, i even tried to rub it in, but sticks badly, after drying "holes", looks shiny and is sticky, but details can be seen best, but needs a second coat to cover everything, and probably the details get worser then
IMG_20240509_235119.jpg
8 is a mix of 7 and 6, sticks better than 7 but is much darker and the details are harder to see
IMG_20240509_235852.jpg

i choose 6, maybe 6 can be thined and then sprayed as "primer" for future projects
 

Attachments

  • IMG_20240509_235915.jpg
    IMG_20240509_235915.jpg
    3.2 MB · Views: 84
  • IMG_20240509_235845.jpg
    IMG_20240509_235845.jpg
    2.9 MB · Views: 101
small update here

i checked some part maps, the "tank part on the rear" - is from a 1/35 Wolverin M10
but we are in 1/48 "half studio scale" so anything from 1/72 should fit

i havent found a single M10 Wolverine, with an afordable price and good details, so i did some research.
the M10 is based on the M4A2 or M4A3 chasis.
suspension-unit-late-3823599031.png
Tie Fighter has only the "basic" part
Tie Advanced, probably the "hero" version, has the full part with "track support roller bracket" and "track skid"
Tie Interceptor has nothing, maybe they forgot it, it got lost or they run out of parts?

So i checked the part scans and decided to take the trumpeter kit
IMG_20240607_151522.jpg
other companys like "italeri" have it cast out of one piece, but "trumpeter" is offering the suspension part in two diffrent versions
IMG_20240607_151502.jpg
* one piece cast part
* the all seperate parts

i chose the seperate parts and the "basic configuration" - one size fits all, because it gives a fast and good part and there are six of it available

Long story short, here is the final part on the back of the
Tie Fighter
IMG_20240609_013142.jpg

Outland Tie Fighter
IMG_20240609_013358.jpg

i also tried to drill some small holes, they can even be "slightly" seen on the "amt" version, but i guess after base coat they get "lost"
IMG_20240609_013449.jpg
time to get/make a drill press, i tried it by hand, it was terrible, inaccurate to place the holes

* interesting note, both Ties have the same color, but as u can see, depending on the light, the Tie Fighter looks much bluer/darker than the Outland Tie
 
a small update here

i was messing around with the cockpit
i dont like, that the "v" thing is taller than on the studio scale
i was thinking of how i can make a new one or how i can modify it and finally i had the super simple idea, just cut it out and glue it on to a new circle
1.jpg2.jpg3.jpg4.jpg5.jpg6.jpg

i also painted the bottom of the cockpit red and tried to dry brush the grid
7.jpg

when fitting Tie Interceptor wings one of the hubs broke off.
so i printed a new one and inserted a brass thread insert, now the wings can be screwed on and off if needed, no more glueing
8.jpg

i also bought some masking tape from "ask distribution" for the viewport
9.jpg
 
Viewport masking, with those masks its so easy and fast
1.jpg2.jpg3.jpg
maybe they can be reused?
4.jpg

i also made some upclose of the plastruct t stripe inside the wings
6.jpg7.jpg8.jpg

i also modified the, what is this thing called? plug? I cut the center off and glued a mini magnet inside, wich sits inside the screw hex hole and holding the plate on
9.jpg

to do
5.jpg
* drill holes into canopy, add those 3 stripes
* drill holes into bottom plate, add missing details to bottom
* make better guns
* mix matching color for t stripes
 
Using the screen cap from Andor, with an (almost) straight erect pilot standing in-plane with the TIE fighter's hatch, I did some basic measurements with an assumed height of TIE Pilot of 68" (5'-8"):
approx. top hatch diameter: 48" or 1" in 1/48 scale
approx. height of wing panel: 320.5" or 6.68" in 1/48 scale

Measuring these features against the Revell TIE kit, I find it to be larger than these dimensions in 1/48 scale. Most telling is the hatch diameter, which is 1.25 inches on the kit, giving a scale of slightly more than 1/38 scale. The AMT and Fine Molds kits have top hatch diameters that are near spot-on for 1/48 scale, measuring at 1". Looking at the wing panels, the Revell kit scales out at 1/44 scale (if the above is assumed to be correct.) However, the AMT/FM kits measure out at just under and just over 6", giving a scaling of approx. 1/53. If I work backwards and say the panels are 1/48, then the 'full size' dimension would be 288 inches, which makes the Revell kit 1/40 scale. Rolling that to the hatch sizes (and I may have introduced an error by measuring the 'hole' on the kits...), I get a hatch dimension of 50", which is then consistent for the Revell kit being 1/40 scale and the AMT/FM kits being 1/48 (the difference is .04 inches, or a little less than 3/64ths inch.)

So, I'm settling on the wing panel height being 288 inches and the hatch is at 50 inches. At least this is consistent between the kits...
Just for fun, a 1/24 scale model would have wing panels twice the height of '1/48' scale, or 12 inches. Seems nice and convenient a measure for model making, doesn't it? However, if the 'real' ILM TIE models had wings that were 17.6875 inches in height, then the scale of those models was 1/16 "scale" if the 288 inch height is assumed.

The 5'-8" height was used as a standard median height used by military aircraft designers. Although a 6' male figure is often provided as a standard scale figure height, it is not appropriate since an average male height is more like 5'-10" (pilots of more 'average' stature require less design volume and are useful for establishing ergometric value ranges to allow for those who are shorter or taller.)

This follows my primary conceptual tenets that the TIE is a smaller craft for many reasons, including reduced target size, short range (patrol radius could be greater for a smaller mass) and minimul crew volumes. One point to be made is that the front 'viewport' is not really for primary piloting of the craft since the constrained view forward is about all there is. More likely, the pilot uses a 'virtual view' display to allow for essentially a 360 degree artificial view projected on that helmet. So using the pilot's 'sight lines' as a means of analyzing the cockpit sizing might be a stretch.

Regardless, it is all "fantasy" so what makes sense for one person is as valid as any other person's!:p

One tip for construction: you can use CA or 'super glues' as fillers for tiny seams. Use a medium viscousity glue formulation and a 'snap cure' accelerator. Put a bit of the glue on a palette (could be a square of aluminum foil or metal lid), then use a toothpick or some similar Using a toothpick, needle or some similar tool as applicator to apply exactly to the joint seam. Loosen the spray cap on the accelerator fluid bottle and apply a drop to the CA with the tip of the 'suction tube' (using the spray cap gets a lot everywhere...), so you can control the application more precisely. Wipe off excess accelerator with a paper towel or tissue, then sand joint smooth immediately. The CA gets harder with time as it cures more fully, so sanding while still 'green' allows for a better result with less impact on the plastic parts.

This is also a useful technique for correcting engraving 'goofs'. It is fast and solid, plus useful reinforcement for solvent glued joints.
 
Last edited:
one important thing!
only because you see it on screen, doesnt mean its actully correct!

that blockade runner in the bottom left corner, is what 10m long?
to smal.png

the hatch is not a good "source", yes its huge, if u ever sit in a tank, that hatch is huuuuge

moffeaton - Jason eaton - has many/some? original mold parts laying around(in his house?), and there was a TIE fighter studio scale discussion, about the ball size.
let me find it, the studio scale ball size is 5 inch something - its one of those plastruct things they used back then

inner ball diameter - 5 1/8"
outer ball diameter - 5 1/4"

so 5,25/2=2,625" "half studio scale" around 66,67mm - "my" "88" series has a diameter of 55mm. the 88 series is around 20% smaller then the real half studio scale of "108" series
108/88=1,22 correction factor

55*1,22=67±1mm - bullseye!

conclussion
studio scale 1/24 ball size diameter 133,35mm
half studio scale 1/48 ("108" series) ball size diameter 66,67mm
1/48("88" series) ball size diameter 55mm
 
I would contest that the studio models have (generally) a "scale". Those models that have features that correspond to full size features of known aka 'actual' dimensions (such as the Astromech droids' dome diameter) can be accurately scaled indeed. However, those like the TIE & A-Wing fighters which have no such features, scaling must be based on .... nothing. We know the figures used were not there to set a scale but to establish an on-screen 'presence'. An exception is the B-Wing model that used a known 1/32 scale figure that was converted (simple head-swap) and fit within a fully detailed cockpit, which establishes a stronger case for 1/32 being the scale of that model. However, for the TIE especially, the figure was not intended to be 'seen' and really only blocks the view of the armature.

So where would the scale being set 1/24 come from? It is actually an arbitrary value since scale was not important to the use/function of the studio filming miniatures. This is why, over the years, the so-called "official" dimensions have fluctuated quite a bit. As the filming of the models was actually done (mostly) separately and then the scenes composited, having a consistent scaling between the models wasn't important. The importance was in the size in relation to the filming function, ease of handling, level of detail, volume for 'working' features, etc. Not the scale. Consistency in proportions and details was more important but as we know, even that could (as in the Millennium Falcon) less important the functionality of the models as filming miniatures. Since you base your analysis on the assumption the studio models had a set scale of 1/24th, I question the findings on that basis since it truly is arbitrary.

I realize using the top 'hatch' as a measure and finding it is roughly 48-50 inches in diameter seems like it is unreasonably large from a 'real world' standpoint. Three feet or less would be more logical for a hatch in a pressure vessel and which should be from an engineering standpoint as small as possible. Yet tagging the Revell TIE as 1/48 would only make the hatch even larger at scale, making it 60" in diameter.

Which brings me back to my primary point: in this context, the scale is up to the beholder! (y)

Regardless, the Revell kit, whatever the interpretation of its scale, still makes a very nice model!

Regards, Robert
 
Am I correct in assuming the reason for the traditional 1/24 scale is because the figure used in the original trilogy miniatures was a racing driver from a 1/24 kit?

We now have a gift of canon scale references from Andor and the Mandalorian, where we see actual pilots both right next to the TIEs (Andor), viewed through the front canopy sat inside them (Mando), and even stood on top of a crashed TIE fighter (also Mando). If anyone's making an exact replica of an original trilogy shooting miniature TIE then absolutely, use a 1/24 racing driver to hide the armature like with the originals. But, the VFX crew and production design departments who worked on Andor and Mando would have gone to a lot of effort to make sure they scaled the pilots correctly against the TIEs (I know from experience that VFX supervisors can be very, very picky about such things). That would probably also explain the latest size reference in the TIE User Manual book now that someone had officially sat down and nailed it. That top hatch in Andor may be really big, but it ain't meant for use by NASA ;)
 
one important thing!
only because you see it on screen, doesnt mean its actully correct!

that blockade runner in the bottom left corner, is what 10m long?
View attachment 1848147
the hatch is not a good "source", yes its huge, if u ever sit in a tank, that hatch is huuuuge

moffeaton - Jason eaton - has many/some? original mold parts laying around(in his house?), and there was a TIE fighter studio scale discussion, about the ball size.
let me find it, the studio scale ball size is 5 inch something - its one of those plastruct things they used back then

inner ball diameter - 5 1/8"
outer ball diameter - 5 1/4"

so 5,25/2=2,625" "half studio scale" around 66,67mm - "my" "88" series has a diameter of 55mm. the 88 series is around 20% smaller then the real half studio scale of "108" series
108/88=1,22 correction factor

55*1,22=67±1mm - bullseye!

conclussion
studio scale 1/24 ball size diameter 133,35mm
half studio scale 1/48 ("108" series) ball size diameter 66,67mm
1/48("88" series) ball size diameter 55mm
Confused What Is This GIF
 
Back
Top