Quick Gonk Droid Build

To go with my Halloween Star Wars theme I need to populate my yard with droids. I have an R2 that is mostly complete so I decided to add a Gonk along side it.
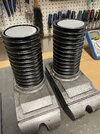
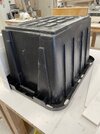
I started with some bins from HD
6F0890A3-0623-4343-AB3E-8ABDFCED637B.jpeg
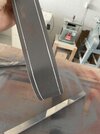
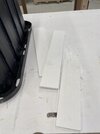
And added some sintra strips and radius corners for the transitions between upper and lower bins.
0D51A87B-8D50-46C5-8C2D-5A6C47A3F2C3.jpeg24AC8F7D-84F5-497D-94F1-AC8FB075B094.jpeg

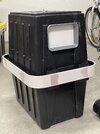
I decided to glue them as one solid piece and smooth out the joints with filler.
E97C583B-066B-4D5A-9879-A9DBD8886EBD.jpeg
 
Last edited:
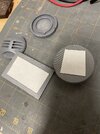
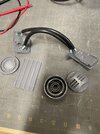
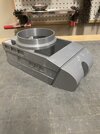
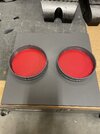
I couldn’t find a cake pan to the dimensions I wanted so modelled and printed one up and cut a recess into the tub. I modelled and printed a bunch of greeblies to match my reference. I have taken a bit of artistic license and am just keeping the shapes simple as the original droid was just a simple shape as well.
4D2F64EC-DB3C-468B-B4BB-D7043C7F27D9.jpeg2AB8A5A4-D39A-4D08-A81A-08BCC38B9E6C.jpeg

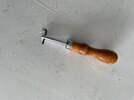
I used a leather groove cutter to add a bit of detail to the center transition strip and everything was primered.
F7360FBE-CA50-426C-937A-8392F23EE35E.jpegC313F651-4EAB-4445-8C00-855EEB11C0A5.jpeg

And this where I am at now. I haven’t decided on the final color yet.
FAFA6694-298C-4DE8-ACF6-38791A04C0EF.jpeg
 
Last edited:
I printed some more greeblies, did some quick weathering and added them to the Gonk. Everything is secured with some industrial double sided tape as CA glue will not stick to the bin plastic and I didn’t want to use mechanical fasteners.
8DFCD529-AABA-4773-9E93-896A4C677B4E.jpeg24D0068F-6733-440B-8629-E66D7C22DDB4.jpeg

I think this is it for detailing and I am still musing the final color. I’m leaning towards a dark grey or blue. The black looks cool but the details stand out more than I like.
0B8EFB65-0C77-46F4-B60B-35A1766227C4.jpeg
F64DCEFD-2D76-4B90-88CA-4FFE8E33770A.jpeg
 
Last edited:
So I decided to go with the traditional grey color scheme. Since I attached all of the greeblies with double faced tape I was able to remove them with a little effort to paint the tubs.
A41B35A5-41B3-4052-ABEC-71EB621AEC1C.jpeg

Coincidentally I was watching Smuggler’s Room newest drop today and I could see that he was having issues with paint sticking. I did a few tests this week on the inside and the best result I got was by using a scotchbrite pad to knock off the sheen, cleaned with acetone and then did a light misting with 3M Super 77 spray contact cement. I let this dry and then sprayed my top coat over that.

I did the finger nail test and had no paint flake. I was able to get down to the tub surface but had to use some effort and the paint is no where near cured.

On my test earlier this week I used Lepage rubber cement and had similar results.

Now I just need to do the legs and dirty him up!

B6ACE88E-5371-4167-BE29-F930543A8BA5.jpeg
80A7F77E-4586-4C52-A00E-9F1DE3BFD8BA.jpeg
 
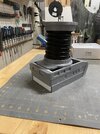
I started mocking up the feet tonight to check the scale and get a sense of how I will put these together. They will be comprised of mixed media, plywood, some 3d printed parts and maybe some foam carving for the toes.
B9B40357-953B-452C-82BC-8D332CAB8D1B.jpeg

I’ll set the final height once the feet are built.
DBD7E025-E0D0-4646-9946-4D1C0390520C.jpegFE9E99E5-1225-4AF2-A7EB-83AC8316E14B.jpeg
 
I decided to print the foot shells and have some pvc pipe that will support the weight of the Gonk. These are just rough prints and I am adding an inner box of sintra to give it some structure.
ED701609-9BBC-45C4-93AF-6CC79BEE6046.jpeg380453E2-F54F-4F60-9CC6-E57FF4880CD6.jpeg

The Gonk body is just balanced there for these pics but I think once everything is glued and tied together it will be pretty stable. I also have the option of weighting down the feet with some plaster if needed.
D76E4EF4-4325-43DA-A16A-F00697E7A0A8.jpeg

0782EA1A-F51D-427D-BFCC-25D663FAB33D.jpeg
 
I puttied up the joints in the feet and gave a quick spray texture before priming. I didn’t spend too much time on this as the feet are going to be heavily weathered and this is just a background piece.

I’m thinking I’ll paint the final color silver to give some contrast to the rest of the droid.
C270619A-704A-4F00-9F4A-78D1BC57BC16.jpeg
 
I threw on some paint tonight and did the first round of weathering on the feet. I just did an acrylic wash with dark brown and black and blotted off most of it except for where I thought grime would accumulate.

I followed up with hitting some edges with a silver paint pen.

The legs were dry brushed with some silver highlights.

Almost there! I just need to attach the legs and weather the body and it will be done.
56B1830F-91EA-463F-A107-E88A9C9FFCBF.jpeg
 

Attachments

  • F61C31B6-D4D8-4844-9BB0-BA0FFEE29756.jpeg
    F61C31B6-D4D8-4844-9BB0-BA0FFEE29756.jpeg
    1.6 MB · Views: 319
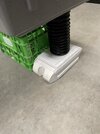
I printed up some more parts to attach the legs. I made some toppers for the pvc supports and these were a nice snug fit, no glue required.
DDA47E12-B5BD-4E2D-A761-DCC723A780BB.jpeg291943A0-92C8-451B-BBB2-FFDDEDF4C54D.jpeg

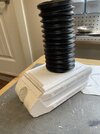
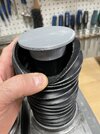
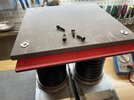
I then made a topper to hide the rough edge of the flexible tubing and provide a transition to the body. These were glued to the platform that supports the body and painted the body color to blend in. The legs were glued to this to provide a complete unit.
516A6C55-A359-4961-A8E5-D1DEB9BA0DF7.jpeg9DBAAB90-45F3-4B81-8609-478E2C11BFB0.jpeg

I made an internal platform with plywood and the idea is that I can bolt on the legs and the body tub is sandwiched in between the support platform and plywood. The screws I had were not long enough so I am using washers and bolts until I get longer screws. The legs will come off quickly and I can store them inside the droid.
F5281D22-1AD6-476D-8B15-C6A5D619DF6F.jpeg
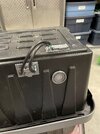
Lastly I added an led to give it some life. I decided on blue so it wouldn’t look intimidating like a red one would with an all grey color scheme.

3A91C1EE-4718-43B2-A088-EE497DE08C9D.jpeg
ADBF2F1F-B05A-4D55-899E-887D3A06B9FD.jpeg

I still have a couple of small things to do, weather the body, add a switch for the led and add the sound system.

Stay tuned.
 
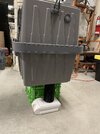
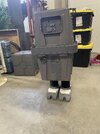
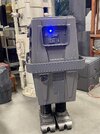
I’m back from holidays so time to finish this guy off. I dirtied up the Gonk with acrylics and added a few scratches here and there with a box cutter. I wanted to give it the look that it would just get a quick wipe down with a greasy rag and the be put back to work.

The audio is a looped track playing through a cheap Bluetooth speaker.

I’m calling this done and on to the next project!
 
I think it is for waste water for RV's. It comes compressed and you pull it out like an accordion and it keeps its shape. You can also make a 90 degree bend with it and it doesn't spring back. If I have the packaging I'll post a pic.
 

Your message may be considered spam for the following reasons:

If you wish to reply despite these issues, check the box below before replying.
Be aware that malicious compliance may result in more severe penalties.
Back
Top