Tieyourwheels
New Member
First off Hello!  I have been creeping around on TheRPF for quite some time mainly admiring everyone's fantastic work and great attitudes.
Anywho, since I'm nearing the final stretch of this project, I figured I would go ahead and post my progression thus far and obstacles and other fun that has happened during this really fun project. Lets begin! (sorry if I have a bad thread presentation in advanced)
It all started On May 16th when I was in the office talking to my co-worker about Jurassic World and how excited I am for its release. She teased and asked what I was going to do its premiere as all of us management staff had dressed up as The Avengers for the premiere for Age Of Ultron. Although I lacked the time and funds to actually complete my costume I still wore what I had done. Everyone else looked awesome and the kids loved it!

After much contemplation I went back to the idea I had originally wanted to do before I plunged thousands of dollars in on a real Jurassic Park Jeep. That was to make a miniature version that Ive since had just leaning up in the corner gathering dust. As you see this is a far as I got on that. (August 2014)


As that jeep has started to warp, has many inaccurate measurements, and was just all sorts of frustrating not having anything other than a hacksaw to cut. I really didn't want to dive into another project that with a release so soon that it would be near impossible working fulltime to finish. So I came up with a great alternative use something already existing. Power Wheels Barbie Jeep to the rescue! I found a few locally. The one I settled on was the lowest priced and when I arrived it was actually offered to me for free!

After disassembling the sunburnt, stained, and dirty jeep to force it into my police interceptor trunk it was off to cleaning!!

Oh boy was there alot of cleaning and sanding and more cleaning. This was defiantly the longest part of the process so far and the least fun.... (well almost, we will get there)
 (Before)
 (After/opposite side)

After 4 days of cleaning and sanding most of the body was ready for primer. And then it flooded in Texas for days. :facepalm
After the rain cleared it was painting for 3 days straight. 3 coats of primer for everything as I was overly cautious that the plastic wouldn't take to the paint very well. (Krylon Max)
The first can of color I went with was too tan for my liking so I switched over to a Khaki color and was pleased with the look.

While working on painting the main body I was scouting theRPF and found Andrewshaddox and his great Barbie Jeep to Jurassic Park Jeep conversion and was super excited to see someone else who had done the same and did a darn good job! You should check it out if you havent seen it yet! Link to his thread - http://www.therpf.com/showthread.php?t=238464

After seeing Andrews and talking to my boss I thought it would be really cool if we could have a place set up as a display for the jeep. Annnddddd then things get complicated. From just a Jeep this project turned into a full on display above our entrance doors complete with a T-Rex, foreground/background elements, lights, and a matte painting for the background. I tend to get overly ambitious on projects. What can I say??


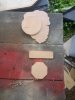
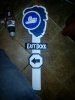
So while continuing progress on the jeep throughout the month of May and into June I also started figuring out the game plan and some things to add. 2 big things I wanted was the T-Rex Head to scale if the jeep was actual size and a scaled version of the East Dock sign from the movie.


I created several images to use in the jeep and also used existing reference images and files from thejurassicparkjeep forums. I wanted to keep cost low so having decals cut in vinyl was out of the picture so I went a cheap but quick route. I used full sized sheet shipping labels to print my decals and some stencils on. This method while being effective also has the downfall of the adhesive not holding very well under the Texas heat so when I take it to the theater im most defiantly have to cover it from the heat and sun.

Shortly after finishing the decals and printing them out painting was nearing completion so I slapped on as many decals as I could at once


After getting overly excited after I slapped the decals on I went into full on work mode for many hours without to many progression photos. Sorry I got really into it
I started figuring out how to mount a roll cage on the jeep because I didnt like the look of the standard barbie jeep ones. So I made one using 3 pieces of CPVC, a heat gun and pipe insulation (the nice rubbery kind) Also added the semi painted windshield to early.

Shortly afterwards took the windshield back out and painted it fully and then made a seat. Ive never done any uplhostry work before so please take it easy on me Its just 2 pieces of MDF, a pillow for the bottom seat, 2 thick pieces of interlocking foam used in shipping ice cream cones for the back, and all wrapped in a nice comfy cloth. What you cant see is a bajillion staples that I had to hide!

AND I MOUNTED THE WHEELS!!! (The most frustrating part)
These wheels..... so much hassle the internal tooth lock washers that are used on these power wheels are a nightmare to get off but even worse trying to put on after you take them off.... I broke them..... all of them. So I had to go to the hardware....errrhuuummm all the hardware stores (except the horrible one in my small town) and no one carries the size used. So I went online and ordered 7/16th lock washers.... nope. But Alas! I went to my local extremely overpriced and never stocked up hardware store that I cant stand going to and guess what I found. Yup the perfect sized lock washers. I grabbed me a hammer and a socket and popped them on and had a couple of beers afterwards.

(next post)
I have been creeping around on TheRPF for quite some time mainly admiring everyone's fantastic work and great attitudes. Anywho, since I'm nearing the final stretch of this project, I figured I would go ahead and post my progression thus far and obstacles and other fun that has happened during this really fun project.
Lets begin! (sorry if I have a bad thread presentation in advanced) It all started On May 16th when I was in the office talking to my co-worker about Jurassic World and how excited I am for its release. She teased and asked what I was going to do its premiere as all of us management staff had dressed up as The Avengers for the premiere for Age Of Ultron. Although I lacked the time and funds to actually complete my costume I still wore what I had done. Everyone else looked awesome and the kids loved it!
After much contemplation I went back to the idea I had originally wanted to do before I plunged thousands of dollars in on a real Jurassic Park Jeep. That was to make a miniature version that Ive since had just leaning up in the corner gathering dust. As you see this is a far as I got on that.
(August 2014)As that jeep has started to warp, has many inaccurate measurements, and was just all sorts of frustrating not having anything other than a hacksaw to cut. I really didn't want to dive into another project that with a release so soon that it would be near impossible working fulltime to finish. So I came up with a great alternative use something already existing. Power Wheels Barbie Jeep to the rescue! I found a few locally. The one I settled on was the lowest priced and when I arrived it was actually offered to me for free!
After disassembling the sunburnt, stained, and dirty jeep to force it into my police interceptor trunk it was off to cleaning!!
Oh boy was there alot of cleaning and sanding and more cleaning. This was defiantly the longest part of the process so far and the least fun.... (well almost, we will get there)
(Before)(After/opposite side)After 4 days of cleaning and sanding most of the body was ready for primer. And then it flooded in Texas for days. :facepalm
After the rain cleared it was painting for 3 days straight. 3 coats of primer for everything as I was overly cautious that the plastic wouldn't take to the paint very well. (Krylon Max)
The first can of color I went with was too tan for my liking so I switched over to a Khaki color and was pleased with the look.
While working on painting the main body I was scouting theRPF and found Andrewshaddox and his great Barbie Jeep to Jurassic Park Jeep conversion and was super excited to see someone else who had done the same and did a darn good job! You should check it out if you havent seen it yet! Link to his thread - http://www.therpf.com/showthread.php?t=238464
After seeing Andrews and talking to my boss I thought it would be really cool if we could have a place set up as a display for the jeep. Annnddddd then things get complicated. From just a Jeep this project turned into a full on display above our entrance doors complete with a T-Rex, foreground/background elements, lights, and a matte painting for the background. I tend to get overly ambitious on projects. What can I say??
So while continuing progress on the jeep throughout the month of May and into June I also started figuring out the game plan and some things to add. 2 big things I wanted was the T-Rex Head to scale if the jeep was actual size and a scaled version of the East Dock sign from the movie.
I created several images to use in the jeep and also used existing reference images and files from thejurassicparkjeep forums. I wanted to keep cost low so having decals cut in vinyl was out of the picture so I went a cheap but quick route. I used full sized sheet shipping labels to print my decals and some stencils on. This method while being effective also has the downfall of the adhesive not holding very well under the Texas heat so when I take it to the theater im most defiantly have to cover it from the heat and sun.
Shortly after finishing the decals and printing them out painting was nearing completion so I slapped on as many decals as I could at once
After getting overly excited after I slapped the decals on I went into full on work mode for many hours without to many progression photos. Sorry I got really into it
I started figuring out how to mount a roll cage on the jeep because I didnt like the look of the standard barbie jeep ones. So I made one using 3 pieces of CPVC, a heat gun and pipe insulation (the nice rubbery kind) Also added the semi painted windshield to early.
Shortly afterwards took the windshield back out and painted it fully and then made a seat. Ive never done any uplhostry work before so please take it easy on me
Its just 2 pieces of MDF, a pillow for the bottom seat, 2 thick pieces of interlocking foam used in shipping ice cream cones for the back, and all wrapped in a nice comfy cloth. What you cant see is a bajillion staples that I had to hide! AND I MOUNTED THE WHEELS!!! (The most frustrating part)
These wheels..... so much hassle the internal tooth lock washers that are used on these power wheels are a nightmare to get off but even worse trying to put on after you take them off.... I broke them..... all of them. So I had to go to the hardware....errrhuuummm all the hardware stores (except the horrible one in my small town) and no one carries the size used. So I went online and ordered 7/16th lock washers.... nope. But Alas! I went to my local extremely overpriced and never stocked up hardware store that I cant stand going to and guess what I found. Yup the perfect sized lock washers. I grabbed me a hammer and a socket and popped them on and had a couple of beers afterwards.
(next post)