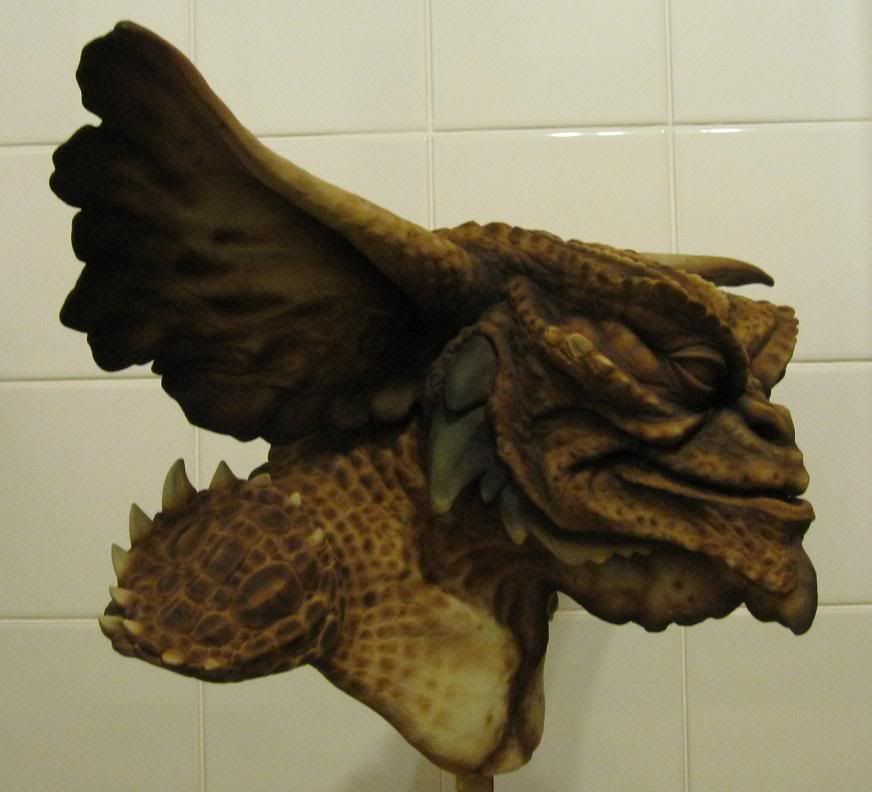
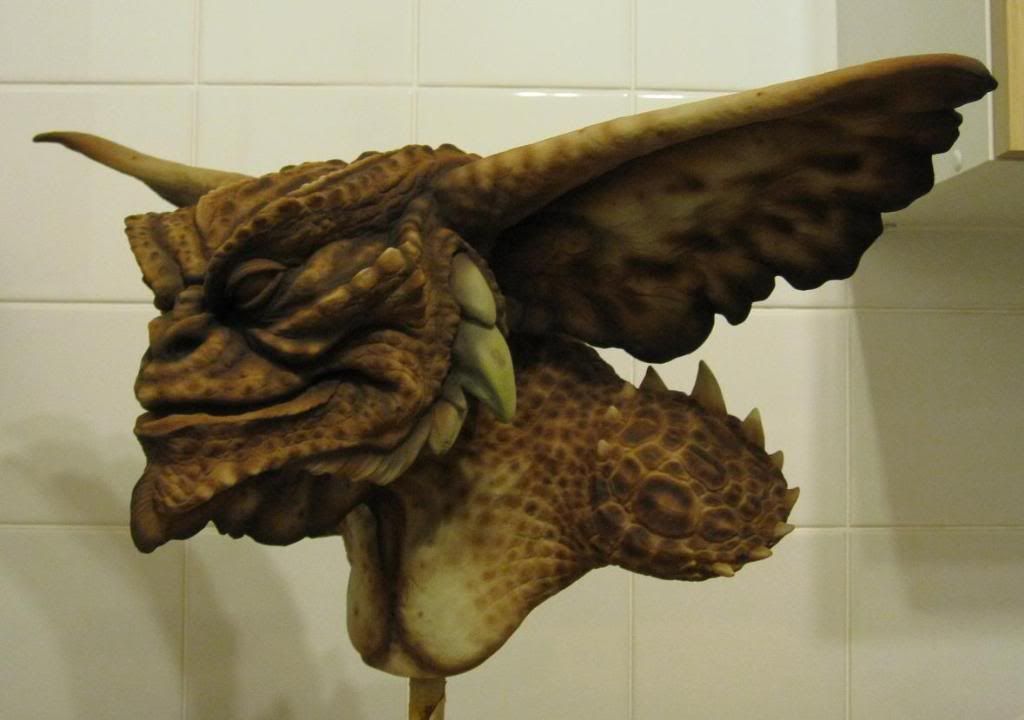
PAINTING MY GREMLIN step by step--FINISHED pics POST#39

zorg

Master Member
RPF PREMIUM MEMBER
hi, you may have seen my thread about turning a full size vinyl gremlin into a bust, see below

http://www.therpf.com/f9/disected-my-gremlin-weekend-96887/

well i thought i'd start a new one covering the paint up, some of you may find it interesting? i hope :unsure

first up, i have no experience in painting this type of piece, i am just following things that i have read over the years.

second, i am NOT trying to copy any particular gremlin, this will be a custom paint job using various reference. i'm just going for something that looks aesthetically pleasing.(to me)

i have collected various pics and have decided on a brown scheme.

i might totally muck this up but what the hell....

i hope you don't mind pics :confused

base layer being applied (tamiya buff with flat white)
IMG_1003.jpg

then started shading the folds and creases with a brown red (tamiya)
IMG_1004.jpg

this is actually more time consuming that i thought :unsure
thankfully its just a bust!
IMG_1005.jpg

IMG_1006.jpg

IMG_1007.jpg

with the shading and mottling complete the original base coat colour is misted over the top
i also added some blue veining with a small brush, i would haveadded a bit more but it was getting cold in the garage :confused
IMG_1008.jpg

IMG_1009.jpg

IMG_1011.jpg

IMG_1012.jpg

thats it for tonight, about 2hours work. i hope to get more done tomorrow

thanks for looking

-z
 
Last edited:
Re: PAINTING MY GREMLIN step by step

looking very good so far. Are you going to paint the eyes or install glass? I ask only becuse it would be easier to install before your done and would look really good on this piece.
 
Re: PAINTING MY GREMLIN step by step

looks great ..What kind of airbrush do you use ?

Its a revell pro

looking very good so far. Are you going to paint the eyes or install glass? I ask only becuse it would be easier to install before your done and would look really good on this piece.

i had considered it but since its vinyl i know it can be a pain to work with so i decided to leave them in. the head is foam filled now so its too late.

-z
 
Re: PAINTING MY GREMLIN step by step

Man, that's looking cool. Love the shading. So subtle. Looking forward to see more.

What kind of foam did you fill it with?
 
Re: PAINTING MY GREMLIN step by step

Gees Zorg you are good. I really like the painting on the back of the ears
 
Re: PAINTING MY GREMLIN step by step

Man, that's looking cool. Love the shading. So subtle. Looking forward to see more.

What kind of foam did you fill it with?

it was a 2 part polyurethane foam

I really like the painting on the back of the ears

so do i but most of it will be covered up by the layers going on top :(

it is a necessary step though to build up depth.

the eyes and horns will be the last to be painted

i'm off out to do some more.......:)

-z
 
Re: PAINTING MY GREMLIN step by step

It looks kinda cool like it sits now! Like it was alive and is now frozen in stone. :)

I think you are off to a great start. I would love to try and do one of these. More freedom to do it your way, and make it come to life. Unlike a Boba helmet etc. Where it's right or WRONG! LOL.
 
Re: PAINTING MY GREMLIN step by step

just back from garage, heres the latest progress pics. my compressor nearly went into meltdown!

i really need to get a moisture trap on my set up. a lot of scary moments when blobs of water coming out at the more delicate stages :confused

i started with that tamiya red brown
IMG_1033.jpg

IMG_1034.jpg

IMG_1035.jpg

then onto a darker brown
IMG_1036.jpg

IMG_1037.jpg

IMG_1038.jpg

IMG_1039.jpg

then i rolled out some flat black to put on the edges of ears and in the shadowed areas
IMG_1040.jpg

IMG_1041.jpg

IMG_1042.jpg

IMG_1043.jpg

IMG_1044.jpg

IMG_1045.jpg

new-1.jpg

new2-1.jpg


got quite a bit of work still to do.

the face/head was kinda neglected and i will go over some areas with the original buff to bring it up to scratch. the lips, eyes, horns and those funny looking things that run along the jawbone still need painting also.

his chest paint job reminds me of a little predator :angel

i also intend to paint a pattern on the backs of the ears, i have not decided yet what to do :unsure

sorry for all the pics ;)

-z
 
Re: PAINTING MY GREMLIN step by step-- new pics update 10/2/10

I like how it is gradually getting darker and darker in tone. Thanks for the info on the foam. Gonna have to check some of that out.
 
Re: PAINTING MY GREMLIN step by step-- new pics update 10/2/10

WOW! Looks amazing...
 
Re: PAINTING MY GREMLIN step by step-- new pics update 10/2/10

i redid most of the face as i was not happy with it, i also plucked up courage to paint a pattern on the back of the ears, was toying with the idea of black gloss horns yes/no?

getting there........
IMG_1054.jpg

IMG_1053.jpg

IMG_1052.jpg

IMG_1051.jpg

IMG_1050.jpg

IMG_1049.jpg

IMG_1048.jpg


-z
 
Re: PAINTING MY GREMLIN step by step-- new pics update 10/4/10

The black edge on the ears really makes them pop. I am learning a lot, yet again.
I can't say I like the pattern at the back of the ears at the moment, it looks like a butterfly to me.
 
Back
Top