enjaypee
Active Member
Thanks man!In all the years,Ive never been able to ever find anything off the shelf..Your doing a fine job making all the the stuff.Thus far it all looks beautiful
Thanks man!In all the years,Ive never been able to ever find anything off the shelf..Your doing a fine job making all the the stuff.Thus far it all looks beautiful
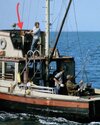
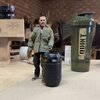
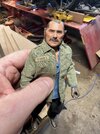
That’s amazing! Seems like it would be a great outdoors project considering the scaleView attachment 1653188View attachment 1653189
If you're going to do it, might as well go full tilt.
go to your instagram messages, i'll send you the rest of the pictures to this collection.That’s amazing! Seems like it would be a great outdoors project considering the scale
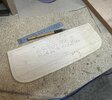
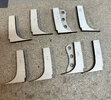
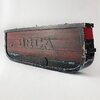
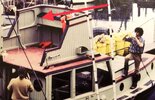
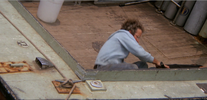
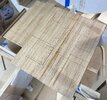
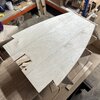
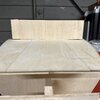
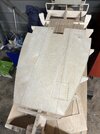
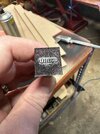
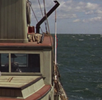
Looking really nice!That’s the wheelhouse decking complete. I made this using oak for the boards. I laser cut the access hatches and engraved the nails for some detail. I decided to make this out of individual boards for some depth and because it was a challenge. For reference I also laser marked where the helm is, the seating area and the table.
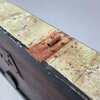
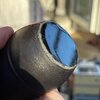
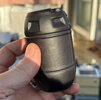
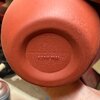
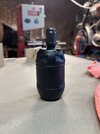
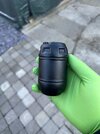
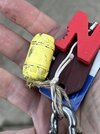
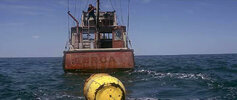
Actually those air bubbles you mentioned dont look bad or inaccurate.Ive had production barrels,where the whole skin of the barrel had that look from sun exposure.Not many updates on the ORCA this week however I did receive a resin casting of a barrel to scale with my model. Unfortunately the barrel was cast from the base, meaning that I had to mod it to look like an original barrel base with the “BORN FREE” logo. I drilled out the bottom, shaped it with a dremel and laser engraved a disc of acrylic to fit into the recess with the lettering. Nodding the base exposed a bunch of air bubbles unfortunately. Once everything is refined I’ll mould and rotocast up the five barrels for the foredeck.
I filled them in the end. For the most part, as you reduce scale, imperfections like that disappear so to sell the scale better I have to do my best to minimise any giveaways. I also have to sell the time period so these barrels would be brand new. I will scuff them up though when I’ve cast them up. Came out ok in the endActually those air bubbles you mentioned dont look bad or inaccurate.Ive had production barrels,where the whole skin of the barrel had that look from sun exposure.
Thanks! Yeah I’m really pleased with how the modifications came out. Deffo more screen accurate nowBarrel looks real good")