One more Hasbro Rebels X-Wing

Hopson

Active Member
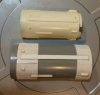
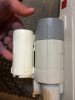
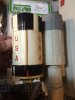
Ok I thought it was time for me to start my own thread, for my personal build most of what I have been doing is seeing what kind of parts I can find to make this big X-Wing better. First thing I thought to buy was a 1/48 scale Sherman Easy 8 for the back end of the toy. Lot of parts of the 1/72 scale kit were used t detail the original models. This is a very flat part and does not look very good. I used the Dragon Easy 8 and it is a pretty good match for the old 1/72 scale kit used on the original studio models. I am not worried about every single piece matching exactly the old kit parts I want to get close as I can. but if there is some slight differences I am okay with that. I made a quick mold of the center pice as this is not a bad match for the kit part used on the original and I think with a little care I can get that part to look a lot more like the original part. The third photos of of the Capt Card board kit.
IMG_9793.jpgIMG_9790.jpgIMG_9787.jpgIMG_9791.jpg
 
Last edited:
The next thing I decided to start building now wing top engines I have seen a lot of the other builds using the parts that come with the toy but that seems like more work to me then just building new parts. that are a closer match to the original kit parts I have many of these parts so I have easy reference to build these parts. I found that the engine parts on the tops of the wings are slightly larger then they should be this is most likely a result of the molding process that was used for the toy. So the engine are fat and taper own to the correct size of intake. I am more or less scratch building this part. to match the old Airfix Saturn V parts. I cut 5 pieces so that if one goes south I will have at least one extra to start over. I have been building this part while getting some casting done for my figure company so as I wait for the spin casting molds to cool down I do a little building. At first I thought the old Revell 1/96 scale Saturn V would be a good place to find parts close to what I needed but it turns out the parts were so different from the Arifix parts as to be unusable for the most part. I have been able to use some small parts with slight mods. I think the engine bells should work for the interior of the engine. They will also need some minor mods to look more like the Airfix parts.
 

Attachments

  • IMG_0917.JPG
    IMG_0917.JPG
    340 KB · Views: 230
  • IMG_0914.jpg
    IMG_0914.jpg
    637.9 KB · Views: 257
  • IMG_0912.JPG
    IMG_0912.JPG
    829.8 KB · Views: 239
  • IMG_0906.jpg
    IMG_0906.jpg
    1.4 MB · Views: 266
  • IMG_0904.JPG
    IMG_0904.JPG
    524.8 KB · Views: 253
  • IMG_0901.JPG
    IMG_0901.JPG
    479.1 KB · Views: 219
  • IMG_0665.JPG
    IMG_0665.JPG
    670.2 KB · Views: 239
  • IMG_0663.jpg
    IMG_0663.jpg
    1.3 MB · Views: 267
  • IMG_0662.jpg
    IMG_0662.jpg
    1.4 MB · Views: 295
Last edited:
Thanks Guys, I know these parts seem like an odd place to start a build like this but as I said I was just searching for parts that looked like what they used on the original but in a larger scale. I have some old pyro wings that I enlarged up to this scale on a copier to use as a templet. for some new wings I think I may use some acrylic I have left over from an old project just like the originals used. The bones of the engine parts are basic shapes that are not too hard to make using basic materials after those are cut to size it is just detailing the parts to look like the original parts.
 
I actually thought those were the best places to start since it only takes a large part to start building around (The Sherman tank and the Saturn V). Did you scratch build that center locomotive part which you made a mold of?
 
No that part is from the toy but it is doubled up. I made a second to glue to the back to make it thicker I plan to rework the bottom to square it off like the original. part it is the only part of that area that will more or less be from the toy.
 
Last edited:
IMG_0940.JPGA quick update got to work on the rest of the wing top engines. Because the wrap pieces meet in the center I tend to just do one side at a time once the first one has set move on to the other side. This photo gave me fits last night . I had taken the parts in the house to get this photo and had set them on the washer which is angled there is only one over head light ,and it was off to one side so the shadows and angles made it look like every one was crooked in some way but they are are straight and true.
 
Last edited:
Loving how this is looking at the moment. Gotta get me some tubing.

View attachment 481040A quick update got to work on the rest of the wing top engines. Because the wrap pieces meet in the center I tend to just do one side at a time once the first one has set move on to the other side. This photo gave me fits last night . I had taken the parts in the house to get this photo and had set them on the washer which is angled there is only one over head light ,and it was off to one side so the shadows and angles made it look like every one was crooked in some way but they are are straight and true.
 
That is weird. I saw it was a broken link so I reposted the photo a few minutes ago. I can see it in my post above yours. Not sure what is going on.
 
I'll be keeping an eye on yours and the other x wing mods....I picked one up at wally world for $32. I've stashed it away until I finish a few other projects. Keep it going !
 
Brought these into the office to finish wrapping them forgot the last bit of plastic. I am doing one extra just to have a little wiggle room if something should go wrong or I find some flaw I can not fix, I am trying to be careful but little flaws can creep in. IMG_0949.JPG
 
So over the weekend I got this part done to the point of looking like the model part. The next step was to add the plates to the sides I was debating just how thick the plastic should be in this scale. I was thinning pretty thin as I thought the originals used vinyl type. Well I got a message from Junk pilot asking me what spacing I had used for the clap board wraps and I had thrown away the bag as there was almost none of the sheet left so I got out the calipers to check and see. I had gone with .040 spacing or 1.0mm, but as I ran the numbers and put the calipers to both the original part and the new parts While wearing my opti-visor I started to realize that the .030 or .75mm was closer to what it should be. It is also as small as they make this sheet. So I find myself wondering what do I do now? So do I forge ahead or rewrap the tubes? So while I contemplate that I will share the first basic part more or less finished. IMG_1009.JPGIMG_1010.JPG
 
If I start over this piece will stay as you see it. A reminder for me to measure 10 times cut and build once.
 
Forge ahead unless you're striving for total accuracy. If you get something that closely resembles how it's meant to look you should still be happy with the effort you've put into it.
 
I would forge ahead as well unless it's something that would bother you in the long run. To me, .25mm would not be something I would notice after it's all painted.
 
I think I can live with it. but it does bother me a little. The spacing for the gap between the siding in scale works out to about 1/2 inch. That is treating the Saturn V part as if it was 1/24 scale. it is really tinny. A twitch of the finger on the wheel of the caliper can changes things a lot.
 
I think the worst thing that can happen is when your done with a build and your eye ends up going right to the spot that bothers you. You defiantly have the talent to make it right and if you do, it will never bother you every time you look at it.
 
What I may do is hedge my bets and just finish these and make it possible to remove them and replace them at a later date. Where I am bitting the bullet and making 4 of those I may just make two of the second type, and mold them.
 
So I had some projects to finish for my figure company this has been taking up my time of late, but I kept thinking about the parts and something was not sitting right with me. The part just did not look like it should. So I made a trip to the hobby store and picked up a couple of more sheets of plastic. One more 1mm and one 0.75mm came home and sat down in the shade outside with lots of sunlight and put on my optivisor and ran all the numbers again I discovered a few things most of the plastic sheet actually measures slightly less then what the package says. I can see as the hot plastic cools it shrinks a little. The spacing on my installed clap board was reading 1.3 more then what I had thought it was. but looking over some photos of the shop when I was working on this I can see a bag that says 1.5 So after opening the bags I garbed the wrong sheet. Well that was a bone head mistake. So my numbers stand the closest matches to the original part scaled up to 1/18 scale are the 1.0mm and the .75mm both look good. So I will be taking a few days to redo the parts.I will keep the plastic in its bag so I do not end up using the wrong one again. I think I have learned my lesson on this one. I will just think of that first part as practice run.
 
Last edited:
This thread is more than 7 years old.

Your message may be considered spam for the following reasons:

  1. This thread hasn't been active in some time. A new post in this thread might not contribute constructively to this discussion after so long.
If you wish to reply despite these issues, check the box below before replying.
Be aware that malicious compliance may result in more severe penalties.
Back
Top