Buzz Lightyear to the rescue
This Build is Finally Complete!
See photos on page 2

Hey there, My wife and I are creating costumes for the local Fandomfest con here in Louisville. I also hope to be able to use this for Halloween and other kid friendly events.
I'm doing a Buzz Lightyear. I'm trying to be as accurate to the character as I can without stumbling over minute details that will slow the build.
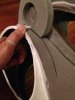
It will be mostly EVA foam and other misc. found and created parts. Here is the progress.
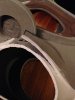
Upper arms

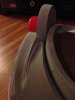
Upper Torso

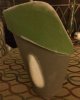
I have to create a slight adjustment here. The back of the neck dips to low and when I add the acrylic half dome shield to the back it will rest too low so will have to cut a piece of foam as a filler to raise the height.
This Build is Finally Complete!
See photos on page 2
Hey there, My wife and I are creating costumes for the local Fandomfest con here in Louisville. I also hope to be able to use this for Halloween and other kid friendly events.
I'm doing a Buzz Lightyear. I'm trying to be as accurate to the character as I can without stumbling over minute details that will slow the build.
It will be mostly EVA foam and other misc. found and created parts. Here is the progress.
Upper arms
Upper Torso
I have to create a slight adjustment here. The back of the neck dips to low and when I add the acrylic half dome shield to the back it will rest too low so will have to cut a piece of foam as a filler to raise the height.
Attachments
Last edited: