You are using an out of date browser. It may not display this or other websites correctly.
You should upgrade or use an alternative browser.
You should upgrade or use an alternative browser.
Nike Mag V2 Mod Discussion (Page 58 Shopping List)
- Thread starter Taff83
- Start date
-
- Tags
- back to the future
- Status
- Not open for further replies.
Yeah I did thanks! Yeah my pair came really green so I jut wanted to get the right color grey ok thereReally nice job with the sock type mod, glasses!
Did you repaint the soles? Cause Your splatters look nicely done!
Well I saw the rd sole has some stippl texture so I used a spoge brush when I painted the grey I used dove grey acrylic mixed into some latex it's held up for 3 days now walking around im really happy with how it came out for the splatter I used am old toothbrushWhat technique/paint did you use? It's like it came out a Nike factory")


 ok wow so ive always noticed the films shoes sraps go forward and all the ones on these replicas go on an uprward curve becuase of where the velcro is placed so i decided to go ahead and try it out and i took my velcro pieces off the shoes so that i could reposition my straps lower like how they are in this scree cap and not only does it make the hc shoes wings look taller it makes the tongue look way taller and the perfect shape just like in the film. I still plan on making a leather tongue and new straps but im really gearing all my mods towards making the shoe more like the film than the rd mags and i know ill never get the wings too look right but for my purposes they look just fine also here's some pics of my sock toe box I'm really happy with how it came out
Last edited:
MrSouthpaw
Sr Member
ok wow so ive always noticed the films shoes sraps go forward and all the ones on these replicas go on an uprward curve becuase of where the velcro is placed so i decided to go ahead and try it out and i took my velcro pieces off the shoes so that i could reposition my straps lower like how they are in this scree cap and not only does it make the hc shoes wings look taller it makes the tongue look way taller and the perfect shape just like in the film. I still plan on making a leather tongue and new straps but im really gearing all my mods towards making the shoe more like the film than the rd mags and i know ill never get the wings too look right but for my purposes they look just fine also here's some pics of my sock toe box I'm really happy with how it came out
http://www.therpf.com/attachment.php?attachmentid=428837&stc=1&thumb=1&d=1421873351
How thin is the material left behind after removing the toe-box?
How durable does the material seem without the toe-box to back it?
The movie right shoe strap sits high like where the HC is velcro'd. It's there in the scene he puts them on and the hoverboard cap you posted.
Last edited:
MrSouthpaw it's thin but stretchy it should be fine I mean these shoes aren't the most durable thing to begin with so I doubt anyone would be beating these things up anyway but they feel good if you've ever worn nike roshes they feel like that
Last edited by a moderator:
MrSouthpaw
Sr Member
@MrSouthpaw it's thin but stretchy it should be fine I mean these shoes aren't the most durable thing to begin with so I doubt anyone would be beating these things up anyway but they feel good if you've ever worn nike roshes they feel like that
I'll keep that in mind, but I think I'm gonna do the steam-mod first and see how I like it.
cavx
Master Member
Just putting it out there that this is still a work in progress, so excuse some roughness.
Lately I have been doing some radical mods using rubber. I still have not quite finished the 2nd layer though I would like to share and get feed back on my latest crazy idea being a Heel Cup reshape.
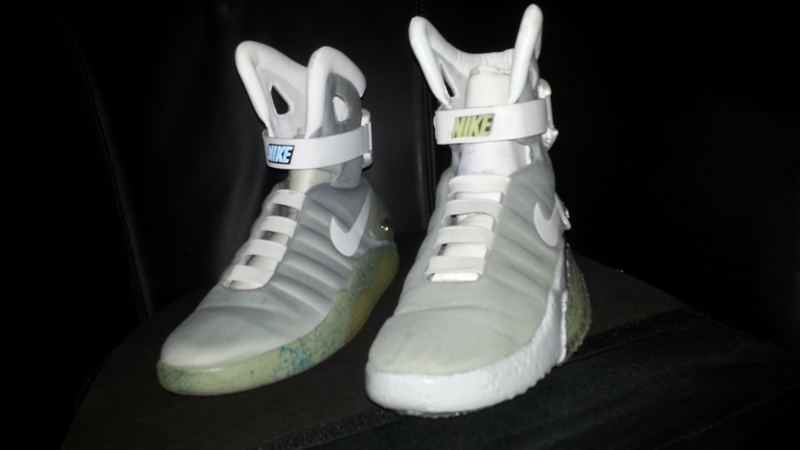
An original on the left and my modded shoe on the right. You can't see it in this shot, but the outrigger soles even give my shoes that odd lean that the real shoes have. The un-modded shoe sits straight.
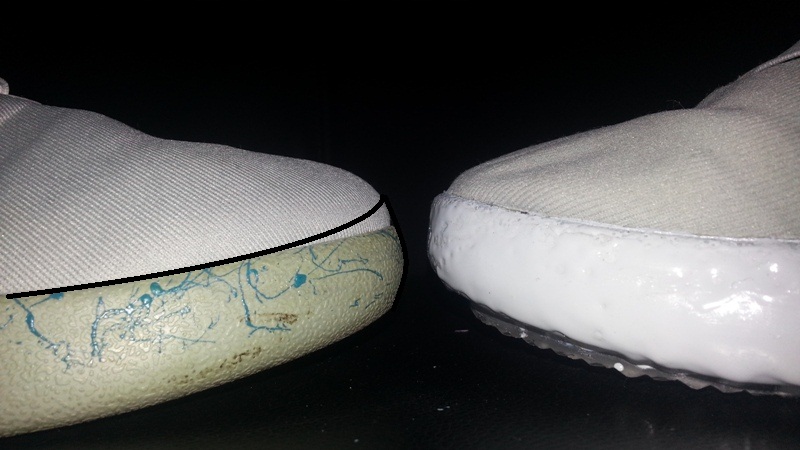
Toe slims have been a hot topic of late and looking at my steam method slim against a factory boot toe, I do wonder if a build up is not now out of the question given the rubber I am using can be built up. Even if I was to do the cut method and remove the toe box completely, I would still want to build up the front of the toe which leads me on to the Heel Cup mod.
Again EXCUSE my rough edges, this is not done yet.
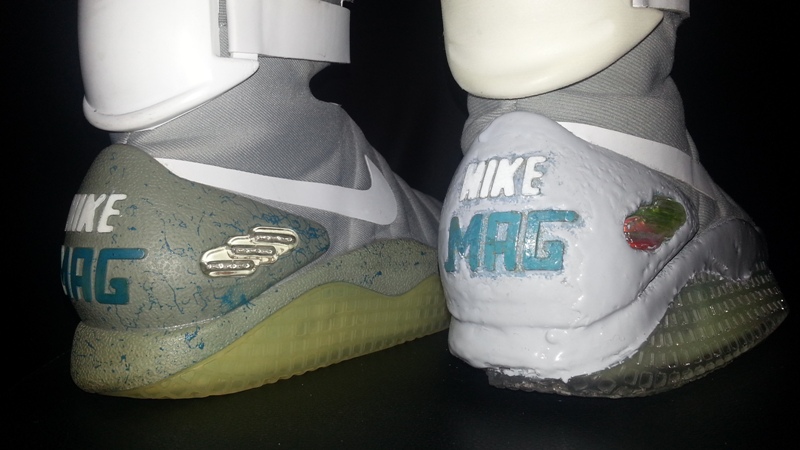
So the RD MAG has a much larger Heel Cup than the V2/HC and the mid-sole is much lower at the back. I really like that "fat-ass" look. A few weeks back, I removed the Heel Cups from their inner mount and re-attached them on the exterior of the mid-sole to give them the appearance of having more size. Note how the letters look too small on my shoe now even though they are the same size as the un-modded shoe on left. They also seem to sit too high, so I will be making some larger MAG letters to attach soon. So now I am thinking of increasing the size of the Heel Cup by layering up small amounts of rubber at a time to build it out.
Side profile (line I drew in) of what I hope to achieve.
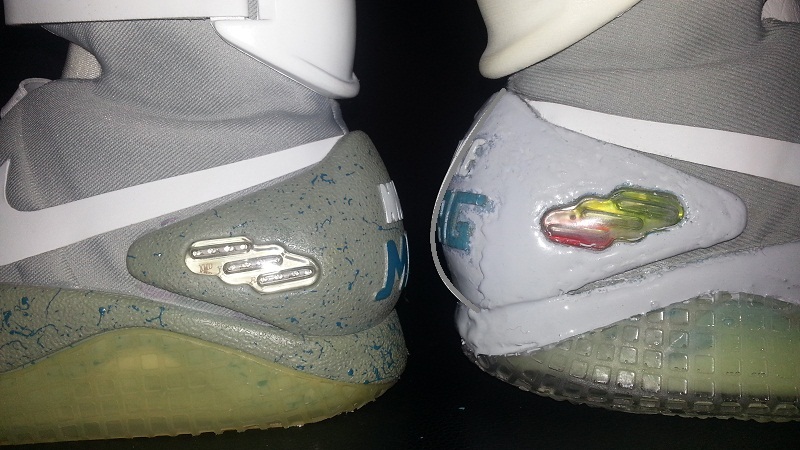
The rubber has a "pot life" of 15 minutes. From its original runny liquid state, it goes into a firmer gel state for about the next 15 minutes where it can still be applied, but does not run or pour anymore. It bonds to the older pours and because I made an excess of the light grey pigment, colour matches perfectly as well. After that first half hour, it starts to set and you then have to wait a further 6~10 hours before you can do anything with it again. So over the last few nights, I have mixed 10 grams, applied that and let it set up over night. This Heel Cup mod will probably take 4 or 5 days to complete. .
Lately I have been doing some radical mods using rubber. I still have not quite finished the 2nd layer though I would like to share and get feed back on my latest crazy idea being a Heel Cup reshape.
An original on the left and my modded shoe on the right. You can't see it in this shot, but the outrigger soles even give my shoes that odd lean that the real shoes have. The un-modded shoe sits straight.
Toe slims have been a hot topic of late and looking at my steam method slim against a factory boot toe, I do wonder if a build up is not now out of the question given the rubber I am using can be built up. Even if I was to do the cut method and remove the toe box completely, I would still want to build up the front of the toe which leads me on to the Heel Cup mod.
Again EXCUSE my rough edges, this is not done yet.
So the RD MAG has a much larger Heel Cup than the V2/HC and the mid-sole is much lower at the back. I really like that "fat-ass" look. A few weeks back, I removed the Heel Cups from their inner mount and re-attached them on the exterior of the mid-sole to give them the appearance of having more size. Note how the letters look too small on my shoe now even though they are the same size as the un-modded shoe on left. They also seem to sit too high, so I will be making some larger MAG letters to attach soon. So now I am thinking of increasing the size of the Heel Cup by layering up small amounts of rubber at a time to build it out.
Side profile (line I drew in) of what I hope to achieve.
The rubber has a "pot life" of 15 minutes. From its original runny liquid state, it goes into a firmer gel state for about the next 15 minutes where it can still be applied, but does not run or pour anymore. It bonds to the older pours and because I made an excess of the light grey pigment, colour matches perfectly as well. After that first half hour, it starts to set and you then have to wait a further 6~10 hours before you can do anything with it again. So over the last few nights, I have mixed 10 grams, applied that and let it set up over night. This Heel Cup mod will probably take 4 or 5 days to complete. .
Attachments


DragonGalvy
Sr Member
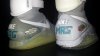
For those of you who asked about the glowing on the BTTF Airmax 90 replicas I got recently, it's disappointing. I'd guess they just painted on the same sort of glow-in-the-dark paint I bought last year and wasn't happy with. Other than that issue, they're pretty good for copies. Even the cushioning is similar.
![IMG_0286[1].JPG](https://therpf-f28a.kxcdn.com/forums/data/attachments/179/179981-85205647a795e94c4ee96587e79b468d.jpg "IMG_0286[1].JPG")
MrSouthpaw
Sr Member
For those of you who asked about the glowing on the BTTF Airmax 90 replicas I got recently, it's disappointing. I'd guess they just painted on the same sort of glow-in-the-dark paint I bought last year and wasn't happy with. Other than that issue, they're pretty good for copies. Even the cushioning is similar.
View attachment 429616
I wonder if the factory glow can be removed. Repaint it with my glow paint.
cavx
Master Member
I wonder if the factory glow can be removed. Repaint it with my glow paint.
Why even remove it? Just paint it over the top.
My kid has decided to keep one of the mix containers from the last batch of GITD I did as even though it is just a skin on the inside (0.5mm thick) it glows enough to be a night light in his room. Looks like I better get that TMNT project done sooner than later.
MrSouthpaw
Sr Member
Why even remove it? Just paint it over the top.
My kid has decided to keep one of the mix containers from the last batch of GITD I did as even though it is just a skin on the inside (0.5mm thick) it glows enough to be a night light in his room. Looks like I better get that TMNT project done sooner than later.
I might have to shoot a letter to glow inc and ask them how well they think their paint would hold up on large patches of shoe and shoe sole.
cavx
Master Member
I might have to shoot a letter to glow inc and ask them how well they think their paint would hold up on large patches of shoe and shoe sole.
See if you can get out of them what percentage the GITD is in their paint. I mix at the maximum recommended amount of 15%. When I first was playing with this, I was only about 5%. Huge amount of difference in the end result when maxed out. Same for the pigments where I go for the maximum of 5%.
MrSouthpaw
Sr Member
See if you can get out of them what percentage the GITD is in their paint. I mix at the maximum recommended amount of 15%. When I first was playing with this, I was only about 5%. Huge amount of difference in the end result when maxed out. Same for the pigments where I go for the maximum of 5%.
On every page for the water-based paint it says...
"Glow Inc only uses Grade 0 or Grade 1 pigments, while most Internet sources use Grade 4 or 5. We add those pigments at a ratio of 2 lbs of phosphorescent pigment to 1 gallon of medium."
Solvent-based...
"Our paints are created by mixing the raw pigment (glow powder) with the custom designed paint in a ratio of 2 lbs of glow in the dark pigment to 1 gallon of paint."
http://glowinc.com/
MrSouthpaw
Sr Member
What does a gallon of medium weigh? Clearly they are mixing huge volumes where I am only mixing 10g at a time.
There is 2.2 pounds per KG.
You know what? Looks like they won't answer.
http://glowinc.com/glow-in-the-dark/contact.aspx
"Sorry, we no longer respond to technical questions via email or phone."
They say join their forum, but it's link leads right back to the main page.
From the technical pages...
http://glowinc.com/glow-in-the-dark/medium.aspx
Liquid Mediums in Large Quantities
2 pounds of glow in the dark powder to 1 gallon of medium
1 kilogram of glow in the dark powder to 5 liters of medium
Liquid Mediums in Small Quantities
1/2 ounce of glow in the dark powder to 1 ounce of medium
Dry Mediums
Add 15% glow in the dark powder by volume to the medium
And here's all the other technical pages....
http://glowinc.com/glow-in-the-dark/info.aspx
I didn't see weight of the medium anywhere.
Last edited:
cavx
Master Member
Dry Mediums
Add 15% glow in the dark powder by volume to the medium
This is the only one that seems close to what I use.
If you look at the small quantities mix is about 50%. Given the cost of this stuff - OUCH!
Another thing to consider too is that I am mixing into a clear liquid. All the GITD paint products I've seen are white liquids that then glow green or blue or somewhere in between like cyan. I do have to wonder how much of an impact that white colour has on the brightness of the light.
cavx
Master Member
Heel Cup reshape.
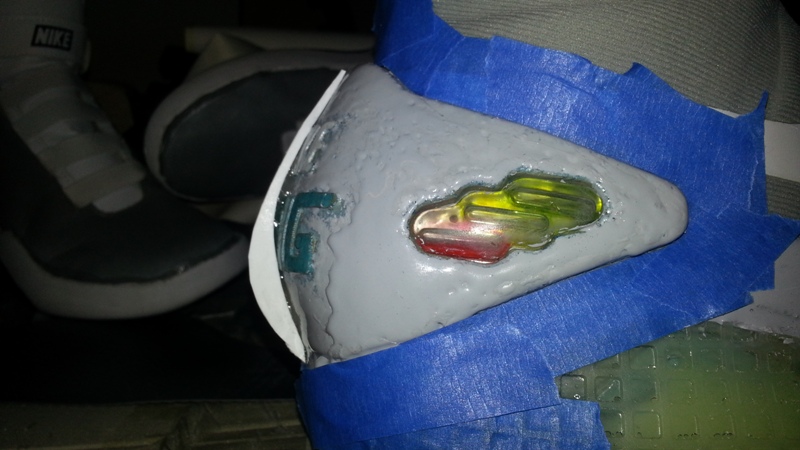
The goal is to get it close to the shape of the profile I have hot glued and taped to the Heel Cup. I don't want to make the part as thick as the profile cutout, but get it close and then blend it into the sides. The first layer has been mixed, vacuumed and applied and both shoes are curing now. I have to do this in two halves so it will be interesting to see what I end up with tomorrow. Still about 4 hours to go before it is safe to touch.
The goal is to get it close to the shape of the profile I have hot glued and taped to the Heel Cup. I don't want to make the part as thick as the profile cutout, but get it close and then blend it into the sides. The first layer has been mixed, vacuumed and applied and both shoes are curing now. I have to do this in two halves so it will be interesting to see what I end up with tomorrow. Still about 4 hours to go before it is safe to touch.
Attachments

- Status
- Not open for further replies.
Similar threads
- Replies
- 12
- Views
- 862
- Replies
- 0
- Views
- 1,081
- Replies
- 62
- Views
- 8,053