That was fast sourcing of the parts! Im glad you found them, did you Ebay the harness? It looks new!
Space is a premium in these goggles. When you scale up from the 3D scans you realise there is little room for boards etc. So I had to strip it down to bare essentials.
Initially I thought they preserved the camera parts as when Mazello turns on the goggles the lens caps go up like the camera. But as I looked more I think this may have been accidental pushing of the rocker switch by Mazello. Especially if you look at the refurbished pair for Jurassic World in a props behind the scenes featurette, they dont have this functionality at all. So I think even the screen used pair grind gears when fully extended.
If you look at the screen used dismantled pair above it appears the same treatment has been applied, stripping down to just the lens and motor. Thats not to say camera parts arent tucked away but I doubt there is room.
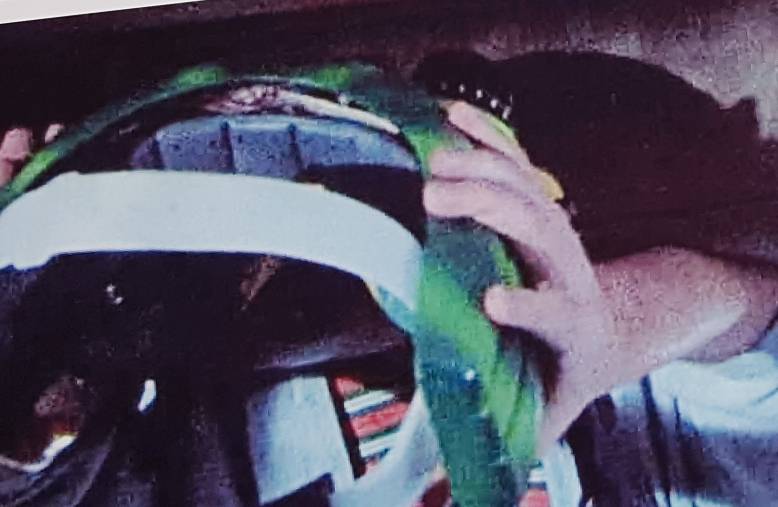
Also you can see in the film bundles of wires stuffed behind the lenses, see attached. But I wanted mine to be self contained like a real product.
So the motor fits in its default position on the right lens. But yes the left motor needed repositioning to fit. This was tricky to be honest. I made the housing out of styrene and cyanoacrylate and had to pay careful attention not to get any filed or sanded pieces styrene in the cogs as these lenses do die with minimal stress on the motor. I used 2mm styrene but had to double up thickness to give the housing strength as the motor liked to pull away from the lens. Looks like the screen used pair has a metal housing. Ive included an image of my first draft but I had to sand the styrene back to fit it all in after this.
I also had to reposition the lens sheath/tube plastic part that has the teeth on it so the new position would work. This process was trial and error and I have to admit to losing two lenses at this stage. Heartbreaking both times.
Timed motors would be great. Id be interested in chipping in to commission a duplicate board if possible?
Any more questions let me know. I think another poster document is in order for extra build info!
https://uploads.tapatalk-cdn.com/20170930/ef70da2b8f5d4c63283aed867d0d3738.jpghttps://uploads.tapatalk-cdn.com/20170930/1474b0028b8db1a7839dcbaacf2fd8ce.jpg
Sent from my SM-G920F using Tapatalk
")