New BMF coming

Yup; just another modeling chore... now cutting the little 'nicks' on the edges, that is the definition of tedium.

R/ Robert
 
new to this forum but checking in frequently. great amount of awesome work and inspiring minds.
just received the mf vents from shapeways, blown away by the quality of FZ6s work and the quality of the prints in general.

Many thanks for your great feedback!! Happy that you liked them!

Just one tip: sand gently the backside of the grilles -the bottom-, to eliminate all the printing debris. They will look better!!!

MF HSBRO ENGINE VENTS 3.jpg

And Merry Christmas!!!

MERRY XMAS BATTLEFRONT 3 15.jpg
 
Installed Tony's turbines and prepped the grills last night. They look awesome!

IMG_7975.JPGIMG_7977.JPG

If i had one suggestion though, possibly making the outer wall of the turbine thicker slightly to fill the void around them on the hasbro (shown on the picture below). It would help not have to have the turbine up inside the ring for glueing and it could be a little lower down. As things stand i feel the grating/cover is a little too flush with the surrounding plastic. Maybe i'll try to build out the edge of the turbine bit with some styrene and see how that looks. Pretty darn happy though with the look. Tony's work is stellar once again! He needs to construct some maintenance wells for printing!! lol

IMG_7978.JPG


Many thanks for your great feedback!! Happy that you liked them!

Just one tip: sand gently the backside of the grilles -the bottom-, to eliminate all the printing debris. They will look better!!!
 
Installed Tony's turbines and prepped the grills last night. They look awesome!

If i had one suggestion though, possibly making the outer wall of the turbine thicker slightly to fill the void around them on the hasbro (shown on the picture below). It would help not have to have the turbine up inside the ring for glueing and it could be a little lower down. As things stand i feel the grating/cover is a little too flush with the surrounding plastic. Maybe i'll try to build out the edge of the turbine bit with some styrene and see how that looks. Pretty darn happy though with the look. Tony's work is stellar once again! He needs to construct some maintenance wells for printing!! lol

Many thanks for your feedback Cellarboy!

Yes, I will add a ring to thicken the surrounding area of the top of the turbines. No problem.

Many thanks for your suggestion!
 
I just purchased the sound & lighting harness (and rear light) for the 2008 Hasbro legacy MF. I think this might make this an even more fun build.

s-l1000.jpg

Just got this in and the curvature and length of the rear engine housing seems a perfect for the 2014 Hasbro. It appears to be exactly twice the height needed but there is the perfect break in the clear lens where there is no detail and makes a channel across the entire length. This could be cut to fit.
 
Last edited:
I've been taking the knife to my BMF the past few days prepping for pieces and checking out what screen grabs I can find to look for areas to improve. One area that really stands out to me is the engine louvers but I don't know if it would be worth the trouble to try and remove and replace them with ones that would be raised off the model like in this shot.

http://img.lum.dolimg.com/v1/images/Screen_Shot_2015-04-08_at_11_9f5de12f.jpeg?region=2,0,2485,1398

With as much of a pain as it is trying to sand and smooth this plastic would it even be worth trying or will I basically need to remove the majority of the rear edge and rebuild it to ever get it to look right?
 
It is a personal choice, Capo of how far to take it (and something I'm considering as well.) Other folks working this toy have covered the spectrum from out of the box with a great paint job to serious chop & replace. Have you checked out some of Tony's stuff on Shapeways (308 Bits shop [http://www.shapeways.com/shops/308bits?section=Falcon+HSBRO&s=0] )? He has also partnered with Mike Salzo to resin cast many of his items so they can be offered more affordably (see thread [http://www.therpf.com/showthread.php?t=236356] )

RE: the 'exhaust flaps', Tony hasn't made anything for those as of yet. One option for you would be to remove them, making a master replacement part and then casting your self a set in resin. You could also just fabricate an entire set from Evergreen plastic but it would be tedious to do so. I picked up a couple of sets of the actuators from 308 Bits to save time & effort.

With all the detailing sets being made by RPF members, there may even be someone who has already produced a set of the flaps, but I cannot say who at this time. Guess I need todig around a bit, too. However, I think you are right in supposing the original detail will not suffer modification because of the nature of the plastic. You'll need to replace it or accept it.

Regards, Robert
 
I have looked at Tony's parts on Shapeways and I'm planning on ordering a few pieces to go along with the kit I have on order from SirCharles.

I've been playing around with a design program this past week and created one of the upper mandible pits that I'm going to have printed. If it turns out decently I may try to draw up/print the flaps and pair them with a set of Tony's actuators.

If we're talking about the same part, Randy Cooper has those exhaust flaps in his 73 part kit here: http://randycoopermodels.com/content/resin-upgrade-parts-30-hasbr-falcon
 
Got my 3D printer in yesterday and decided to try out on of the mandible pits I've drawn up. I only have black filament until the middle of next week but the results turned out pretty well. I'll cut the put out and dry fit the printed one later today to get a better idea of how it will look.

TFbvox9l.jpg


Finding pictures of these pits aren't real easy and the best one I had to go off of was this screen shot from a youtube video of someone's Master Replica
Pit1.PNG


EDIT

Did a dry fit after cutting one of the pits out. Looks pretty good to me, going to start drawing up the other 7 and get some grey filament on order this week.

VrgKIYhl.jpg


YCpugt1l.jpg
 
Last edited:
Got my 3D printer in yesterday and decided to try out on of the mandible pits I've drawn up. I only have black filament until the middle of next week but the results turned out pretty well. I'll cut the put out and dry fit the printed one later today to get a better idea of how it will look.

http://i.imgur.com/TFbvox9l.jpg


Finding pictures of these pits aren't real easy and the best one I had to go off of was this screen shot from a youtube video of someone's Master Replica
View attachment 578237


EDIT

Did a dry fit after cutting one of the pits out. Looks pretty good to me, going to start drawing up the other 7 and get some grey filament on order this week.

http://i.imgur.com/VrgKIYhl.jpg

http://i.imgur.com/YCpugt1l.jpg
This looks pretty cool! Do you know what resolution this was printed with?

Sent from my Nexus 6 using Tapatalk
 
I ran it through on the high quality setting through Simplify3D with 0.1mm layer height. With such small details on these pieces I don't know if there will be any smoothing them out. I'm going to print a few of them to do some trial and error with.
 
I ran it through on the high quality setting through Simplify3D with 0.1mm layer height. With such small details on these pieces I don't know if there will be any smoothing them out. I'm going to print a few of them to do some trial and error with.

Looking pretty good Capo! What printer did you get?
 
Three hundred and fifty bucks for the Maker Select?! Wow, it may be time to jump in. That's looking good - is there any chance you'll eventually make your maintence pit files available?
 
I've only done a few prints so far but for the money it seems like a good little printer. I'm using Simplify3D for my slicer so that may be making things a lot easier on me as well.

For now I'm focusing on getting the pits finished but I'm sure I will make a decision on the files the closer I get to having them completed. I started this as a hobby with no intentions on making any money from it but at the same time I'd prefer someone else not make money off of them either. I may end up putting them on Shapeways at my cost for anyone wanting a frosted detail version of them and trying my hand at casting them in resin to offer at a lower price as well like Tony has been able to do with his parts. At that point there wouldn't be much money to be made off the files so I could offer them.

That's just a few ideas I suppose, I'd be glad to hear anyone's feedback or opinions though. Right now my goal is just to get them and the Falcon completed before my first child gets here later this year. If I don't have it done by then I know it'll start collecting dust.
 
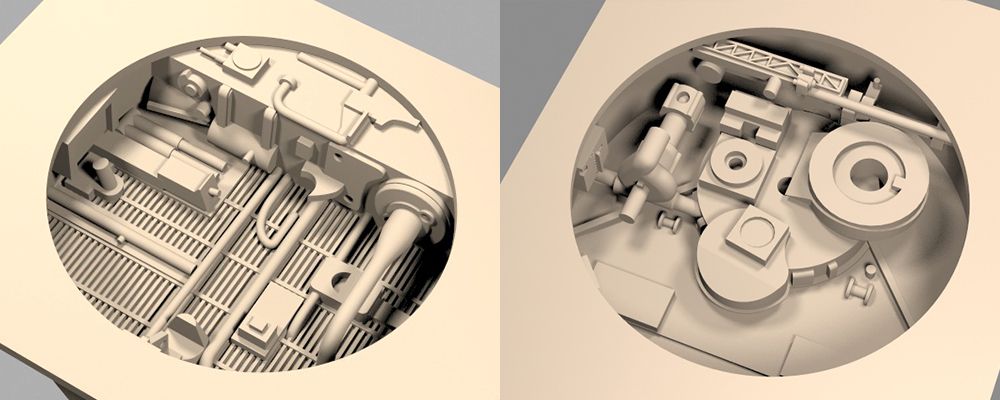
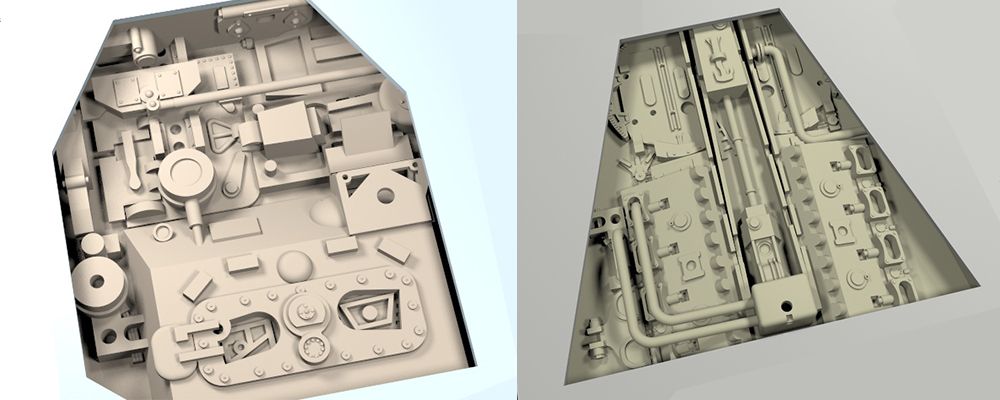
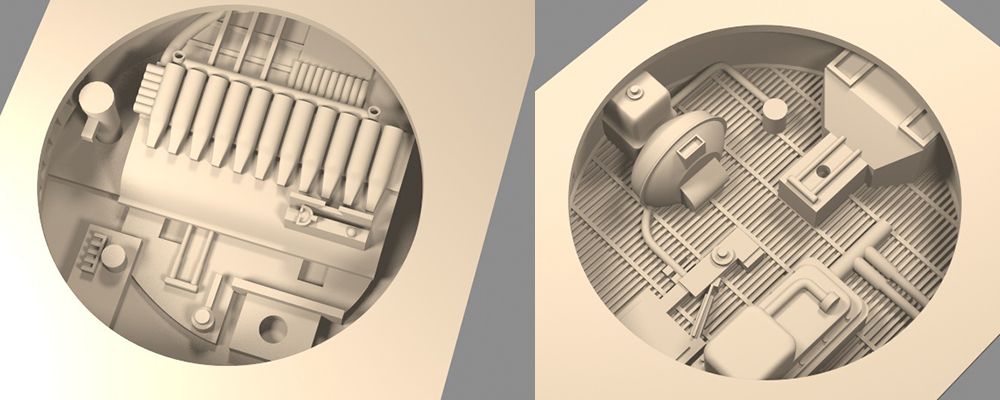
Just wanted to let everyone know that I have been also working for a while on the maintenance pits for the upper hull and I am hoping to have it all done in a few weeks. I am posting the 3D pics of them here for your reference. This is still work and progress and will be refined, especially circular pits. As a reference I had to buy a number of real kits that were used to add detail to these pits as well as tons of reference pictures of the real model and Master Replicas model.
I am planning to make them available in the project runs section and will create an interest thread very soon. They will be printed in grey SLA resin in either 0.05 or 0.025mm to keep all the details crisp.


Back
Top