the.rebel.agent
Sr Member
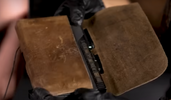
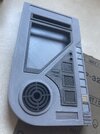
You might find this very cool, I finally put all together. My dad handed me his iPhone7.
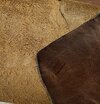
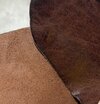
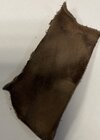
I do like the texture from both sides, but brown should be lighter. How thick are those?Of all the choices here, I can’t seem to find anything that’s close enough to my liking…
Any idea what you are using for the phone?Just got my kit. Amazing. Simply amazing.
I am gonna start on it first thing tomorrow.
Thanks again for making these.
Hey, are you going to be documenting your build so we can follow along?Just got my kit. Amazing. Simply amazing.
I am gonna start on it first thing tomorrow.
Thanks again for making these.
Oh, You bet I will. I was waiting until most of the kits arrived. I will prepare a visual assembly guide like I did for Tech's datapad.Hey, are you going to be documenting your build so we can follow along?

That's was the idea of printing then in the right final color. They are so small to sand anyway. Good to hear from youCurrently disgusted with my Bryar lol, it was time to finally break this out. Nothing much to post atm, just a quick tip to anyone also attempting. I found that putting all the pieces in place and sanding them on the actual tablet was much easier than attempting to do them individually. Also, safer as you don’t risk the chance of the thinner pieces breaking.
This is gonna be a fun build (unlike the Bryar). I’m sanding EVERYTHING to eliminate the printer lines as well as take the shine off for better paint adherence, however, I won’t be priming and repainting the smaller pieces already molded in the correct color plastics. Simply roughing them up with sandpaper then weathering.