kalkamel
Master Member
About 5 years ago, I bought a really crappy cheap hoverboard from Ebay. When it arrived, I was pretty much devastated... it looked ok in the auction pics but in the flesh, it looked more like the product of a kindergarten art class. But I bought it, so I grudgingly kept it, even put it in my display area (mostly hidden from visiting eyes).
Anyway, cut to the present. It still looks like a POS, but in addition to that, the foam had started to break and the graphics (which were printed on card stock and hot glued to the styrofoam body) were peeling off. I thought it was finally time I got a decent replacement. I've always wanted one of bttf123's boards, but he no longer ships internationally. Besides, he no longer offers the correct lenticular material with his boards. The other hoverboards offered were either too pricey for me or lacked some of the features I wanted. So I decided to build my own, albeit a budget one.
When I started this, I had no delusions about making the most screen accurate board ever, just something that I could proudly display in my prop collection. So I decided to combine elements which I liked from the various hero and stunt boards while at the same time making it instantly recognizable.
Here's how the build went.
Day 1: Construction
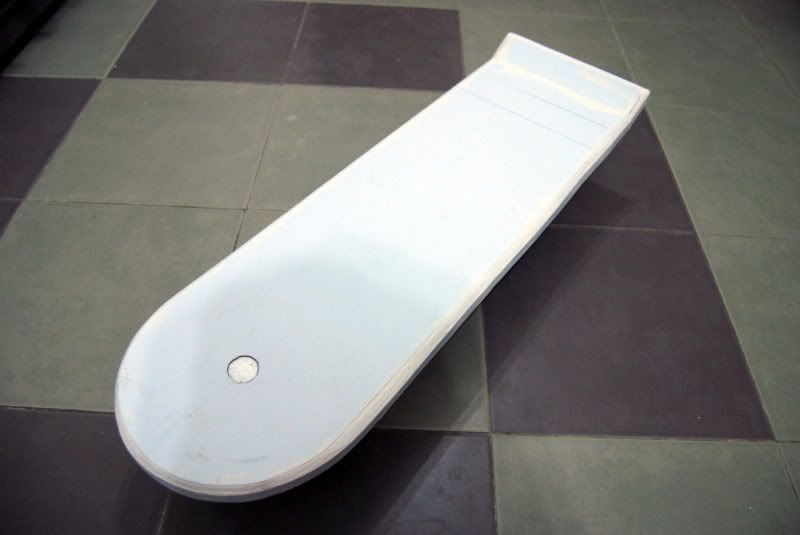
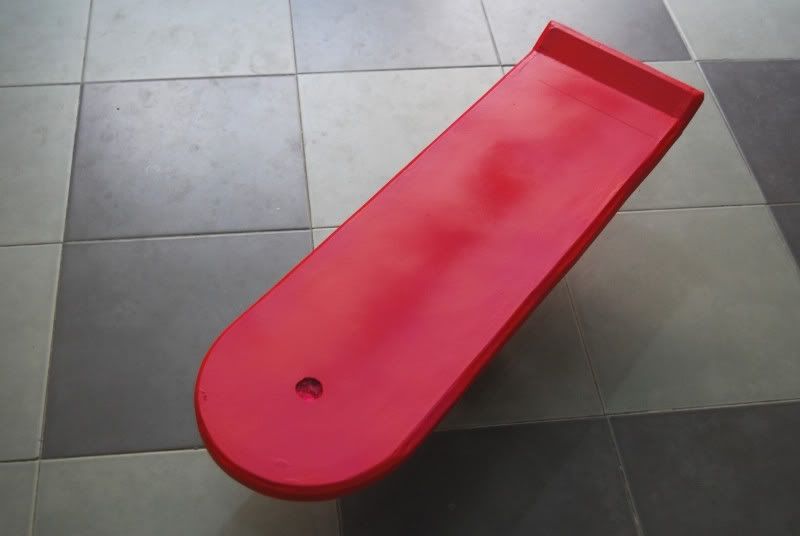
I wanted the board to be light so I decided to build it out of a combination of styrofoam and mounting board. I cut the 1" foam to the dimensions of 28"x8" and that sandwiched that between 2 pieces of mounting board cut slightly smaller. This would enable me to bevel the edges of the board just like the actual prop. I cut off 2" from the end of the board and re-glued it at a 25 degree angle for the kicktail. In hindsight, I realized I should have made the kicktail longer, but too late now. I used wall filler to fill smoothen the edges. Matt sealer was brushed onto the filler surface to allow painting.
Day 2: Priming
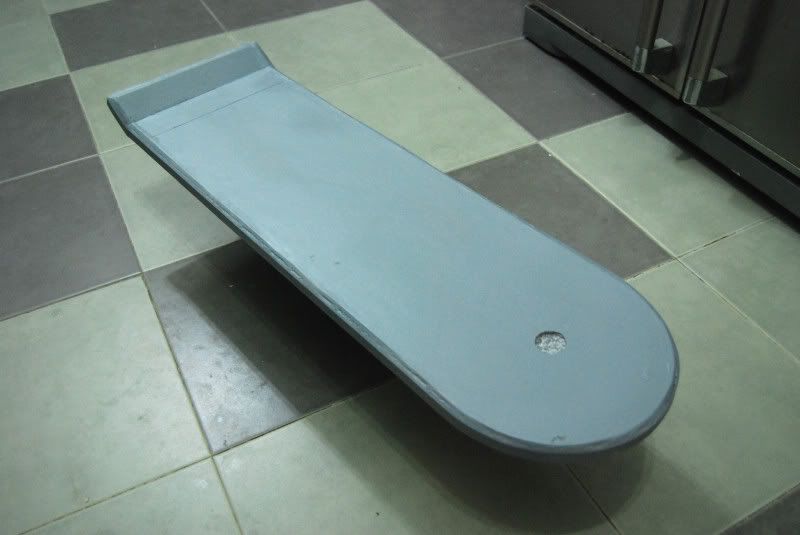
After priming the board, I noticed the imperfections on the edges and went through the process of filling and sanding and filling and sanding until I was satisfied.
Day 3 & Day 4: Painting the board
After a final coat of primer, the board was painted with several coats of flourescent pink from a rattlecan. It came out more reddish than flourescent pink though.
Day 5: Applying the graphics and velcro
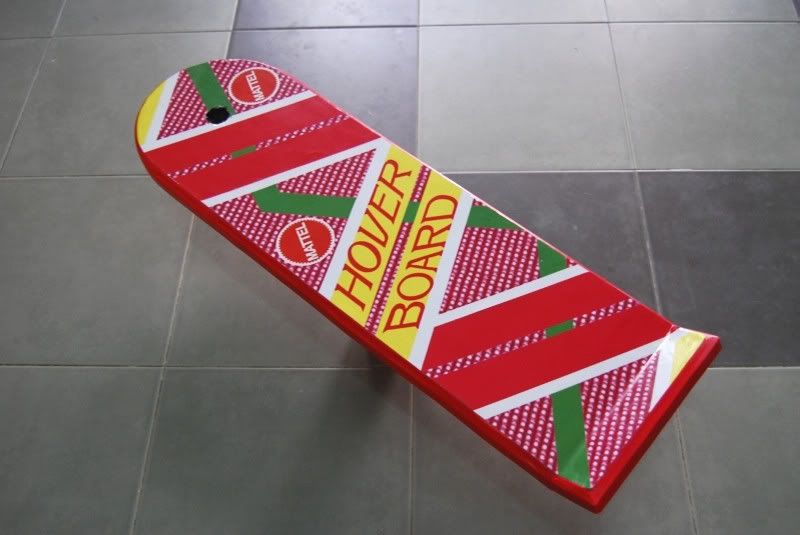
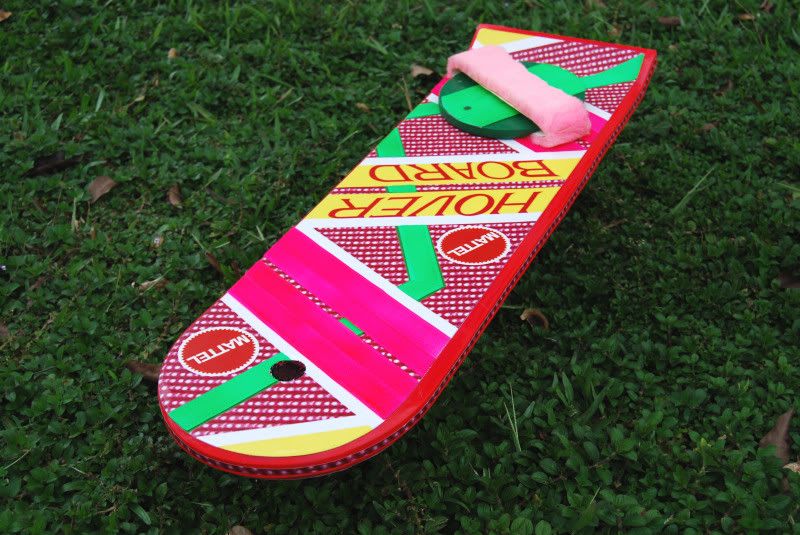
Since I did not have the lenticular material, I used the graphics posted by bttfguy in this thread. The underside graphics ended up being a little short for some reason though. For the velcro, I only had plain white sticky back ones so I painted them flourescent pink (same as the board) and flourescent green.
Before velcros:
After velcros:
Day 6: The footpad, the side graphics
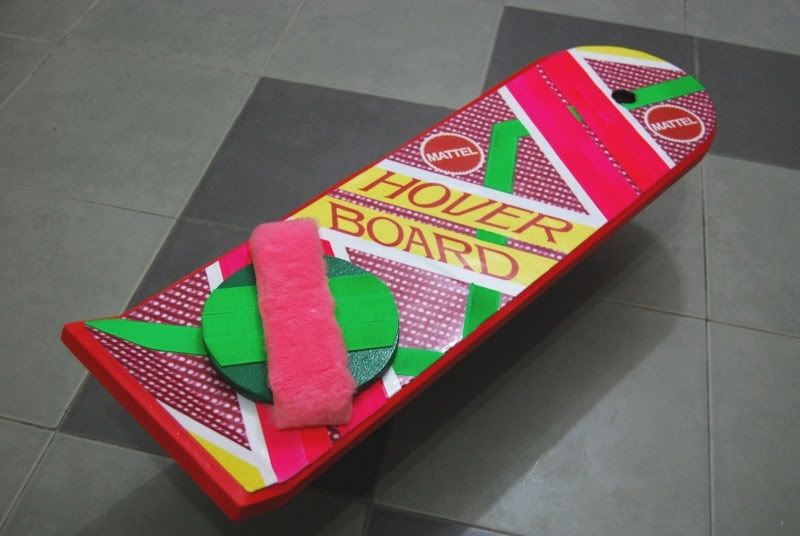
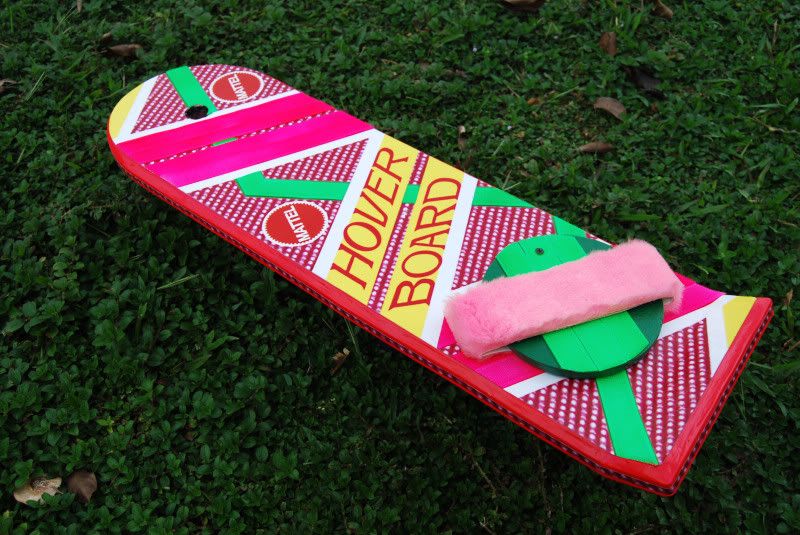
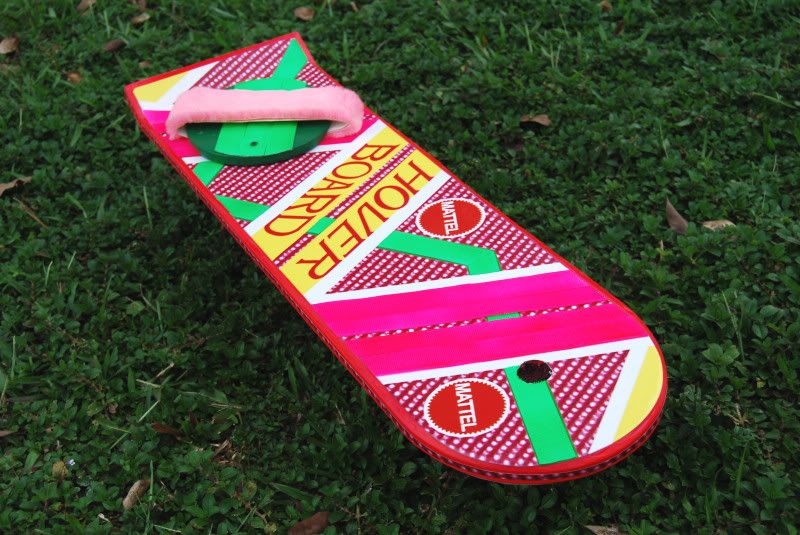
I added the footpad, cut out of MDF, painted green then added the pink furry material and green velcros. And yes, it does rotate.
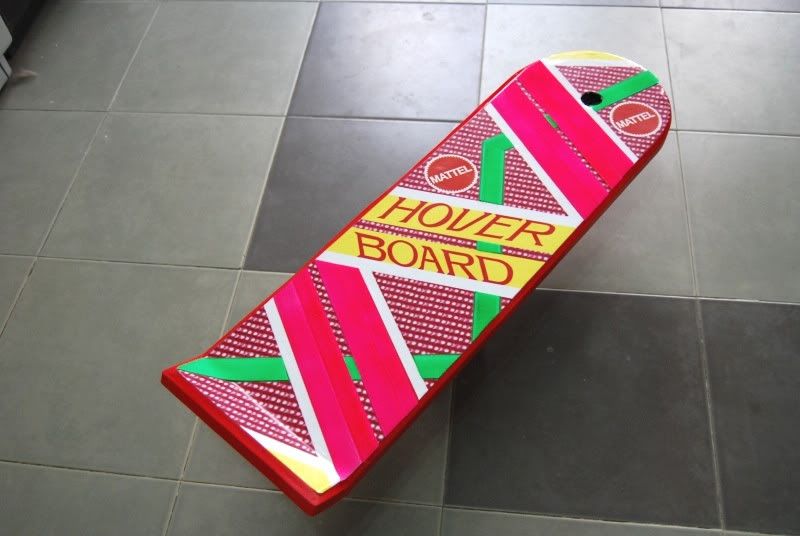
I also added the side graphics. I weighed between using silver reflective tape or a graphic of the lenticular material and decided on the latter after consulting with Vivek and GeneralFrosty.
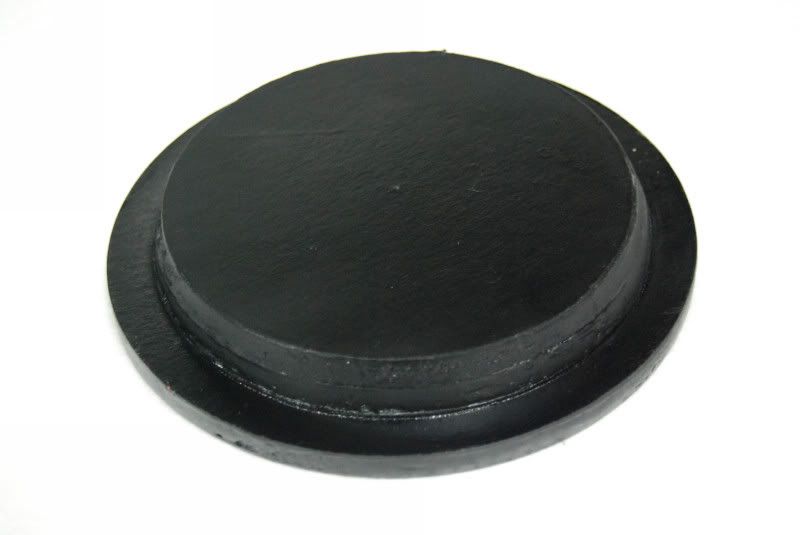
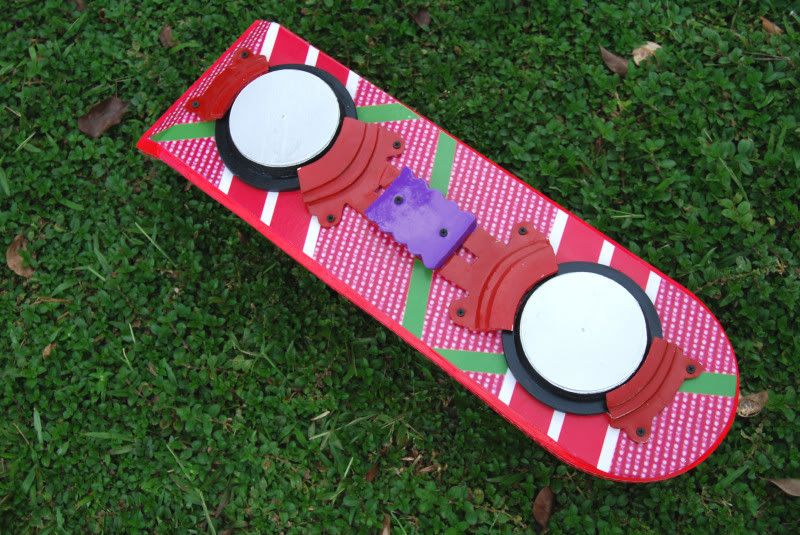
I also started making the magnets. These were made up of two parts. The first is a disc made out of 1/4" foamcore sandwiched between 2 pieces of mounting board about 6.5" in diameter. The second is a tapered disc made out of 1/2" foamcore sandwiched between 2 pieces of mounting board measuring about 6" in diameter at the base and 5.5" at the top. These two pieces are then glued together and painted gloss black.
Day 7: Adding the magnet and clamps
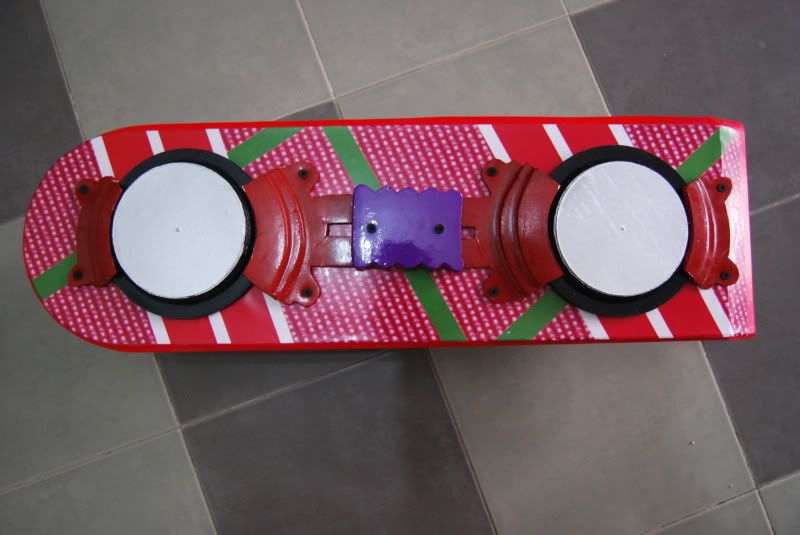
The clamps are made out of layers of 1/4" compressed foam and then painted with acrylics. Screws were added for aesthetics. I also cut out 2 pieces of mounting board circles and painted them silver for the magnet tops.
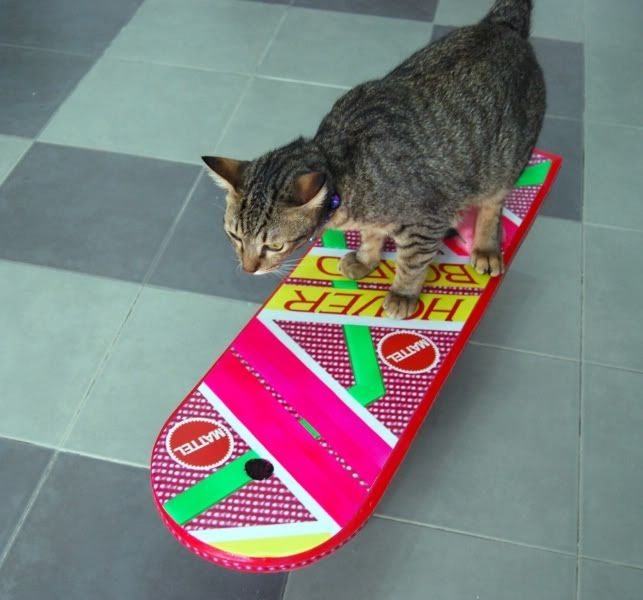
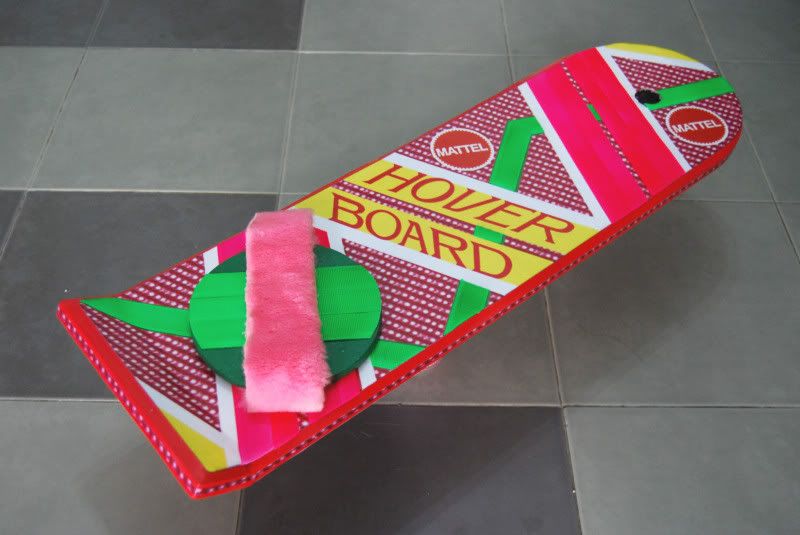
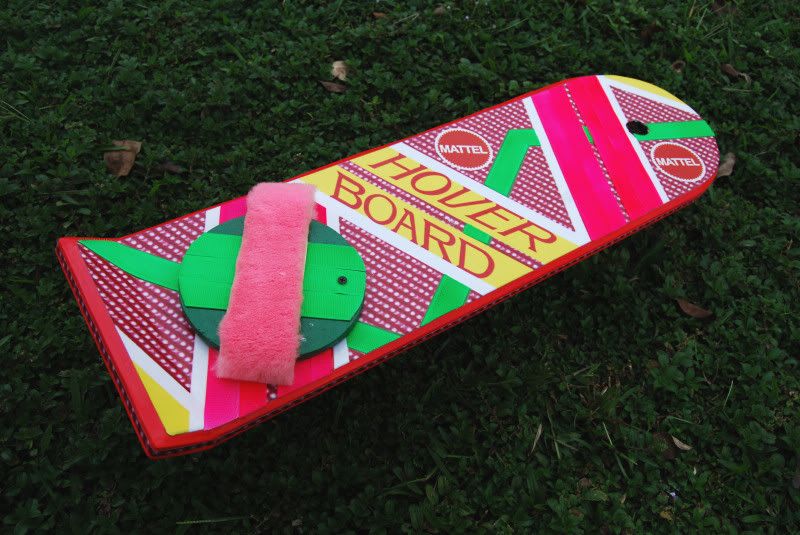
So after a week, I have myself a brand new hoverboard!
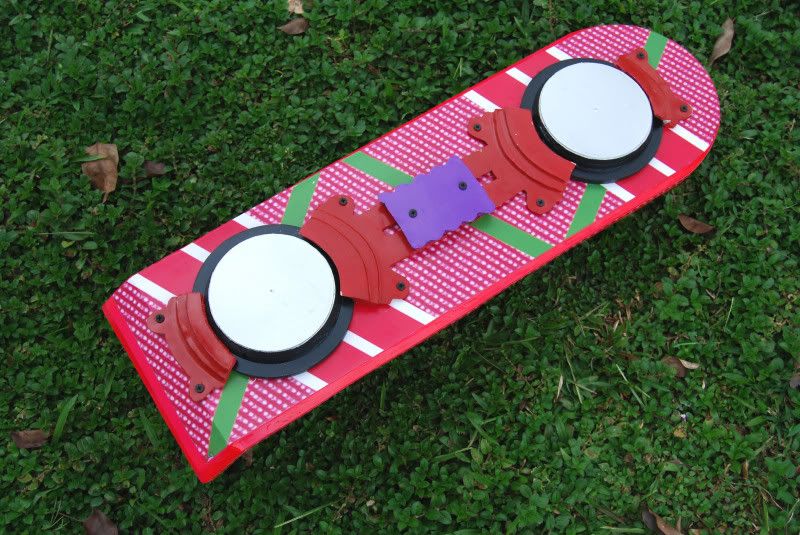
I'm sure there are tons of inaccuracies with the board but as I said at the beginning of this post, I never intended to build a super screen accurate prop. But I'm pretty happy with the end result and at least, now I have a display base for my coming-soon Nike Mags!")
My thanks goes to GeneralFrosty and Vivek for sharing their knowledge and helping me out with this build, as well as to bttfguy for posting the graphics! :cheers
Anyway, cut to the present. It still looks like a POS, but in addition to that, the foam had started to break and the graphics (which were printed on card stock and hot glued to the styrofoam body) were peeling off. I thought it was finally time I got a decent replacement. I've always wanted one of bttf123's boards, but he no longer ships internationally. Besides, he no longer offers the correct lenticular material with his boards. The other hoverboards offered were either too pricey for me or lacked some of the features I wanted. So I decided to build my own, albeit a budget one.
When I started this, I had no delusions about making the most screen accurate board ever, just something that I could proudly display in my prop collection. So I decided to combine elements which I liked from the various hero and stunt boards while at the same time making it instantly recognizable.
Here's how the build went.
Day 1: Construction
I wanted the board to be light so I decided to build it out of a combination of styrofoam and mounting board. I cut the 1" foam to the dimensions of 28"x8" and that sandwiched that between 2 pieces of mounting board cut slightly smaller. This would enable me to bevel the edges of the board just like the actual prop. I cut off 2" from the end of the board and re-glued it at a 25 degree angle for the kicktail. In hindsight, I realized I should have made the kicktail longer, but too late now. I used wall filler to fill smoothen the edges. Matt sealer was brushed onto the filler surface to allow painting.
Day 2: Priming
After priming the board, I noticed the imperfections on the edges and went through the process of filling and sanding and filling and sanding until I was satisfied.
Day 3 & Day 4: Painting the board
After a final coat of primer, the board was painted with several coats of flourescent pink from a rattlecan. It came out more reddish than flourescent pink though.
Day 5: Applying the graphics and velcro
Since I did not have the lenticular material, I used the graphics posted by bttfguy in this thread. The underside graphics ended up being a little short for some reason though. For the velcro, I only had plain white sticky back ones so I painted them flourescent pink (same as the board) and flourescent green.
Before velcros:
After velcros:
Day 6: The footpad, the side graphics
I added the footpad, cut out of MDF, painted green then added the pink furry material and green velcros. And yes, it does rotate.
I also added the side graphics. I weighed between using silver reflective tape or a graphic of the lenticular material and decided on the latter after consulting with Vivek and GeneralFrosty.
I also started making the magnets. These were made up of two parts. The first is a disc made out of 1/4" foamcore sandwiched between 2 pieces of mounting board about 6.5" in diameter. The second is a tapered disc made out of 1/2" foamcore sandwiched between 2 pieces of mounting board measuring about 6" in diameter at the base and 5.5" at the top. These two pieces are then glued together and painted gloss black.
Day 7: Adding the magnet and clamps
The clamps are made out of layers of 1/4" compressed foam and then painted with acrylics. Screws were added for aesthetics. I also cut out 2 pieces of mounting board circles and painted them silver for the magnet tops.
So after a week, I have myself a brand new hoverboard!
I'm sure there are tons of inaccuracies with the board but as I said at the beginning of this post, I never intended to build a super screen accurate prop. But I'm pretty happy with the end result and at least, now I have a display base for my coming-soon Nike Mags!
My thanks goes to GeneralFrosty and Vivek for sharing their knowledge and helping me out with this build, as well as to bttfguy for posting the graphics! :cheers
Last edited: