<EDIT>
Would anybody be interested in a set of these castings? If so, see my thread in the junkyard: Entex Porsche Castings for Slave I
</EDIT>
This post is going to be multi-part and long, but I want to tell the story, hopefully help others, and hear feedback. If you don’t like the wall of text just skip it and look at the pictures.
A couple of months ago I got the opportunity to cut up an Entex Porsche body and make molds for the Slave I parts. It seemed simple enough, drop the parts in RTV, pour resin. Right? Let’s go!
Then I started studying the Entex parts and doing some math. Traditional block molds for the rear fenders would require 12+ pounds of RTV! The front fenders need 10 pounds more! The doors need 4 pounds and the bumper3. At this rate the molds would cost as much as the model! What had I gotten myself into? :wacko
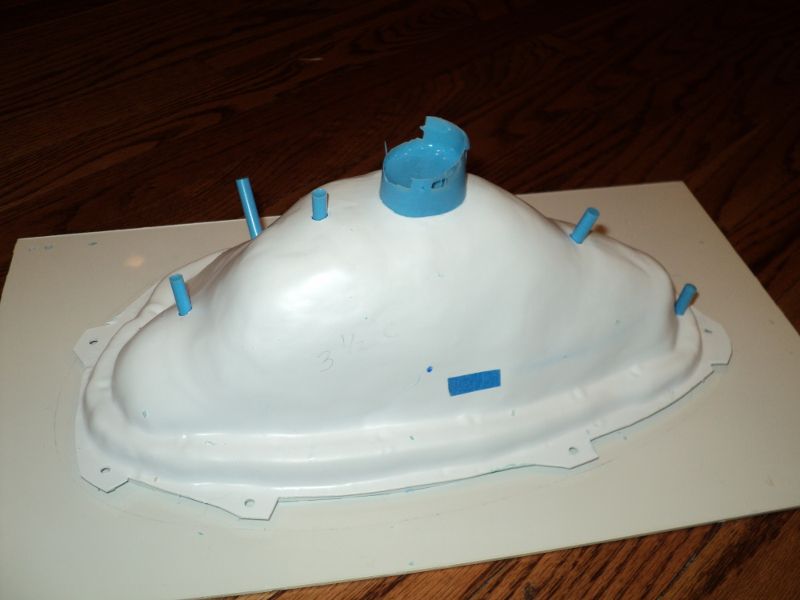
I started to try and figure out a way to use less RTV, focusing on the rear fenders. My first idea was make a custom mold box that would follow the curves of the body instead of a cube shaped box. It turns out that did not help much because the rear wheel well sticks out so far and creates lots of negative space. Then I found a tutorial on the Smooth-On website about cavity pour molds. That would be the solution, but they used Plasti-Paste for the shell. It looked simple enough but looked like a mess. I had never used it and I did not want to learn on this job. Instead, I clayed up the part, put another layer of clay over the whole thing (cavity space) and then vac formed over that with .06 styrene.


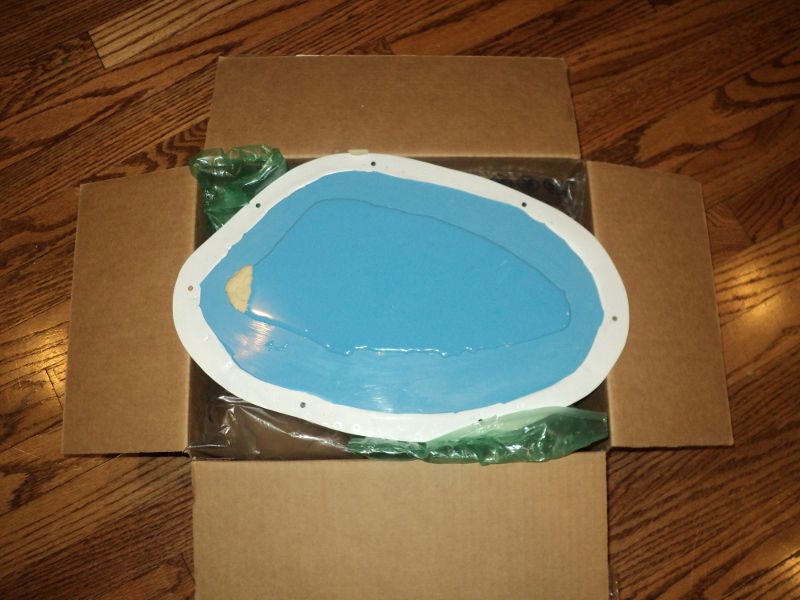
After the shell was created I removed the cavity clay. A pour hole was cut and several vents were drilled and extended with drinking straws. The shell was centered over the rear fender and bolted down through a sheet of scrap ABS that I had laying around. I used some old MoldStar-16 silicone to seal everything up. Lots of people use hot glue for the seal, but that stuff makes a mess. The old RTV worked great and was probably headed for the trash anyway.
The first part poured and curing.

Clay removed.

Measuring how much silicone will be need for the second parts. I measured the first part the same way, but the pictures look like crap. The plastic beads are like what is inside beanie babies.

Poured second part. Not pretty, but it works.

I had planned on pressure casting these…uh oh.
I have a 2.5 gallon pressure pot. A pressure pot big enough would really bust the budget. Okay, I will try the part without pressure. It turned out pretty good. There are some bubbles on the top edges, but all of them can be easily filled, some of them will be trimmed off for the Slave part and others will be hidden so deep in the ship body they will never even be seen anyway.
Raw casting.


Other parts to follow.
Would anybody be interested in a set of these castings? If so, see my thread in the junkyard: Entex Porsche Castings for Slave I
</EDIT>
This post is going to be multi-part and long, but I want to tell the story, hopefully help others, and hear feedback. If you don’t like the wall of text just skip it and look at the pictures.
A couple of months ago I got the opportunity to cut up an Entex Porsche body and make molds for the Slave I parts. It seemed simple enough, drop the parts in RTV, pour resin. Right? Let’s go!
Then I started studying the Entex parts and doing some math. Traditional block molds for the rear fenders would require 12+ pounds of RTV! The front fenders need 10 pounds more! The doors need 4 pounds and the bumper3. At this rate the molds would cost as much as the model! What had I gotten myself into? :wacko
I started to try and figure out a way to use less RTV, focusing on the rear fenders. My first idea was make a custom mold box that would follow the curves of the body instead of a cube shaped box. It turns out that did not help much because the rear wheel well sticks out so far and creates lots of negative space. Then I found a tutorial on the Smooth-On website about cavity pour molds. That would be the solution, but they used Plasti-Paste for the shell. It looked simple enough but looked like a mess. I had never used it and I did not want to learn on this job. Instead, I clayed up the part, put another layer of clay over the whole thing (cavity space) and then vac formed over that with .06 styrene.
After the shell was created I removed the cavity clay. A pour hole was cut and several vents were drilled and extended with drinking straws. The shell was centered over the rear fender and bolted down through a sheet of scrap ABS that I had laying around. I used some old MoldStar-16 silicone to seal everything up. Lots of people use hot glue for the seal, but that stuff makes a mess. The old RTV worked great and was probably headed for the trash anyway.
The first part poured and curing.
Clay removed.
Measuring how much silicone will be need for the second parts. I measured the first part the same way, but the pictures look like crap. The plastic beads are like what is inside beanie babies.
Poured second part. Not pretty, but it works.
I had planned on pressure casting these…uh oh.
I have a 2.5 gallon pressure pot. A pressure pot big enough would really bust the budget. Okay, I will try the part without pressure. It turned out pretty good. There are some bubbles on the top edges, but all of them can be easily filled, some of them will be trimmed off for the Slave part and others will be hidden so deep in the ship body they will never even be seen anyway.
Raw casting.
Other parts to follow.
Last edited: