Moisture Vaporator Build

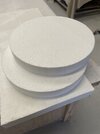
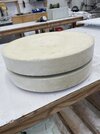
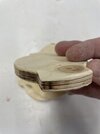
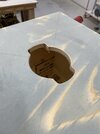
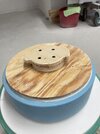
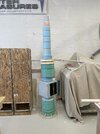
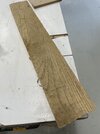
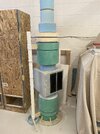
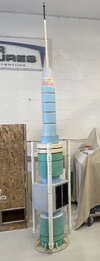
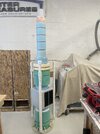
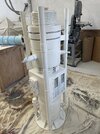
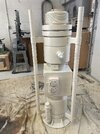
I’m doing a Star Wars theme for Halloween this year so decided I needed a big prop for the yard so decided on a moisture vaporator. I will be taking some liberties with this and upcycling as much as possible.

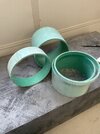
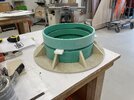
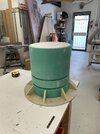
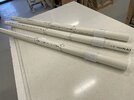
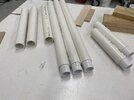
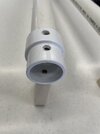
The main tubes I received from a buddy and the biggest tube determined the scale which I estimate around 55%.
 

Attachments

  • DA1786A4-0138-4447-9F52-F3AB5C5400F8.jpeg
    DA1786A4-0138-4447-9F52-F3AB5C5400F8.jpeg
    1.8 MB · Views: 69
  • D040DBBC-4349-4DCC-8CA1-EFE472DF4F72.jpeg
    D040DBBC-4349-4DCC-8CA1-EFE472DF4F72.jpeg
    3.2 MB · Views: 74
  • 1D6F90DE-B2AF-410C-A3F8-DBE5B84EF743.jpeg
    1D6F90DE-B2AF-410C-A3F8-DBE5B84EF743.jpeg
    1.3 MB · Views: 70
The main box is plywood that I smoothed out with some body filler to get rid of the wood grain.
 

Attachments

  • 90986C2C-739F-46B1-AD7E-22EC8B33B62B.jpeg
    90986C2C-739F-46B1-AD7E-22EC8B33B62B.jpeg
    1.2 MB · Views: 50
I needed a couple of rings that were a little larger than what I had. I had some 2” foam laying around so cut the rings from that, sealed with a couple coats of white glue and wrapped with card stock that I had. I wanted something that would take a hard knock so once the glue had dried I coated the entire thing with polyester resin that soaked into the paper and produced a hard shell.
 

Attachments

  • 769D4797-49FB-4C22-9A9B-0FE2564EEE82.jpeg
    769D4797-49FB-4C22-9A9B-0FE2564EEE82.jpeg
    1.2 MB · Views: 52
  • E75E7C22-6670-4CCE-B94D-6E60023CD203.jpeg
    E75E7C22-6670-4CCE-B94D-6E60023CD203.jpeg
    1.4 MB · Views: 51
I have made this so it can break down easily so there are 4 sections that interlock together. I made a quick template and cut out my keys with a router. There is a bit of a bevel on the back side so these twist into place easily.
 

Attachments

  • 775A3A5C-36E5-4BE9-A957-FEBB56E09877.jpeg
    775A3A5C-36E5-4BE9-A957-FEBB56E09877.jpeg
    1.3 MB · Views: 56
  • 0B4FE225-9930-491A-A1AA-8EB7B55D8A63.jpeg
    0B4FE225-9930-491A-A1AA-8EB7B55D8A63.jpeg
    1.4 MB · Views: 50
  • 9C72BE86-07A6-41DD-82EA-428D5AF430F8.jpeg
    9C72BE86-07A6-41DD-82EA-428D5AF430F8.jpeg
    1.6 MB · Views: 60
  • 347F13C5-398A-4825-8140-EF905EB8C4B7.jpeg
    347F13C5-398A-4825-8140-EF905EB8C4B7.jpeg
    1 MB · Views: 54
I also cut the corresponding hole for the key after making another template.
 

Attachments

  • 743B0F4C-9BB8-4110-9699-C14EDFEEAE2E.jpeg
    743B0F4C-9BB8-4110-9699-C14EDFEEAE2E.jpeg
    1.8 MB · Views: 45
  • 15BF7C1A-067D-44FA-87F3-1704A9362293.jpeg
    15BF7C1A-067D-44FA-87F3-1704A9362293.jpeg
    1.4 MB · Views: 48
  • 5943F2B8-C6B9-445A-9821-ACB1876EC711.jpeg
    5943F2B8-C6B9-445A-9821-ACB1876EC711.jpeg
    1.5 MB · Views: 56
I stole a couple of hours from work today to start on the chiller bars. I had to purchase the pvc for this and so far it has been the only cash outlay besides some adhesive. I cut up some pipe and screwed together with some fittings.
 

Attachments

  • B06FCF0A-CF95-409B-B207-BF88AD0F96C0.jpeg
    B06FCF0A-CF95-409B-B207-BF88AD0F96C0.jpeg
    2.8 MB · Views: 51
  • 3C5E6E50-CEA9-4EA2-8013-2DC5BF2CE432.jpeg
    3C5E6E50-CEA9-4EA2-8013-2DC5BF2CE432.jpeg
    3 MB · Views: 54
I used some hardwood from a pallet I ripped apart for the chiller bar supports. I have an idea for a quick connect system but need to get some hardware for it. I just mocked up one bar to get an idea of how it is going to look.
 

Attachments

  • 5150DD73-FFBB-4FEA-A9D0-2BDE82D7E72A.jpeg
    5150DD73-FFBB-4FEA-A9D0-2BDE82D7E72A.jpeg
    1.4 MB · Views: 73
  • 4DE5BC49-5FDA-4E94-BD6F-B1C2625E20C2.jpeg
    4DE5BC49-5FDA-4E94-BD6F-B1C2625E20C2.jpeg
    1.6 MB · Views: 60
  • 99A76906-830B-4201-9868-2620FA3C0518.jpeg
    99A76906-830B-4201-9868-2620FA3C0518.jpeg
    1.8 MB · Views: 56
I am using these hidden connectors for the chiller bars. Since this connection won’t be seen I didn’t worry too much about making it pretty as I needed to make it quick. Everything is glued and screwed together and the chiller bar just slips down into place and locks in like a French cleat.
 

Attachments

  • 73D61566-5BA4-4868-94D4-F54F7AC20F21.jpeg
    73D61566-5BA4-4868-94D4-F54F7AC20F21.jpeg
    1 MB · Views: 51
  • 2577278A-53E0-4A2D-836E-40854AD43969.jpeg
    2577278A-53E0-4A2D-836E-40854AD43969.jpeg
    1.4 MB · Views: 49
  • 313C7401-A286-45CD-91DF-5E82AD06637E.jpeg
    313C7401-A286-45CD-91DF-5E82AD06637E.jpeg
    1.3 MB · Views: 64
This is where I be am at today.

I’ll have to leave it until the weekend now as I have some real work to do. My next step is to do a bit of clean up work and patch some holes and start adding greeblies. I’m hoping to have it ready for paint after the weekend.
 

Attachments

  • DDE19839-270F-4AB0-A197-FCAAE7535E9F.jpeg
    DDE19839-270F-4AB0-A197-FCAAE7535E9F.jpeg
    1.4 MB · Views: 74
  • 1B8C32F4-A069-4A0E-9BC9-5C4B34043796.jpeg
    1B8C32F4-A069-4A0E-9BC9-5C4B34043796.jpeg
    1.7 MB · Views: 83
Greeblie day today! I just collected odds and ends of whatever junk I could find and tried to cobble together something that made sense to me. I’ll try to describe the parts as I go along.

This is one of the few pieces I paid money for, 1/4” vinyl tubing and some right angle barbed connectors for landscaping drip line. Turns out I had a roll of the black landscaping tubing that I found after I had purchased and opened the other one. This is glued in place with hot melt.
AE19184C-767B-47B0-8B9E-6F65D2309368.jpeg

These blocks are leftover from the chiller bar supports. I just cut a couple of grooves in the back and used an old electrical cord from the trash pile hotmelt glued in.

E3E16305-93D8-4EA3-AE41-124DE6097D18.jpegA0437004-0670-488C-BFE0-DC4ECF0C88A3.jpeg

I made the vent box with scrap sintra I had and the keen eye will see that the vents are part of R2’s octagonal ports. I used a failed 3d print on the one side and an old cabinet door pull with some copper tubing on the other. I screwed a scrap of wood to the side box and this was glued to that for a better bond.

1A515DF0-EFAB-4BC4-9A8E-934862951C78.jpeg

I used another junk 3d print and a pvc fitting for more detail. I sanded the curvature on the back of the pvc so it sits flush. The other part I glued around with hotmelt to simulate a rough welding job.

CCA11000-0EAE-4417-9A1D-8113FC9602BB.jpegE7C028DE-B4BA-4983-A80E-102CC1AF161A.jpeg
 
I cannibalised a broken coffee grinder and added some bits from a broken air nailer and a piece of aluminum that was a cutoff when I resized my mom’s cane.
A51DDE56-452D-46AB-88AF-82FD4F5B2E2D.jpeg7A9C5542-EF37-4AA5-8FD3-4848DAB98815.jpeg

I added a locking post from some knock down furniture and added it the side of one piece to add more interest.
C5407751-56F8-4A94-A500-56575E0E4C78.jpeg
 
On the back side I added a derby cover that I got from my buddy’s scrap bin, inverted it and set it into the box.
B795DF77-78FC-459A-B64A-6CD3832F0FDC.jpeg

On another panel I added another scrap cover, the top of the air nailer and another miscellaneous nailer piece. I found a meat thermometer and added it as pressure or heat gauge.
DFCA5174-1243-4D75-B74D-CAFBA08808B0.jpeg

On the bottom I just added some pvc pipe for interest and topped it with a lid from laundry detergent.

9246590E-FE5E-4D9B-B891-1F6A5A36C299.jpeg
 
I started the paint process today. I thought I would be able to do it with a couple of cans but it looks like it will be 4 or 5 for complete coverage. In hi sigh tv I should have just bought a can of paint and used a detail gun.
 

Attachments

  • B778E5FE-3410-4916-81CE-33742732FA5D.jpeg
    B778E5FE-3410-4916-81CE-33742732FA5D.jpeg
    1.6 MB · Views: 68
  • 42D5B291-AF50-44C7-A987-838021A41F58.jpeg
    42D5B291-AF50-44C7-A987-838021A41F58.jpeg
    1.7 MB · Views: 64

Your message may be considered spam for the following reasons:

If you wish to reply despite these issues, check the box below before replying.
Be aware that malicious compliance may result in more severe penalties.
Back
Top