TerranCmdr
Well-Known Member
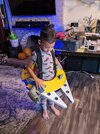
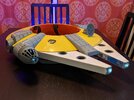
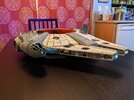
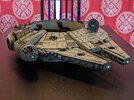
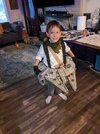
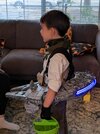
I usually pull out all the stops for costumes and of course Halloween is my favorite time of year. My son's been old enough to choose his own costume for a few years now and so far we've done an ambulance and X-Wing pilot Luke. He set me quite the challenge this year though when he said "I want to be the Millennium Falcon!"


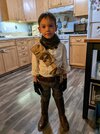
When I sat down to plan this beast, my first question was "who's going to fly the Falcon?" I knew at some point he'd get tired of wearing a big bulky costume, plus if he had any kind of Halloween event at school he'd probably need something a little easier to wear. We settled on Poe from Episode 9 and so that's where I started with the costume.
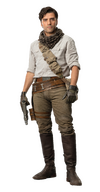
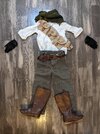
We hit up our local thrift stores and I ended up finding basically all I needed to complete the Poe look. I had some canvas-like material left over from our little one's Grogu costume last year so I sewed up some very basic pouches and added some leather straps to them. The pants needed to be taken in and the belt shortened. The shemagh was one I already had that I cut into 1/4. The gloves we got from a local motorcycle shop on clearance (score!) Voila!
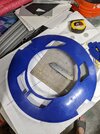
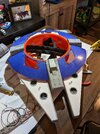
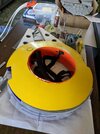
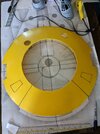
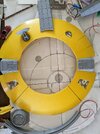
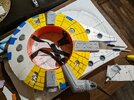
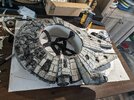
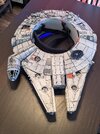
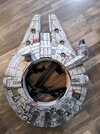
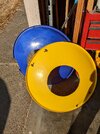
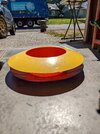
Anyway with that out of the way it was time to start on the main event. I had a rough idea of how to construct it and needed to gather some supplies. I figured the easiest way to create the domed sections would be to use two snow saucers. Once those were sourced they would set the scale we'd be working with. Luckily a friend of mine scours neighborhood cleanups for greeblies for his builds and grabbed me two saucers. I did a rough measurement on my son's waist and came up with about 11" for the opening. I took a nail and a piece of string, drilled a hole in the center of the saucers, attached a pen to the other side of the string, and used that as a makeshift compass to get a decent circle. I cut it out with a jigsaw. I did realize afterwards that I'd need to do the same thing to cut the outer part off and ended up having to sort of place the center back in place to mark it out again but it worked out.
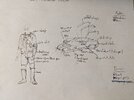
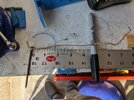
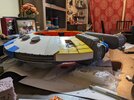
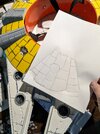
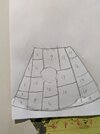
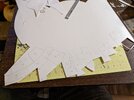
Once the saucers were cut down I could use those to figure out the scale. I found an excellent 3d model of the Falcon by Andy Crook (which would serve as a guide for the 3d printed pieces) and started sizing things out in Rhino. Turns out my costume/model would be around 30" long, very close to the size of the ESB model! It just so happened that a Home Depot bucket was almost exactly 11" diameter so I grabbed one of those and cut it down to size. It was a bit floppy so I actually took the top part and attached it with rivets to make a stronger center. I printed out a full size simplified top-down view to build off of and realized this thing was going to be pretty sizeable!
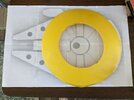
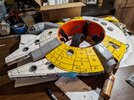
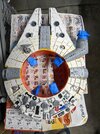
I figured I'd use 1" aluminum coming from the center as supports for the mandibles (the 1" height sized perfectly for the sides of the Falcon, a happy accident). At this point I also riveted on the straps.
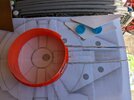
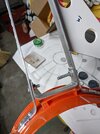
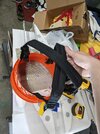
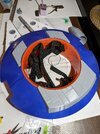
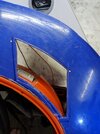
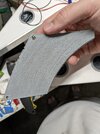
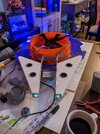
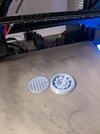
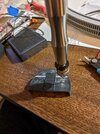
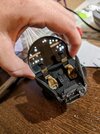
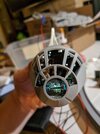
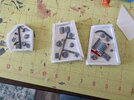
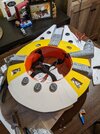
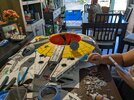
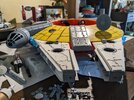
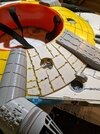
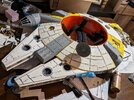
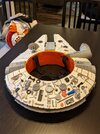
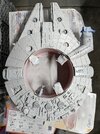
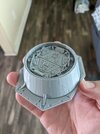
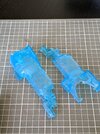
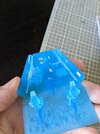
Things got a little sporadic at this point as I wanted to start getting parts on the 3d printer. I used Andy's model as a sort of template to create the cockpit exterior - his model was not designed with 3d printing in mind and it was just easier to remodel than to try and fix most parts. I also cut the mandibles out of foam core (trying to keep this costume as light as possible) and printed out a set of greeblies (sourced from here). Moving on from there, I did a lot of work to make the interior of the cockpit printable (not much remodeling here but a lot of digital cleanup) and printed that out on my resin printer. I designed the control panel to accept an LED so I could light up specific parts of it by masking it off when I painted. I also printed one of the large circular side greeblies (I think it's a docking port?) and an awesome Wankel rotary (found here) because it's a very recognizable specific greeblie.
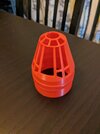
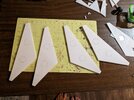
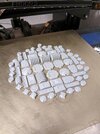
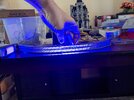
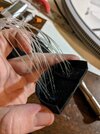
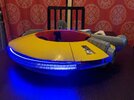
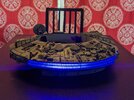
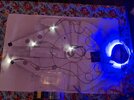
While all that was going on, I was also figuring out the wiring for this beast. I couldn't build this costume without adding some lights, so I figured out a simple circuit utilizing 4x rechargeable AAs we had on hand. I wired it to have a headlight in each mandible, two lights for the cockpit, and one blue LED strip for the engines.
Continued in part 2...
When I sat down to plan this beast, my first question was "who's going to fly the Falcon?" I knew at some point he'd get tired of wearing a big bulky costume, plus if he had any kind of Halloween event at school he'd probably need something a little easier to wear. We settled on Poe from Episode 9 and so that's where I started with the costume.

We hit up our local thrift stores and I ended up finding basically all I needed to complete the Poe look. I had some canvas-like material left over from our little one's Grogu costume last year so I sewed up some very basic pouches and added some leather straps to them. The pants needed to be taken in and the belt shortened. The shemagh was one I already had that I cut into 1/4. The gloves we got from a local motorcycle shop on clearance (score!) Voila!


Anyway with that out of the way it was time to start on the main event. I had a rough idea of how to construct it and needed to gather some supplies. I figured the easiest way to create the domed sections would be to use two snow saucers. Once those were sourced they would set the scale we'd be working with. Luckily a friend of mine scours neighborhood cleanups for greeblies for his builds and grabbed me two saucers. I did a rough measurement on my son's waist and came up with about 11" for the opening. I took a nail and a piece of string, drilled a hole in the center of the saucers, attached a pen to the other side of the string, and used that as a makeshift compass to get a decent circle. I cut it out with a jigsaw. I did realize afterwards that I'd need to do the same thing to cut the outer part off and ended up having to sort of place the center back in place to mark it out again but it worked out.


Once the saucers were cut down I could use those to figure out the scale. I found an excellent 3d model of the Falcon by Andy Crook (which would serve as a guide for the 3d printed pieces) and started sizing things out in Rhino. Turns out my costume/model would be around 30" long, very close to the size of the ESB model! It just so happened that a Home Depot bucket was almost exactly 11" diameter so I grabbed one of those and cut it down to size. It was a bit floppy so I actually took the top part and attached it with rivets to make a stronger center. I printed out a full size simplified top-down view to build off of and realized this thing was going to be pretty sizeable!


I figured I'd use 1" aluminum coming from the center as supports for the mandibles (the 1" height sized perfectly for the sides of the Falcon, a happy accident). At this point I also riveted on the straps.


Things got a little sporadic at this point as I wanted to start getting parts on the 3d printer. I used Andy's model as a sort of template to create the cockpit exterior - his model was not designed with 3d printing in mind and it was just easier to remodel than to try and fix most parts. I also cut the mandibles out of foam core (trying to keep this costume as light as possible) and printed out a set of greeblies (sourced from here). Moving on from there, I did a lot of work to make the interior of the cockpit printable (not much remodeling here but a lot of digital cleanup) and printed that out on my resin printer. I designed the control panel to accept an LED so I could light up specific parts of it by masking it off when I painted. I also printed one of the large circular side greeblies (I think it's a docking port?) and an awesome Wankel rotary (found here) because it's a very recognizable specific greeblie.


While all that was going on, I was also figuring out the wiring for this beast. I couldn't build this costume without adding some lights, so I figured out a simple circuit utilizing 4x rechargeable AAs we had on hand. I wired it to have a headlight in each mandible, two lights for the cockpit, and one blue LED strip for the engines.

Continued in part 2...

