qckslvr546
New Member
Hey, this is my first build and I'm doing the N7 armor from Mass Effect using EVA foam. Wanted to do this since I saw an awesome armor at this years Comic Con and have it done by the time ME3 comes out but it's actually going faster than planned so I'm hoping to get it done for Halloween.
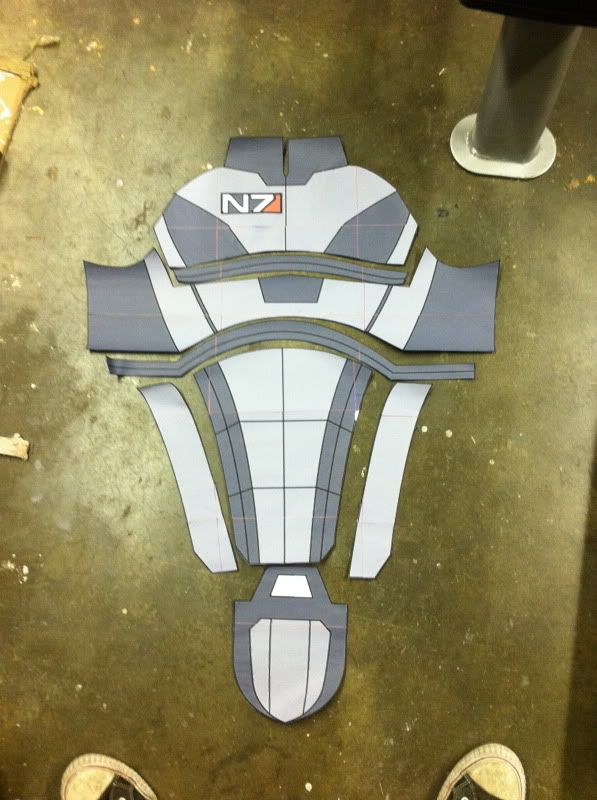
Got the templates from a thread on The405th that also has videos on how to scale them Mass Effect 2 Templates Have Arrived
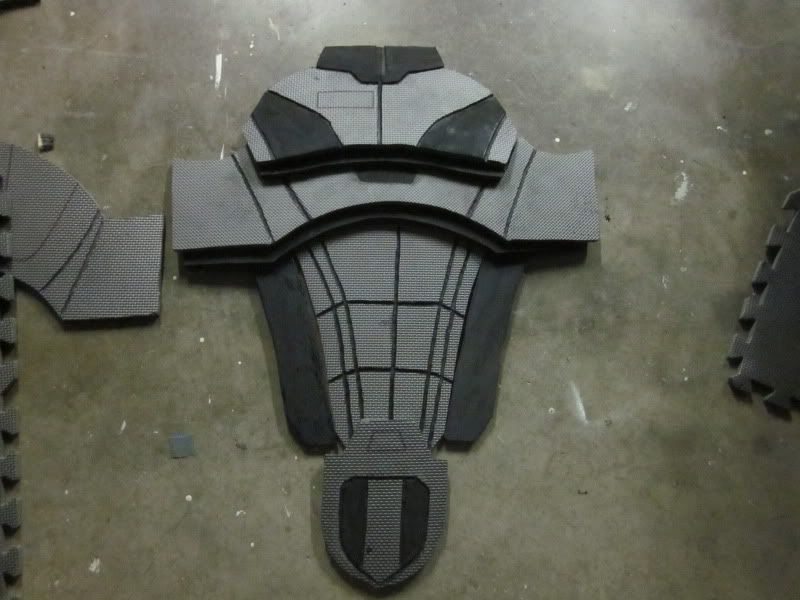
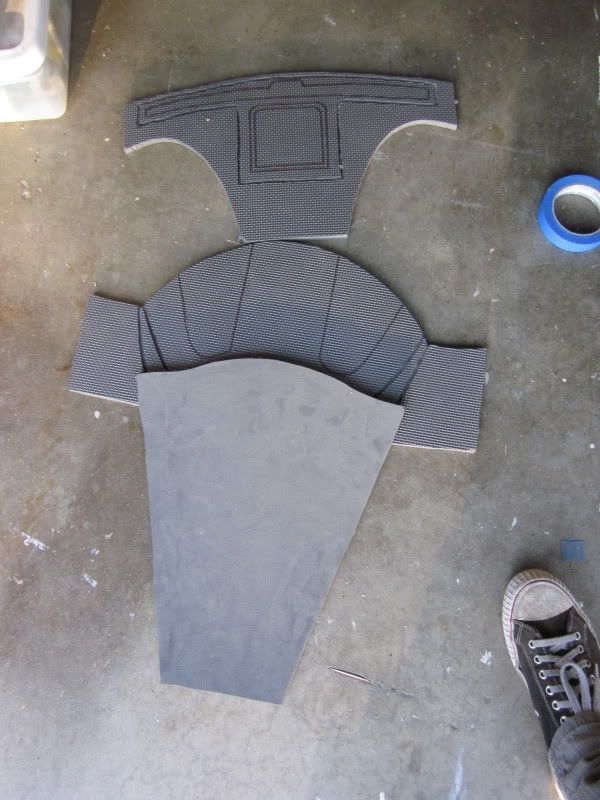
^Got the front torso templates cut out and assembled^
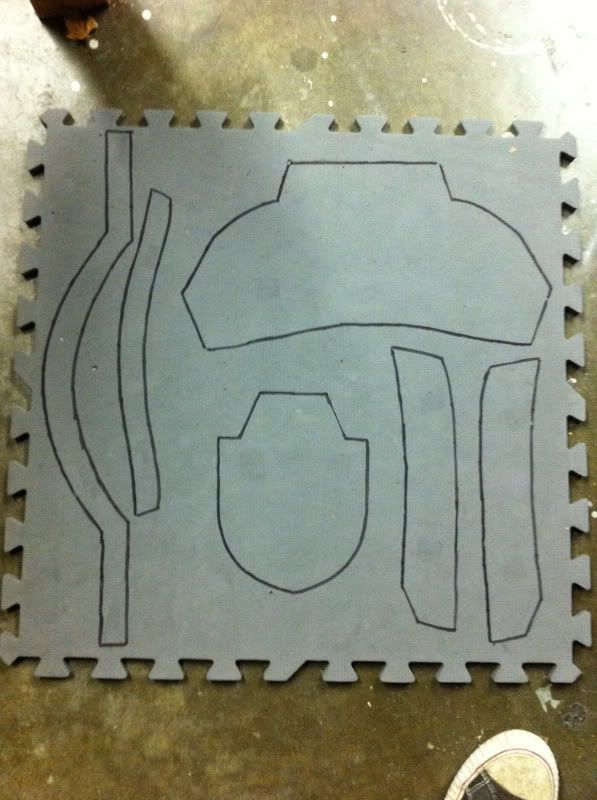
^I trace the patters onto the smooth side of the foam since it's a lot easier to see while cutting and the textured side looks just like it does in the game (double win!) Although a couple pieces are supposed to be smooth so you just trace on the textured side.^

^Got a few pieces cut out^
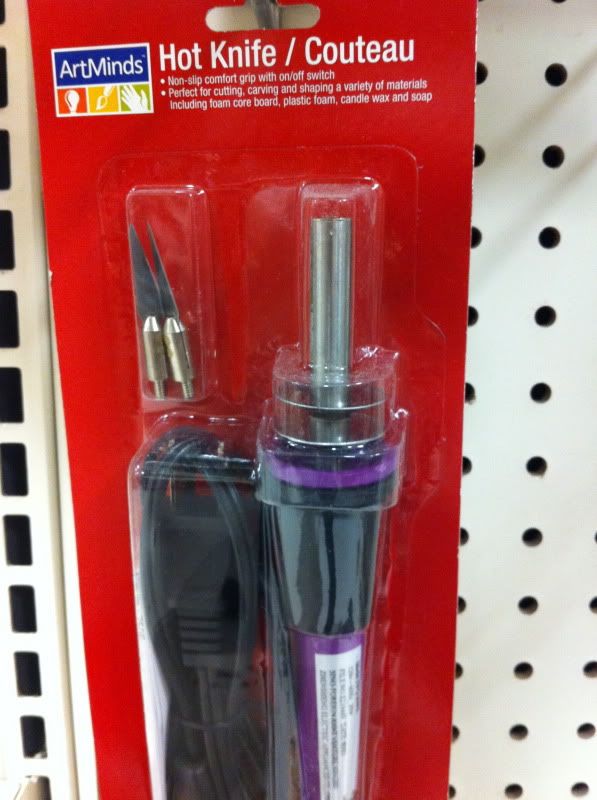
^Using a hot knife I got from Michaels.^
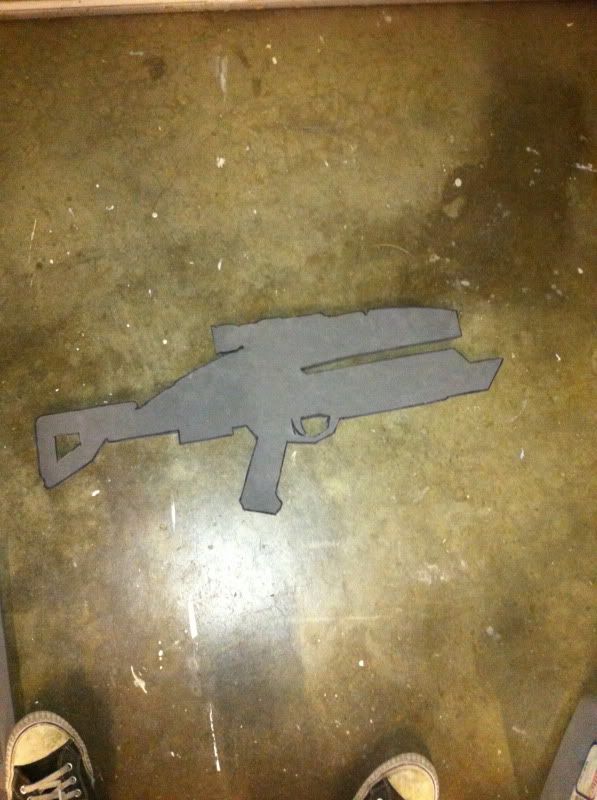
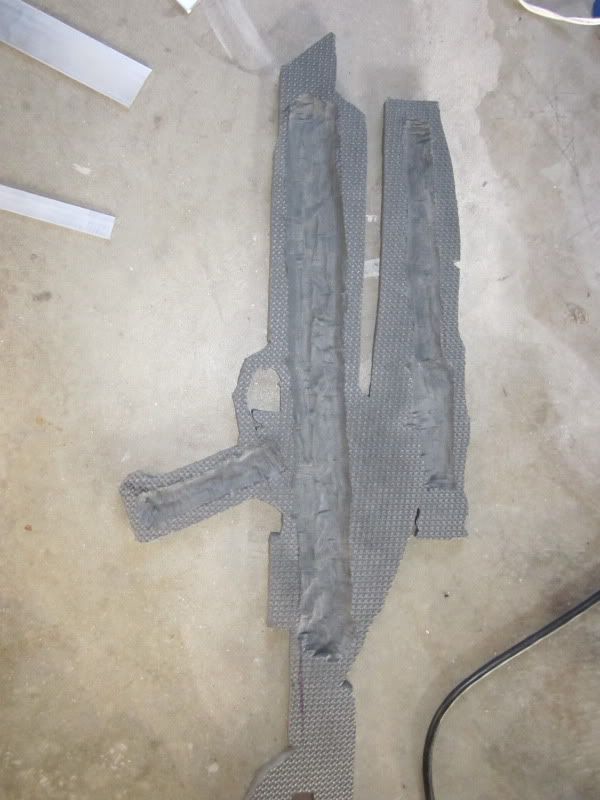
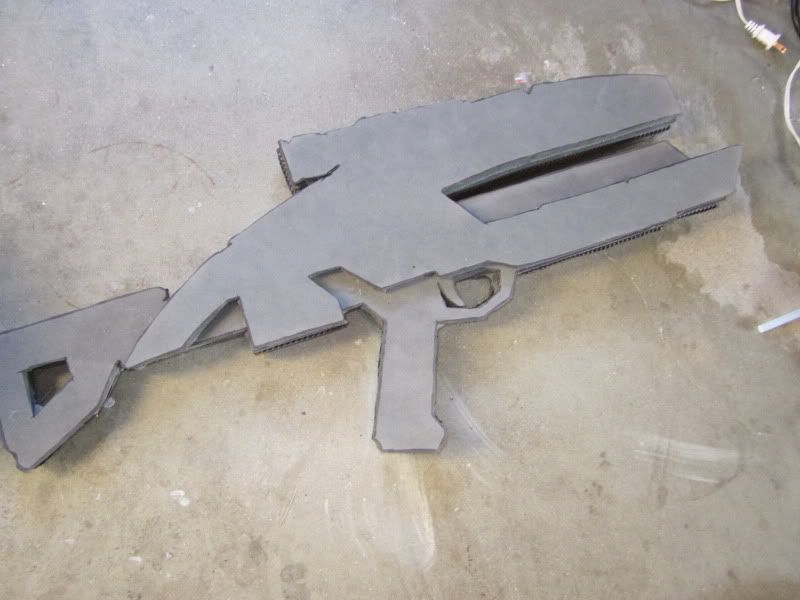
^Part of the gun cut out^
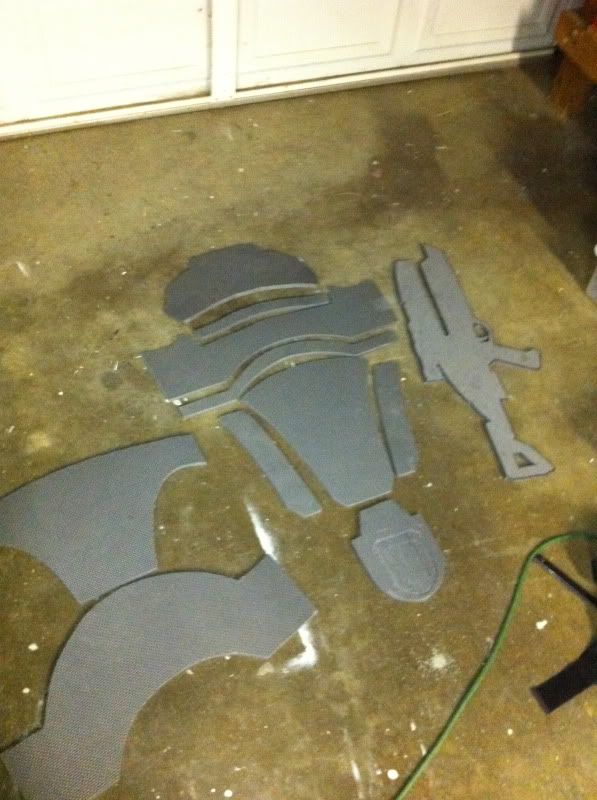
^The front torso and most of the back cut out with the gun^

^I was re-printing out all the pieces then cutting out each section of that piece to make patterns to figure out where to draw the lines should go to make the cut lines, but this took waaaay too long. So I just had my friend who's way better at drawing than me to just freehand the lines on. Came out really good I think and saved me so much time.^
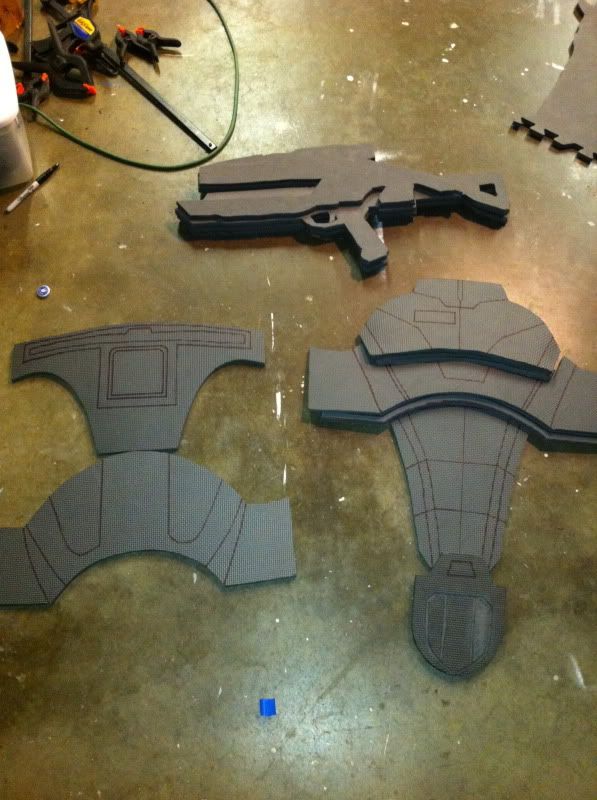
^Lines drawn on and the gun pieces stacked on top of eachother^
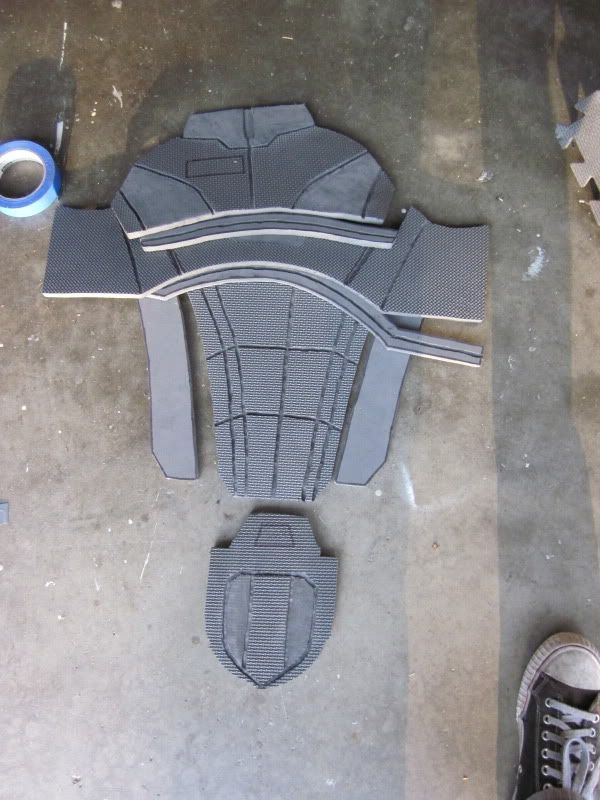
^Cut lines on front and back torso. Leaving the back pieces kinda undone for now since I'm going to add lighting and other pieces to it later. The lines look a little wonkey because it was my first time using a dremel tool but I think once I paint them black it wont' be that noticeable^
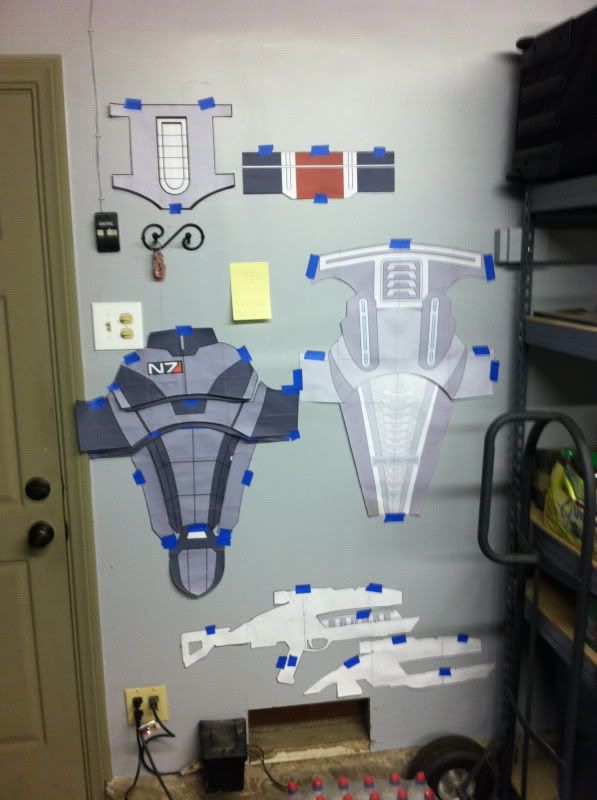
^Hung up the templates to the stuff I've cut out already because I kept stepping on them and tearing them while they were on the floor. And it's easier to find a reference piece if I need it now.^
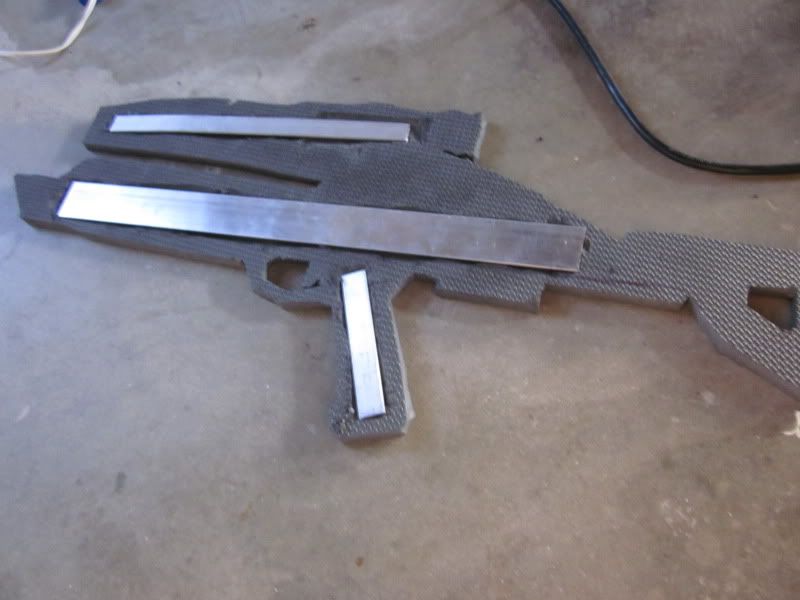
^To make the rifle more rigid I carved out channels in it and added metal rods I got from Home Depot.^
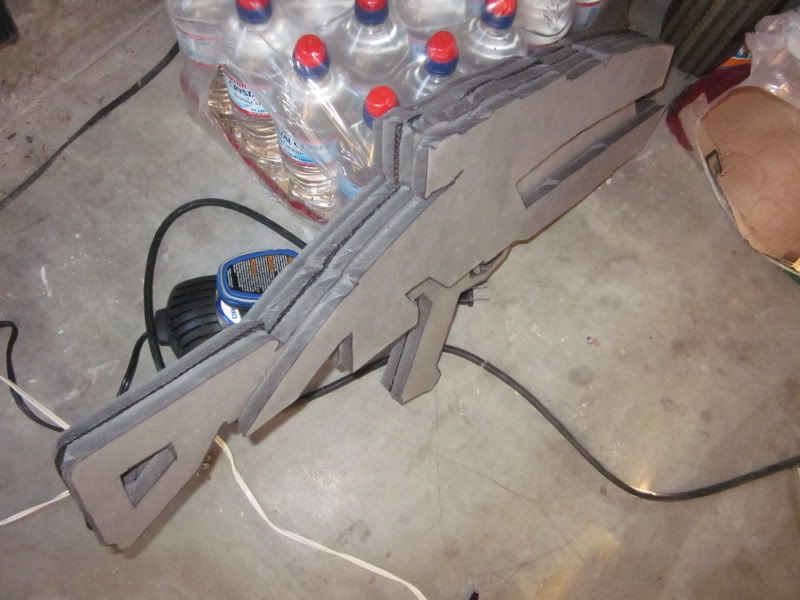
^Rifle all assembled. Now the long process of sanding everything until it's even using the dremel tool to carve make some of the overlapping pieces a little more uniform.
Have some other things done but haven't taken pictures yet. Will try to update every couple days. Gonna try to get my friend to help me make a duct tape mannequin tomorrow because using the heat gun then pressing the armor against me isn't going as well as I'd hoped. I'm also having a real tough time figuring out how to paint this thing. I wanted to make the armor a darker grey but can't find any paint that isn't glossy. Also tried using plasti-dip for the black lines but that didn't turn out too well. Any suggestions would be awesome.
Got the templates from a thread on The405th that also has videos on how to scale them Mass Effect 2 Templates Have Arrived
^Got the front torso templates cut out and assembled^
^I trace the patters onto the smooth side of the foam since it's a lot easier to see while cutting and the textured side looks just like it does in the game (double win!) Although a couple pieces are supposed to be smooth so you just trace on the textured side.^
^Got a few pieces cut out^
^Using a hot knife I got from Michaels.^
^Part of the gun cut out^
^The front torso and most of the back cut out with the gun^
^I was re-printing out all the pieces then cutting out each section of that piece to make patterns to figure out where to draw the lines should go to make the cut lines, but this took waaaay too long. So I just had my friend who's way better at drawing than me to just freehand the lines on. Came out really good I think and saved me so much time.^
^Lines drawn on and the gun pieces stacked on top of eachother^
^Cut lines on front and back torso. Leaving the back pieces kinda undone for now since I'm going to add lighting and other pieces to it later. The lines look a little wonkey because it was my first time using a dremel tool but I think once I paint them black it wont' be that noticeable^
^Hung up the templates to the stuff I've cut out already because I kept stepping on them and tearing them while they were on the floor. And it's easier to find a reference piece if I need it now.^
^To make the rifle more rigid I carved out channels in it and added metal rods I got from Home Depot.^
^Rifle all assembled. Now the long process of sanding everything until it's even using the dremel tool to carve make some of the overlapping pieces a little more uniform.
Have some other things done but haven't taken pictures yet. Will try to update every couple days. Gonna try to get my friend to help me make a duct tape mannequin tomorrow because using the heat gun then pressing the armor against me isn't going as well as I'd hoped. I'm also having a real tough time figuring out how to paint this thing. I wanted to make the armor a darker grey but can't find any paint that isn't glossy. Also tried using plasti-dip for the black lines but that didn't turn out too well. Any suggestions would be awesome.