Making a practice 1/537 model for aztec painting in airbrush, getting ready for 1/350 build

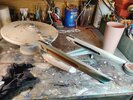
After painstakingly, and horrifically watched certain areas of my paint job on my saucer get destroyed, it was soo hard to see her like this after sanding her new rim down smooth. I can almost see her crying in pain. I was about to :(:(:(:(:(
IMG_20250401_162056632.jpg
 
Wanted to go back before it took a swan-dive and show you how good it looked before with its spotlight test pic. My favorite pic thus far!! Did it with a #3 dental mirror with an led strapped into the base. Ill clean that up before im done. It will be this good again. I swear it.
image5849[1].jpg
 
Anyway, Here is the mess of what the new rim looked like before I sanded it. The UV light shows you the mess that exists even though invisible.

image6333[1].jpg


After 2 days of filling, drying sanding and painting I got the rim back to a proper smooth circumference. It looks SOOO much better and all the electronics are working flawlessly, even though I have to drill the holes and repaint certain aztec patterns on certain panels over and redecal the rim. I dont care it looks proper again and it took ALOT of work. Seriously guys, if your not modeling with your 3d printers excess UV resin, your missing a serious opportunity. This has had some major ups and downs as you have with this kit because of the manufactured defects and inaccuracies, I did learn what I started out to learn and that was masking aztec and paneling, as well as airbrushing said panels onto model with translucent custom mixed mica paints and I learned to mix, reduce, and airbrush 7 colors in total! I didn't know airbrushing when I started, but I sure as hell got it down to a science now. A demonstration of that is the galaxy clouds and star halos I painted on the base. At least thats coming out on the first attempt. **See very last pic in this column.** I had to reinforce it for the excess weight but it is coming out nicely! There thats all my updates for the last week. Let me know how I did so far!
IMG_20250401_200124659_HDR.jpg


IMG_20250401_200512989.jpg
 
Thank you for the compliment. I hope the recovery keeps the momentum. So far it has. I redrilled the proper holes for the windows and it came out perfectly aligned and accurately placed. I made a drilling template out of an old lotion bottle lol. Whatever works right? I filled the new holes with elmers to match the other holes and the results are breathtaking when lit up. It required some filing and sanding but the resin held up and it came out WAY better than the original windows. These are sized right and accurately placed and drilled which I had no intention of doing but being I had to rebuild the rim , I just ran with it. Ill post more pics as I go. Its touching up paint and aztec patterns next. *Hail mary**
IMG_20250405_144541542.jpg
 
One thing I will say is that at least its even with the saucer all the way around now and completely smooth despite how it may photograph, it looks soo much better. The engines falling off turned out to be a blessing as well because I was able to put them back on better aligned and symmetrical than before, improving the overall look of the ship format and profile.
IMG_20250401_200127294_HDR.jpg
 
IMG_20250401_162056632.jpg


This was what it looked like before I repainted the saucer rim and drilled holes etc. I knew I would have to touch up some areas but this was heartbreaking knowing I have to redo the aztec around the rim edge and whatnot. So far its going great but the first time was great I just want to get back to then hopefully.
 
It is what it is. I decaled the rim and cleaned up the rim as best as possible then sent it to the buyer as is. I learned what I could from this nightmare and the almost perfected 1/350 scale if i remember, is a hell of a lot easier to build even with detail than the defective 1/537 scale. I learned what I needed from this project, now its time to begin the bigger and better. Im just at a point where the 537 isnt going to get any better than it is currently
 
thanks for your support with the 1/537 scale. I hope its good at the new owners house as it was finished. He seemed to be happy with it.
 

Attachments

  • IMG_20250401_200127294_HDR.jpg
    IMG_20250401_200127294_HDR.jpg
    2.9 MB · Views: 23
Ok the 1/537 was completed as best as I could get it. No finished pics available bc I rushed off to customer who wanted it. Anyway, The 1/350 build begins at long last. The moments I have been prepping, training, and practicing for. First thing, prime all the pieces light gray, then mask the areas off that are eggshell blue and paint those, finishing part prep.
IMG_20250511_185605071.jpg
IMG_20250511_185608612.jpg
IMG_20250512_164731341.jpg
 
Next, I got the photoetch for p[art 1 of the shuttlebay, in which is the cargo containers by Green Strawberry. I made a photo-realistic decal set that fits each of the cargo containers perfectly! I am so happy how well they came out and they are designed with the same color scheme as used in Star Trek: The Motion Picture.
IMG_20250515_133107766.jpg
IMG_20250516_130750831.jpg
IMG_20250517_220900363.jpg

Even the cross-bar lines conform as well perfectly!! This decal is one to save!
 
IMG_20250511_185613524.jpg


I primed the shuttle bay pieces and then I used the Elmer's glue trick to mask the in-between areas of the inside warp engine panel, that way you can still achieve a pinstripe masking without the tape. The procedure is really simple, one trick while teaching myself all i needed for this kit. It came out perfect for both sides as pictured here.
 
Got to work more on the inside of the shuttle bay, while waiting for the rest of the photoetch to show up. I have multiple kits coming from multiple areas across the globe. Now that I know how to airbrush, I dont do anything in regular paint can or paint brush unless I have to. Its so much easier and cheaper to mix, use and clean with your own custom homemade paints and supplies. Far cheaper than buying airbrush paints, thinners, reducers, and cleaners. I make them all with component chemicals at home and they work fabulously! Especially reducer and thinner for cleaning. I even reduced a big can of clear gloss 2x rustoleum to use in my airbrush and it coats so well plus i get way more use per ounce than with a brush. I spent a lot of time during the 1/537 build perfecting my paint reducing and mixing as well as my reducing of mainstream paints as well for airbrush usage.
IMG_20250526_203839991.jpg
IMG_20250526_203803994.jpg
IMG_20250526_203820338.jpg
 
IMG_20250511_185553793.jpg


While painting the Shuttle-Bay floor, I masked off the areas of the outer engine nacelles that are to be painted black so that way I can prep airbrush for 1 paint, multiple uses before cleaning and changing the color.
 
IMG_20250516_130804860.jpg


The final pic of the prep work. All done with airbrush. Just need my masks to do my main iridescent pattern painting. Now that I know what I am aiming for I know how to achieve it. My paints for the last model were too dim and not bright enough. I solved that problem by REALLY adding ALOT more mica powder to each where not a drop cant be used without significant shine and immersion.
 
I designed decals for the bridge rear airlock 3-piece, from Green Strawberry, In which to make more Ultra-realistic, I did hyper-texturized decals for all 3 layers. This is a pic of the decals I made for the arboretum deck and the rear-airlock 3 piece. Anyone who wants the full page of decals to size for the entire areas of the Green-Strawberry Photo-Etch, Its available for sale. Comes also with the cargo containers as well as other sections of Photo-etch not mentioned yet here.
Arboretum.jpg
 
Back
Top